Construction of Sarissa Precision 28mm Chateau

Being dangerously close to the two-year mark since we last posted a construction project, we tried our hands on a Chateau by Sarissa Precision. Sarissa Precision produces a range a MDF buildings in 15mm, 20mm, and 28mm scale that can be used for wargaming and dioramas. We made the 28mm version, which came with laser-cut cardboard roof tiles.

Included in the kit are laser-cut cardboard roof tiles and window shutters.
This kit came with 5 A4-size MDF sheets. Here are the floors and support structures.
Here are the walls and window surrounds.
The main building structure ‘snaps’ together – no glue is necessary. If you are using it for wargaming and want to keep the roof and each floor separated, you might want to loosen the inter-locking parts. Otherwise it is very hard to get it apart again once snapped together.
The window and door surrounds were glued on with superglue.
The roof tiles were attached using masking tape to see how they fitted before gluing on permanently.
Here is the entire building assembled.
The building was covered with a layer of PVA glue to stop it soaking up too much paint. A wood filler was used to add texture and cover up any gaps.
We hand-brushed the entire building with Army Painter acrylic paint and added stone scatters.

New Stock – Ammo Atom Paint

ATOM is a paint specially designed for modelling, formulated for maximum performance with both brush and airbrush application. ATOM paints provide strong covering power without obscuring details, resulting in a smooth, uniform, and durable matte finish. They can even be applied without the use of primer. In addition to their excellent resistance, fluidity, colour intensity, and fast drying time, ATOM paints also possess exceptional self-levelling properties.

ATOM paints are water-based acrylics with the benefits and properties of lacquer paints when applied using an airbrush. This includes minimal clogging, excellent durability, and a quick drying time. When applied with a brush, they retain all of the advantages of acrylic paint, as well as the unique properties of the ATOM range. ATOM paints are odourless and non-toxic; and they are manufactured in compliance with the latest global safety regulations.

The advantages and innovations of ATOM paints extend beyond their formula. Their revolutionary packaging, designed and manufactured exclusively for this range, is completely transparent and features a vertical dropper, accommodating quick, convenient, and clean use with just one hand required to open and close the cap. Additionally, its 20ml capacity is larger than most acrylic paint containers, providing a much more favourable price-to-capacity ratio.

Construction of Zvezda 1:72 Greek Infantry V-IV BC

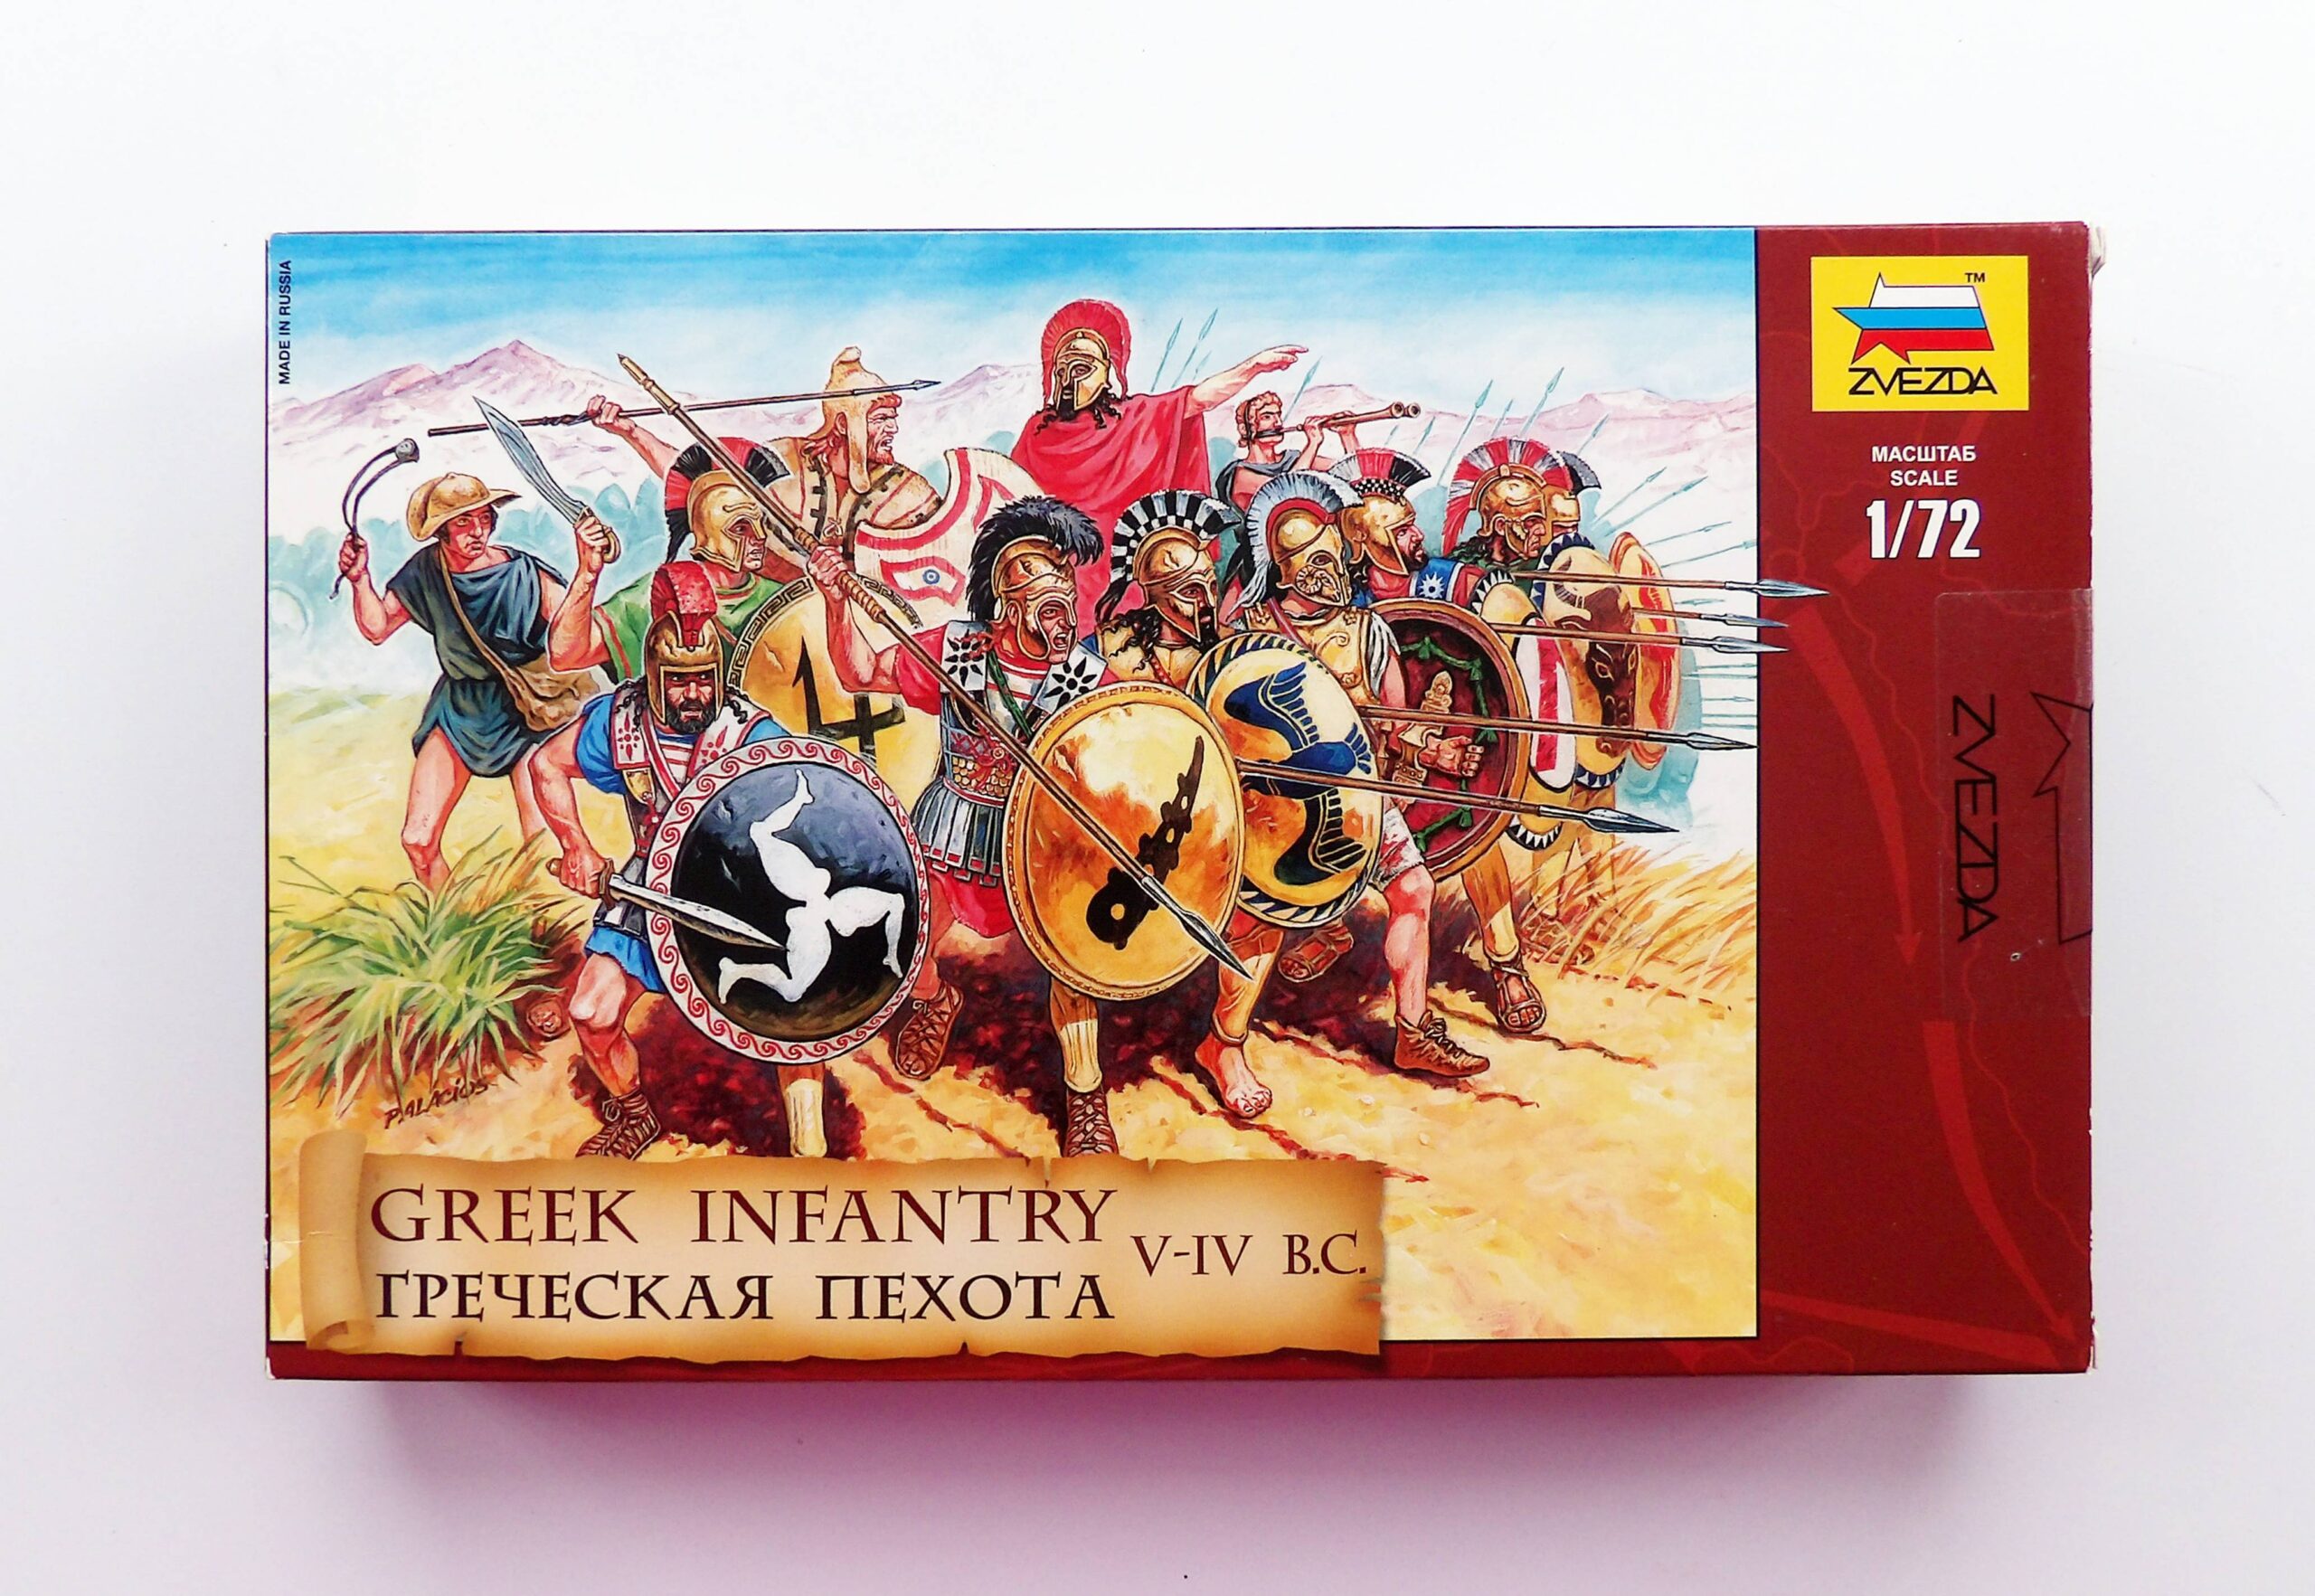
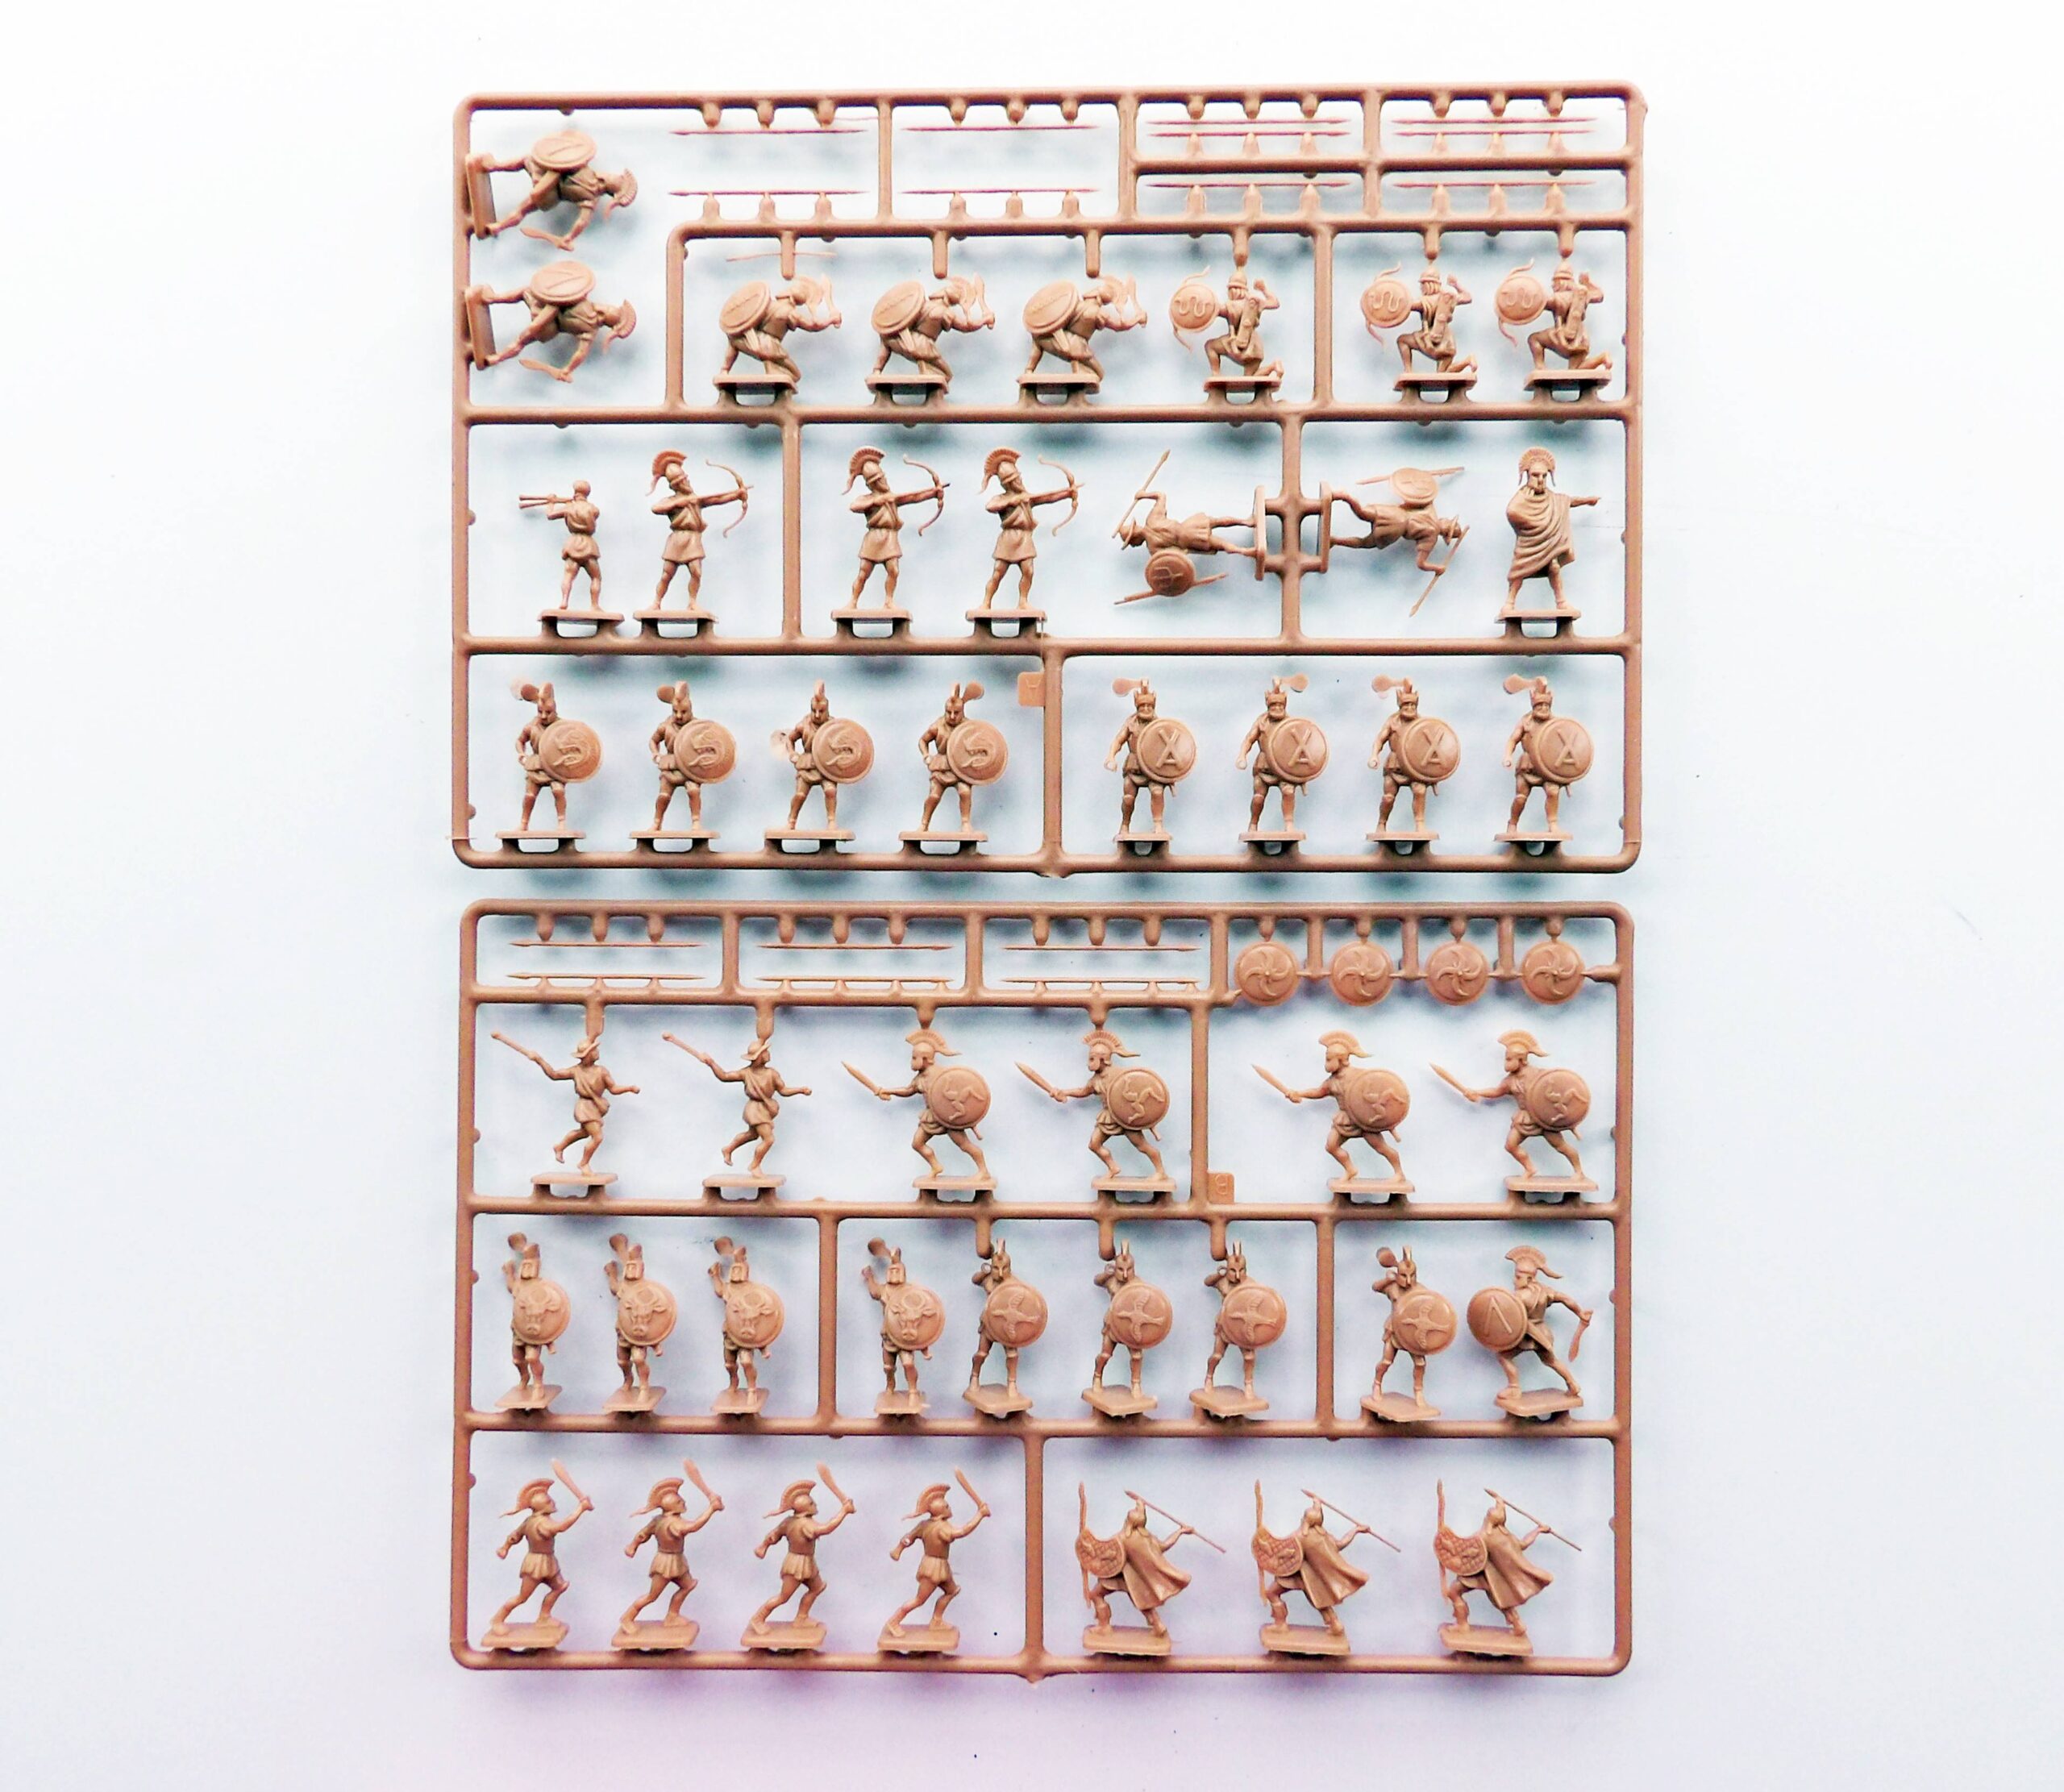
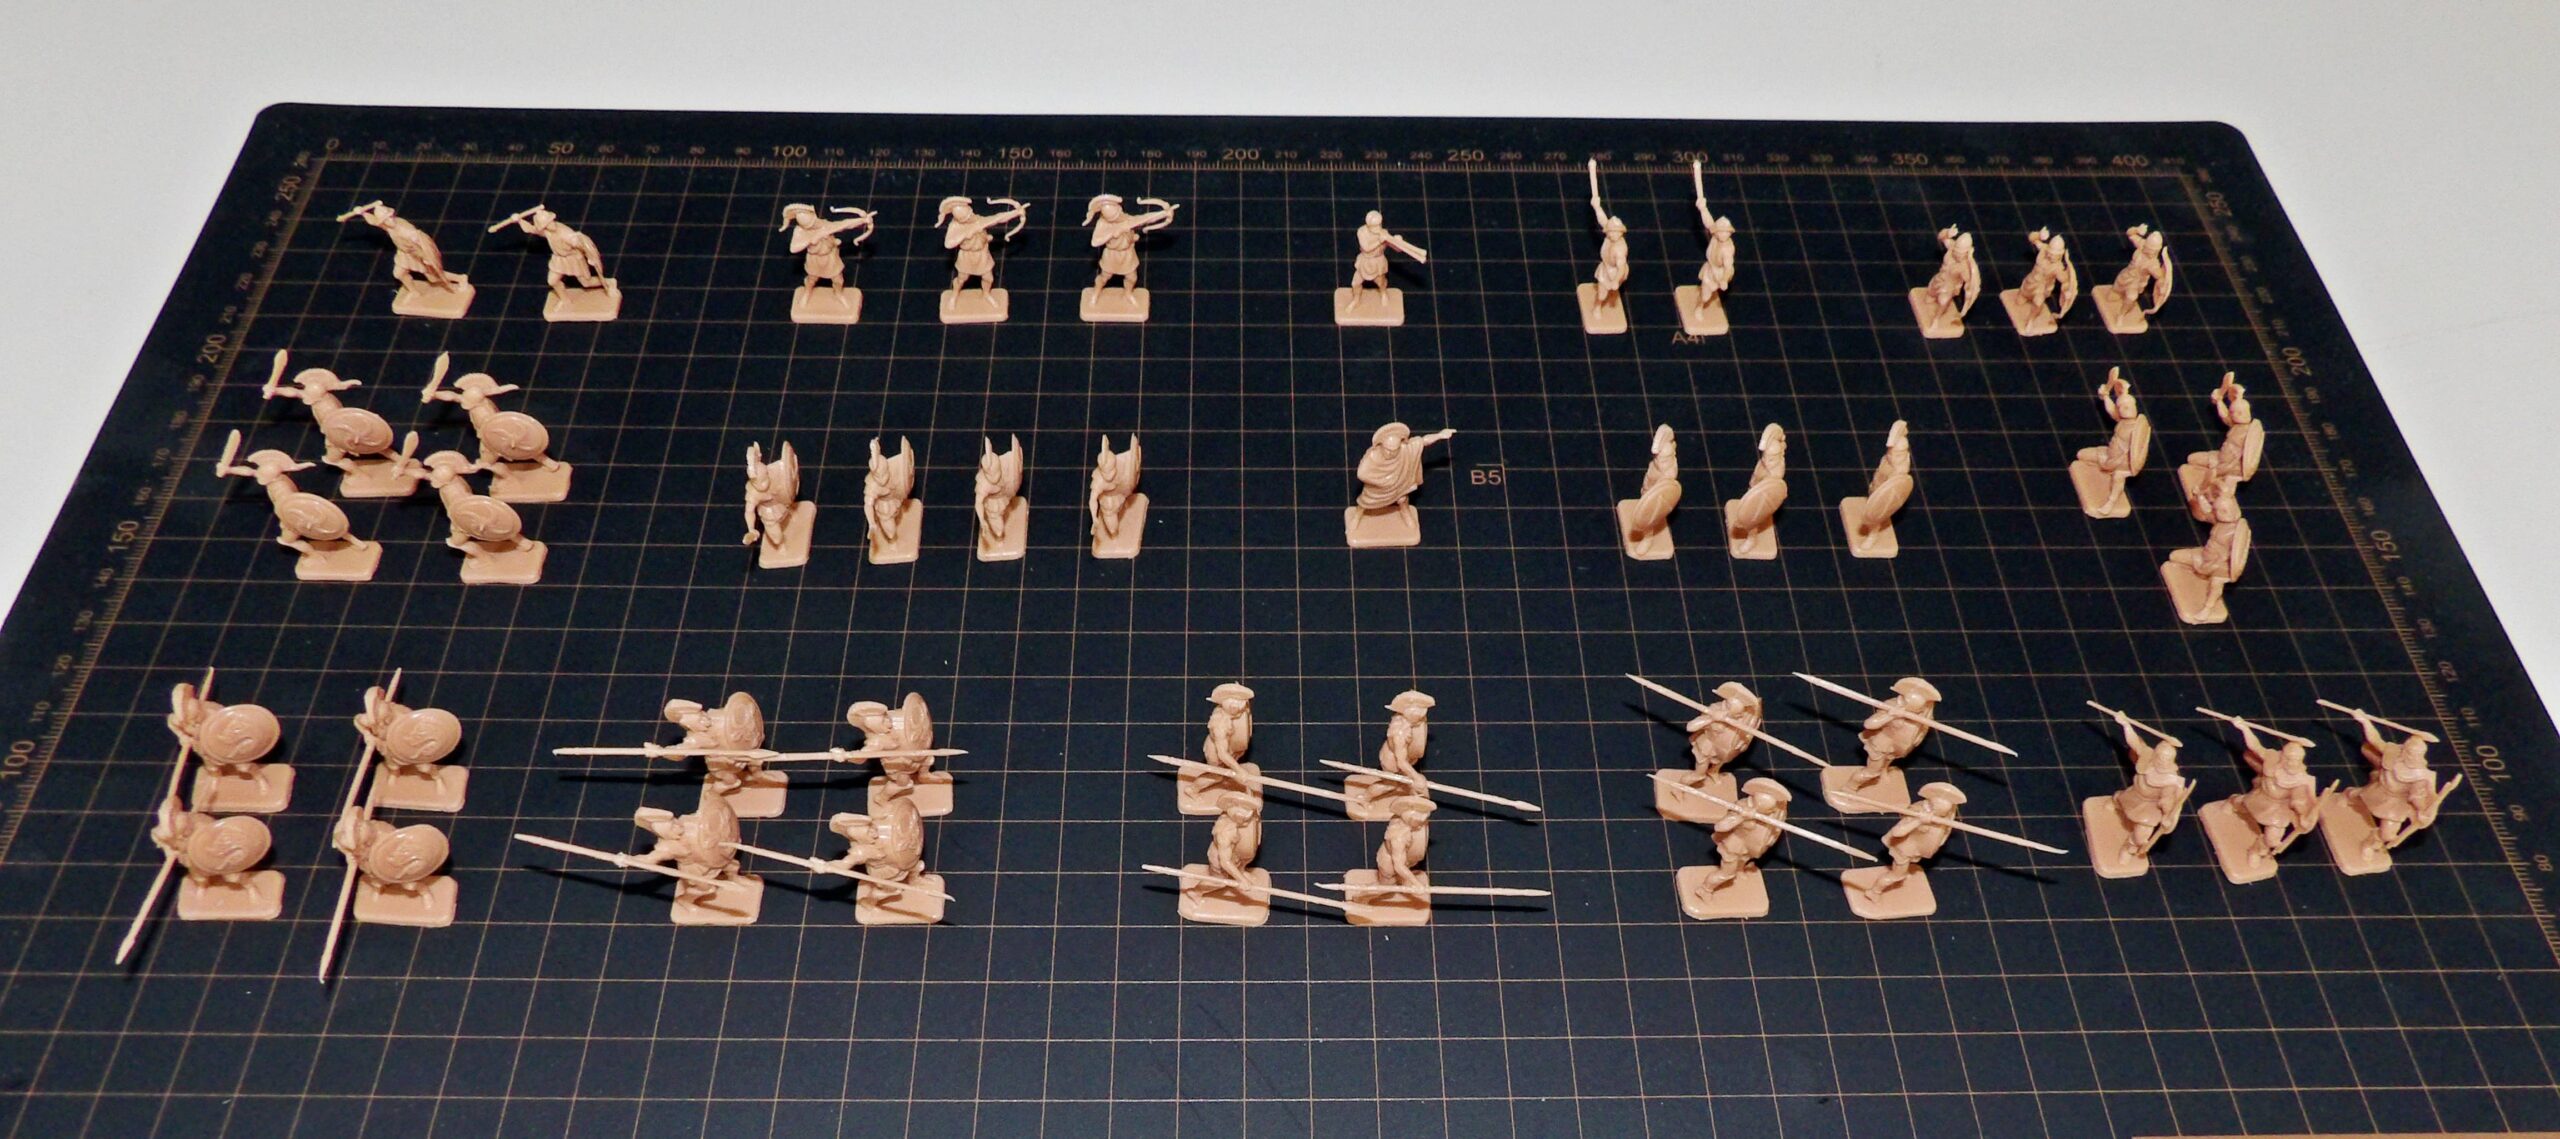
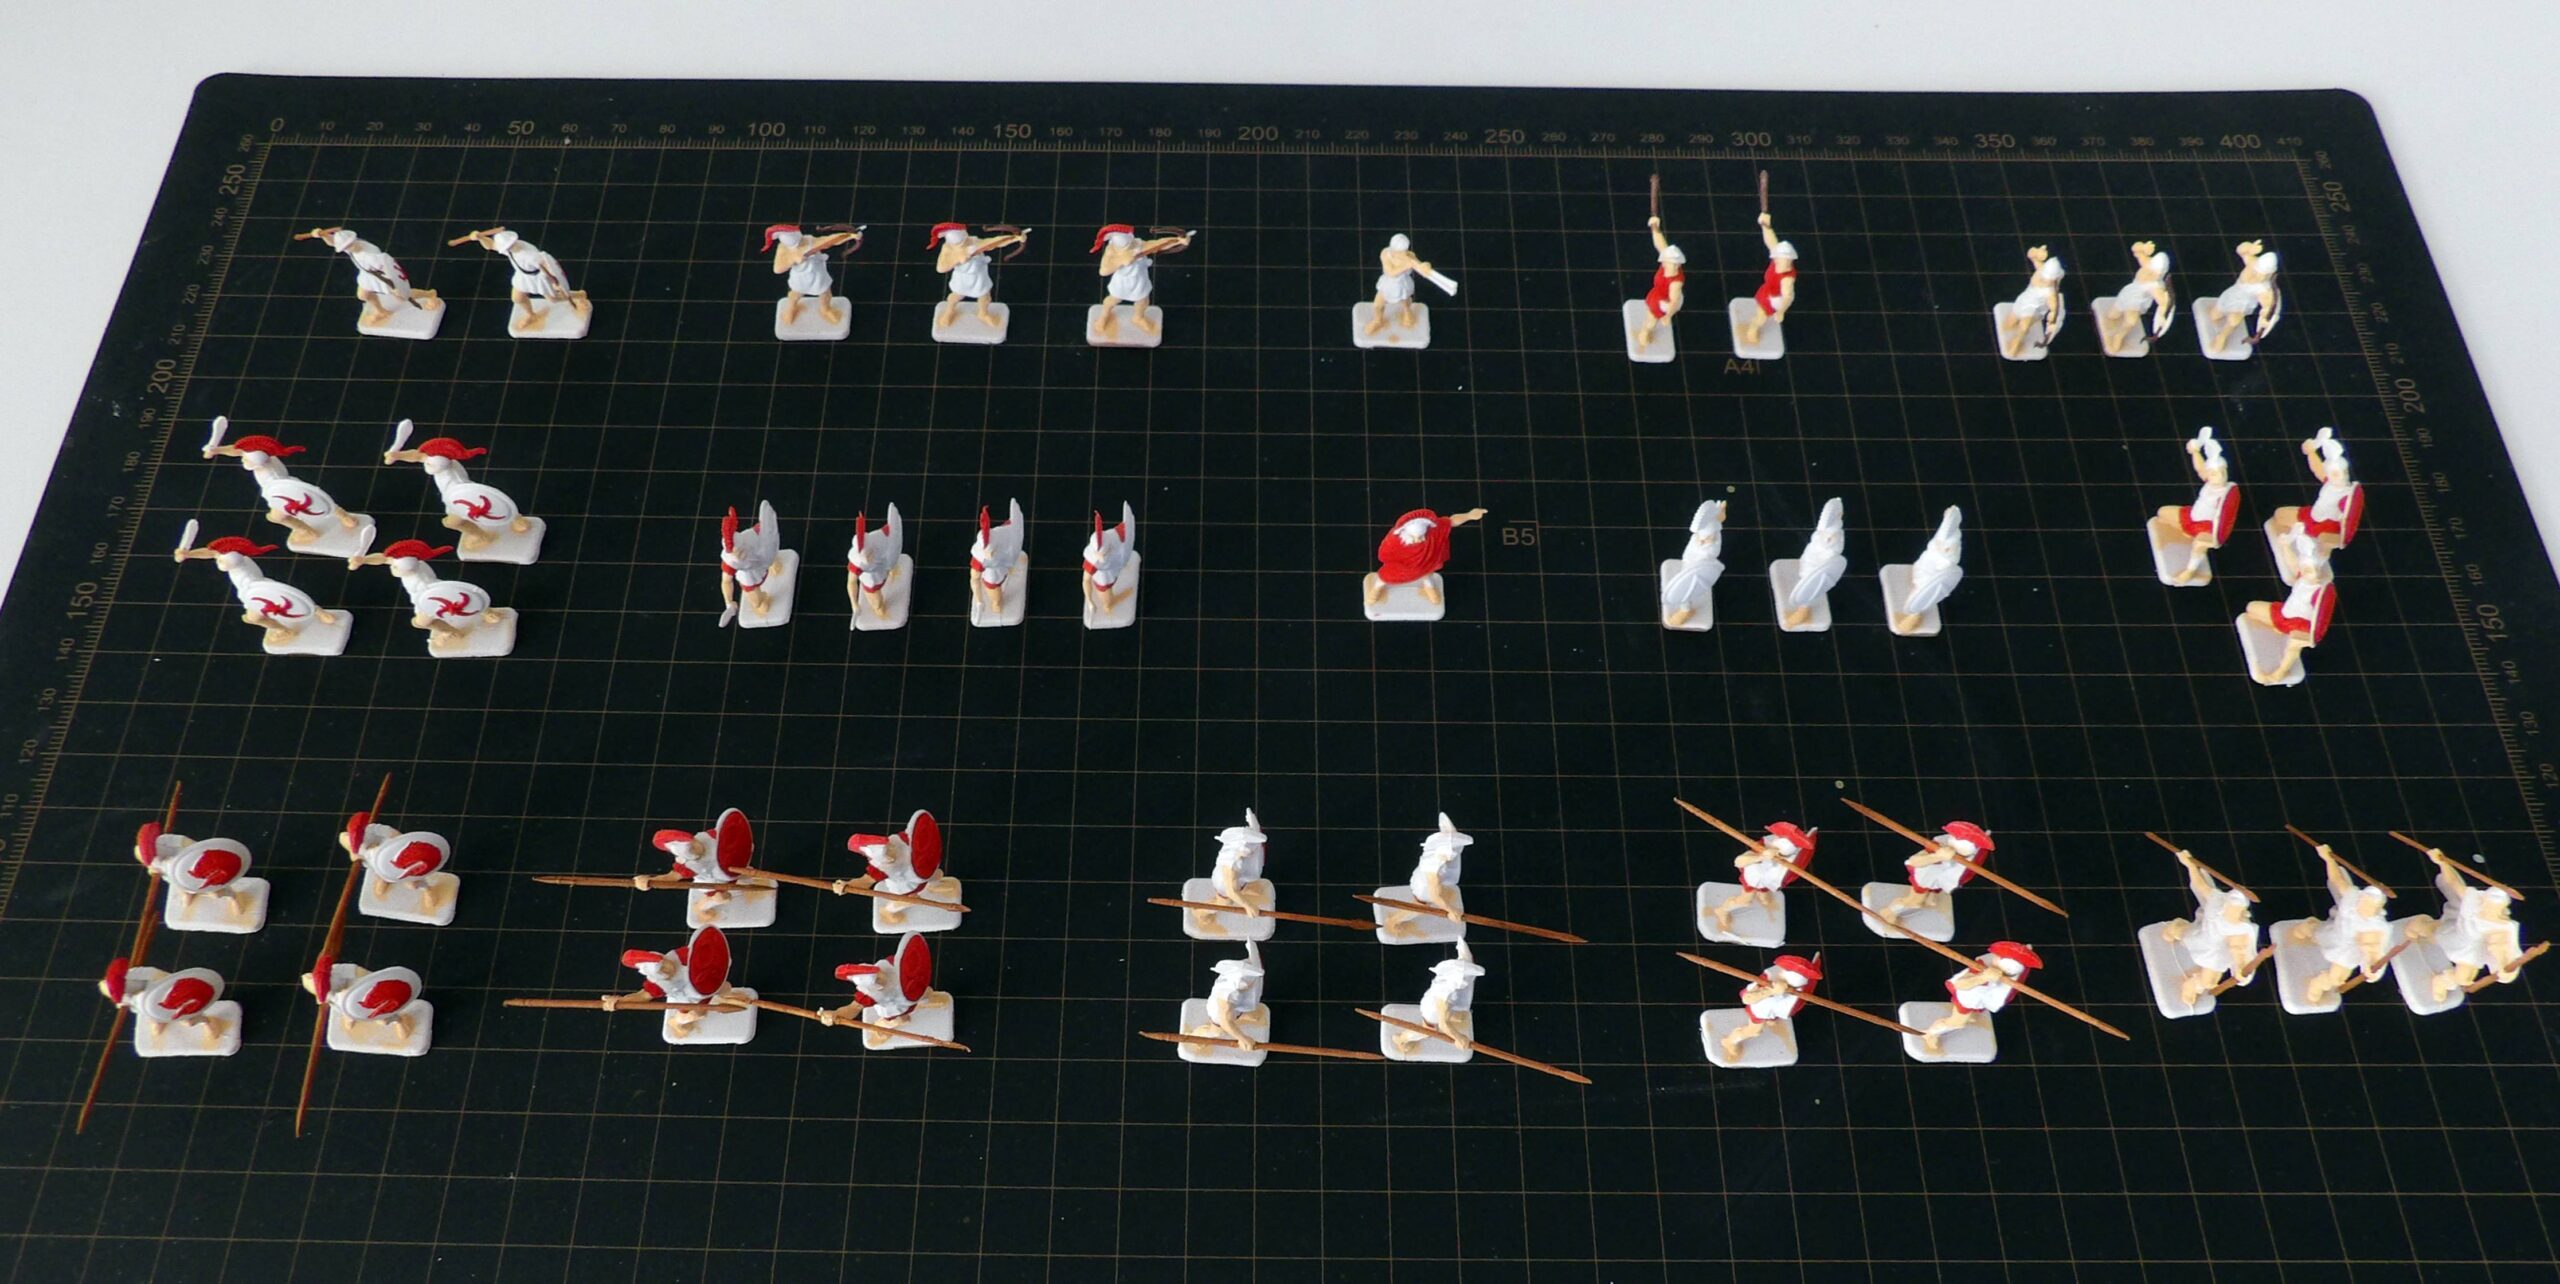
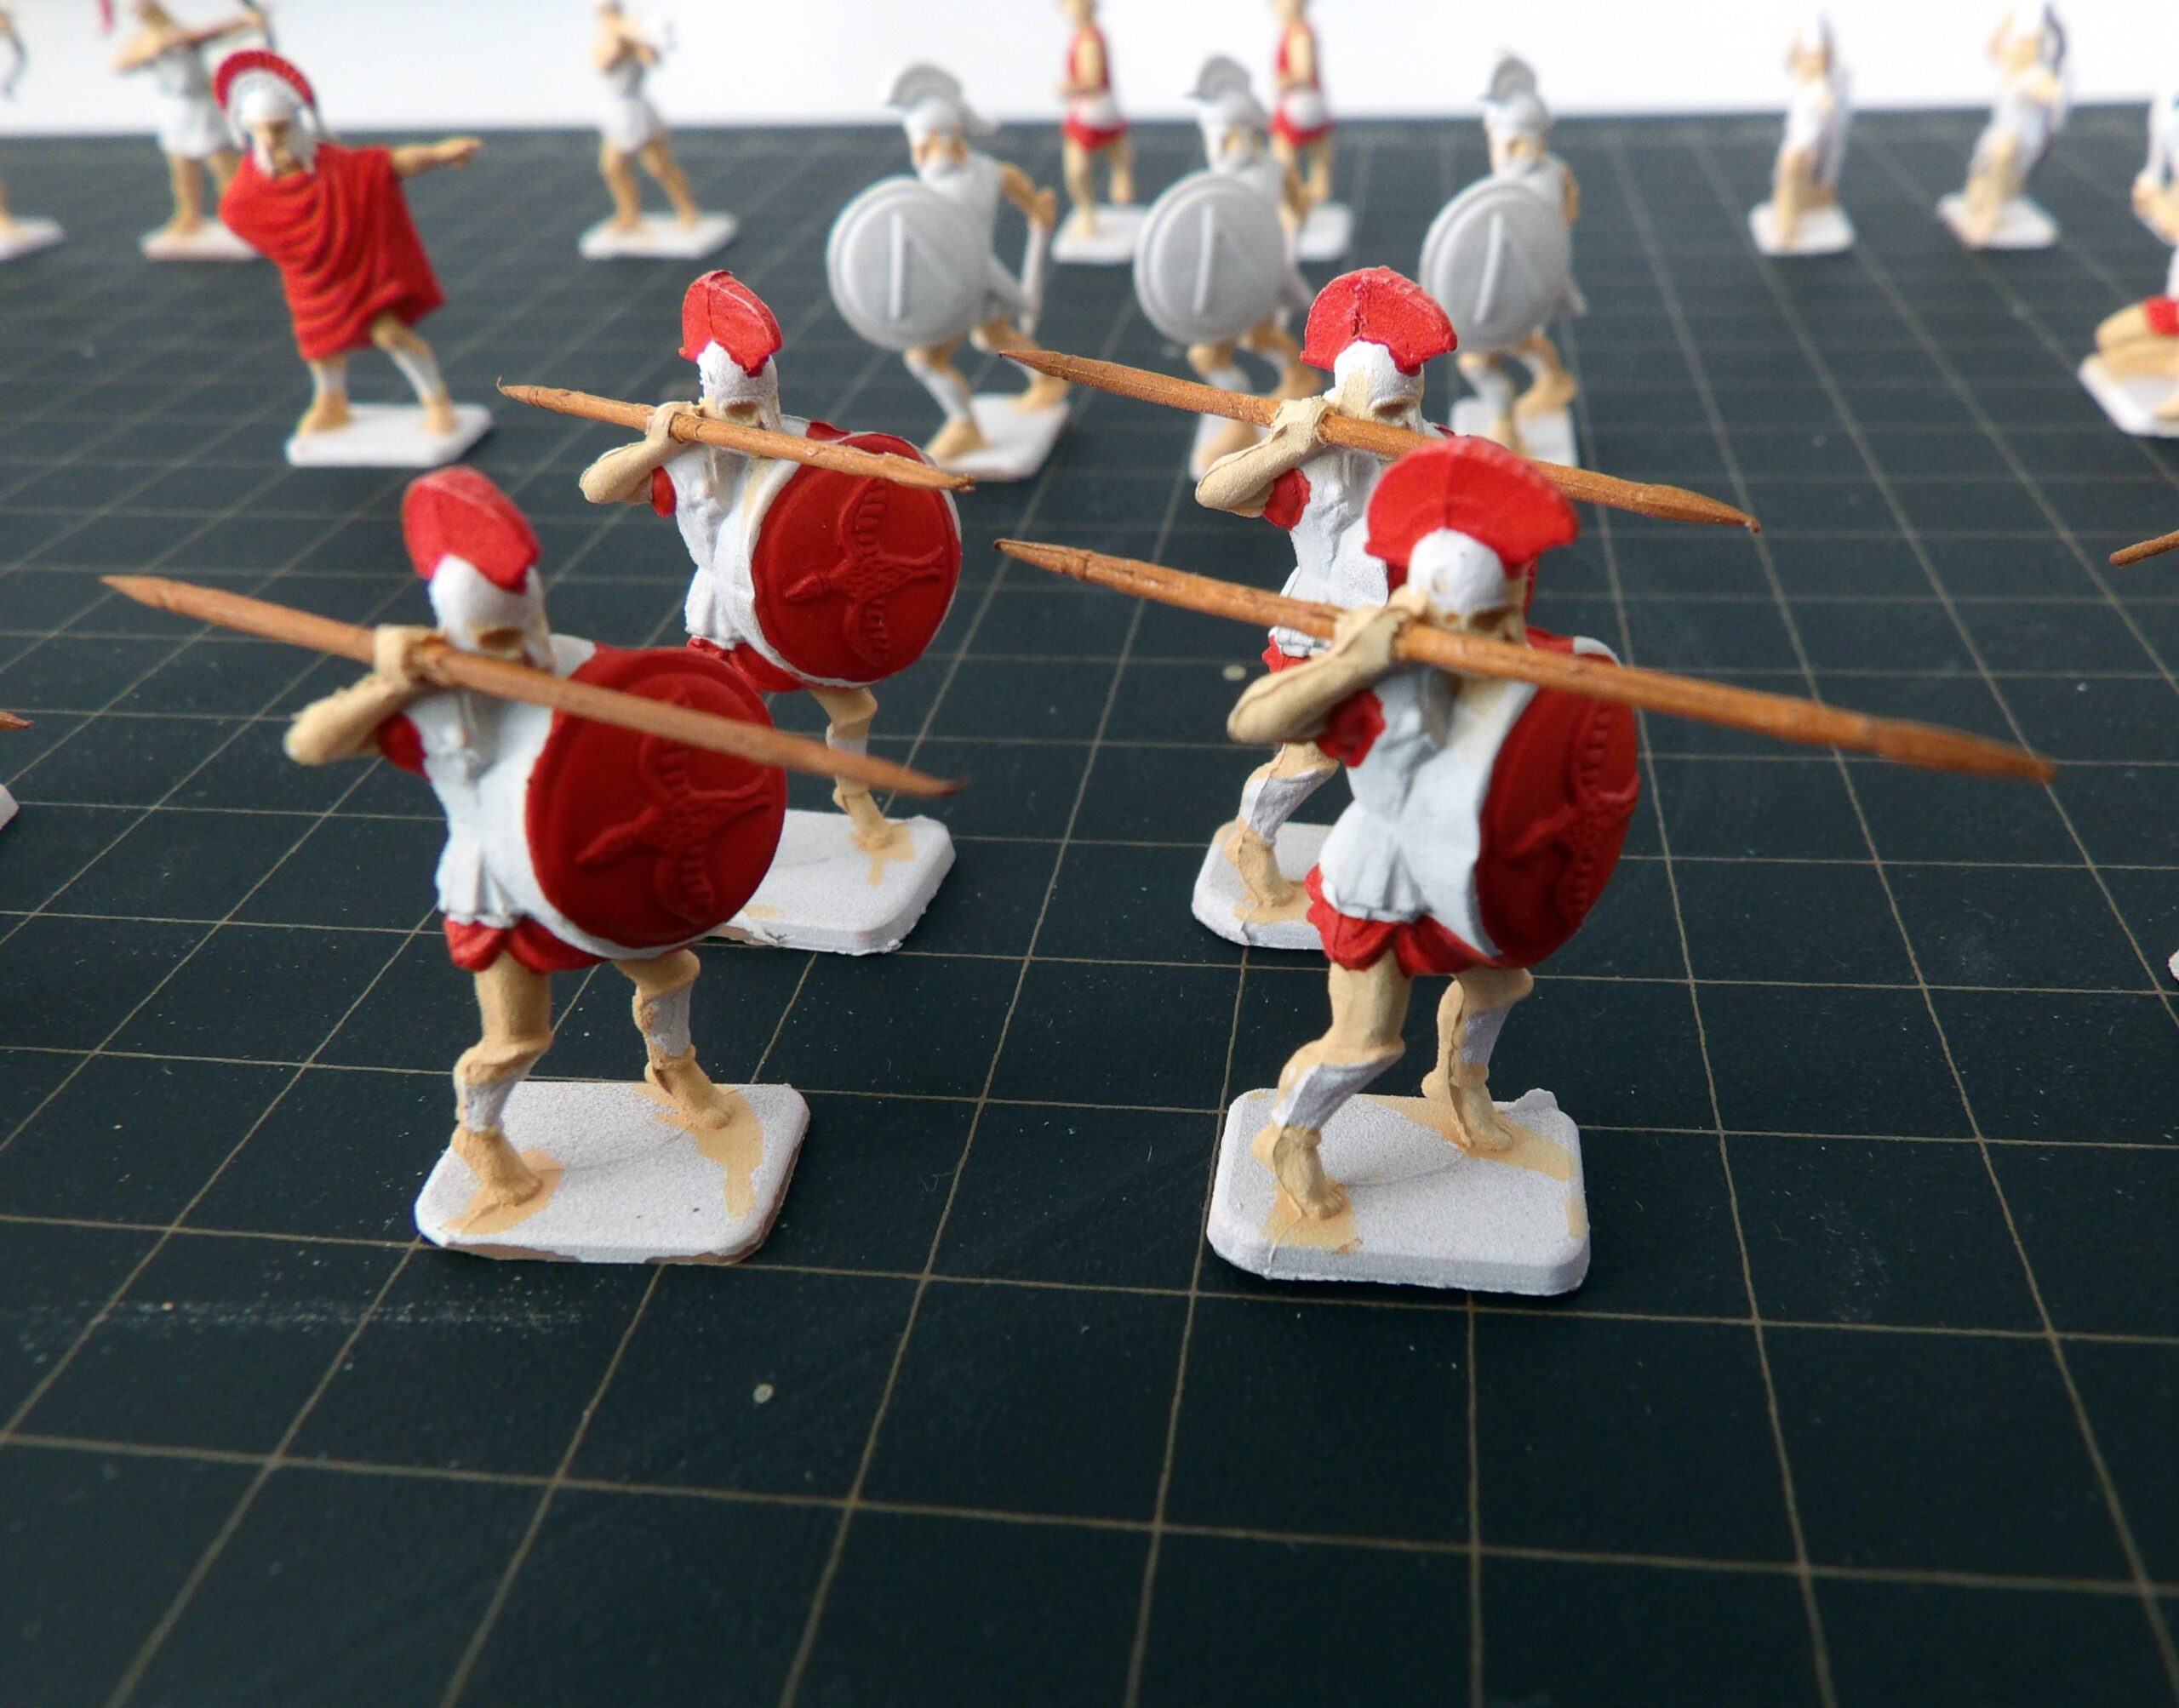
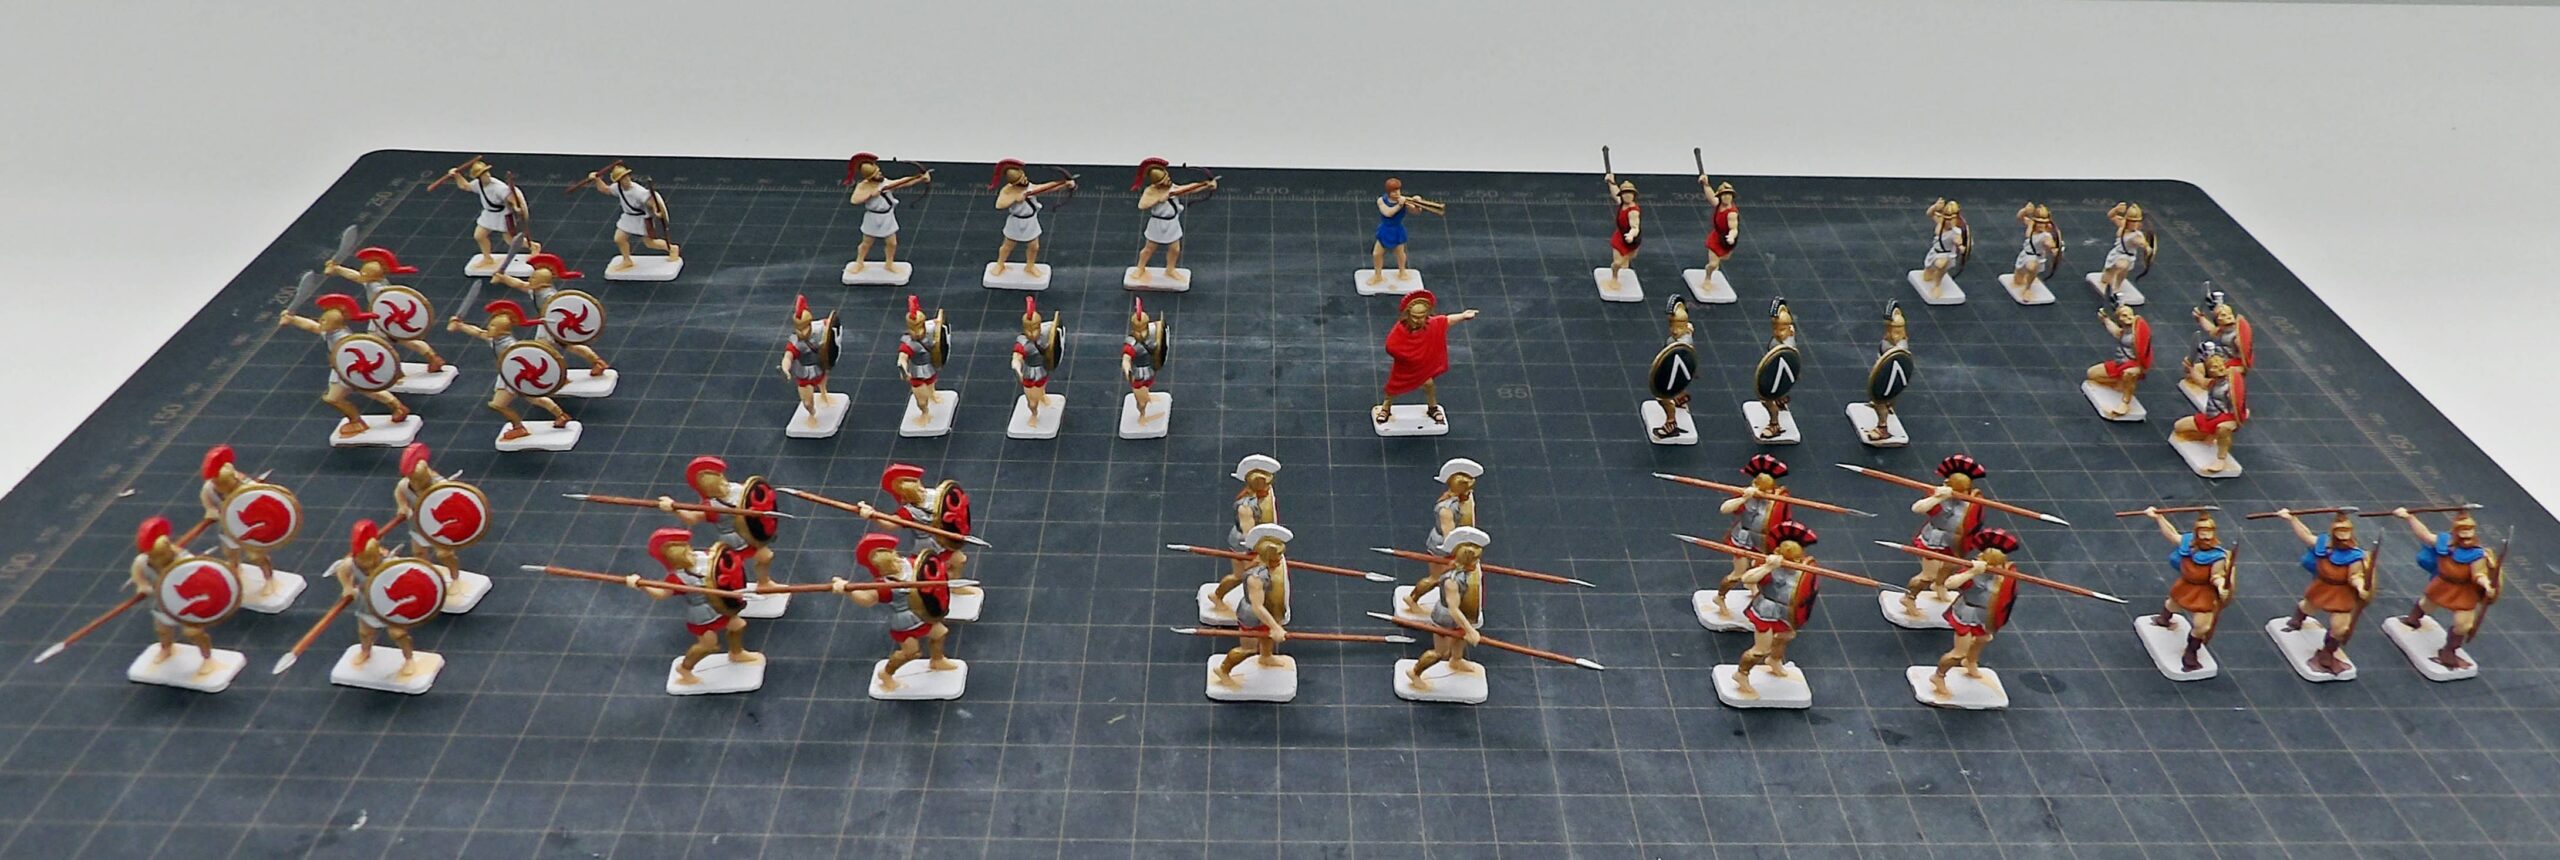
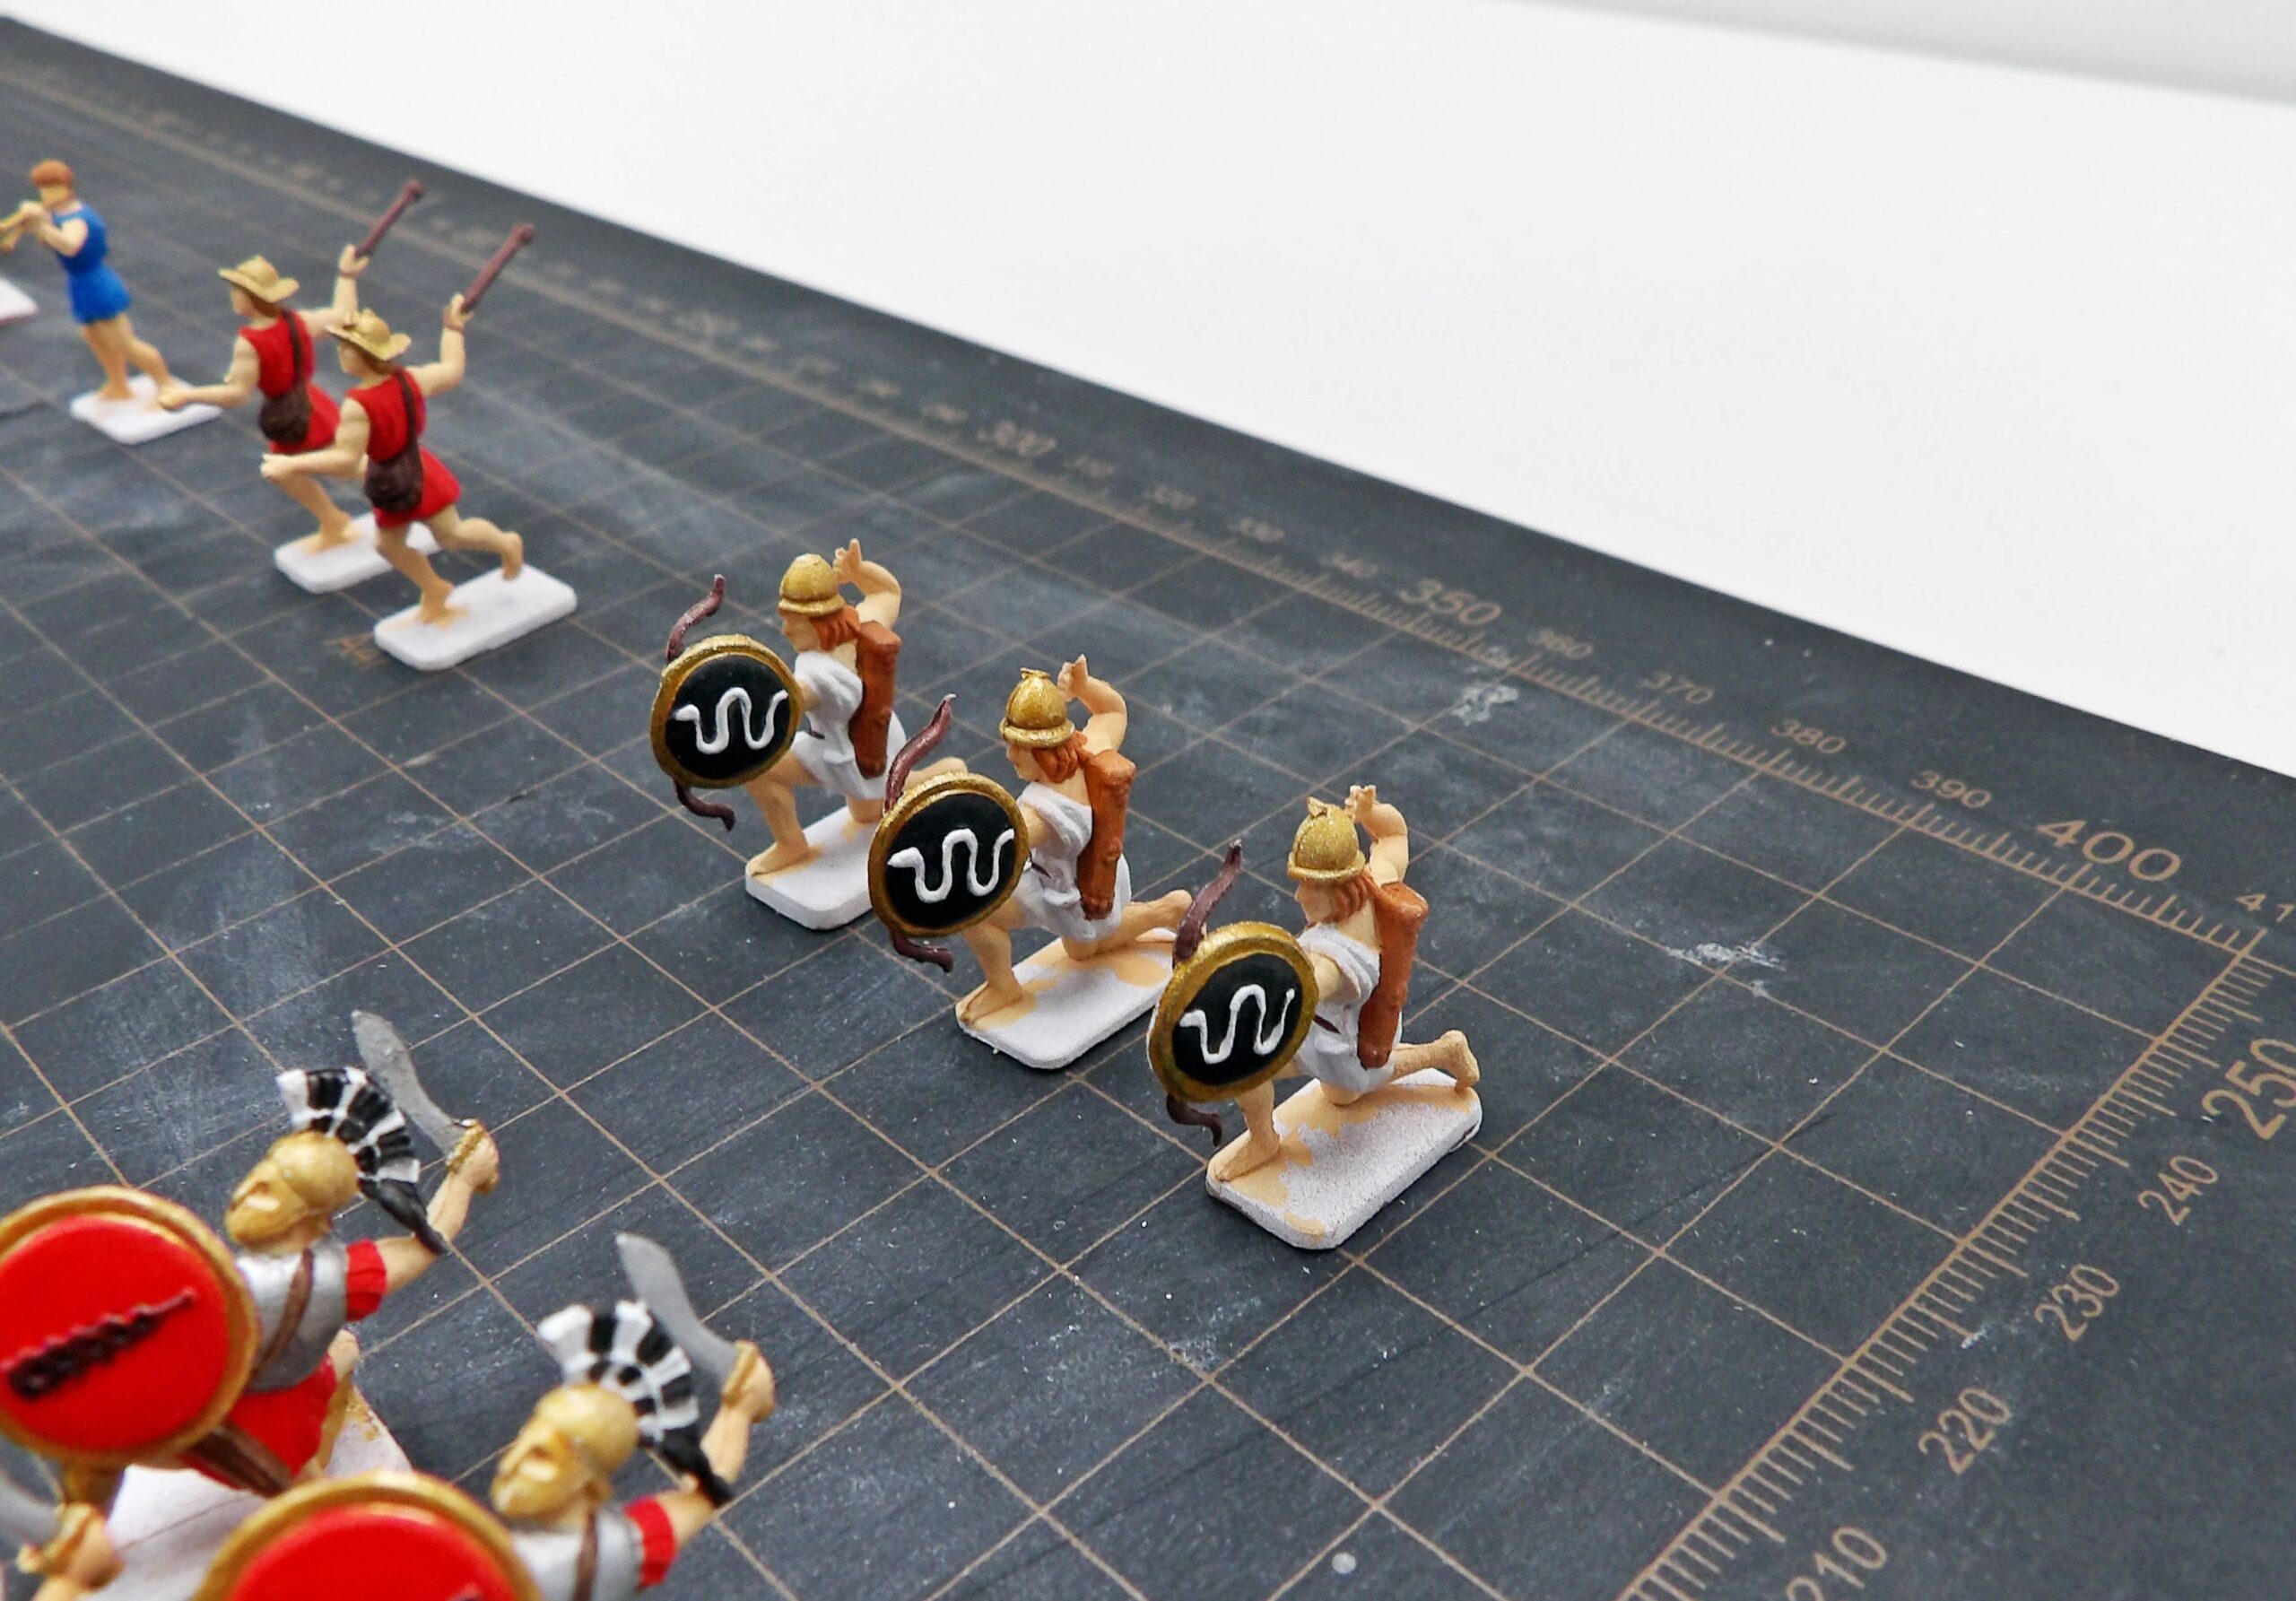
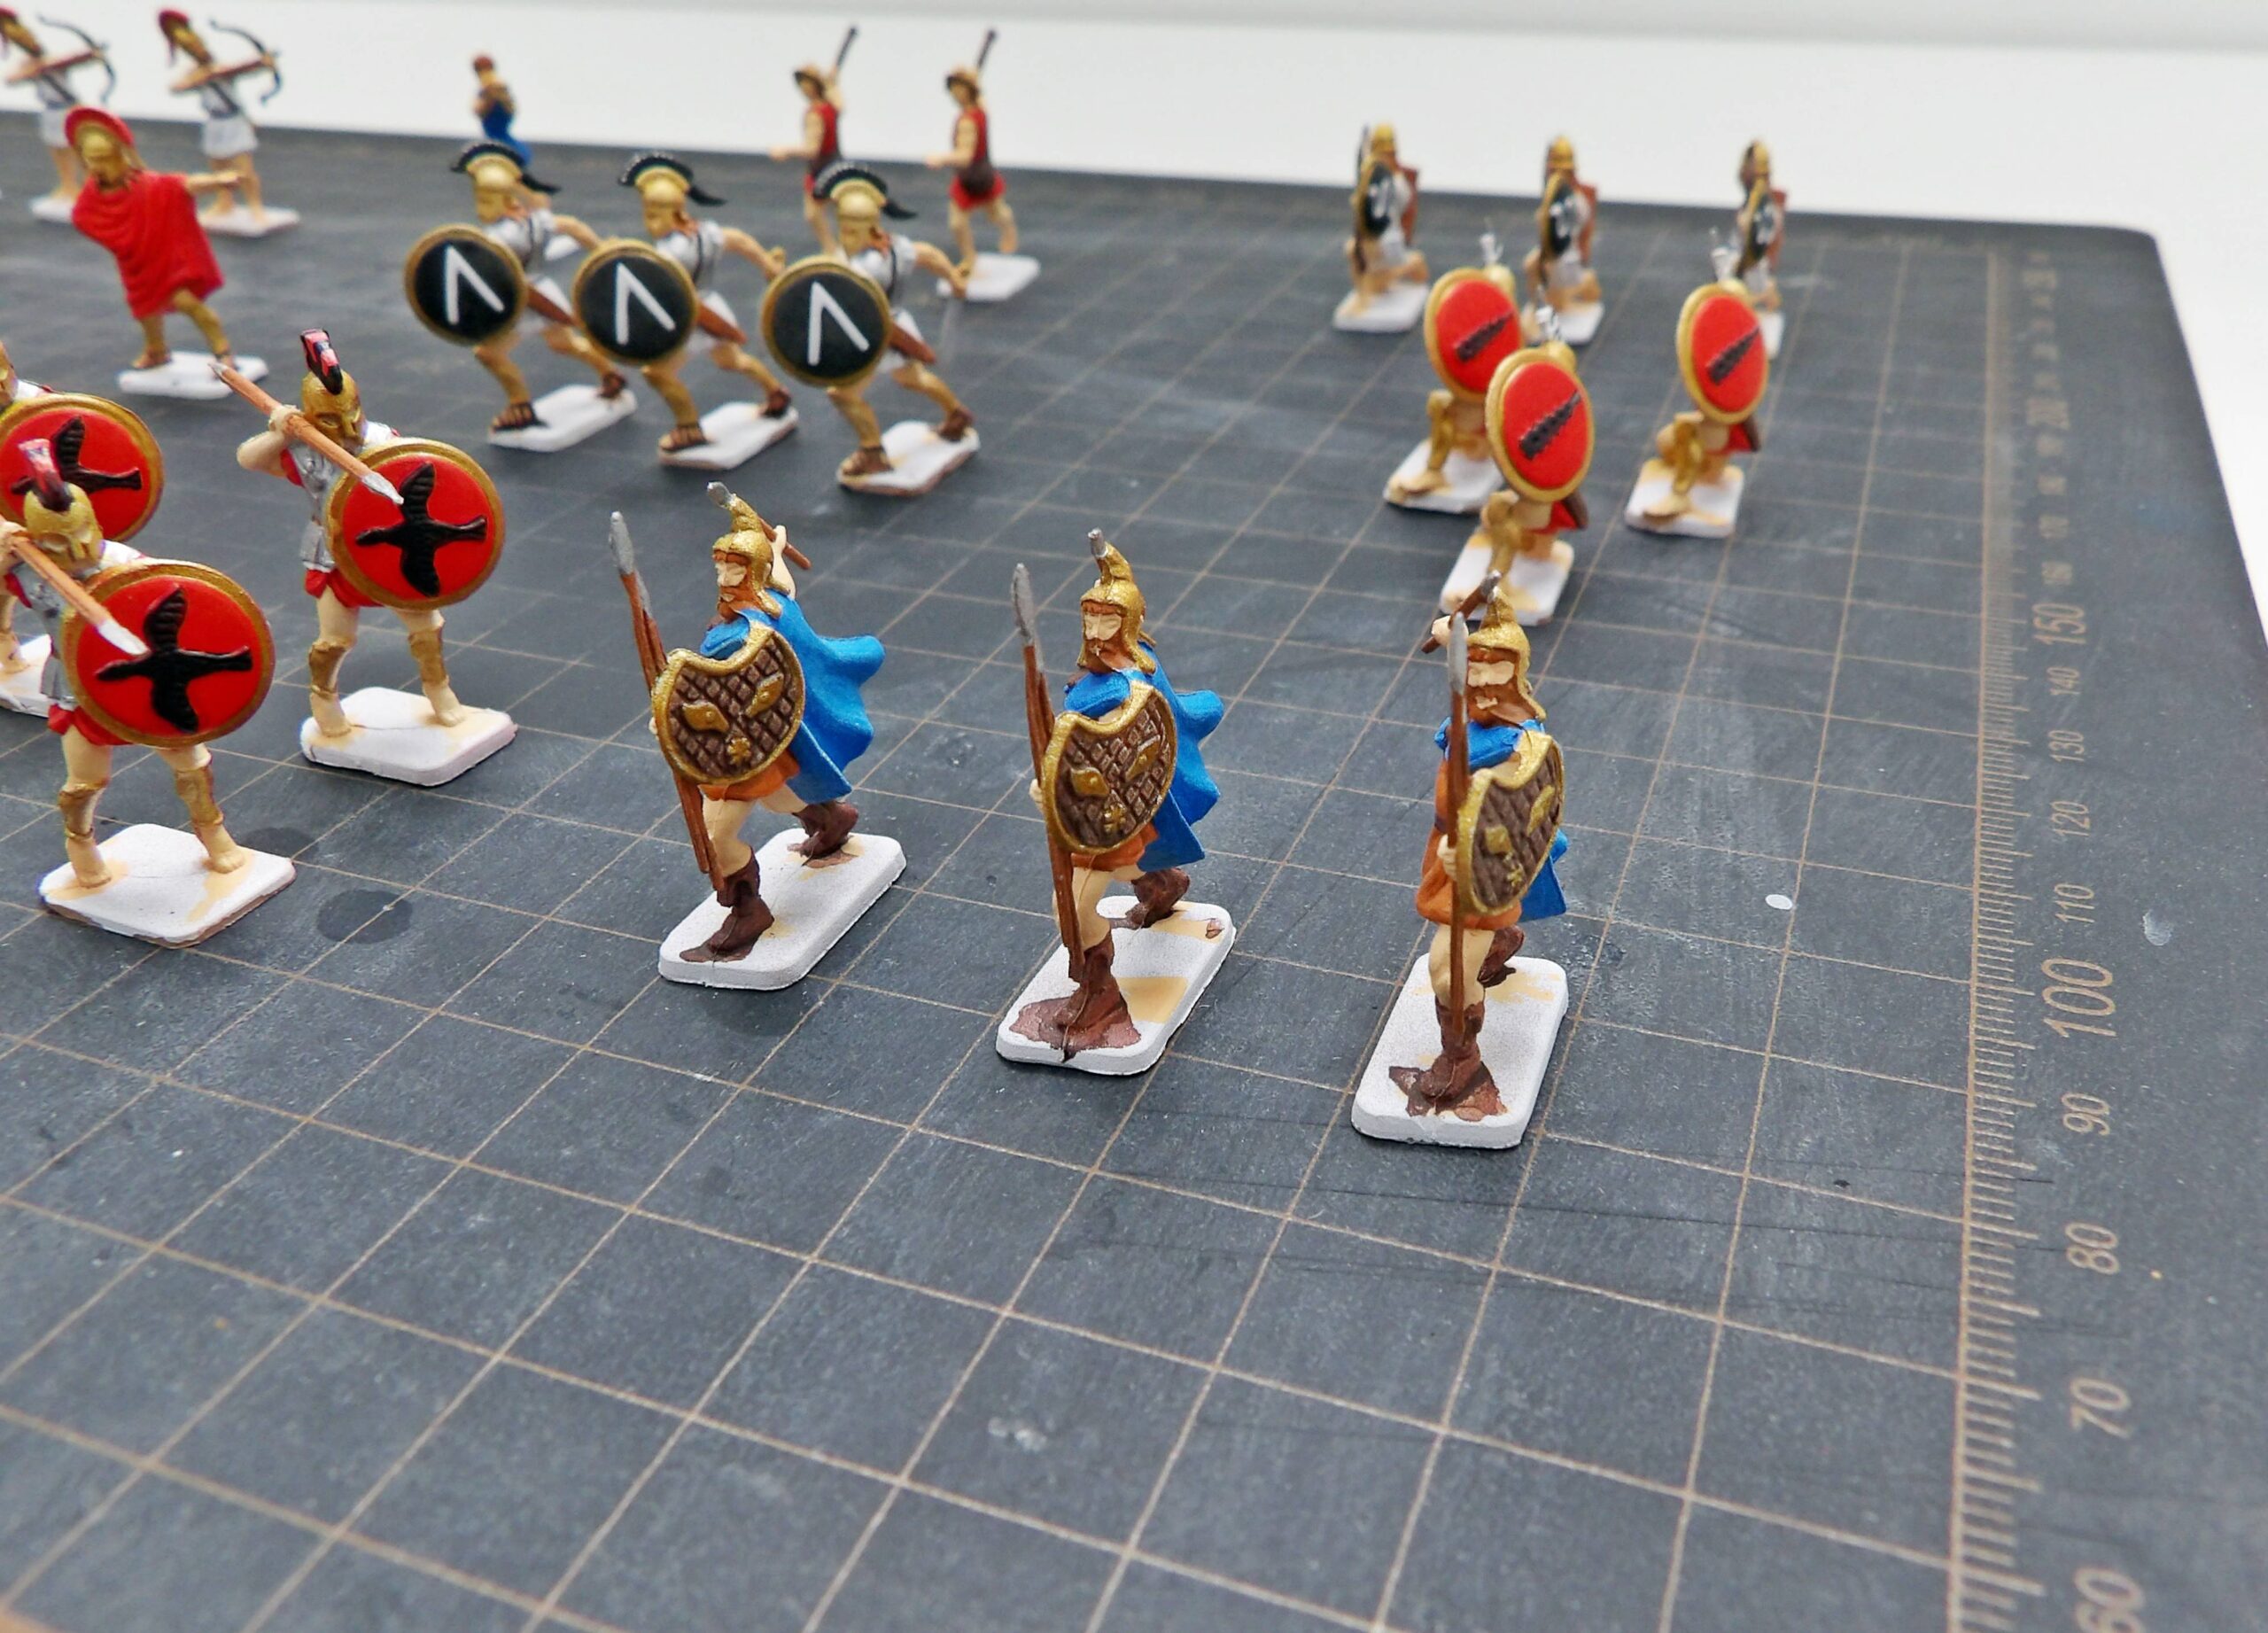
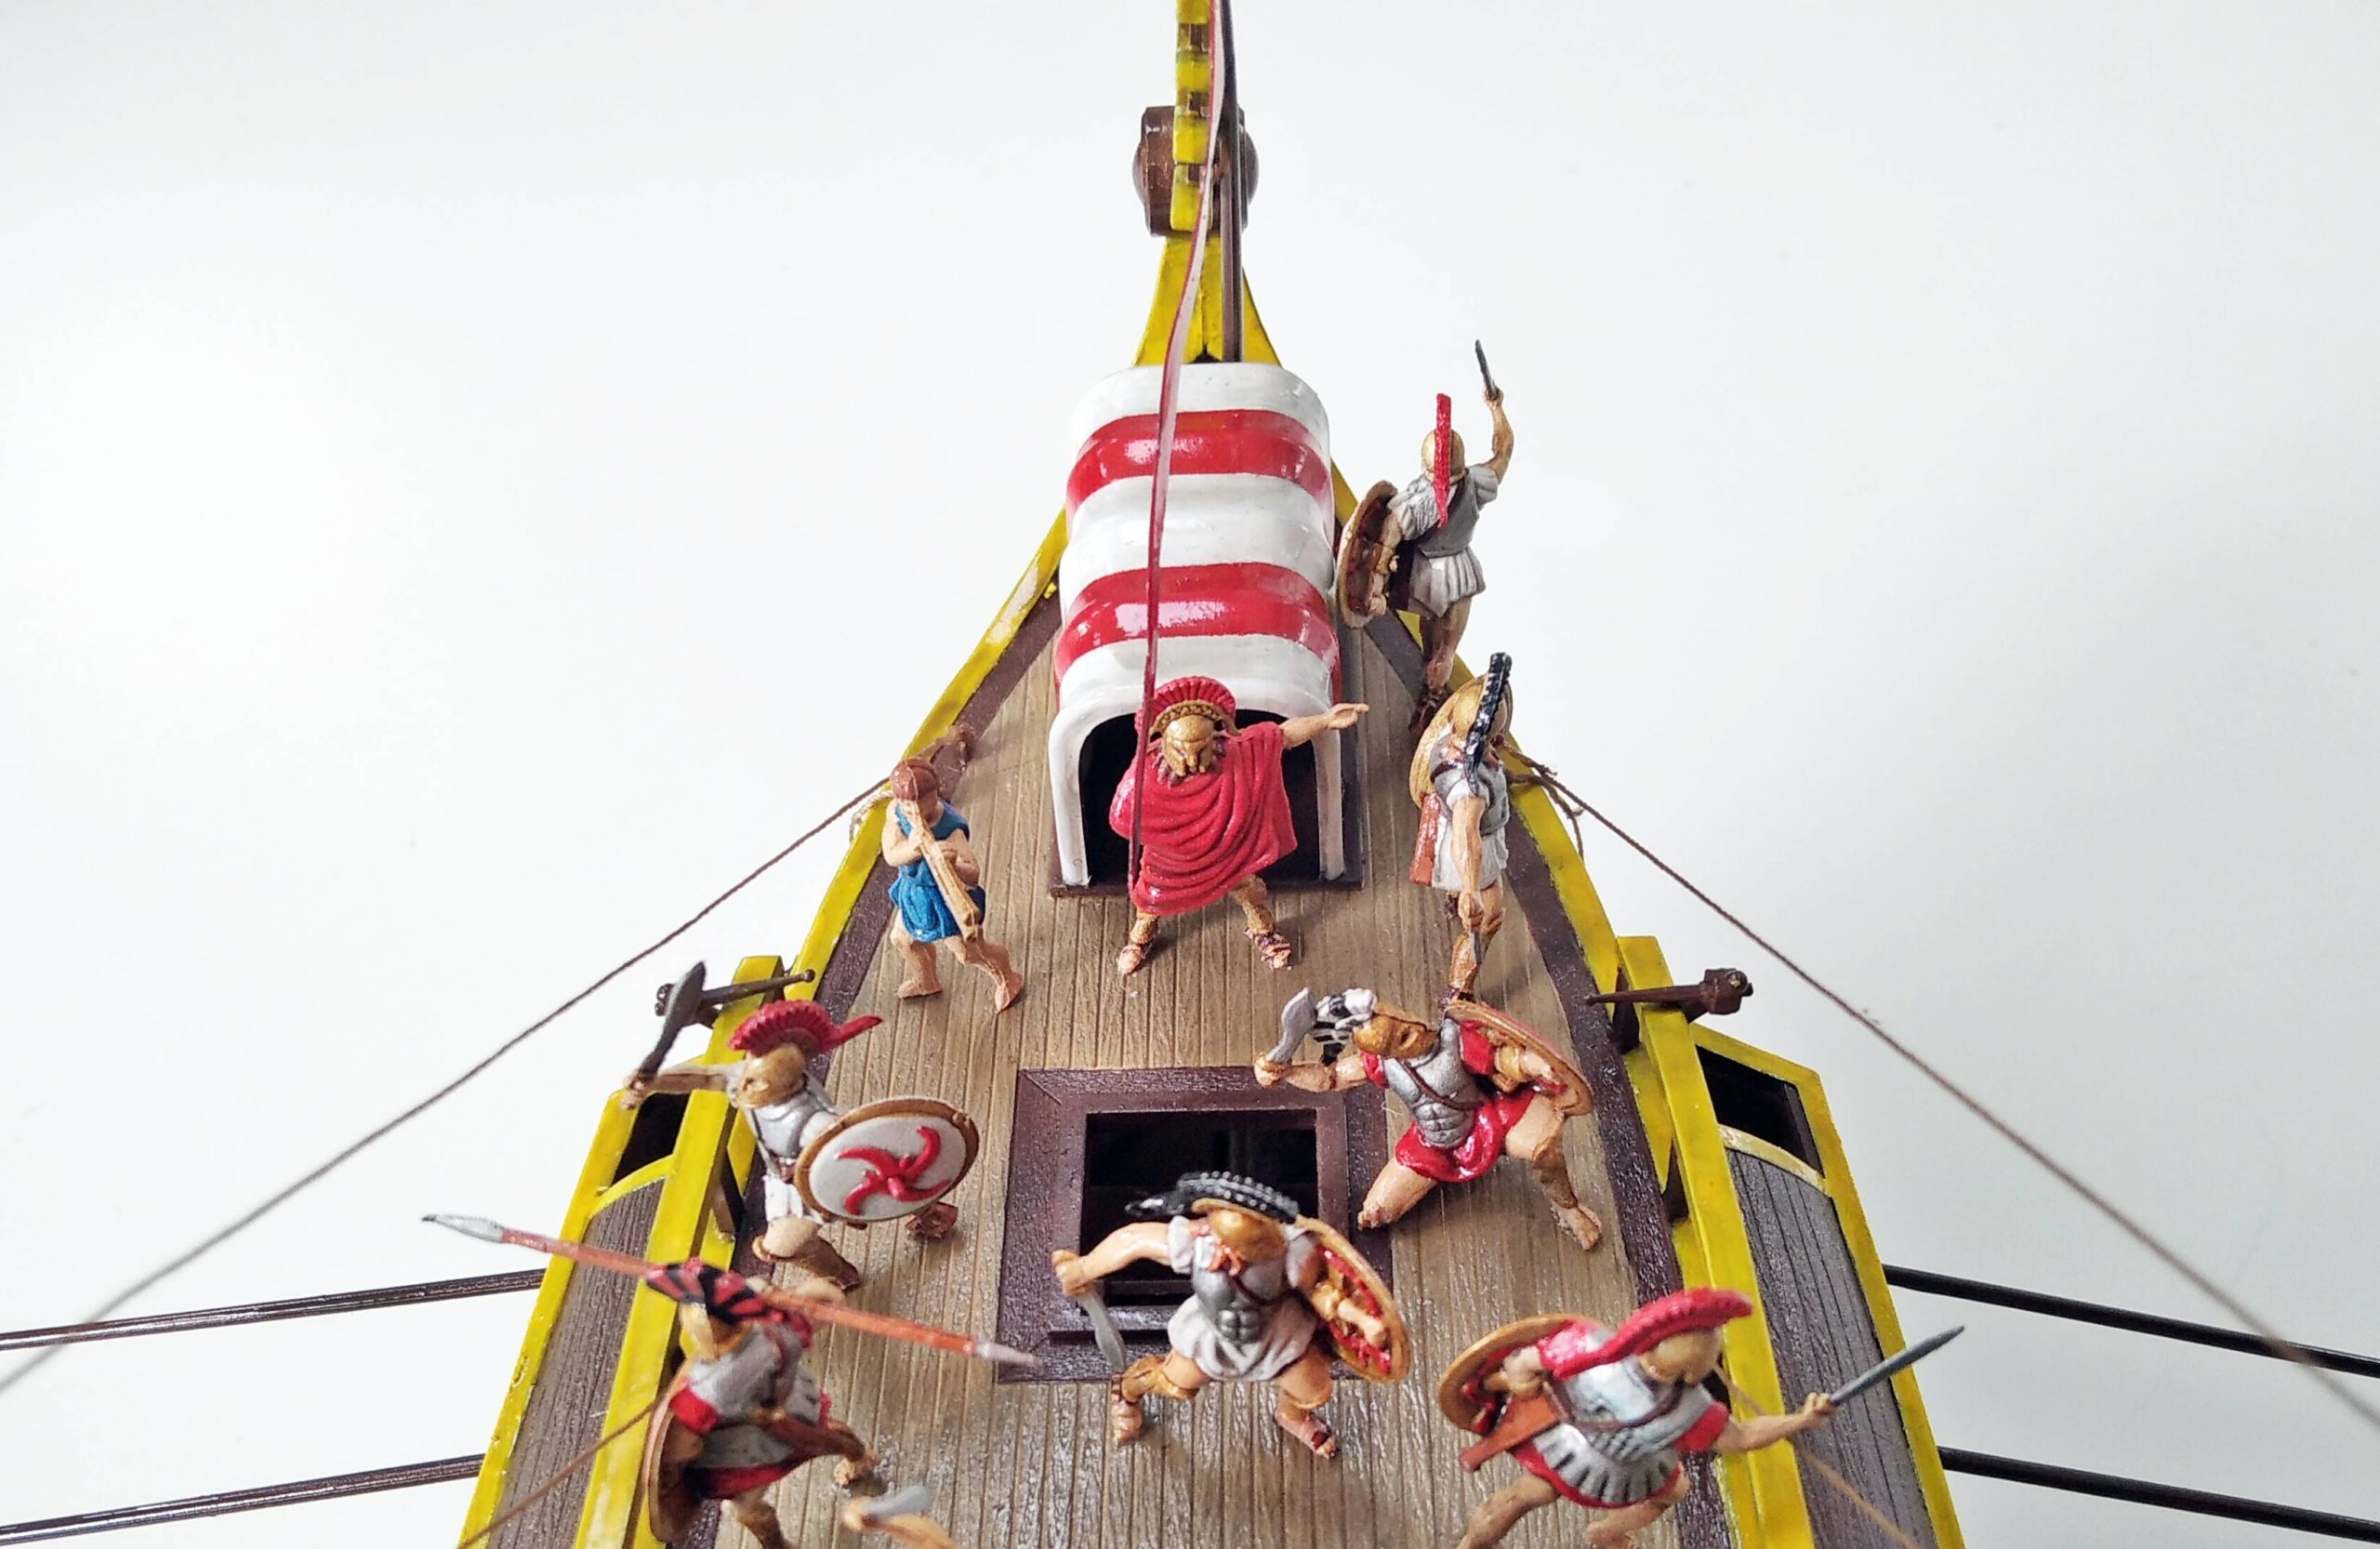
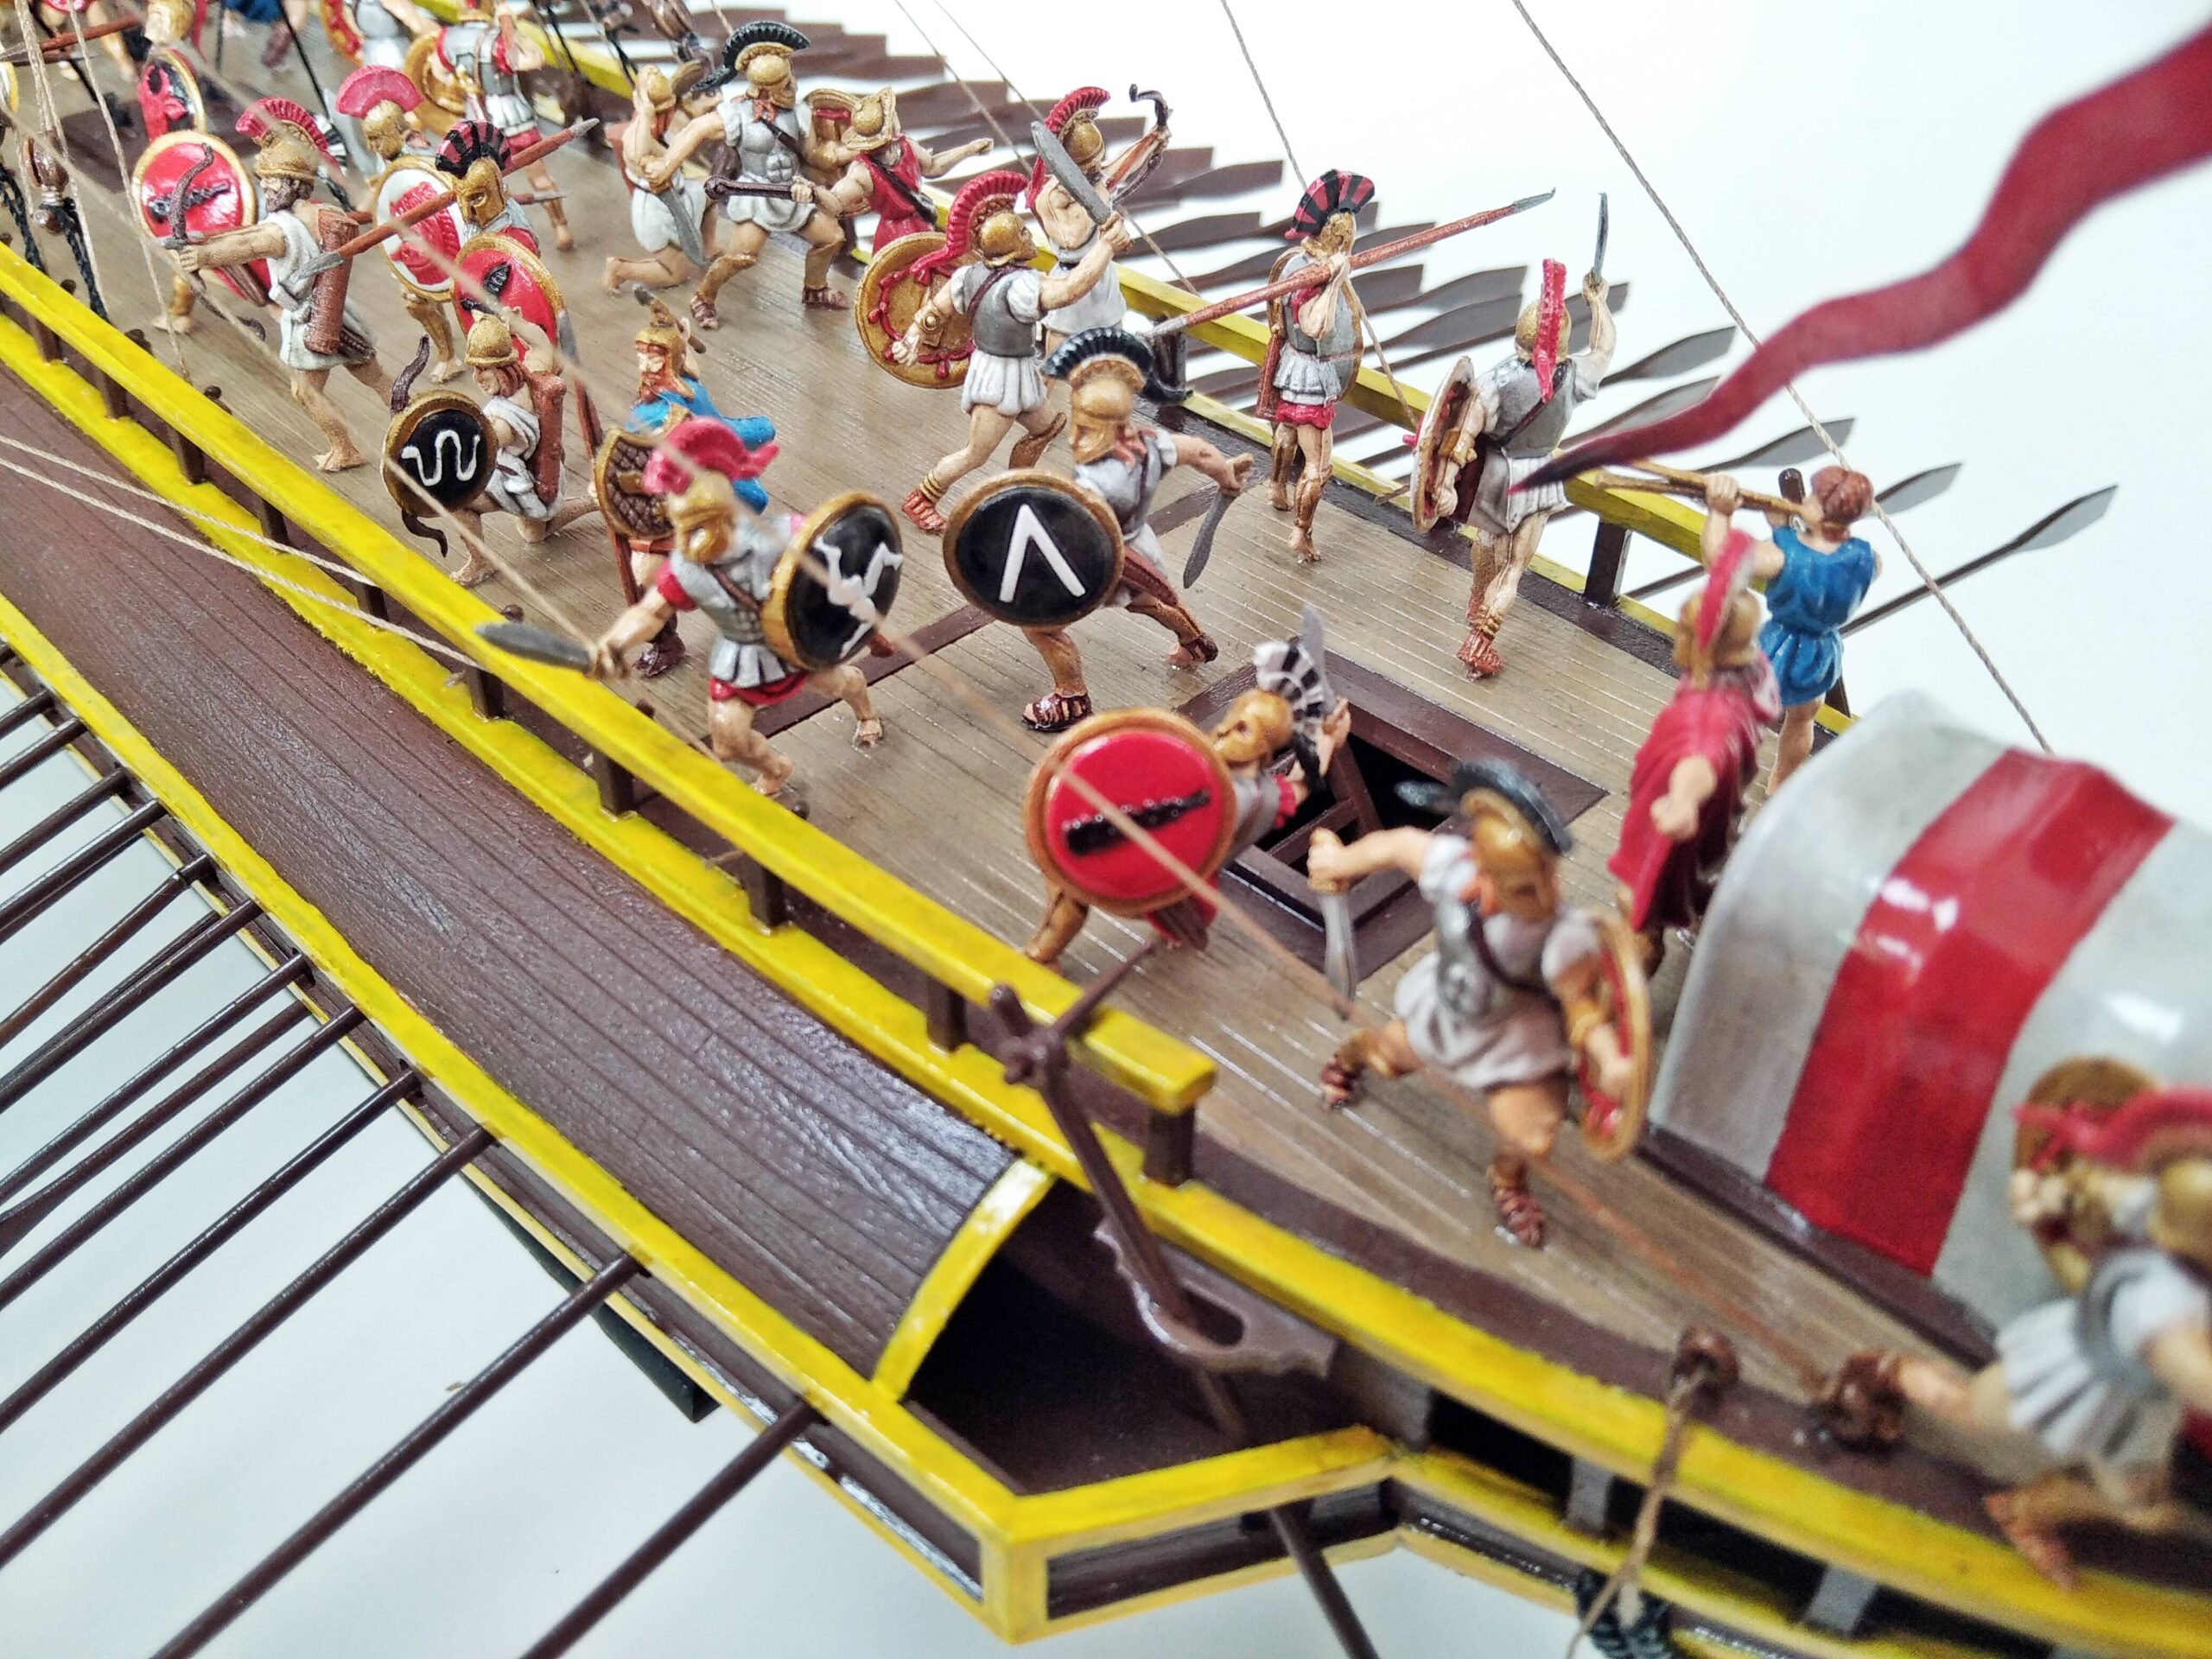
As we sit through another day of pouring rain, we finally got around to post our finished Greek Infantry!

Both the Greek Trireme we completed earlier, and these figures are 1:72 scale, perfect match!
Not too much construction in this kit – glue on the spears and shields and you’re done.
Here are the unpainted figures nicely arranged.
The figures in the photo have been primed and partially painted.
The painting is complete. Our cutting mat has changed colour since we started this project!
The figures are carefully arranged on the trireme.
Finally, we snipped the figures from the bases (taking care not to chop off any limbs in the process) and glued them onto the trireme.

Construction of Revell 1:72 patrol Torpedo Boat PT-579

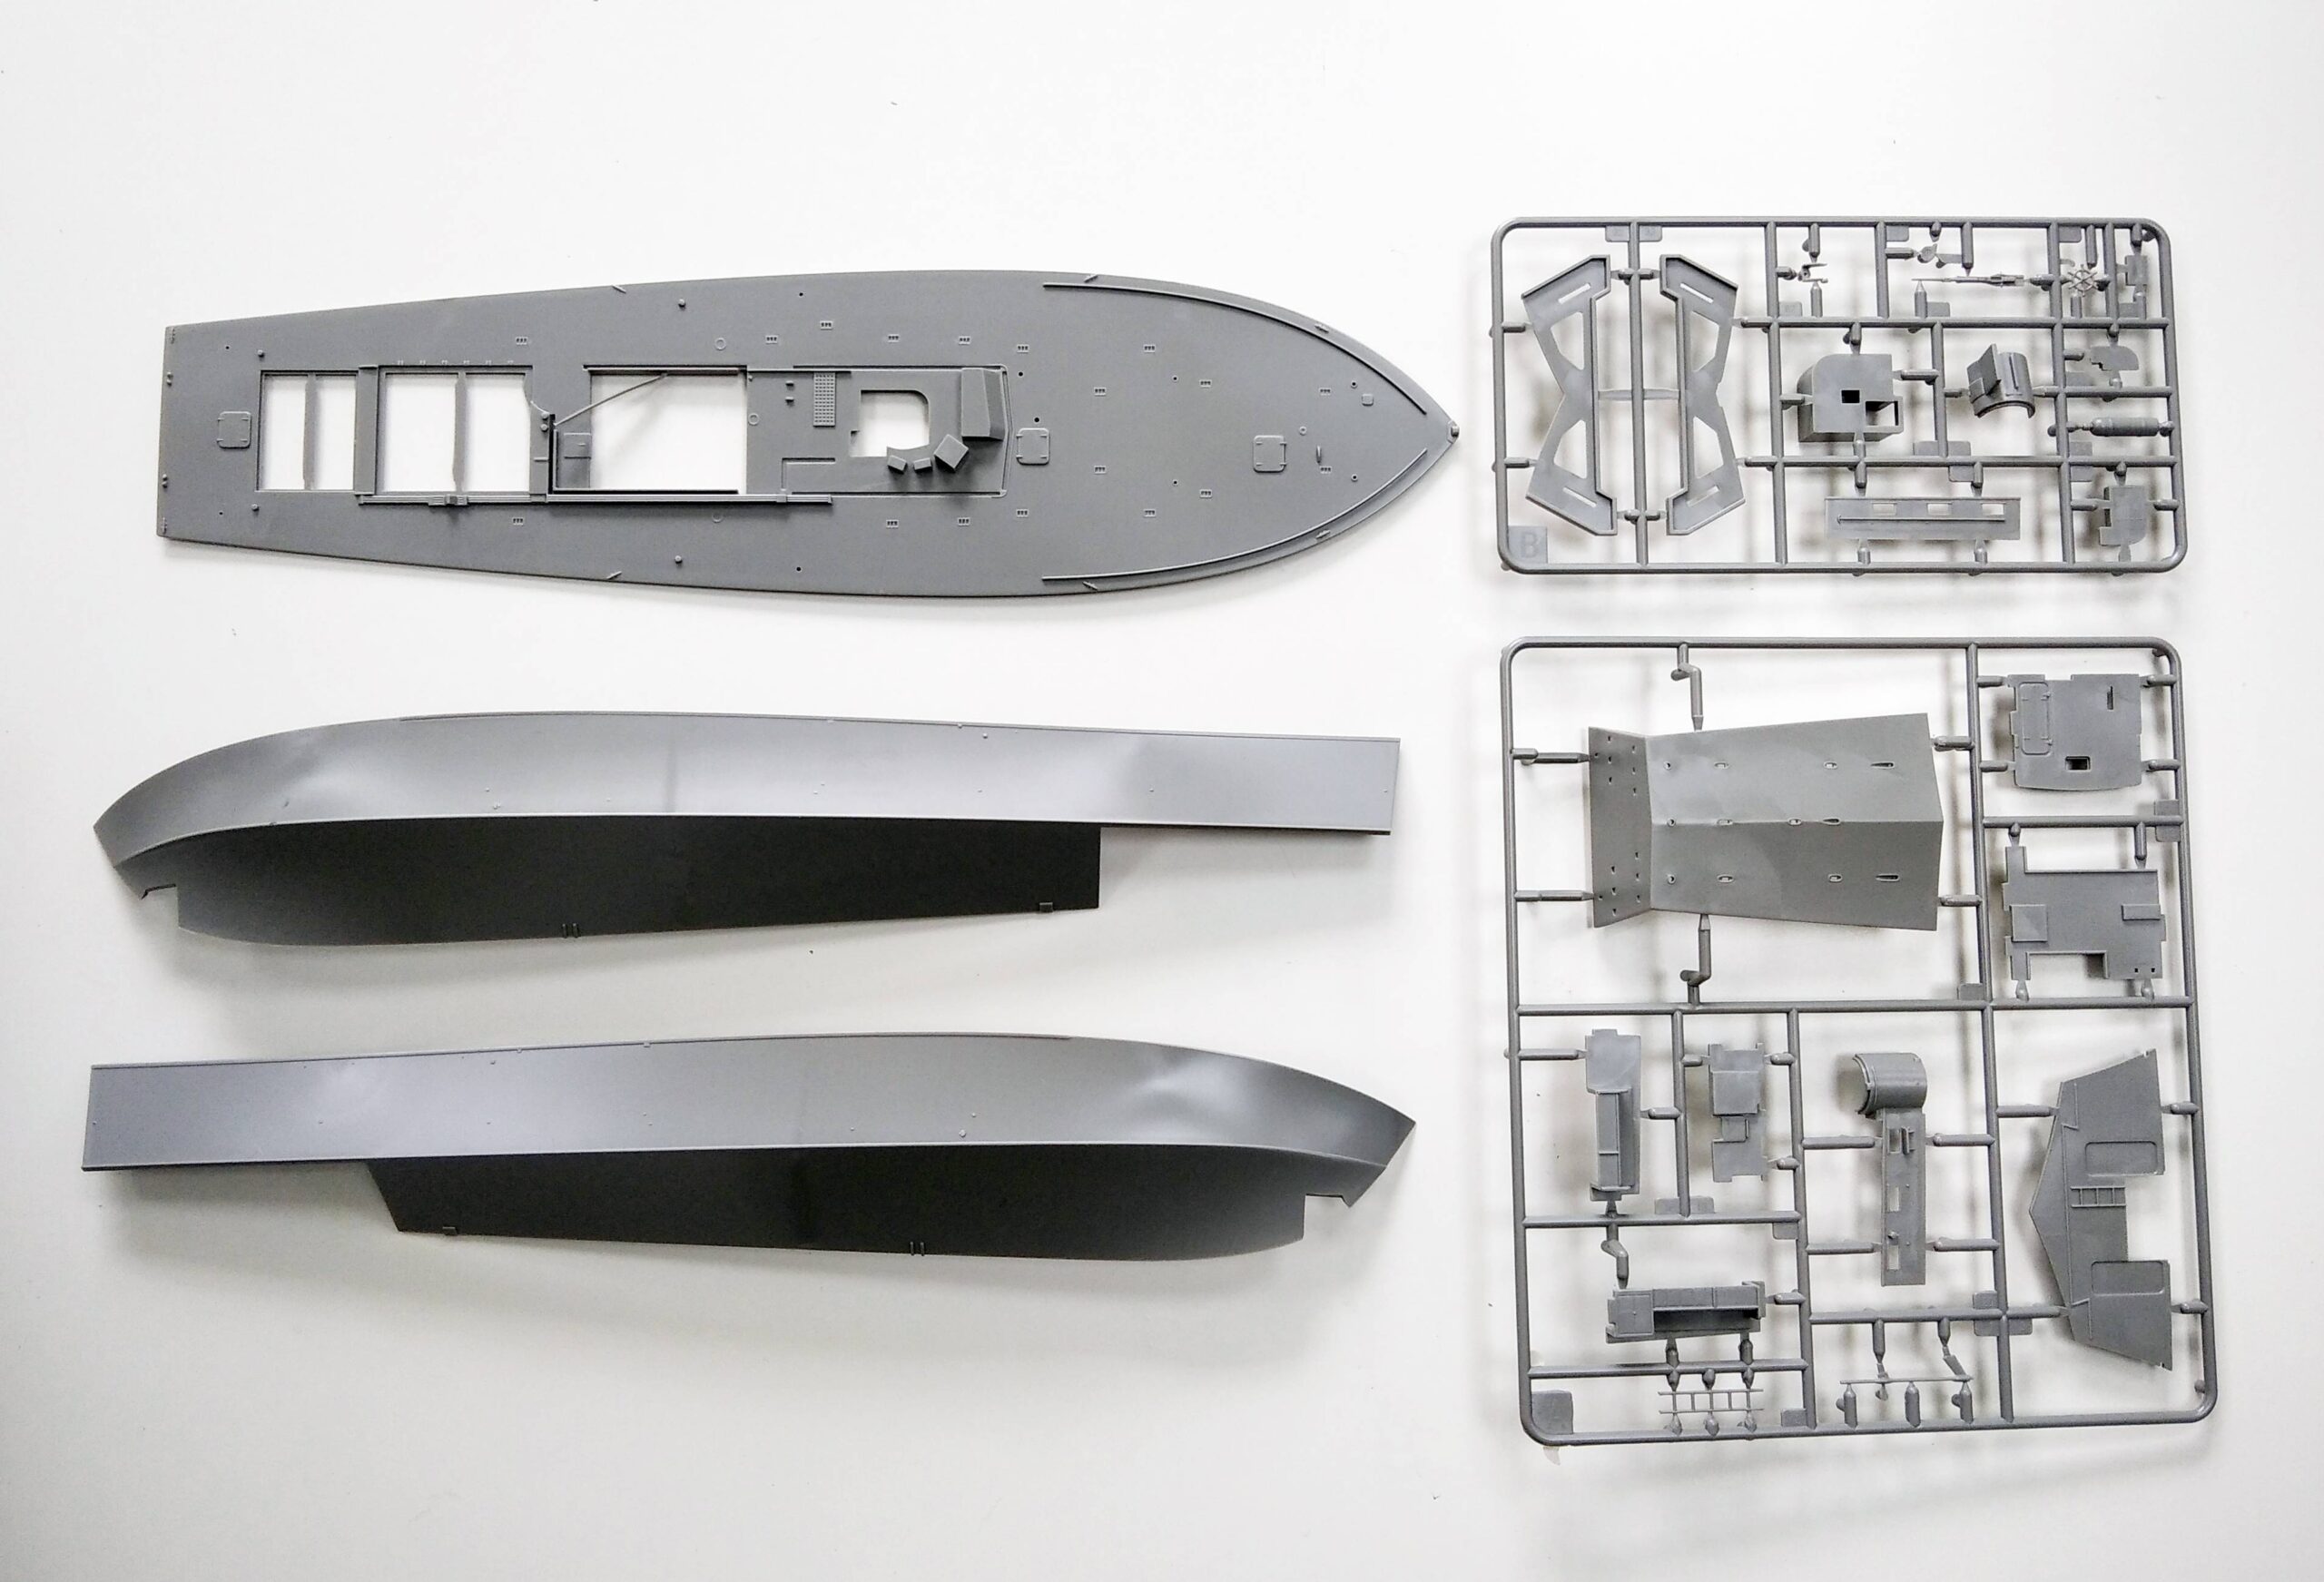
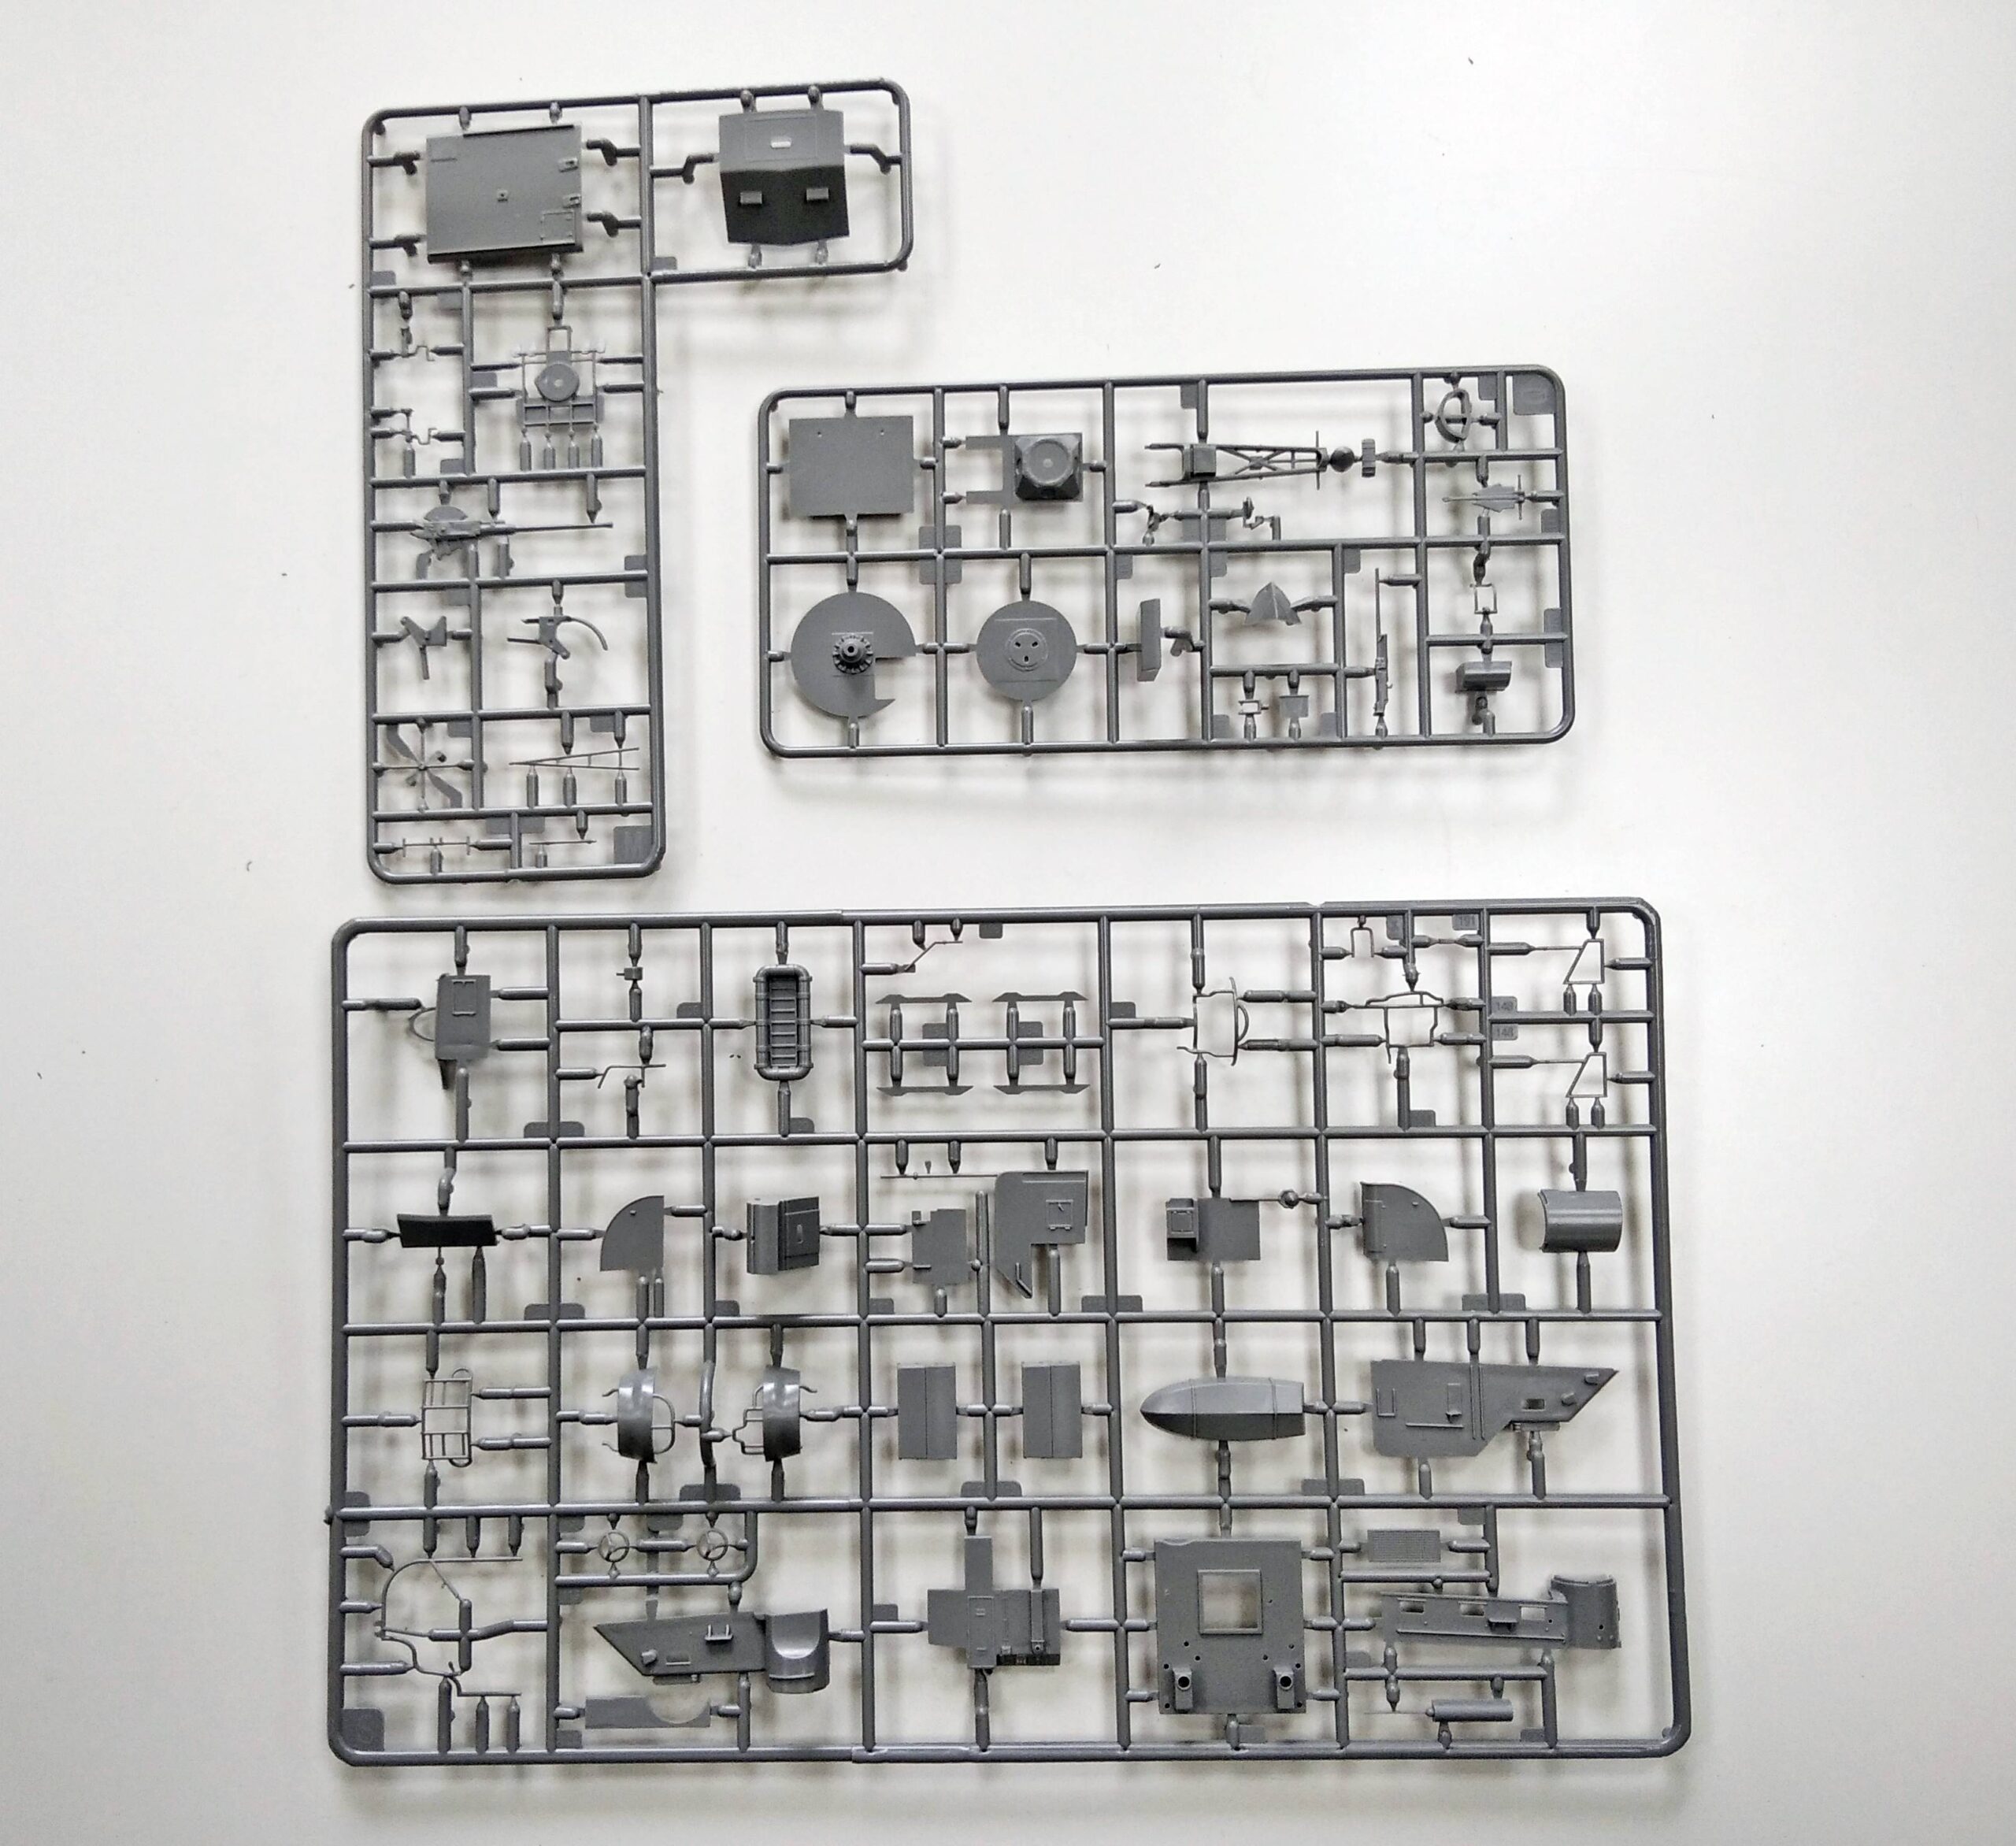
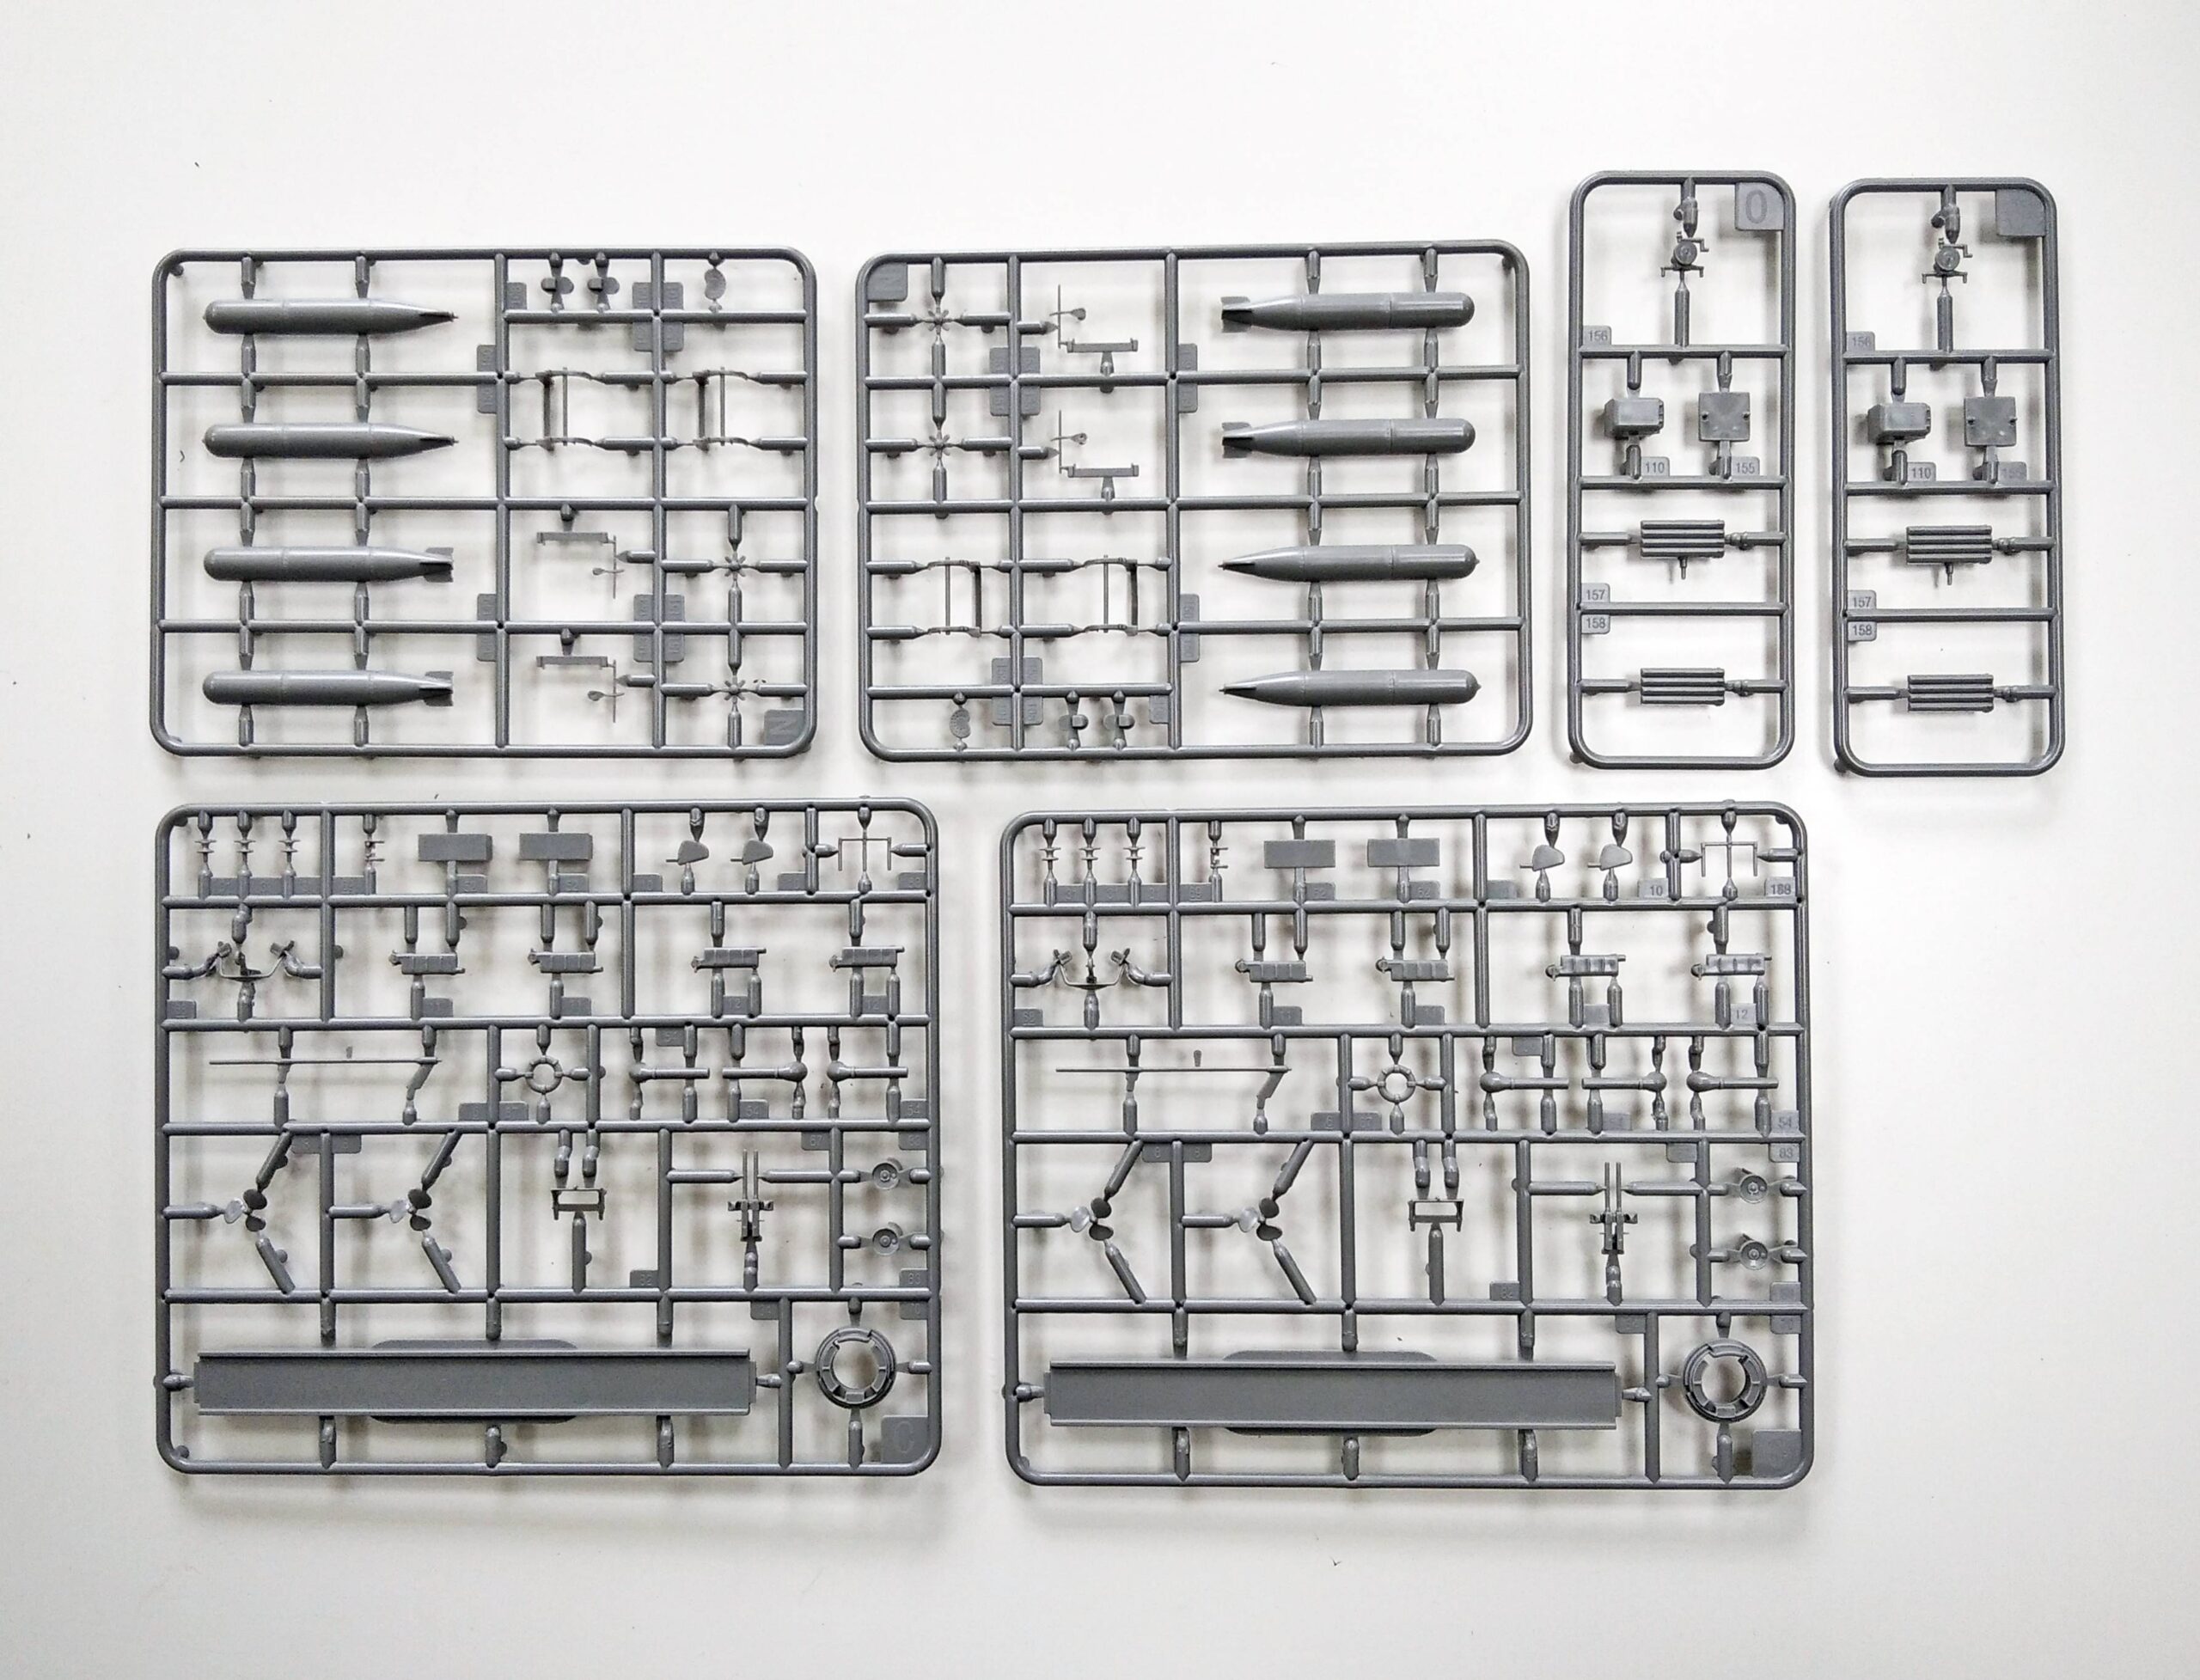
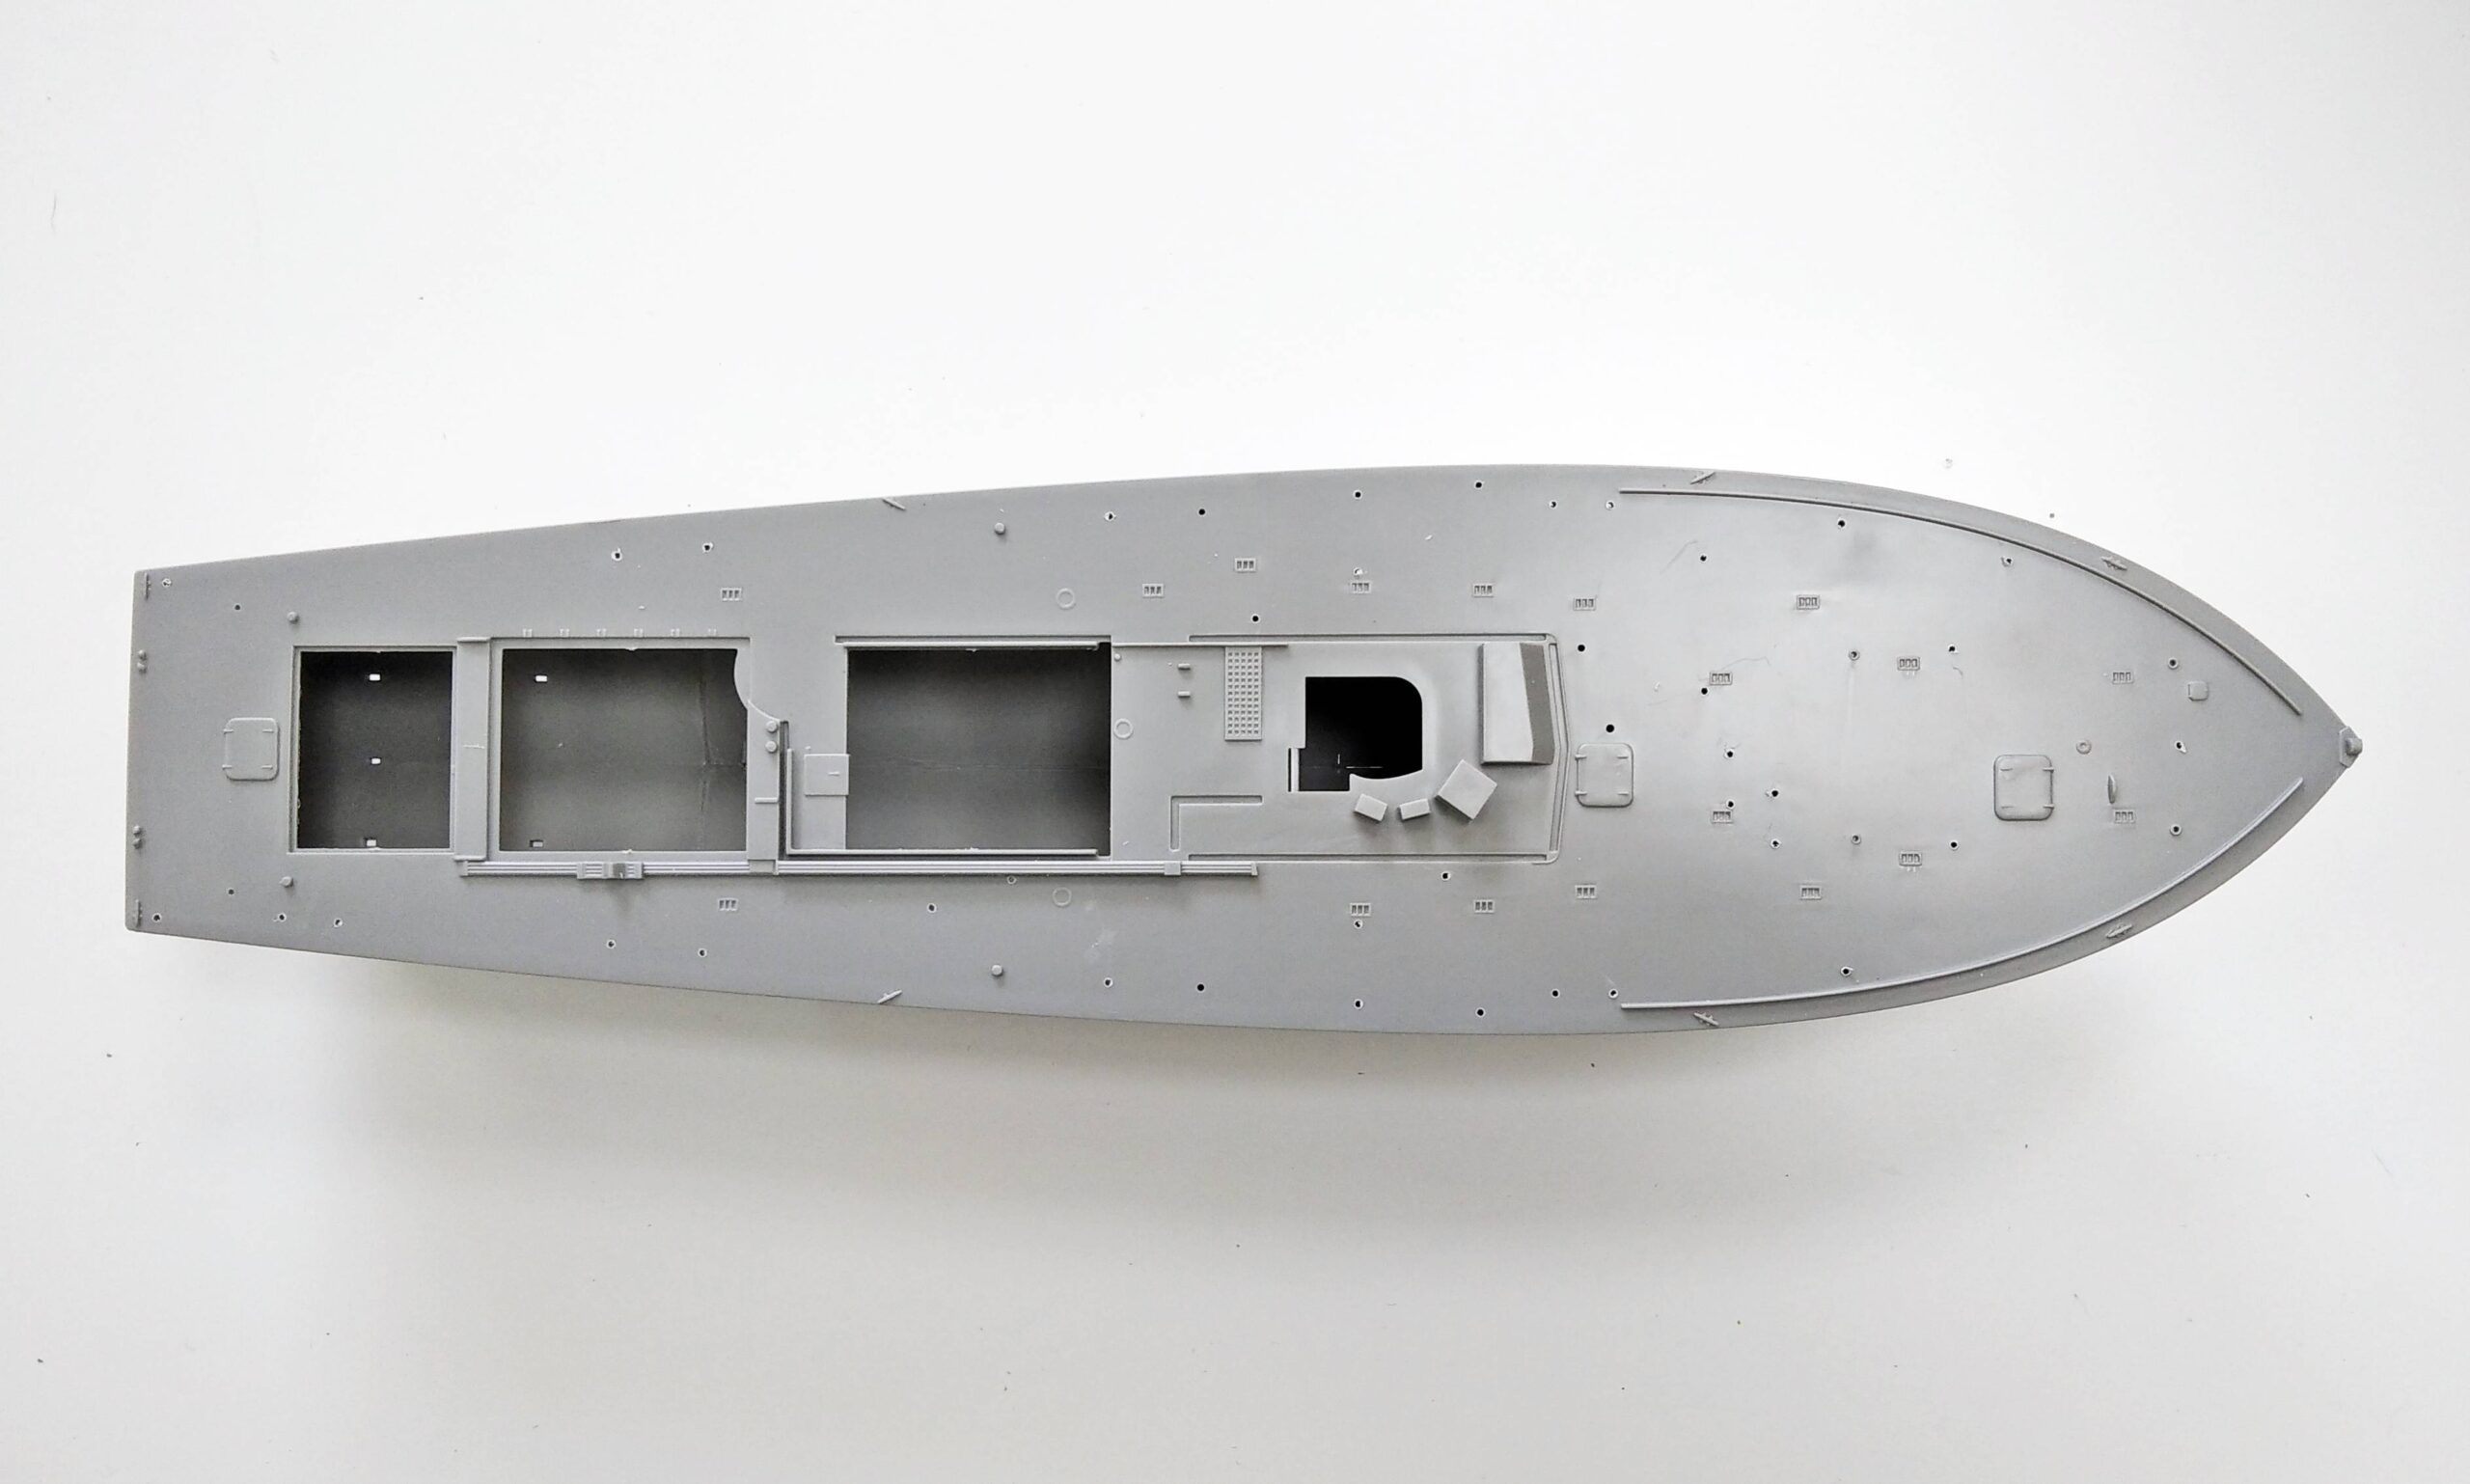
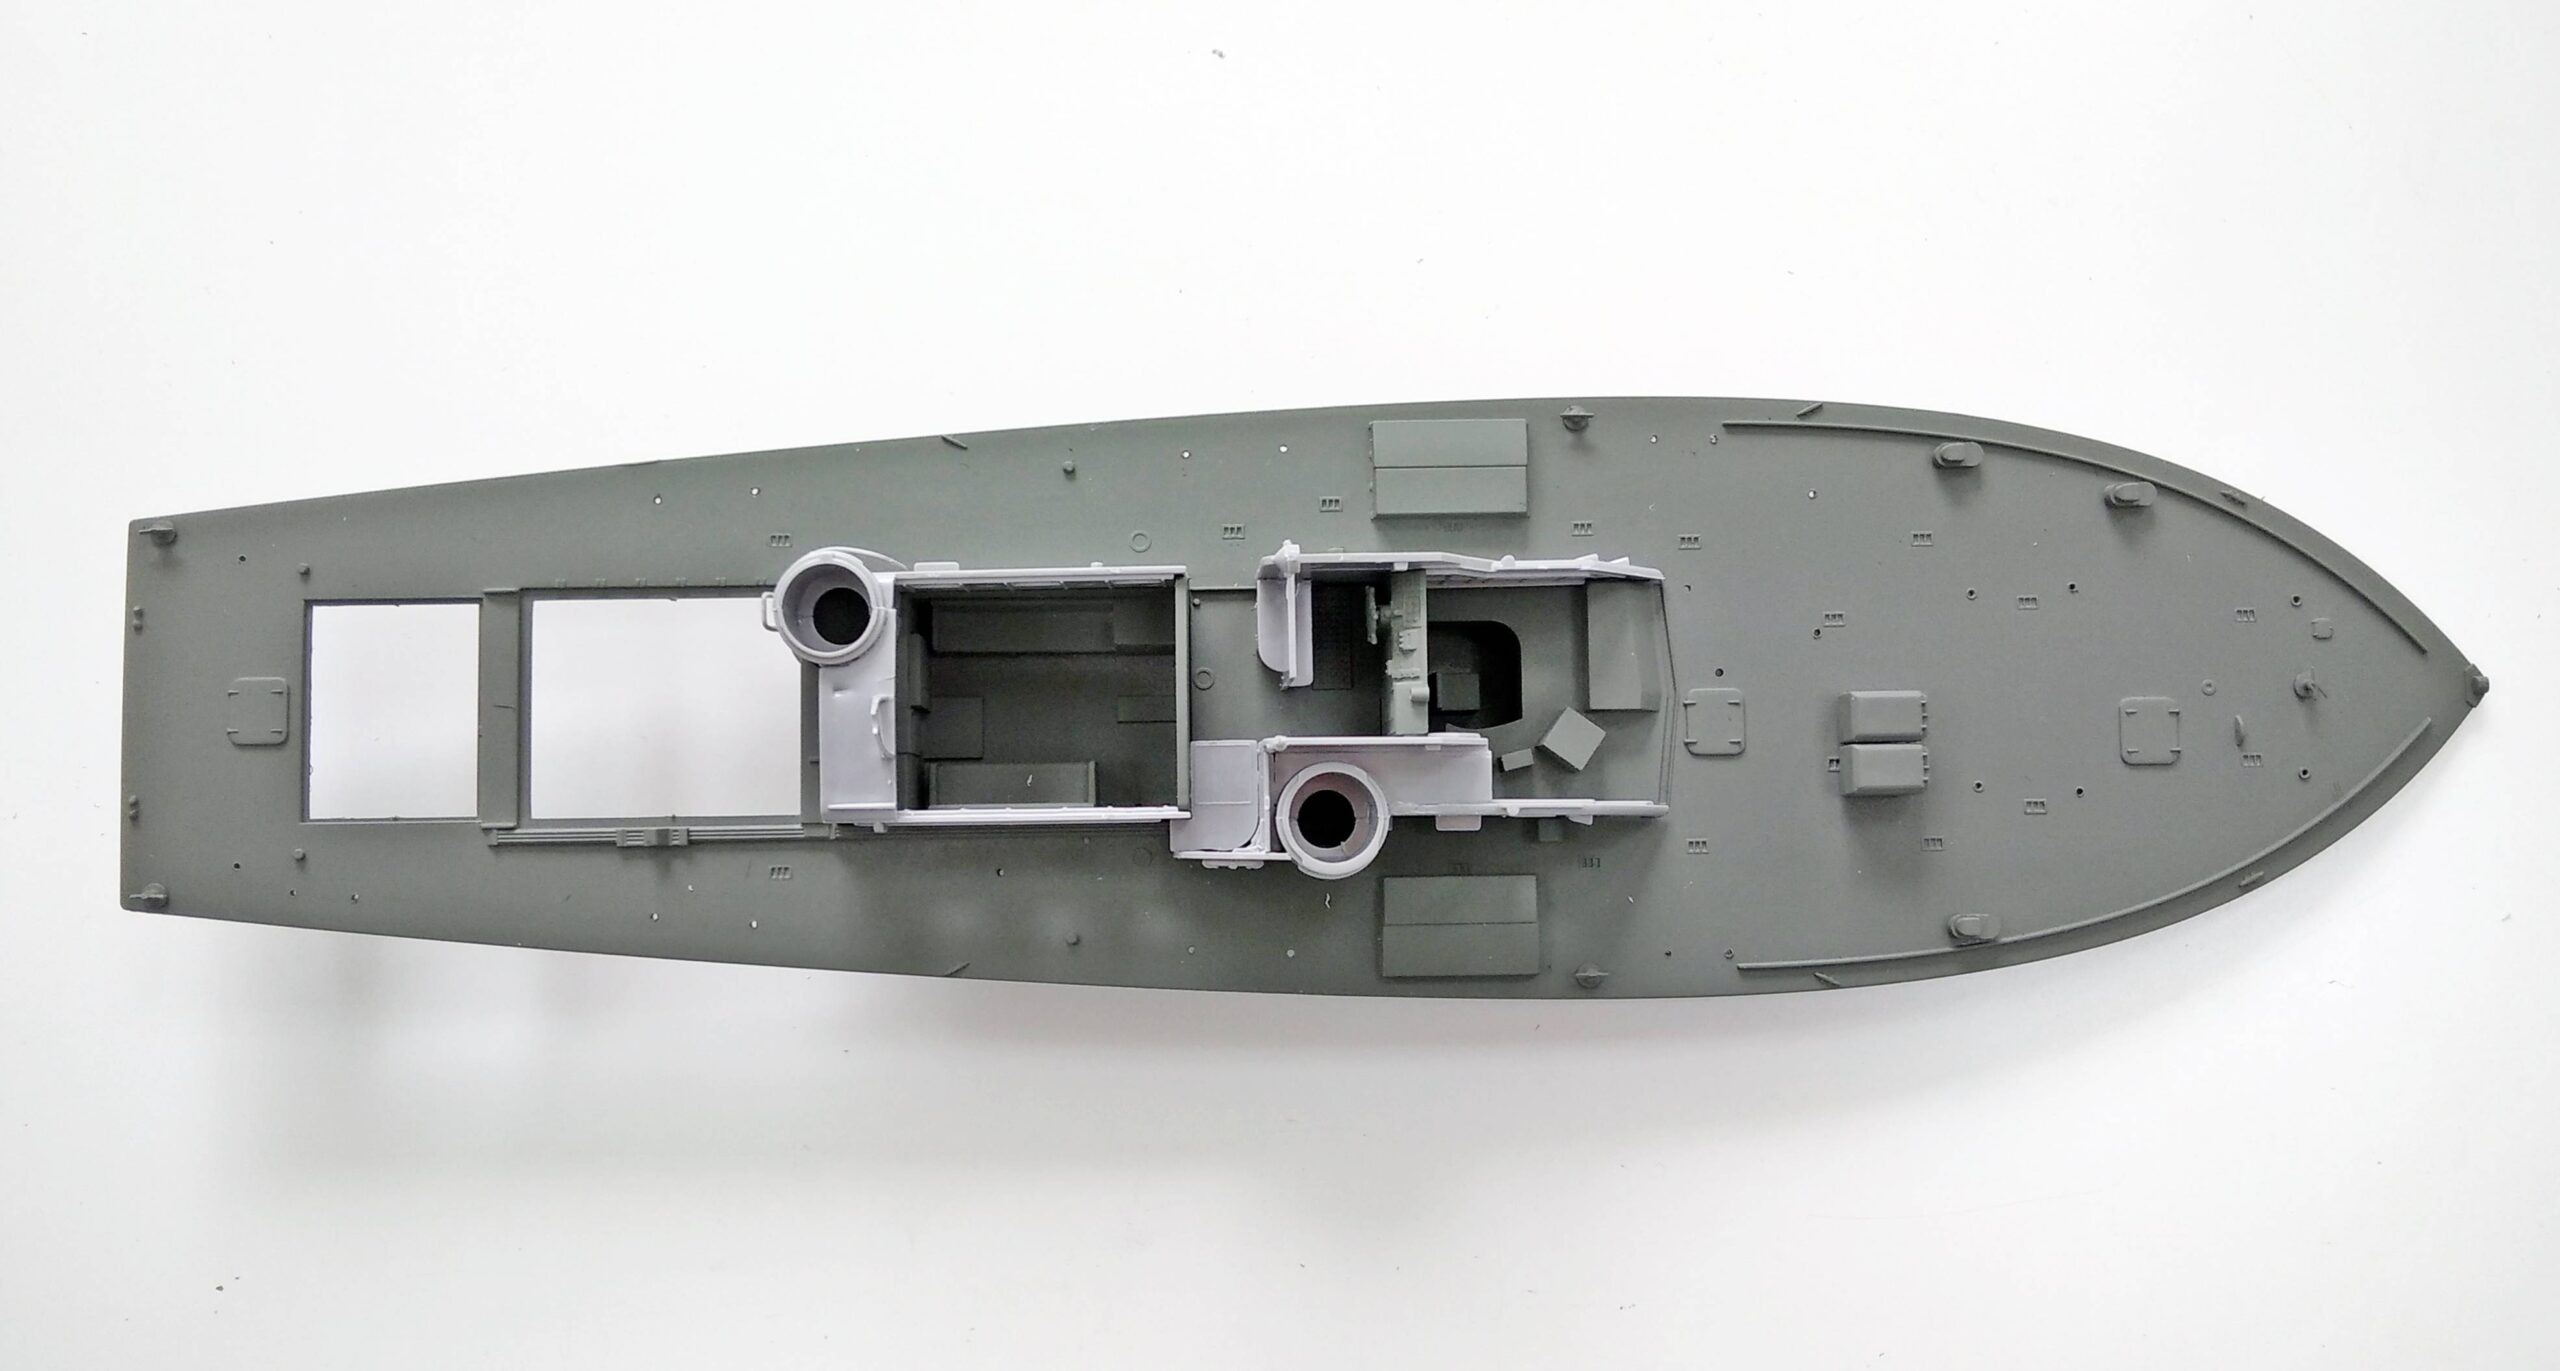
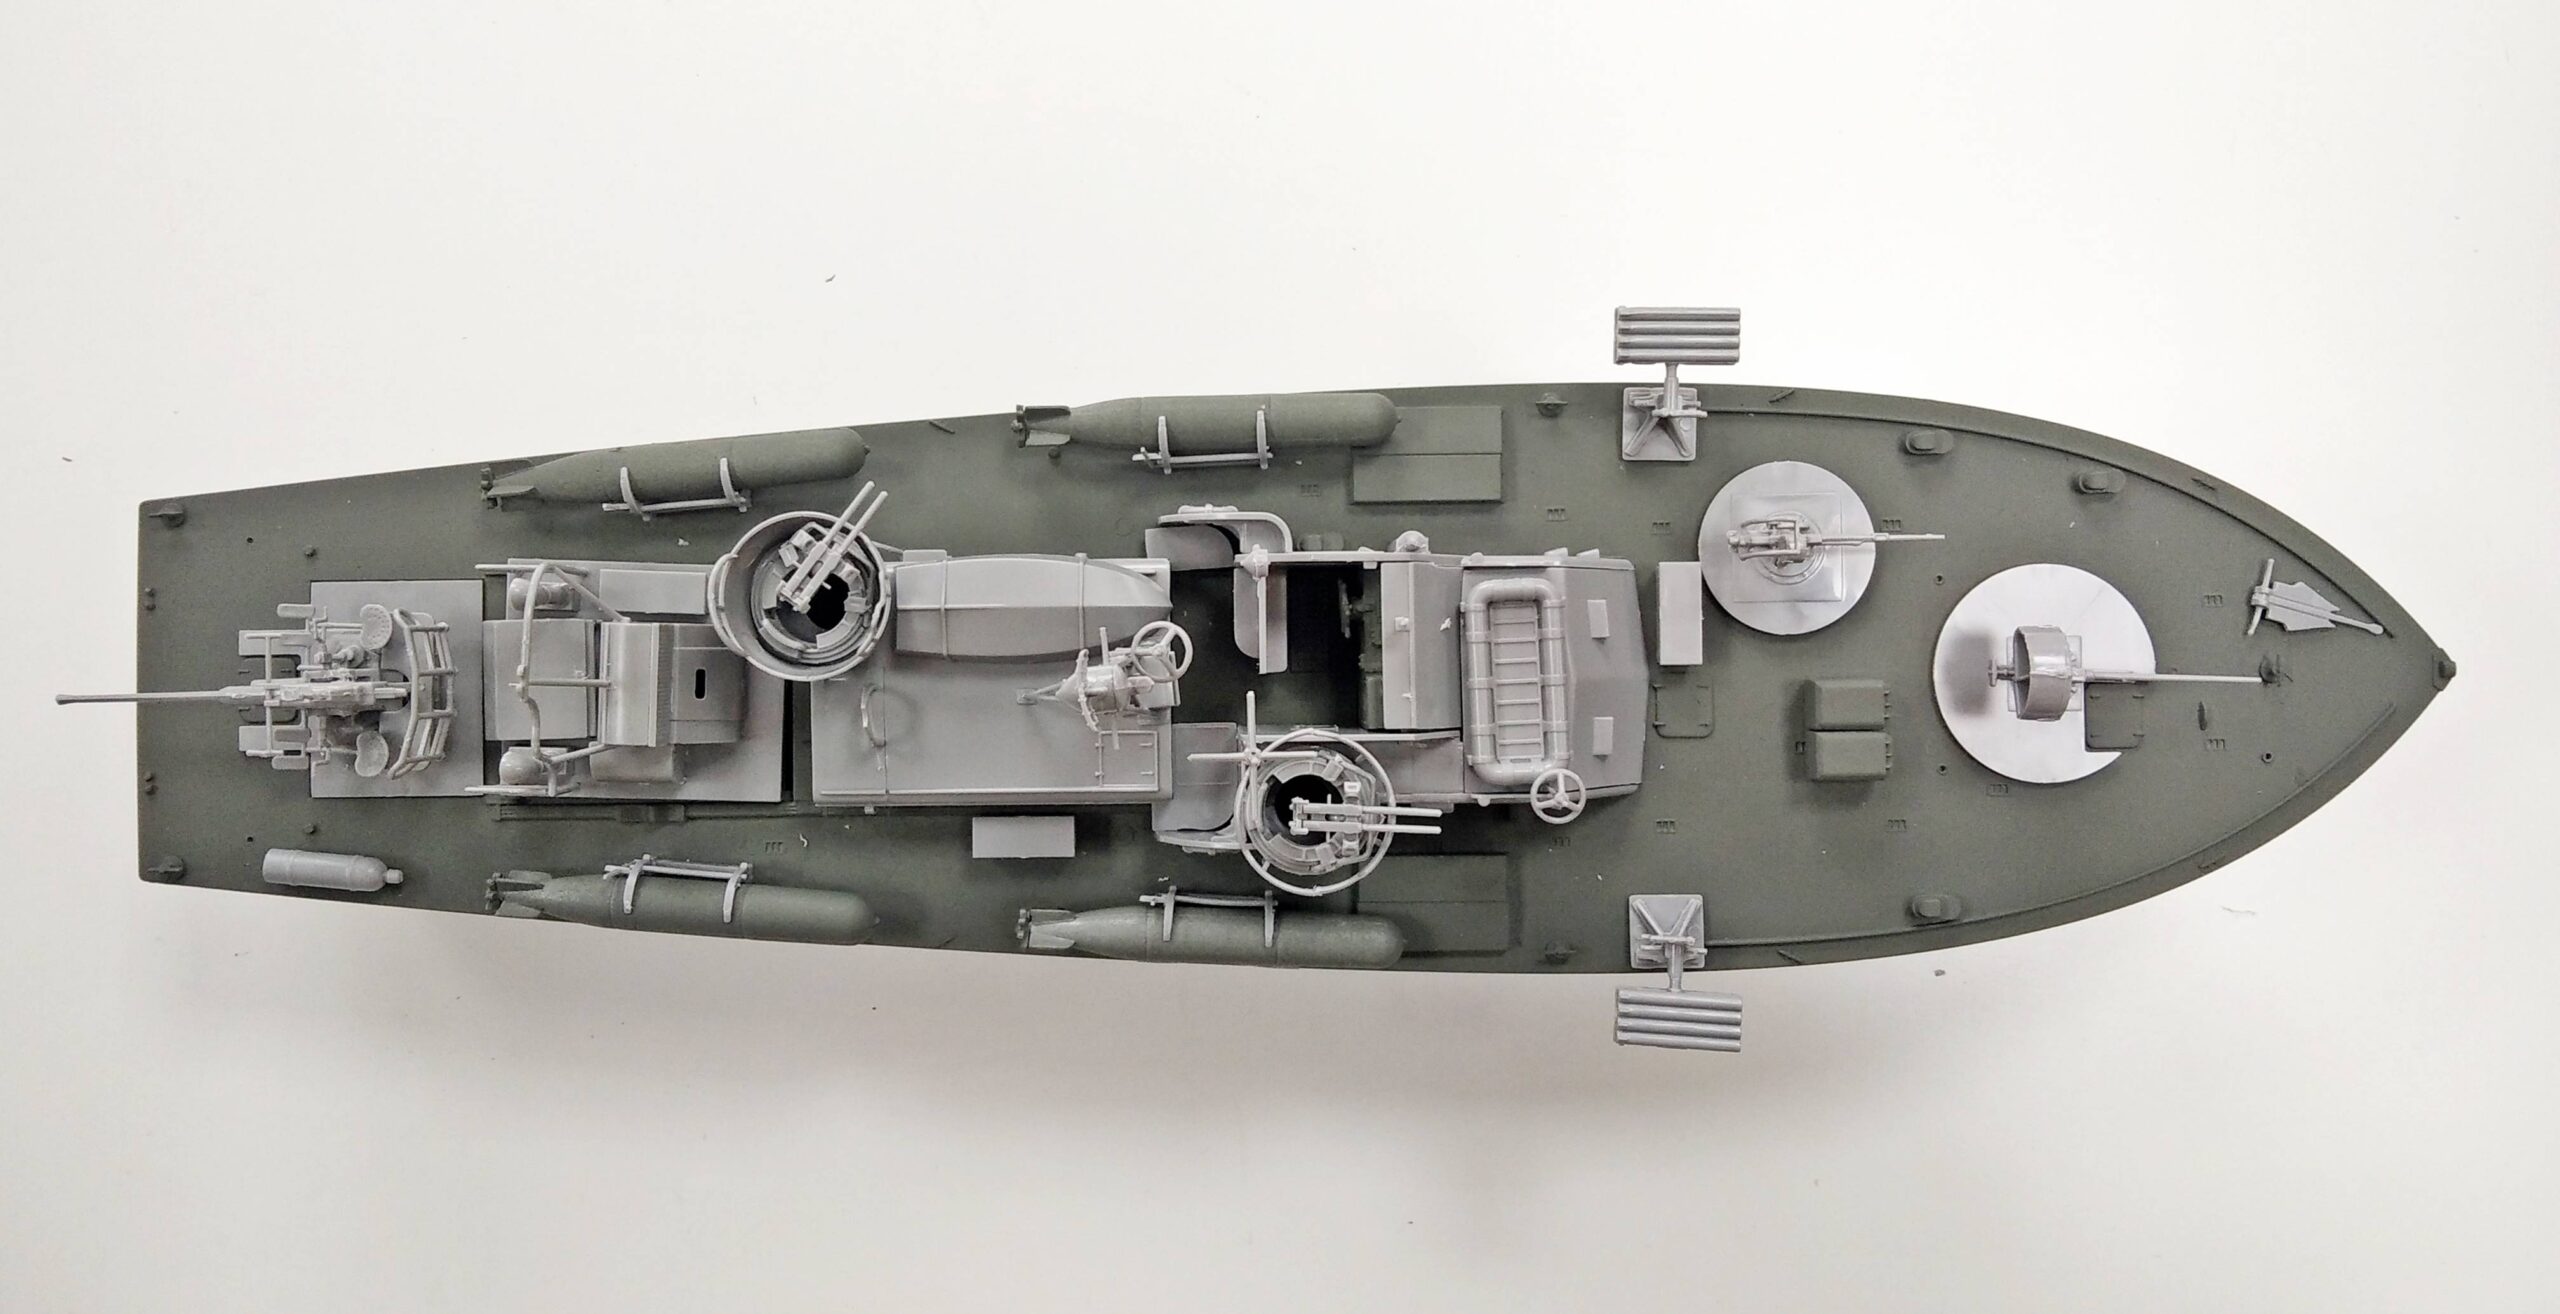
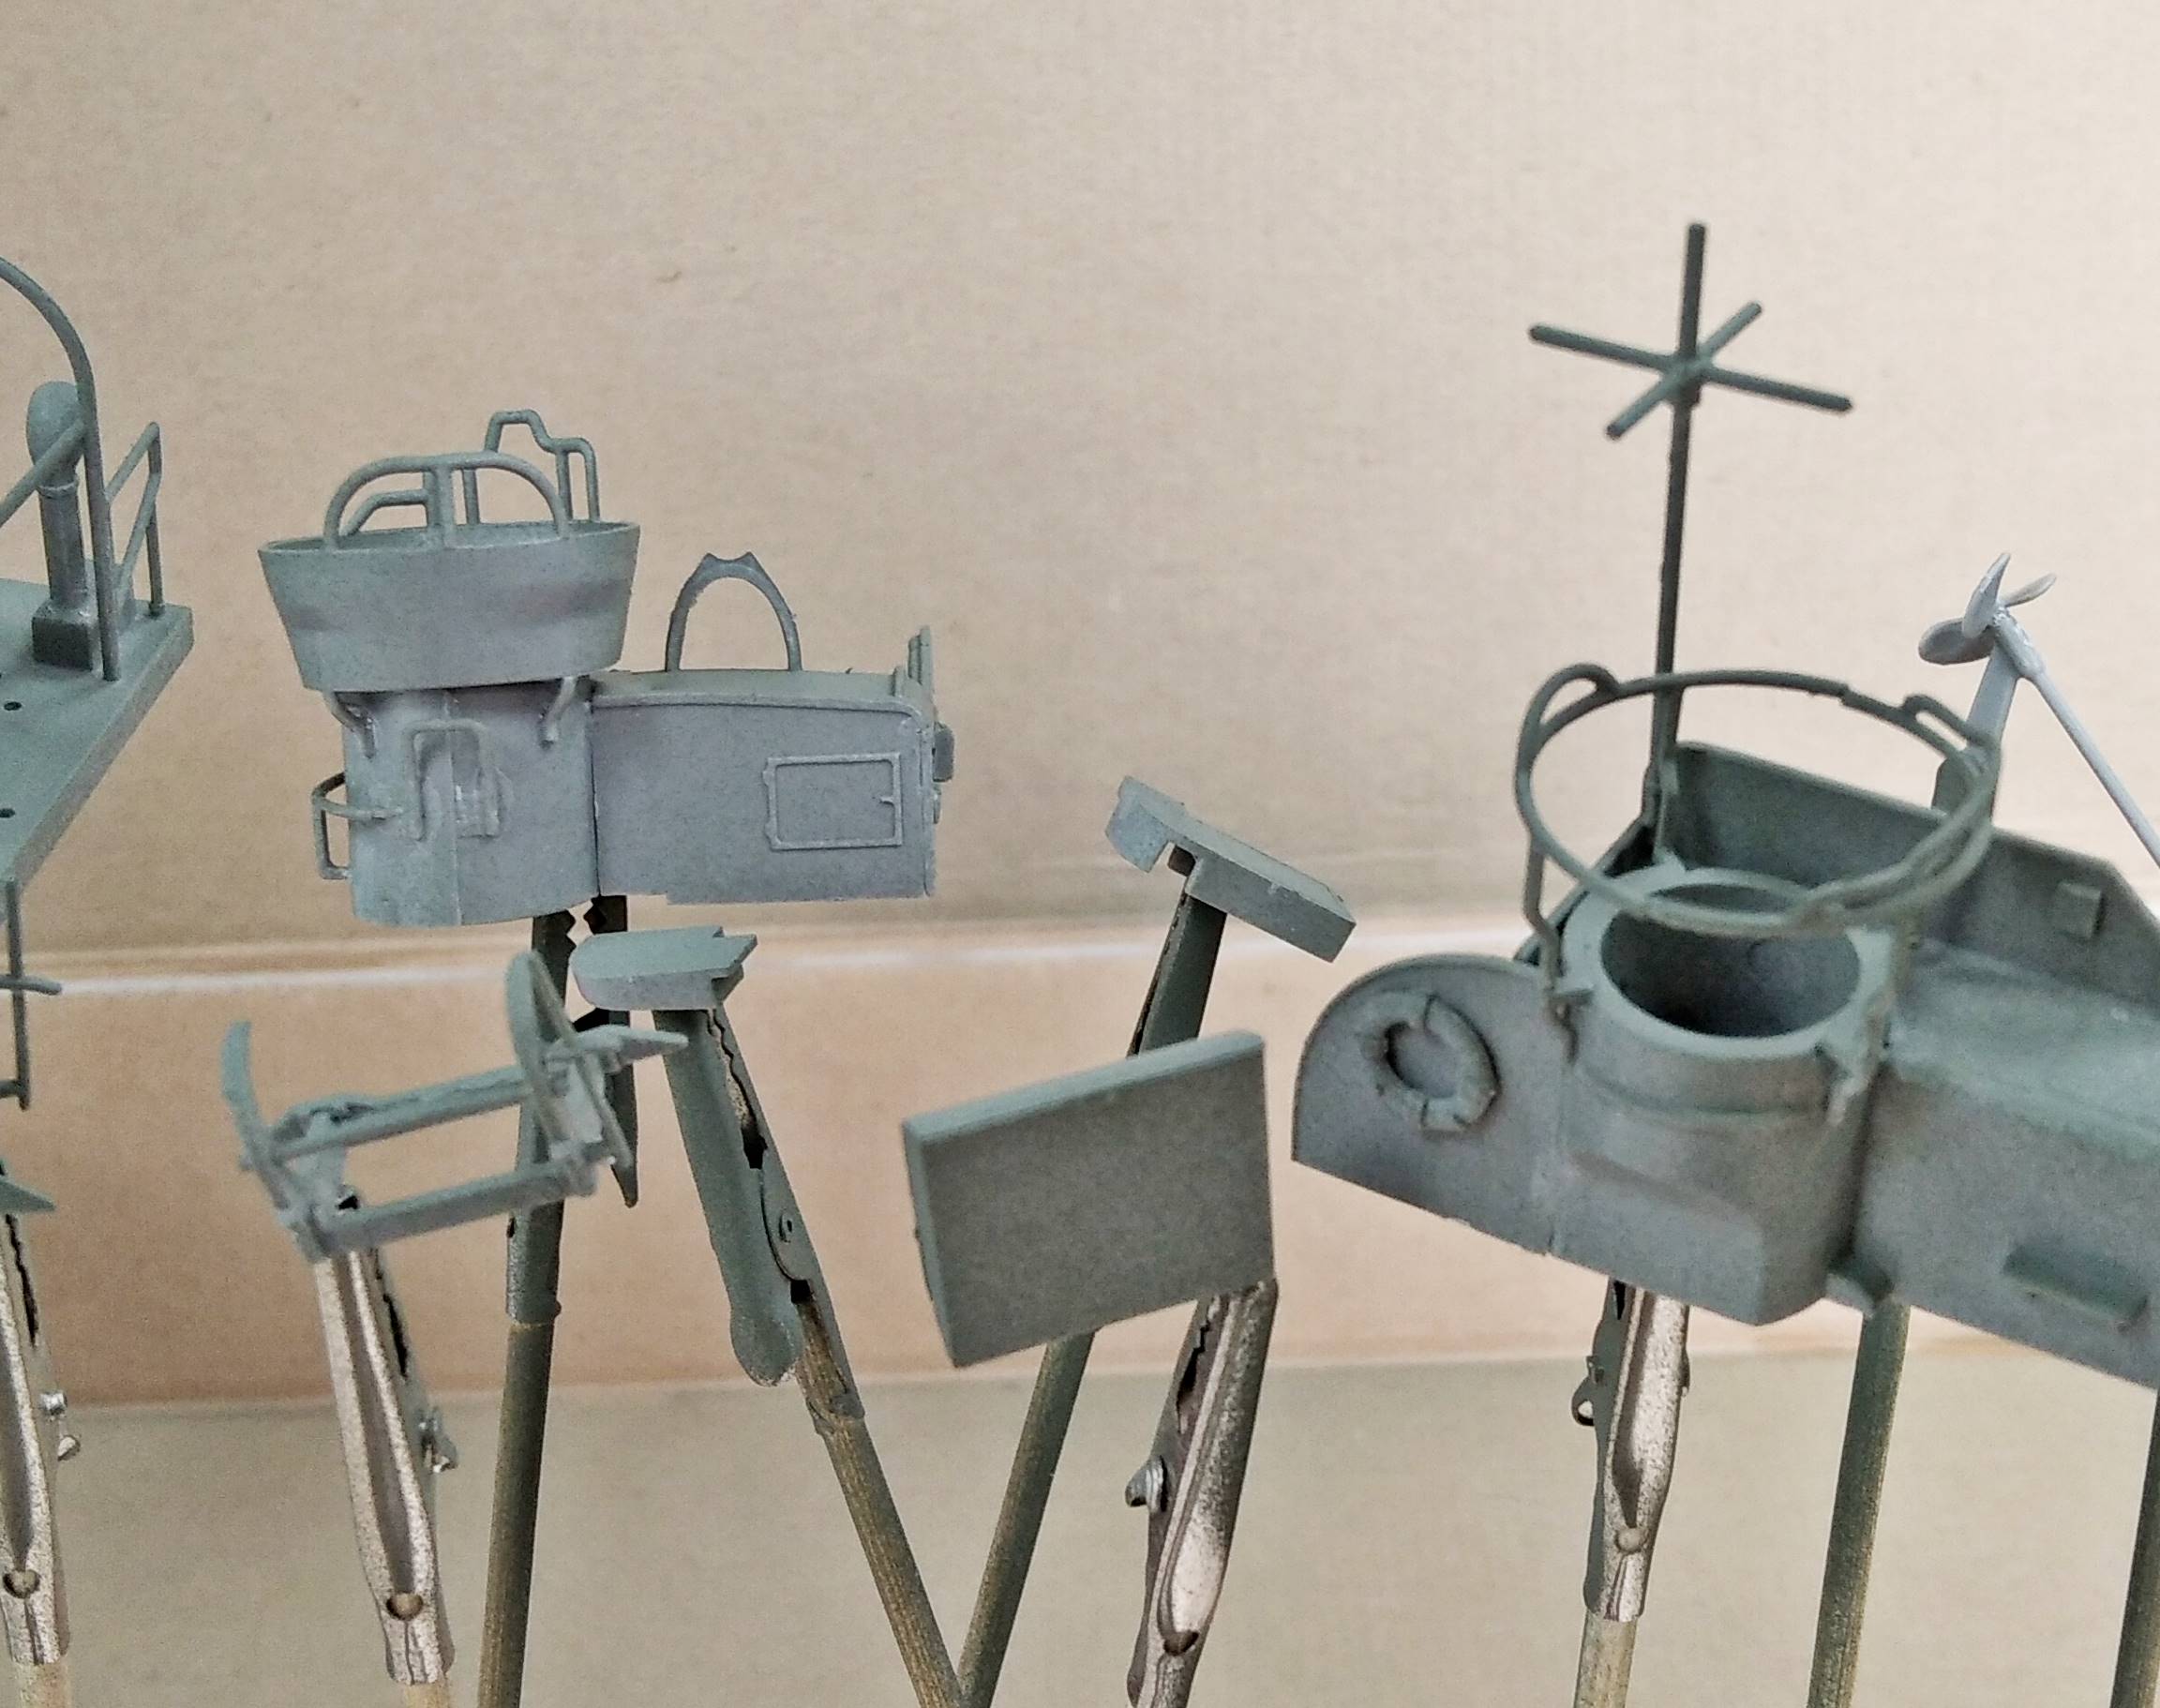
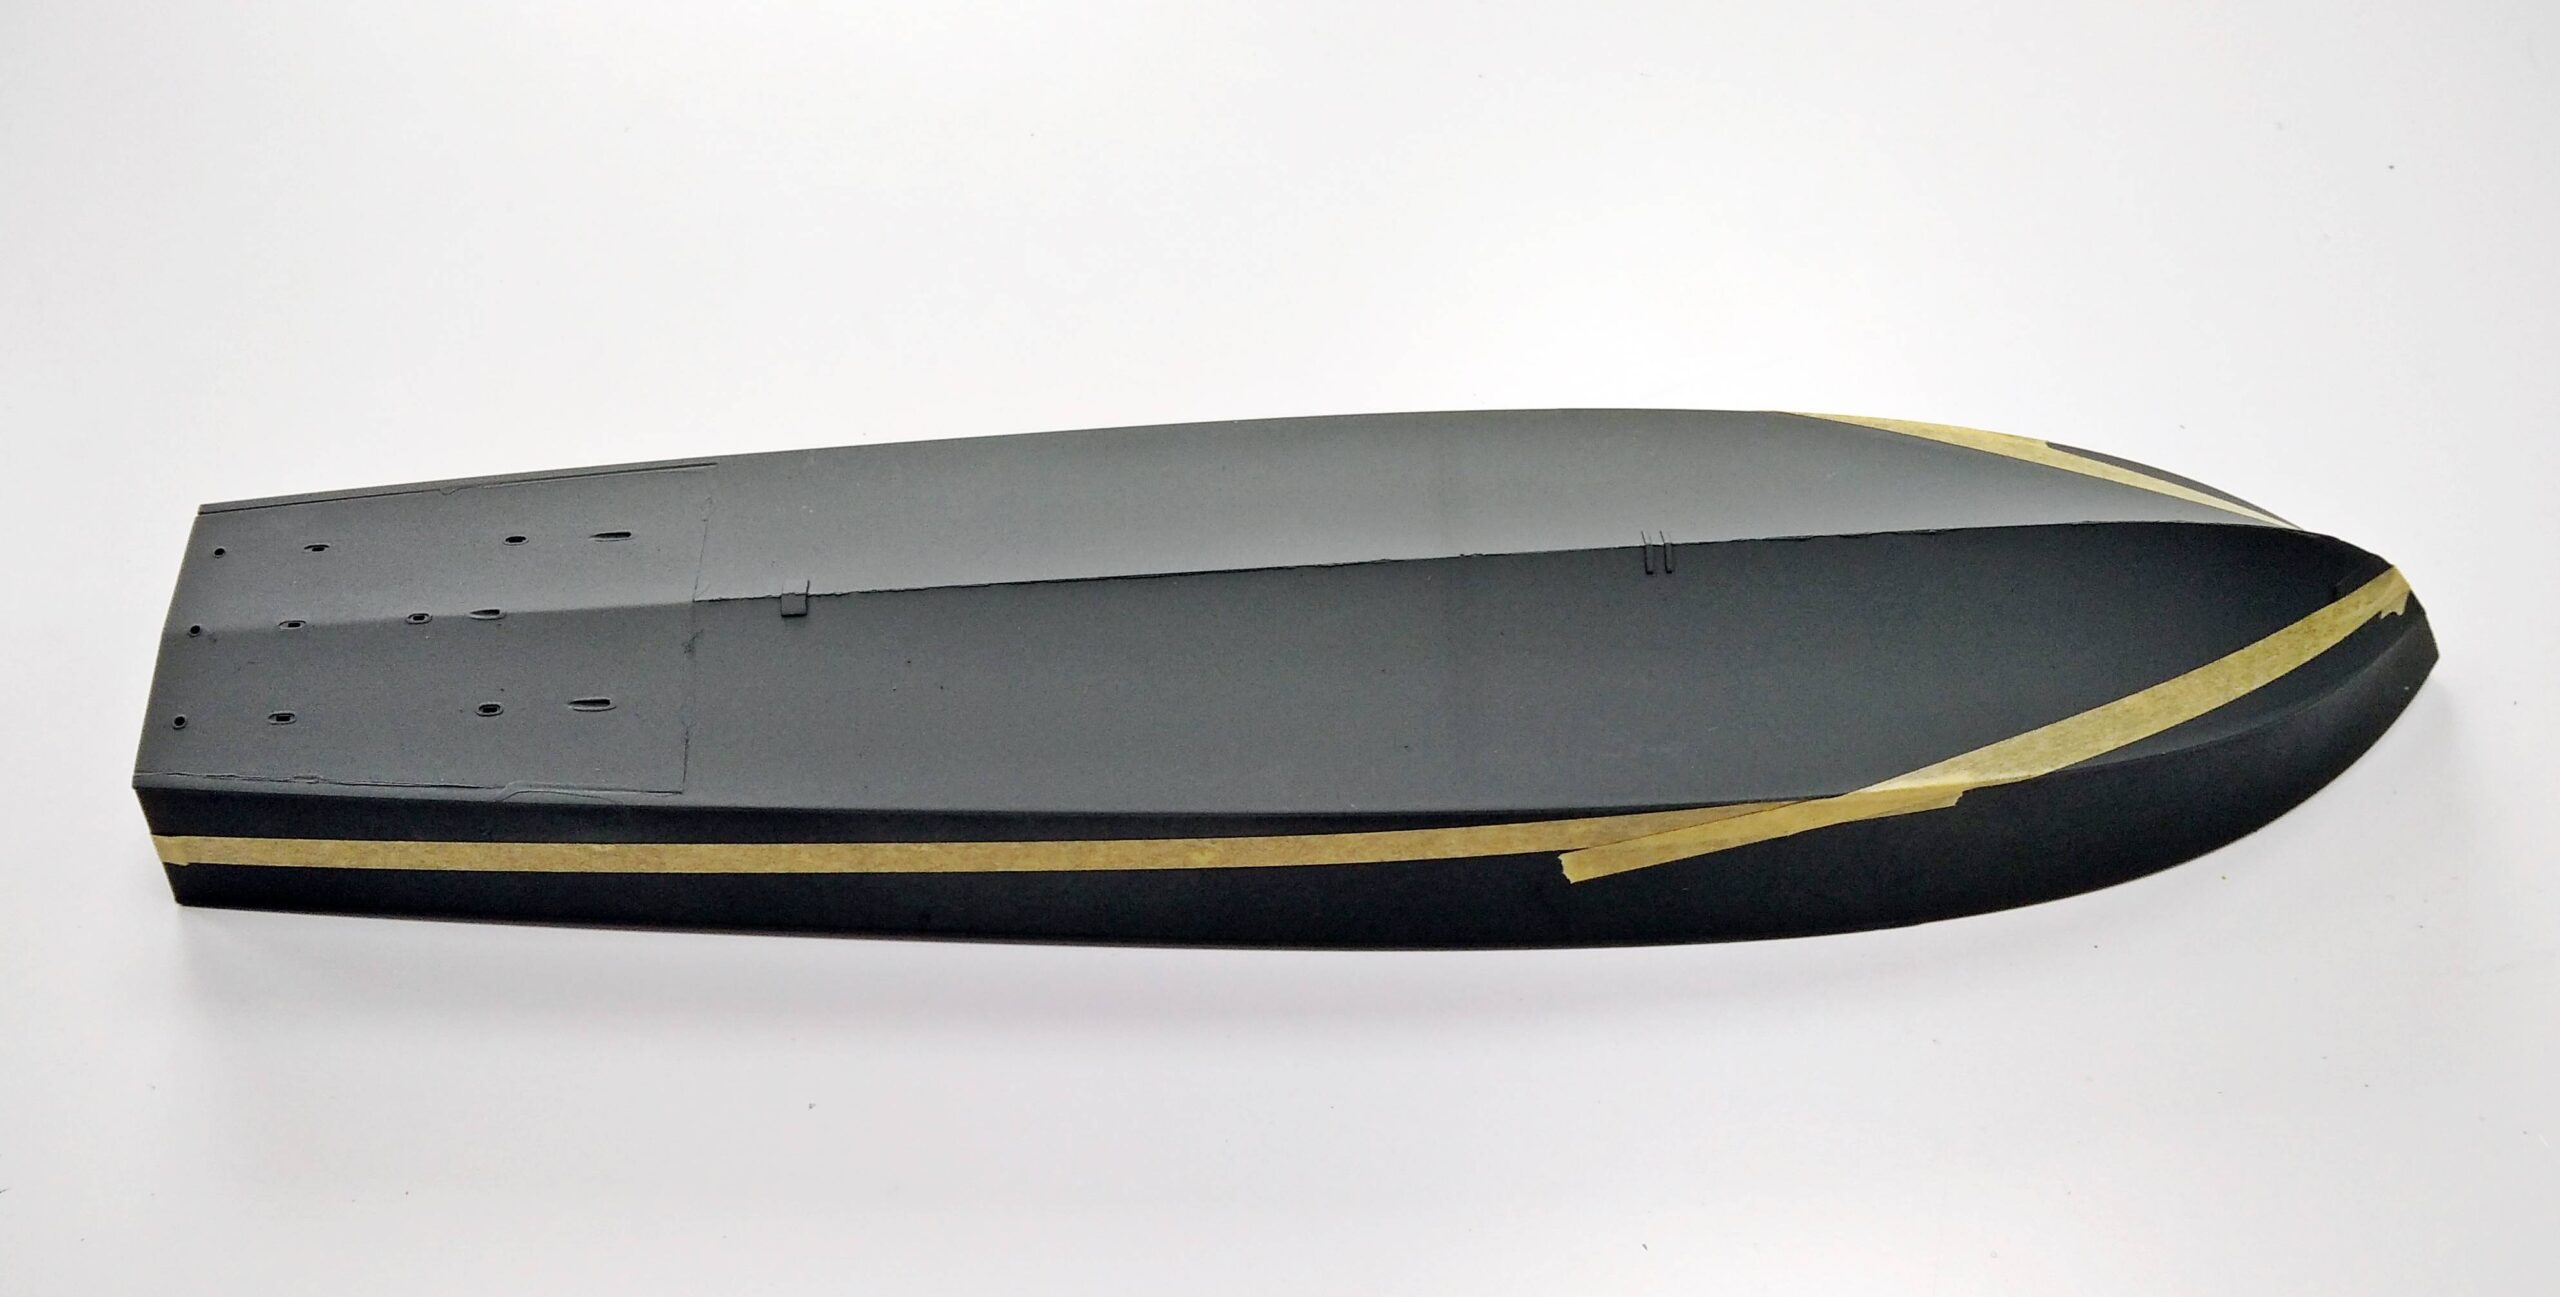
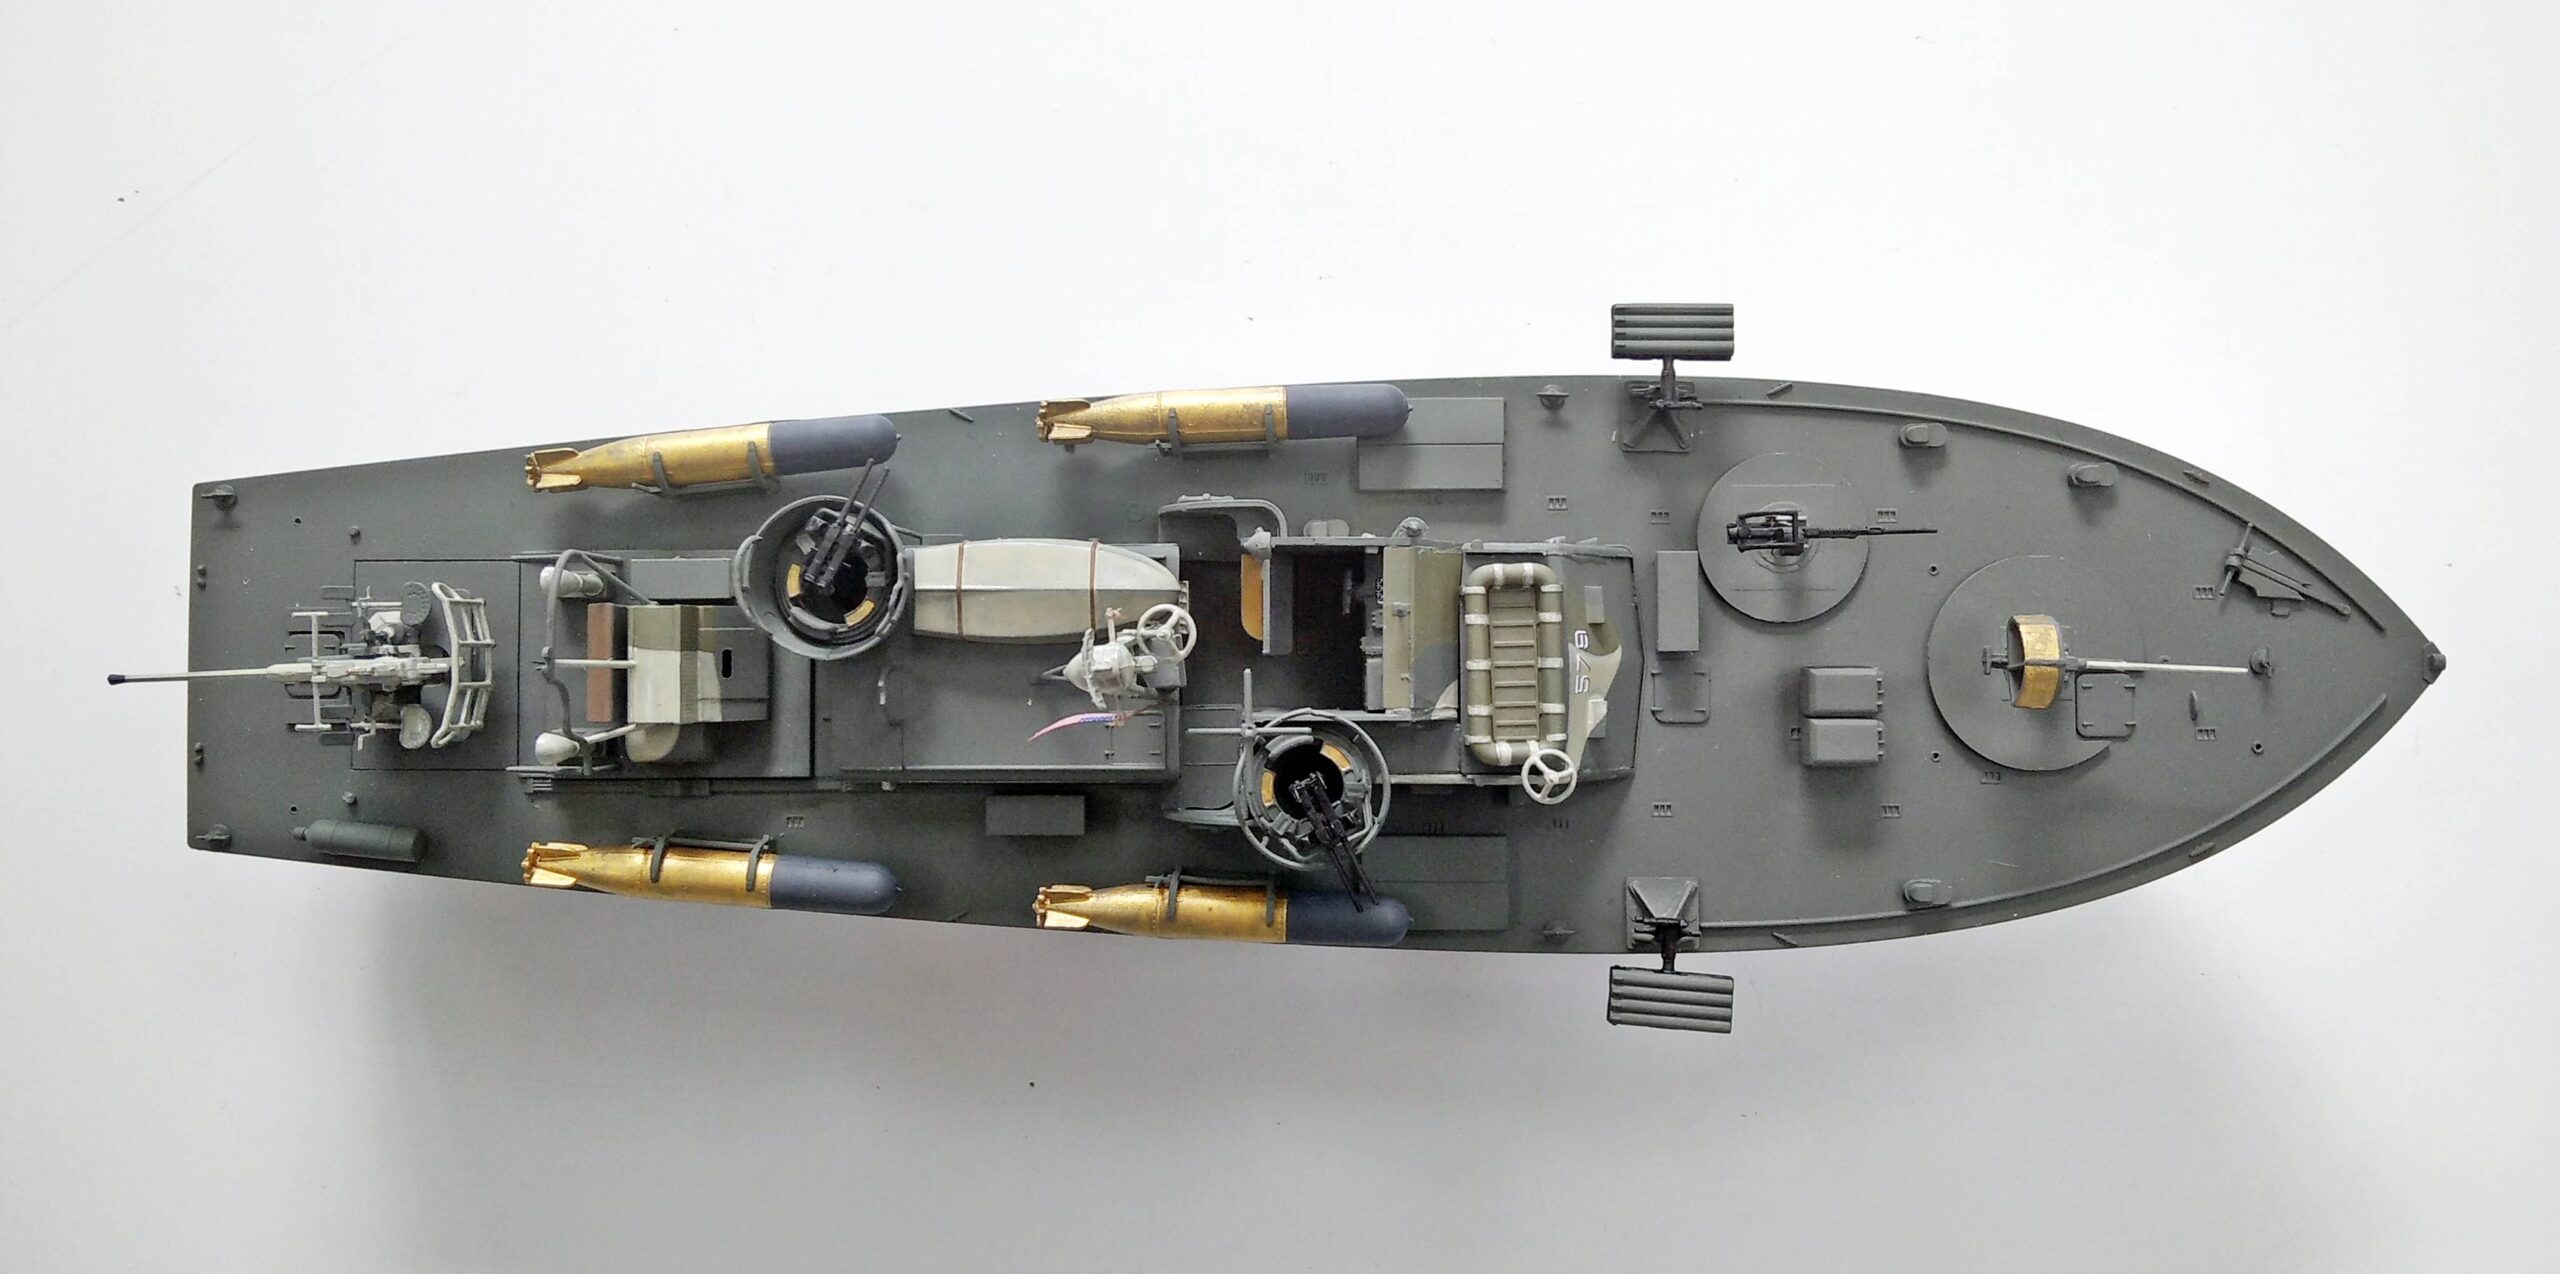
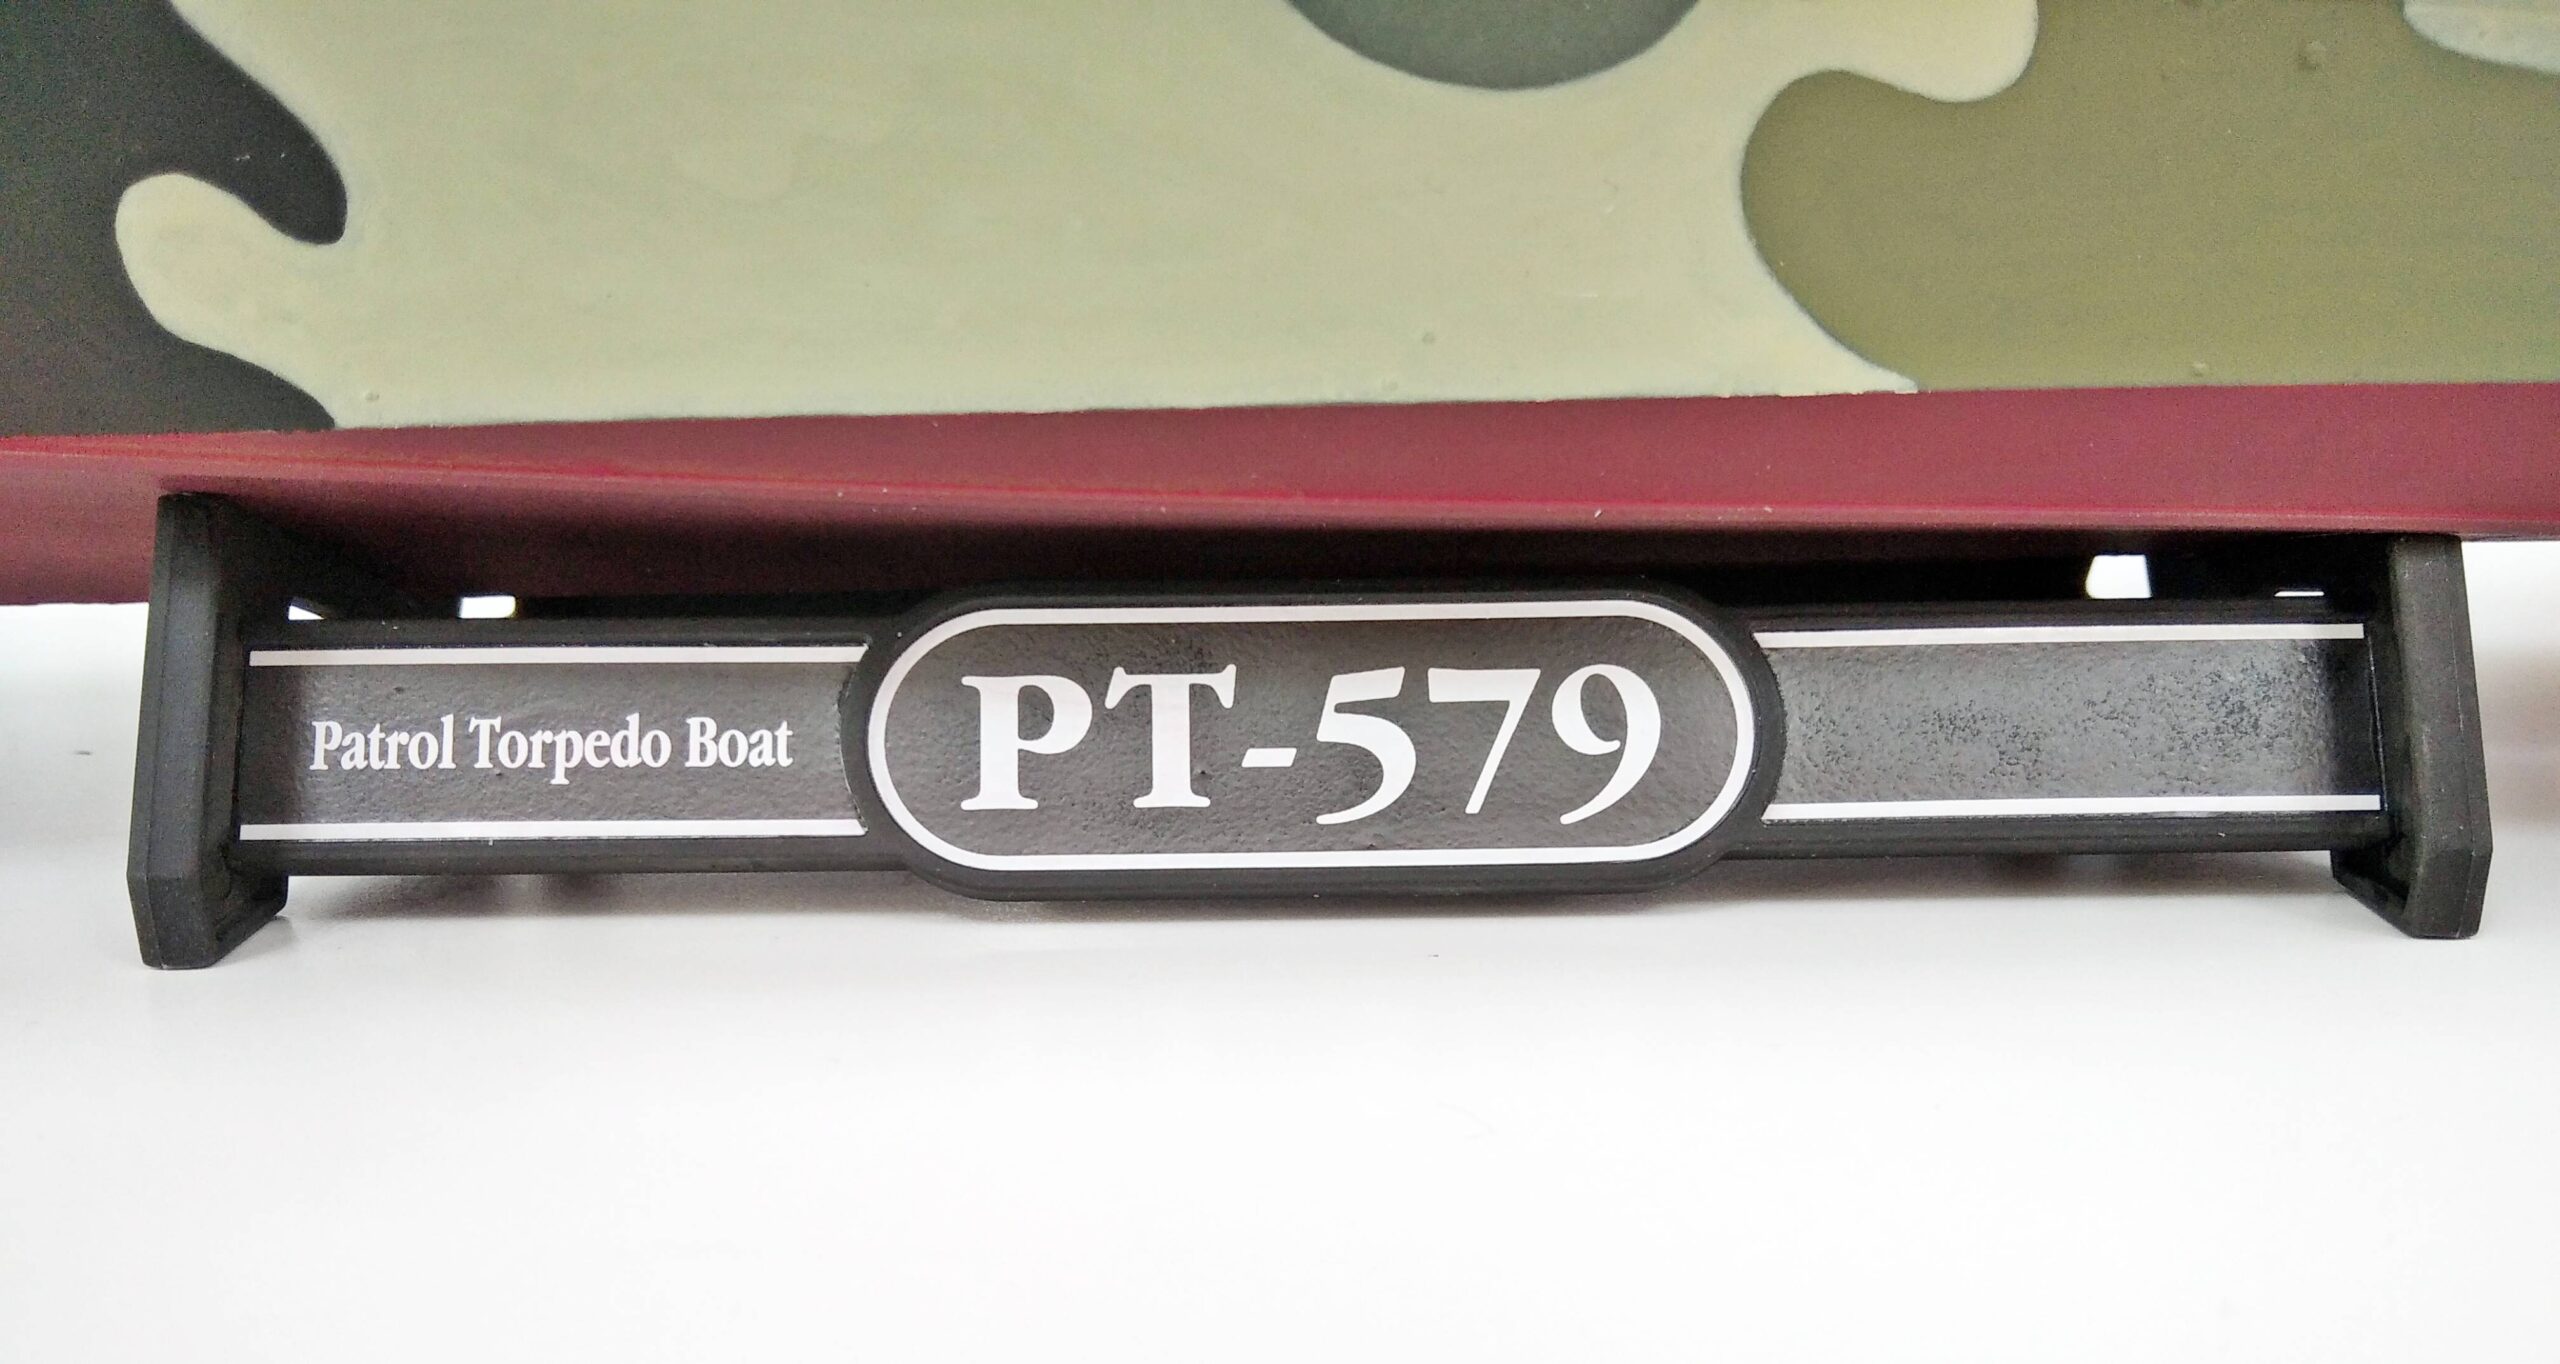
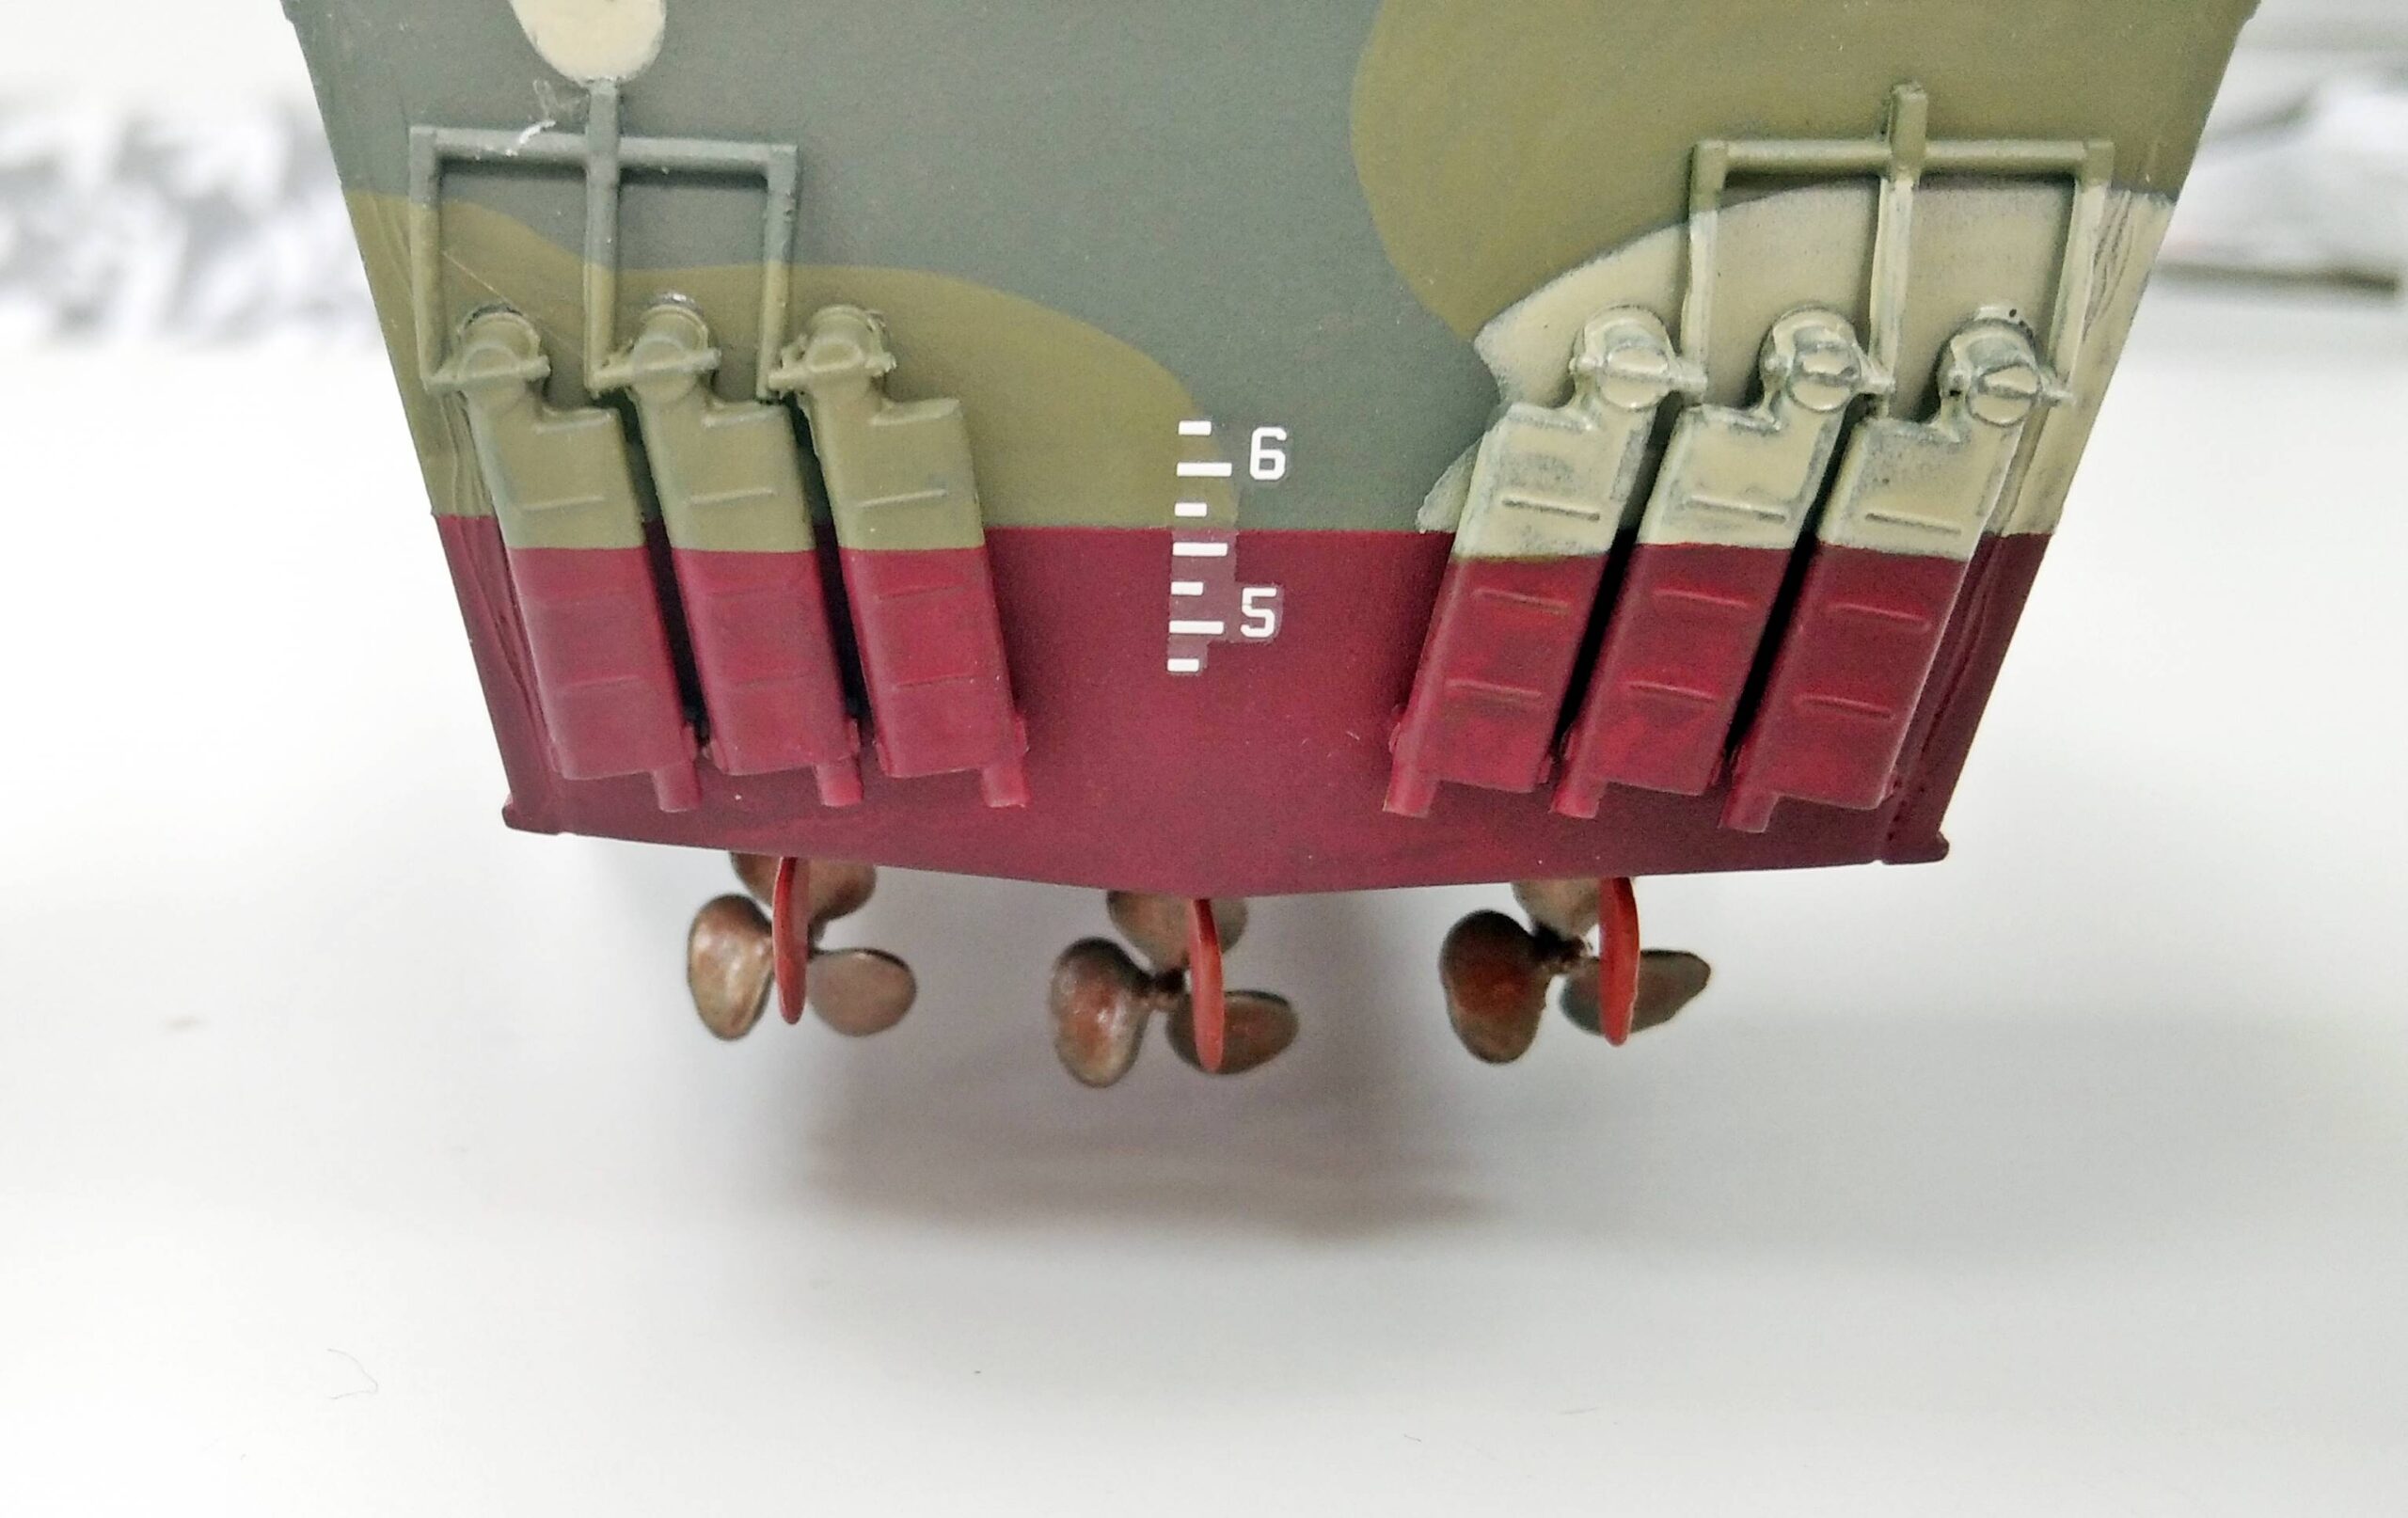
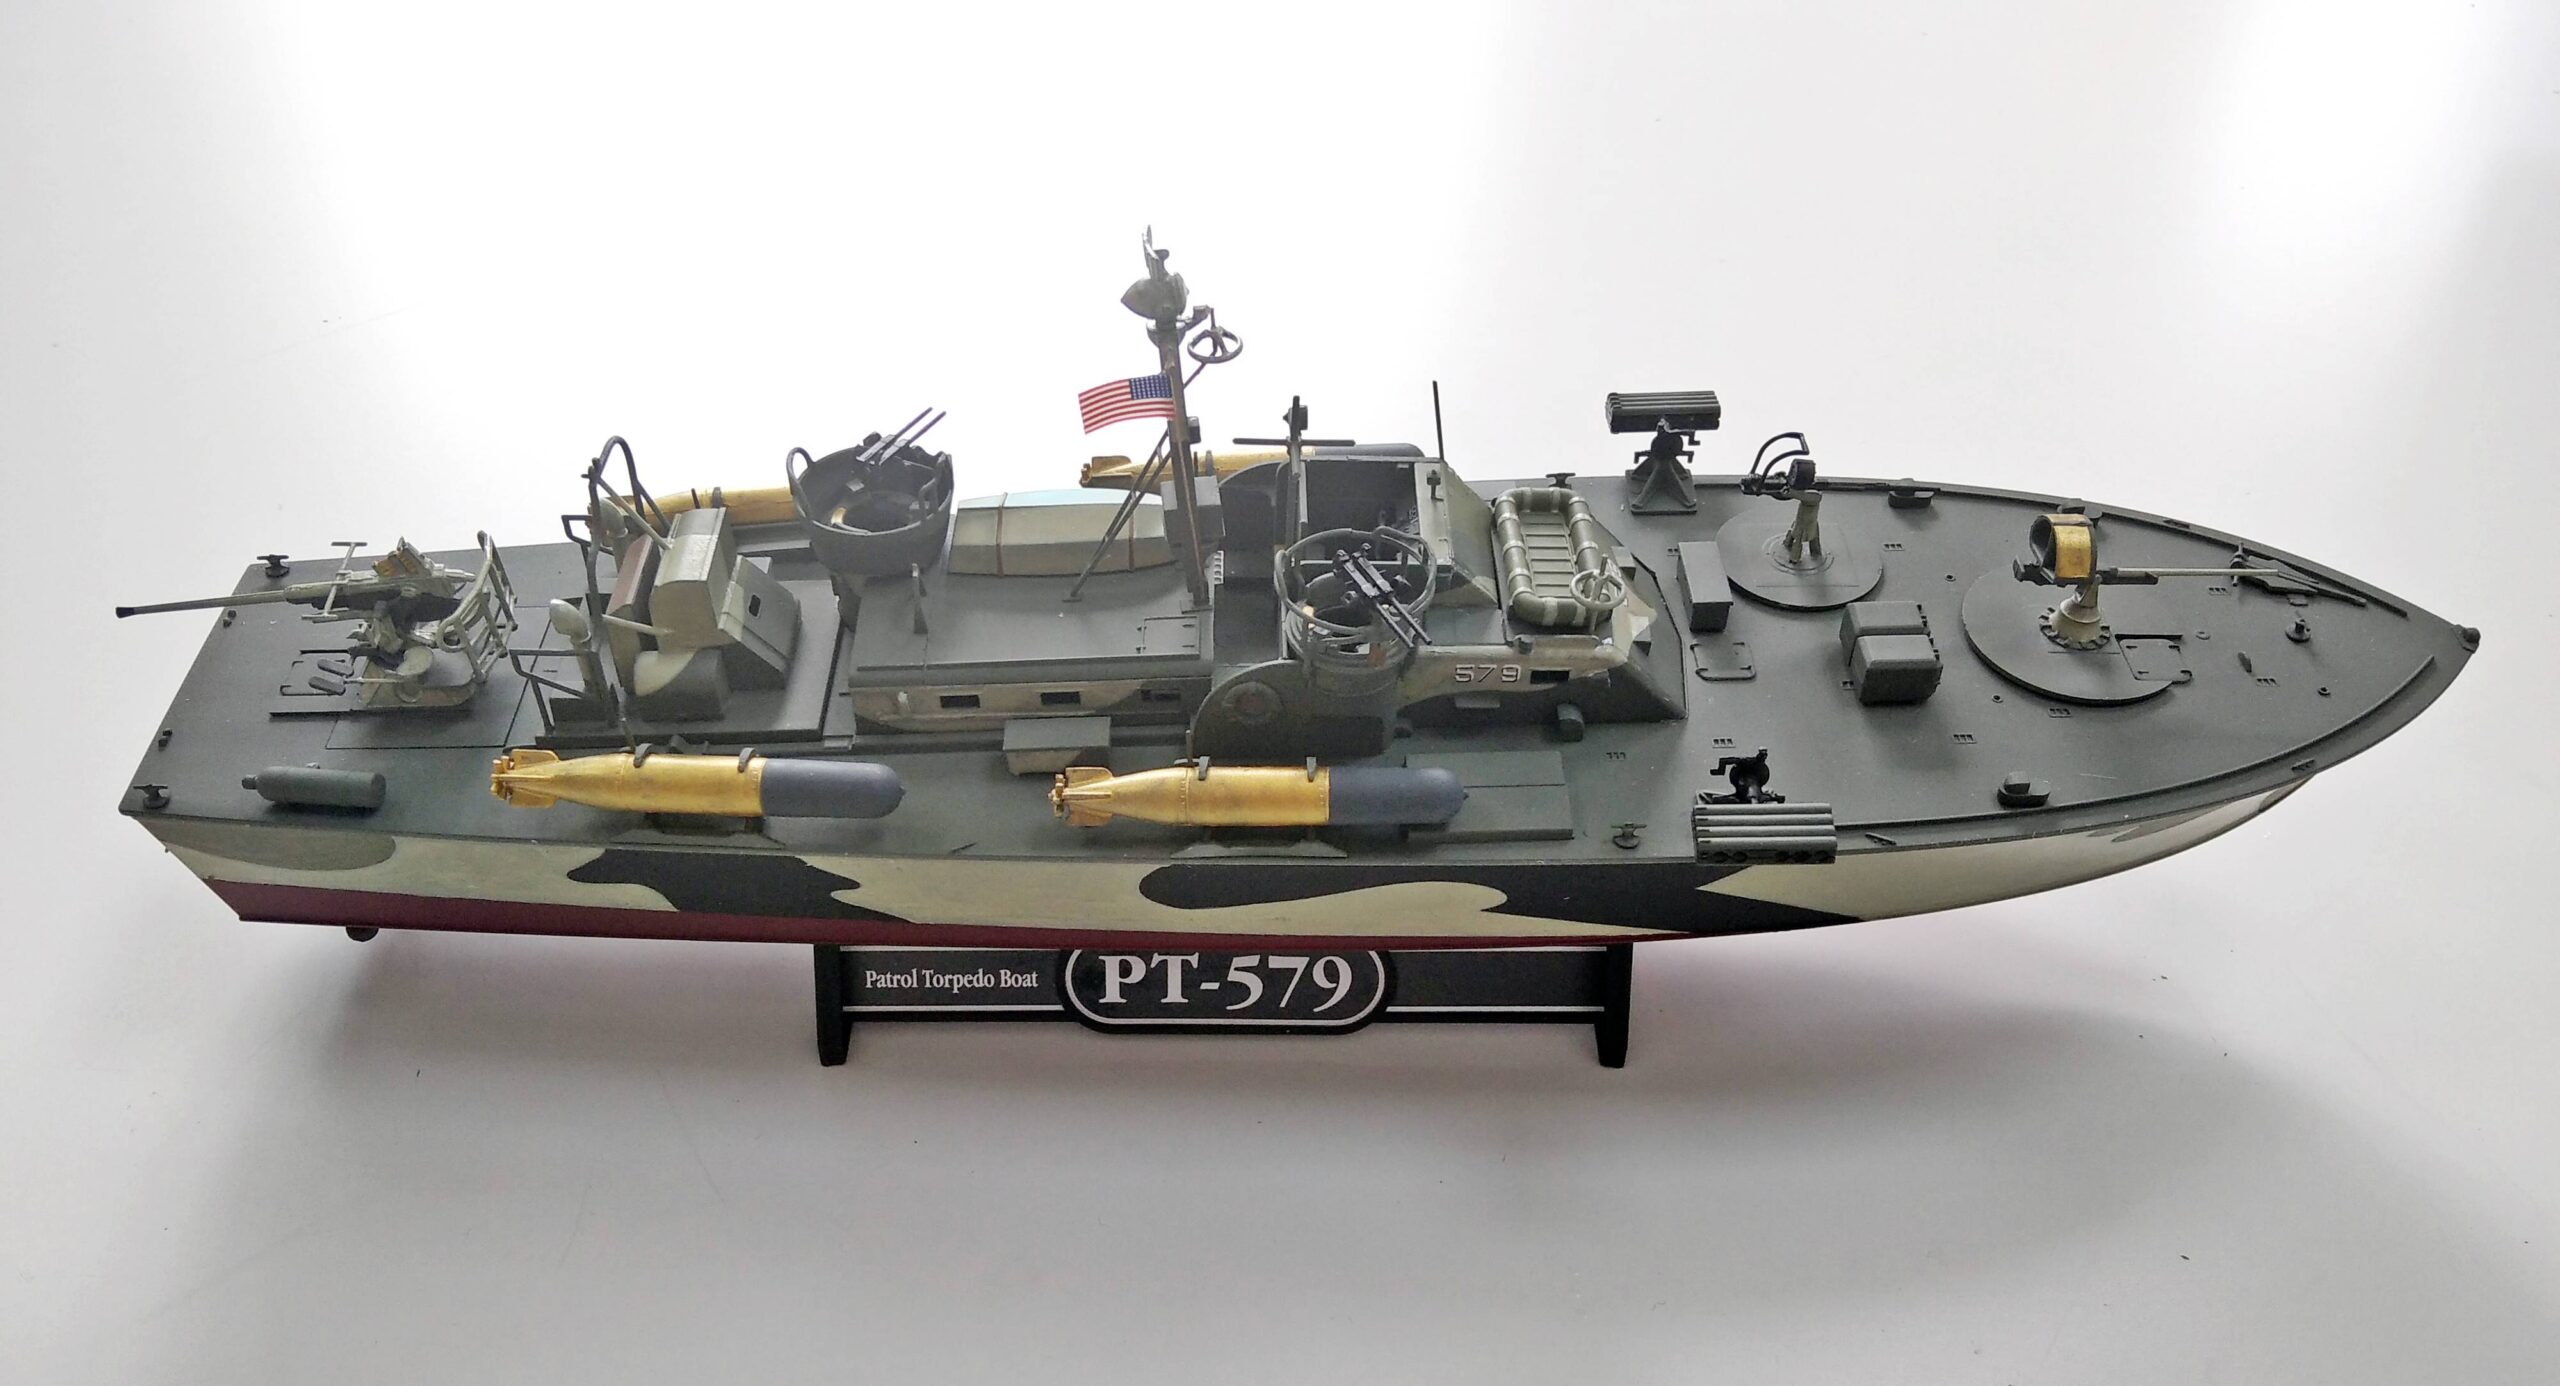
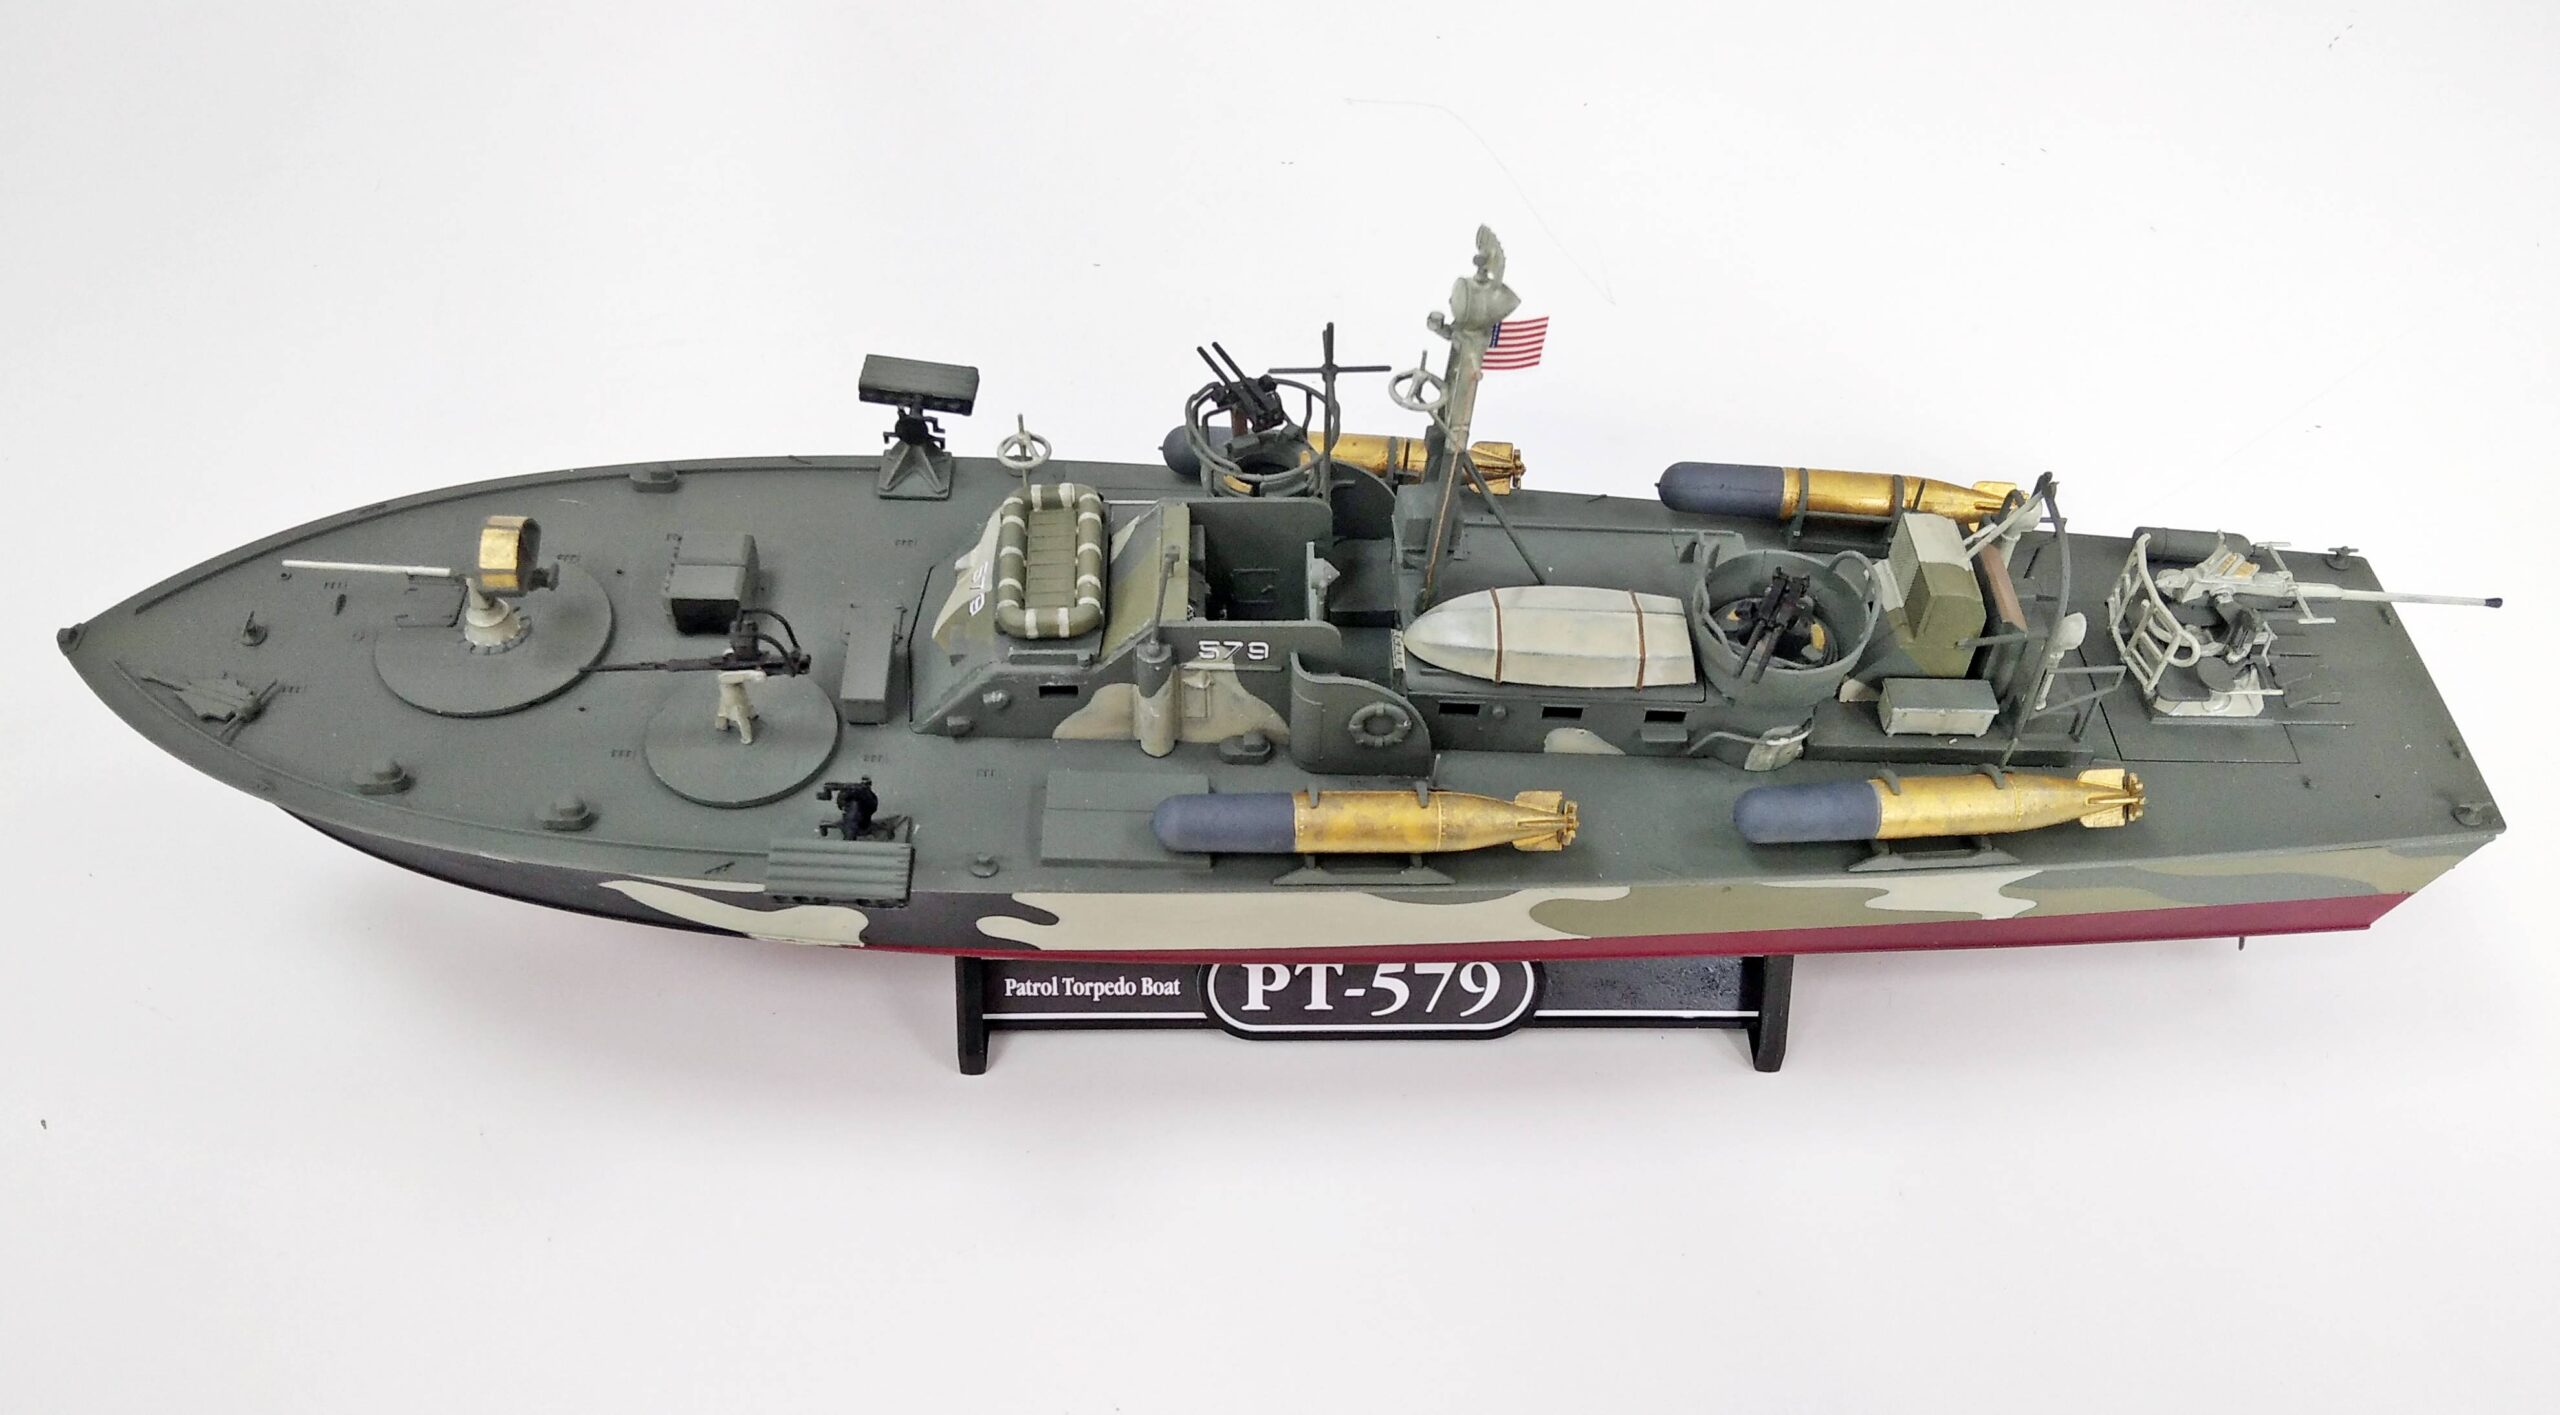
We were commissioned to build a Torpedo boat! Couldn’t tell who was happier – the customer, who had their boat built, or us, who got to make something instead of doing paperwork.

We decided not to add the clear windows because they were a little fiddly to glue on and you can’t really see through them.
The deck appears to be used for another Torpedo boat kit, so right at the start we drilled around 30 holes onto it. The positions of the holes are clearly labelled on the bottom.
We glued on the parts that are same colour as the deck and spray-painted it. Next, we constructed the remaining components and dry-fitted it on to the deck.
We primed the remaining components and painted on the camouflage scheme.
The hull was masked and painted.
Finally, we glued all the parts together and here is the finished boat.

Construction of Zvezda 1:72 Greek Trireme

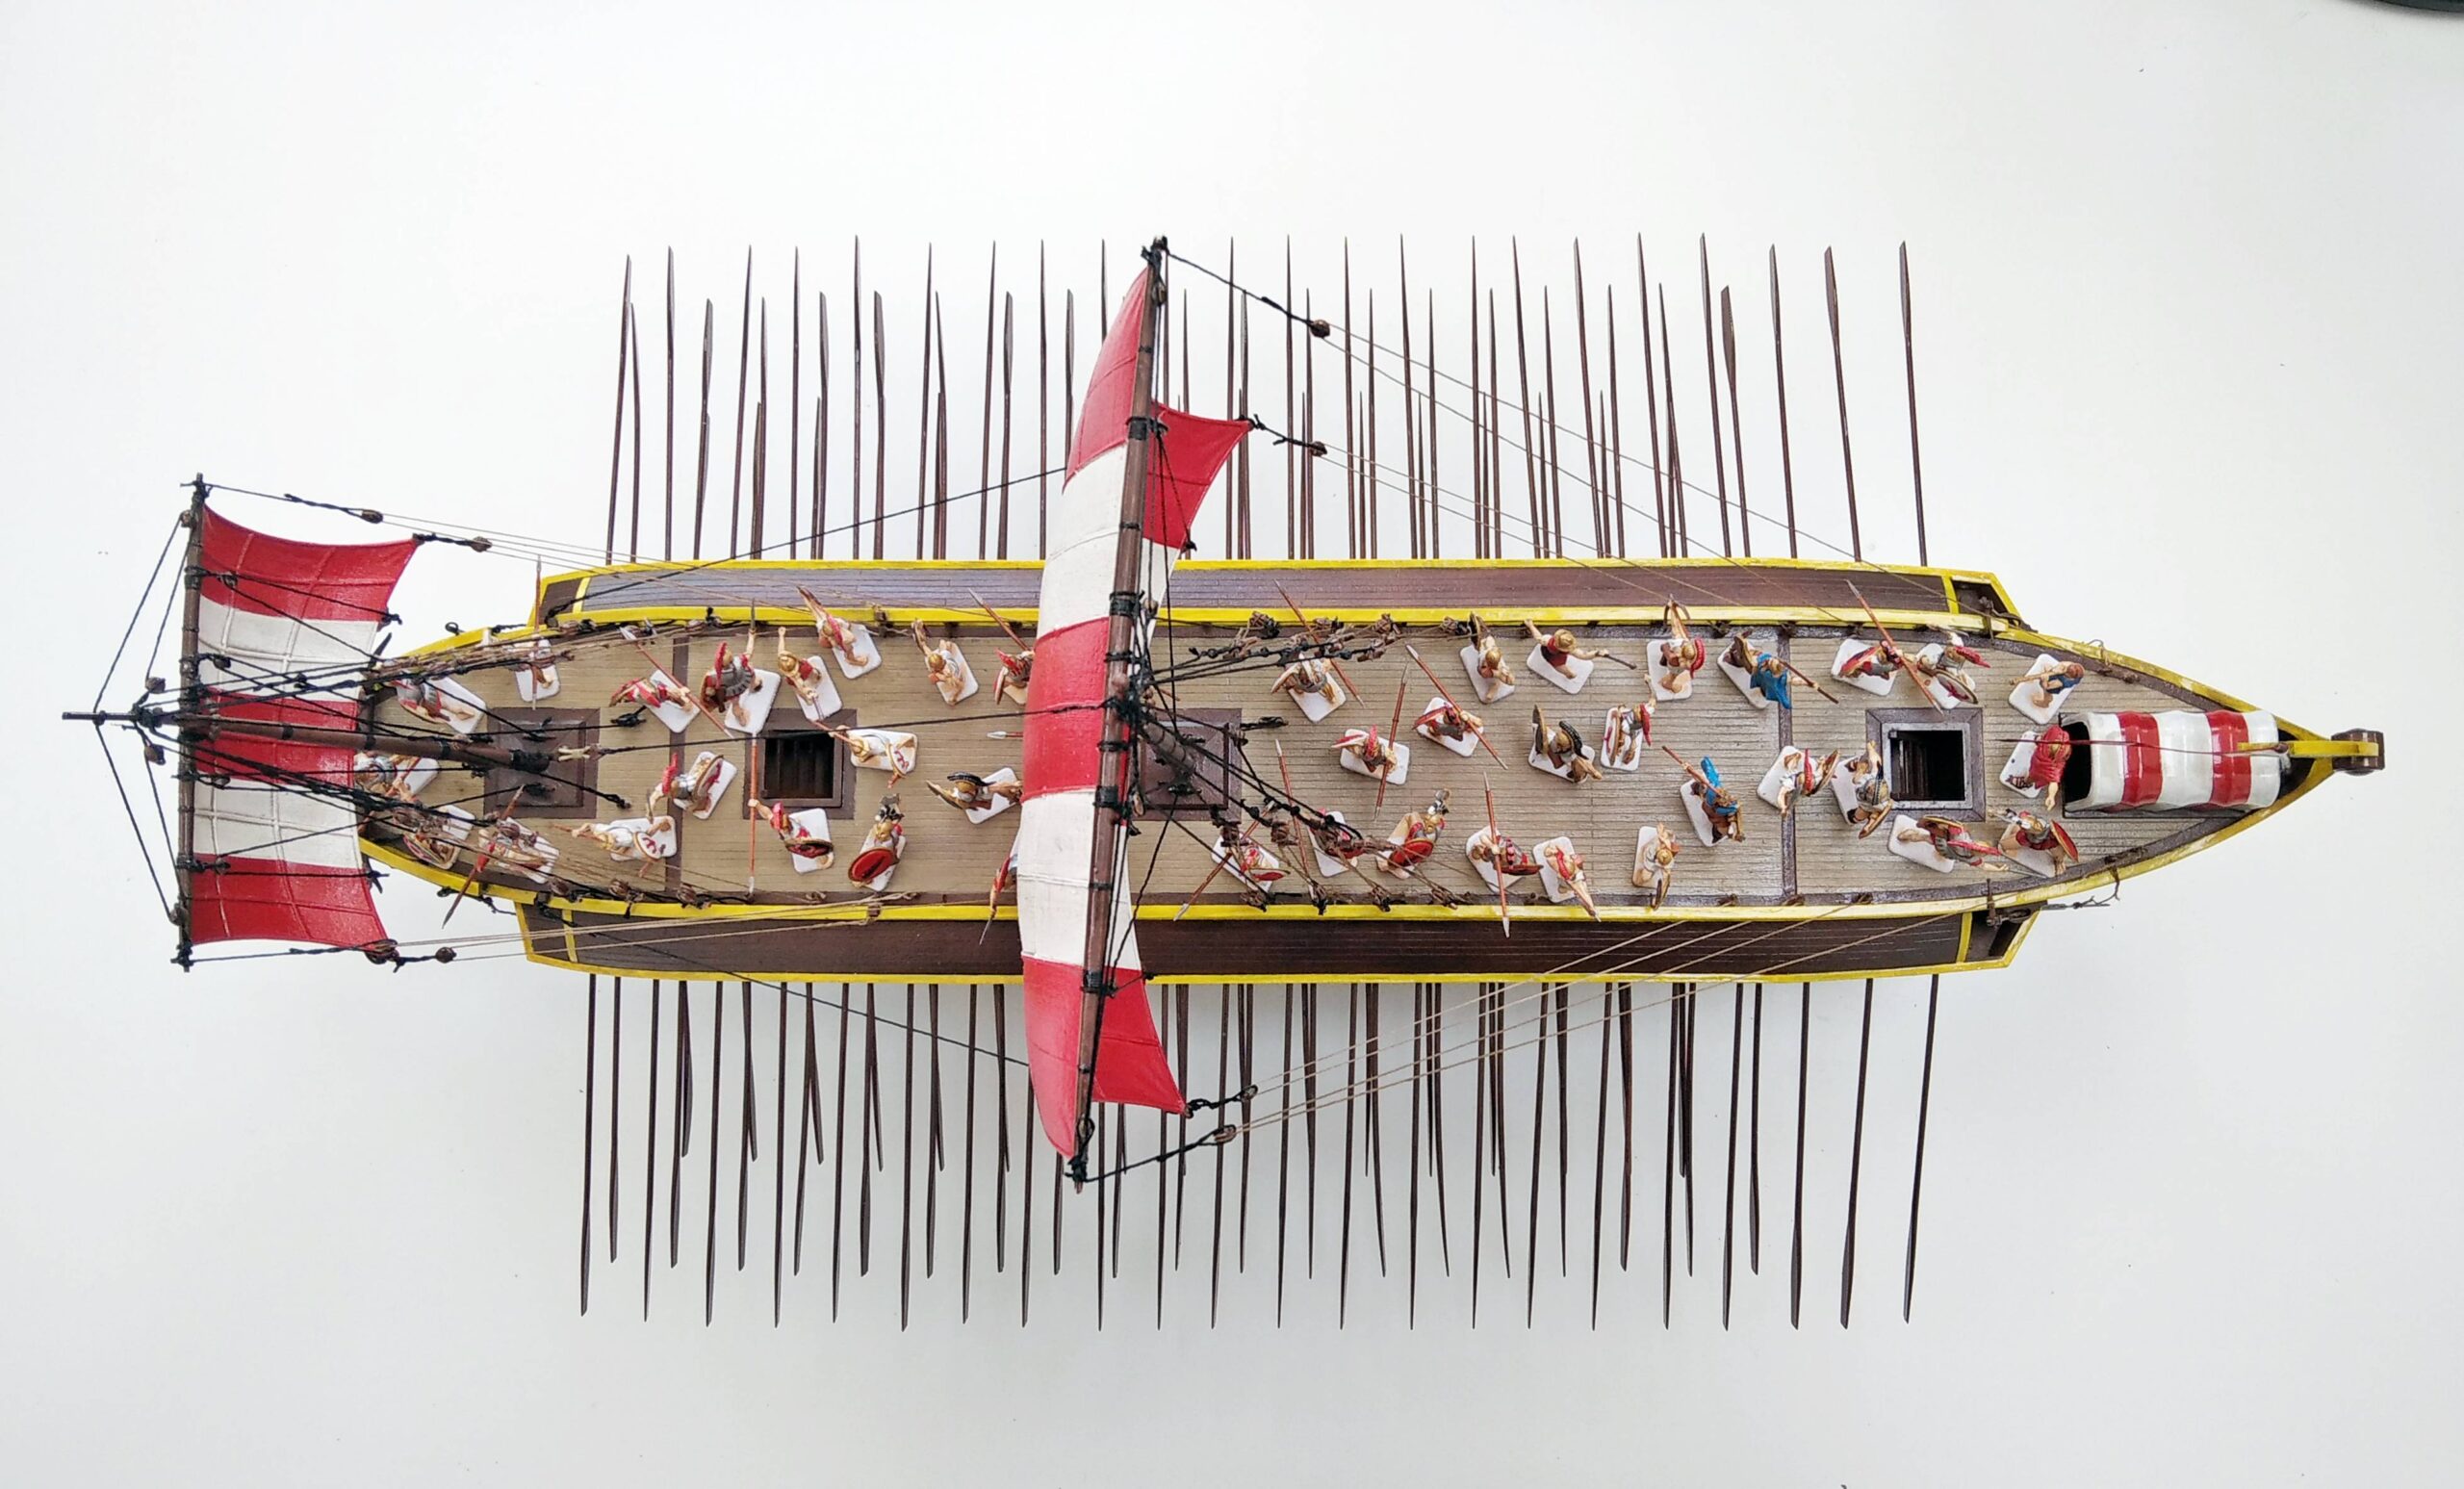
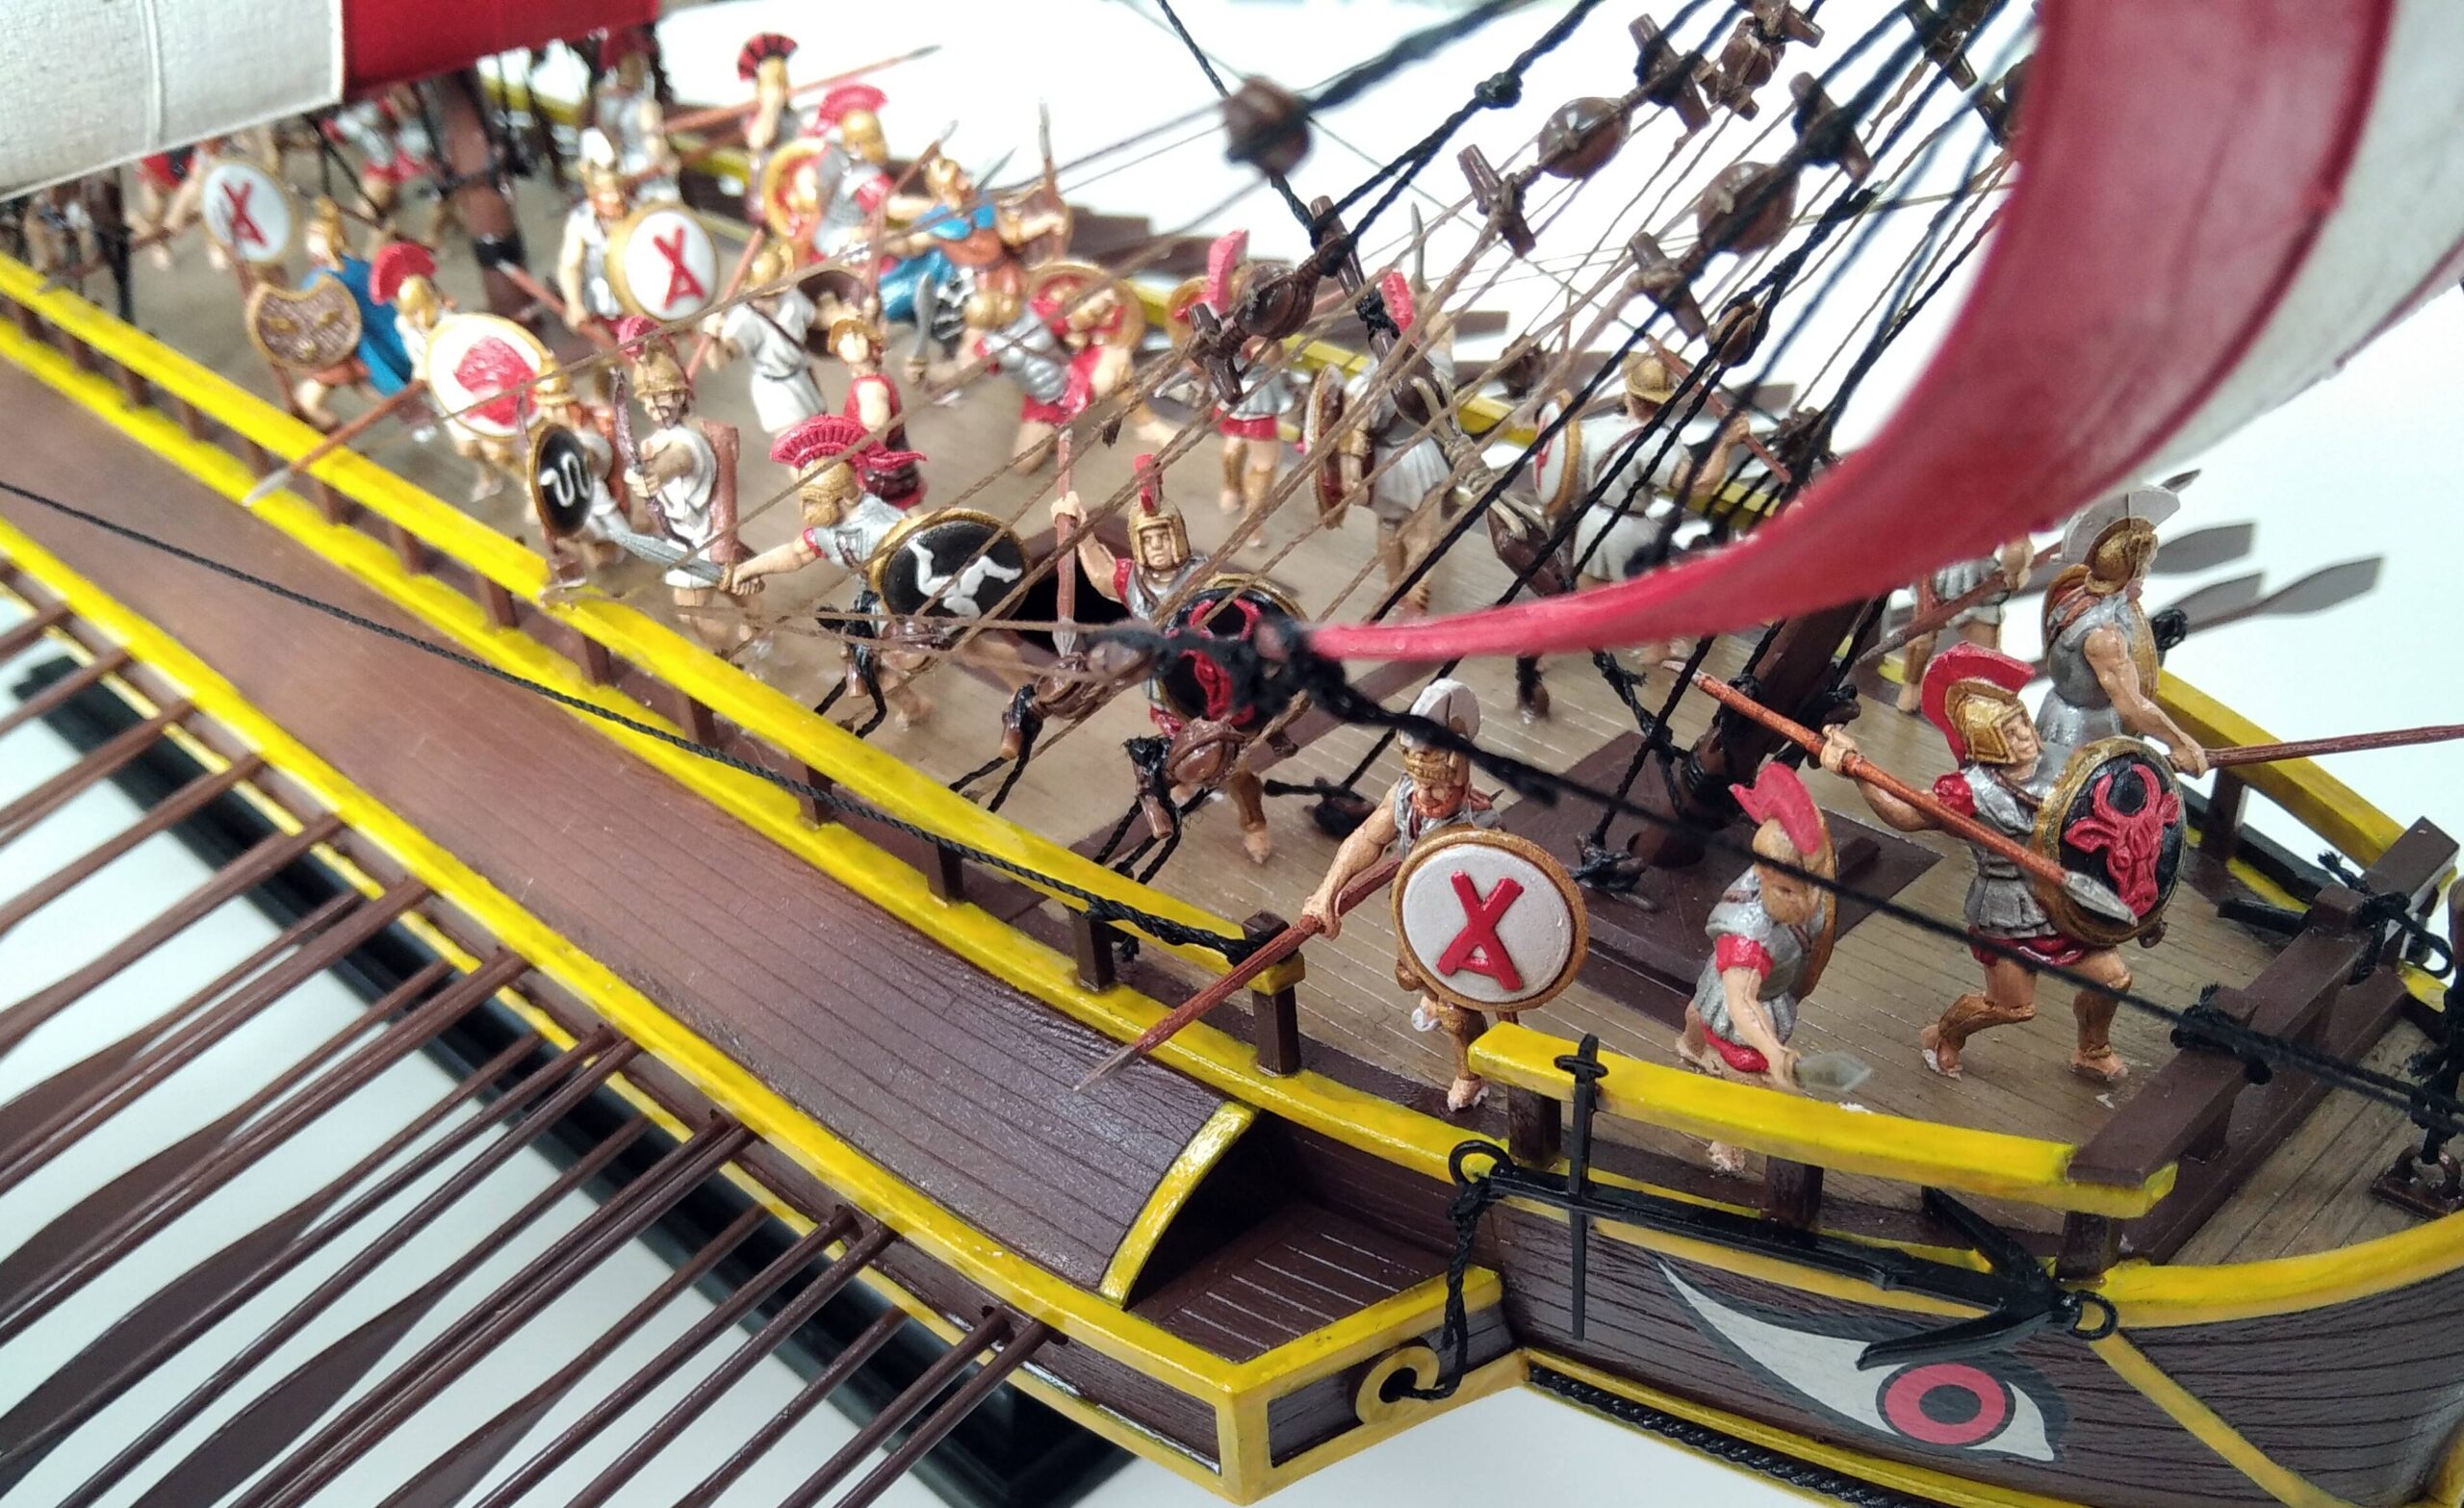
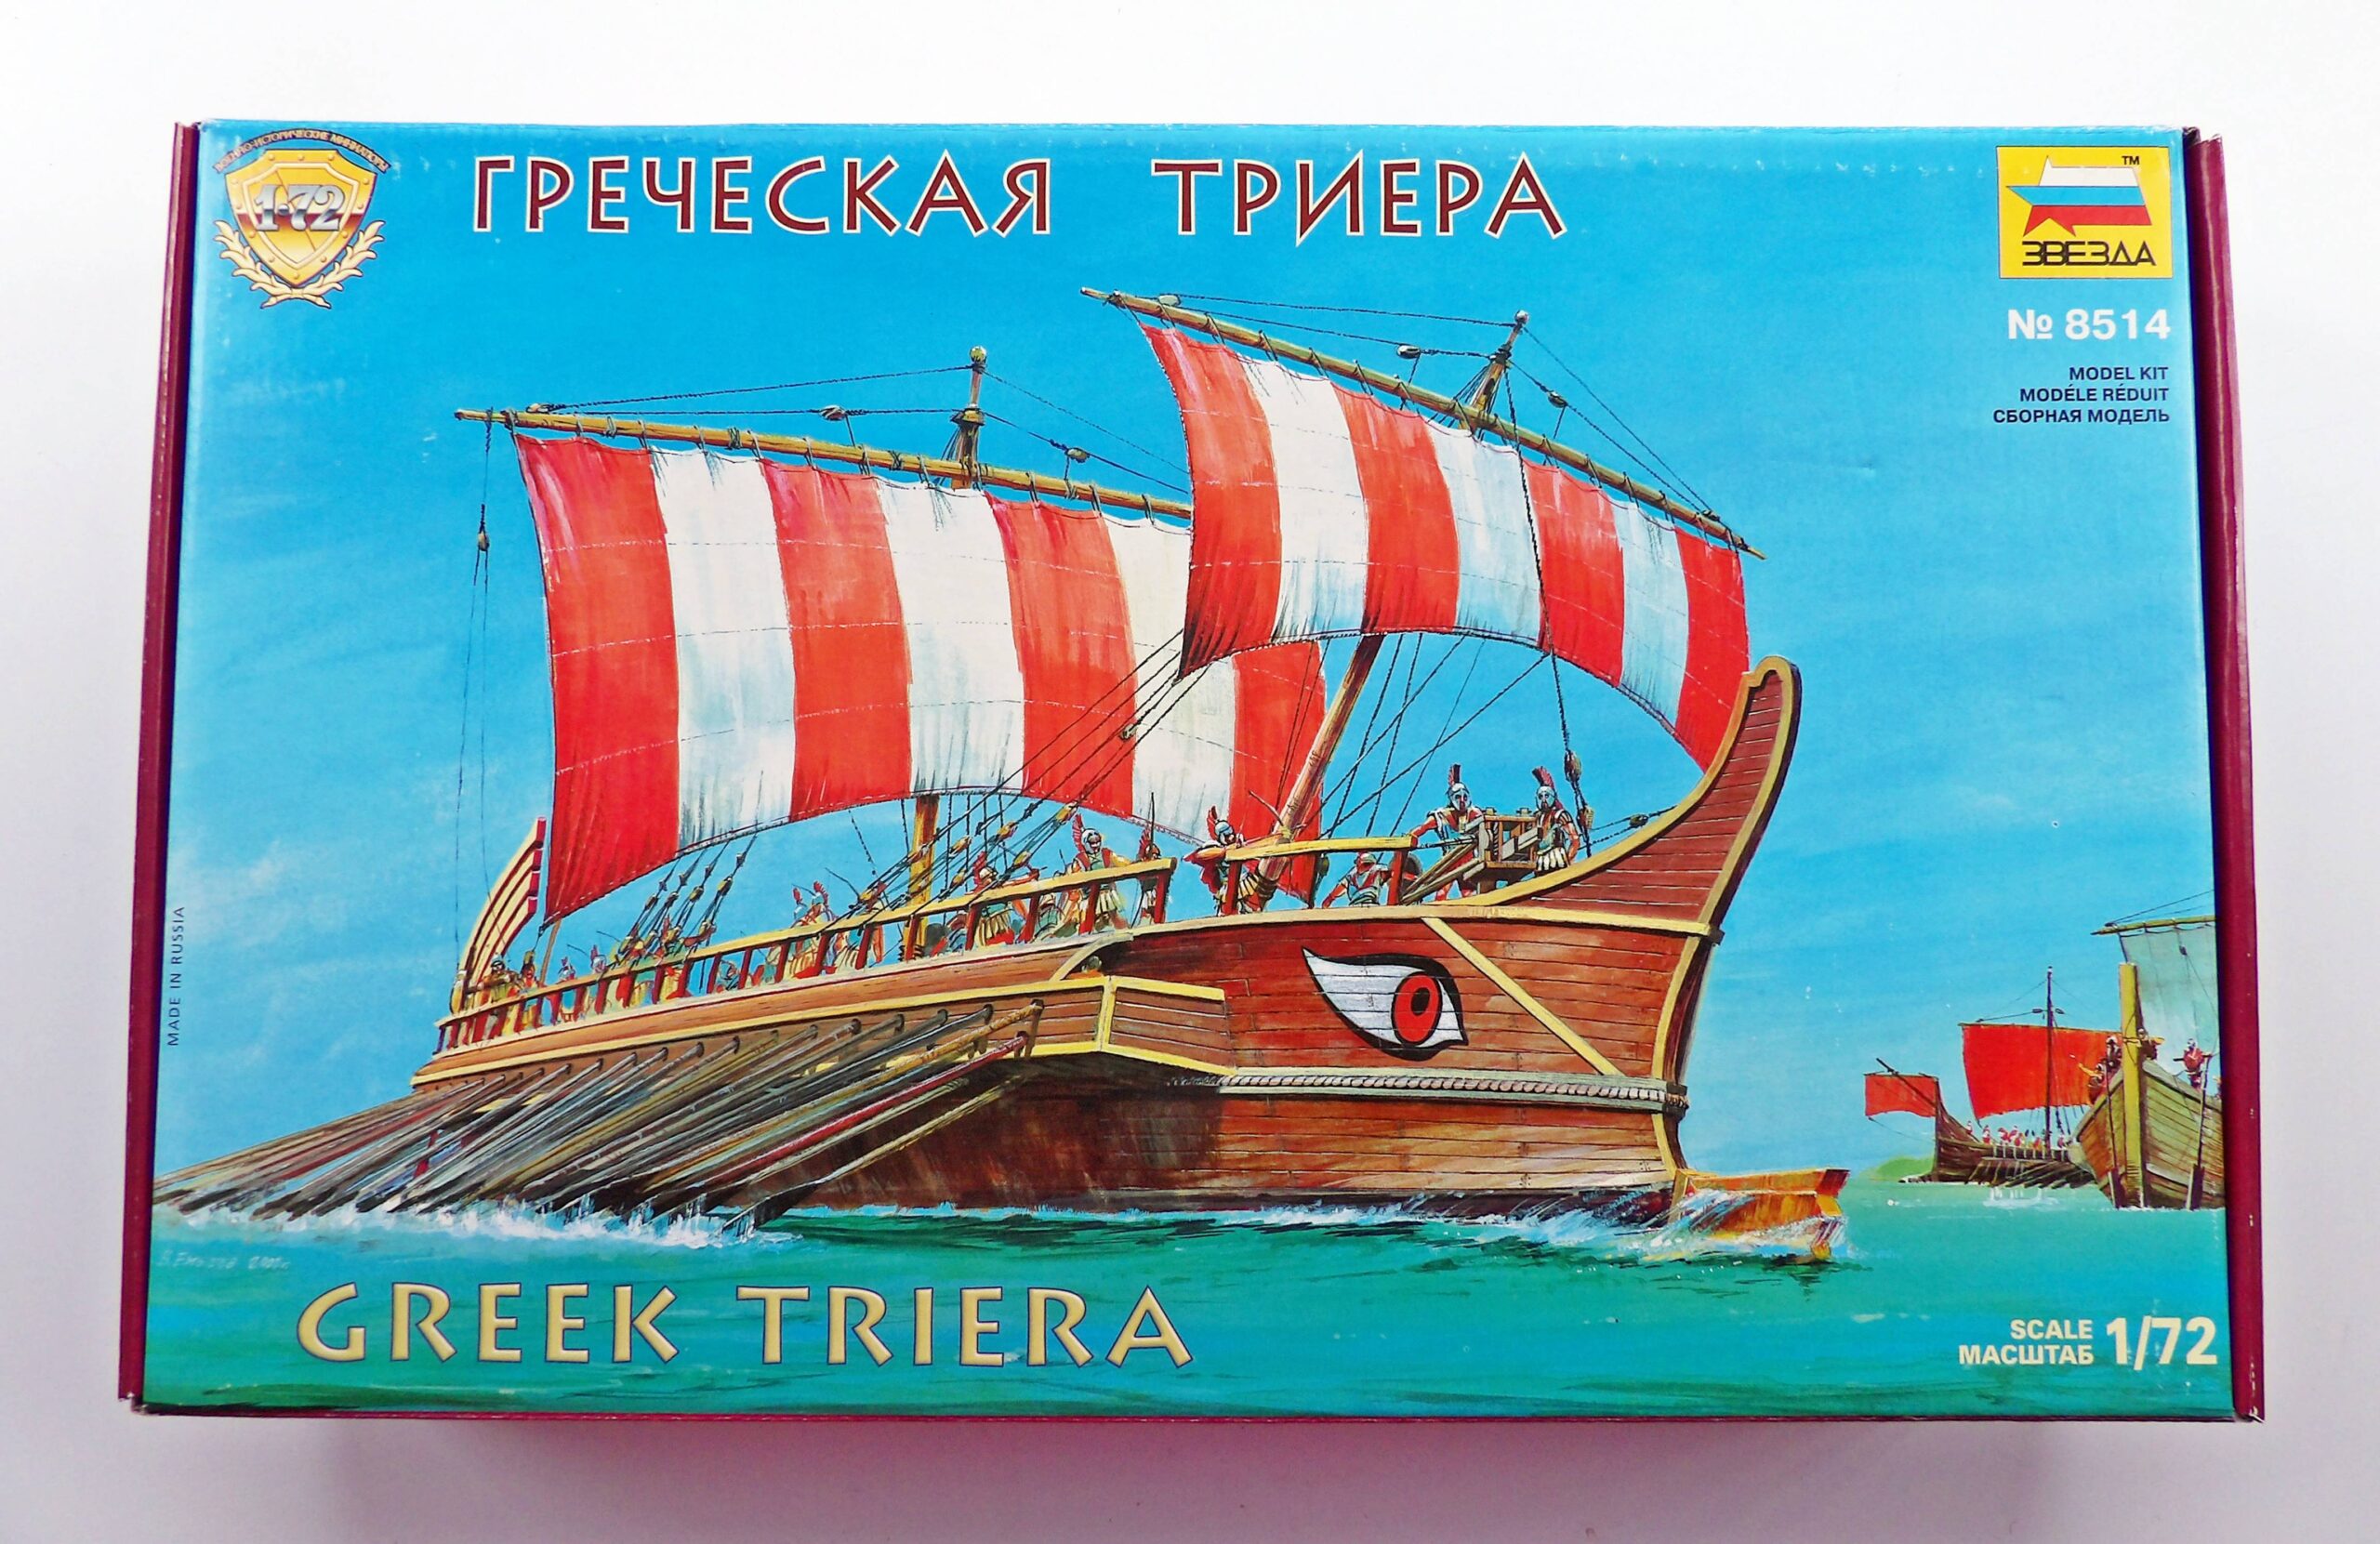
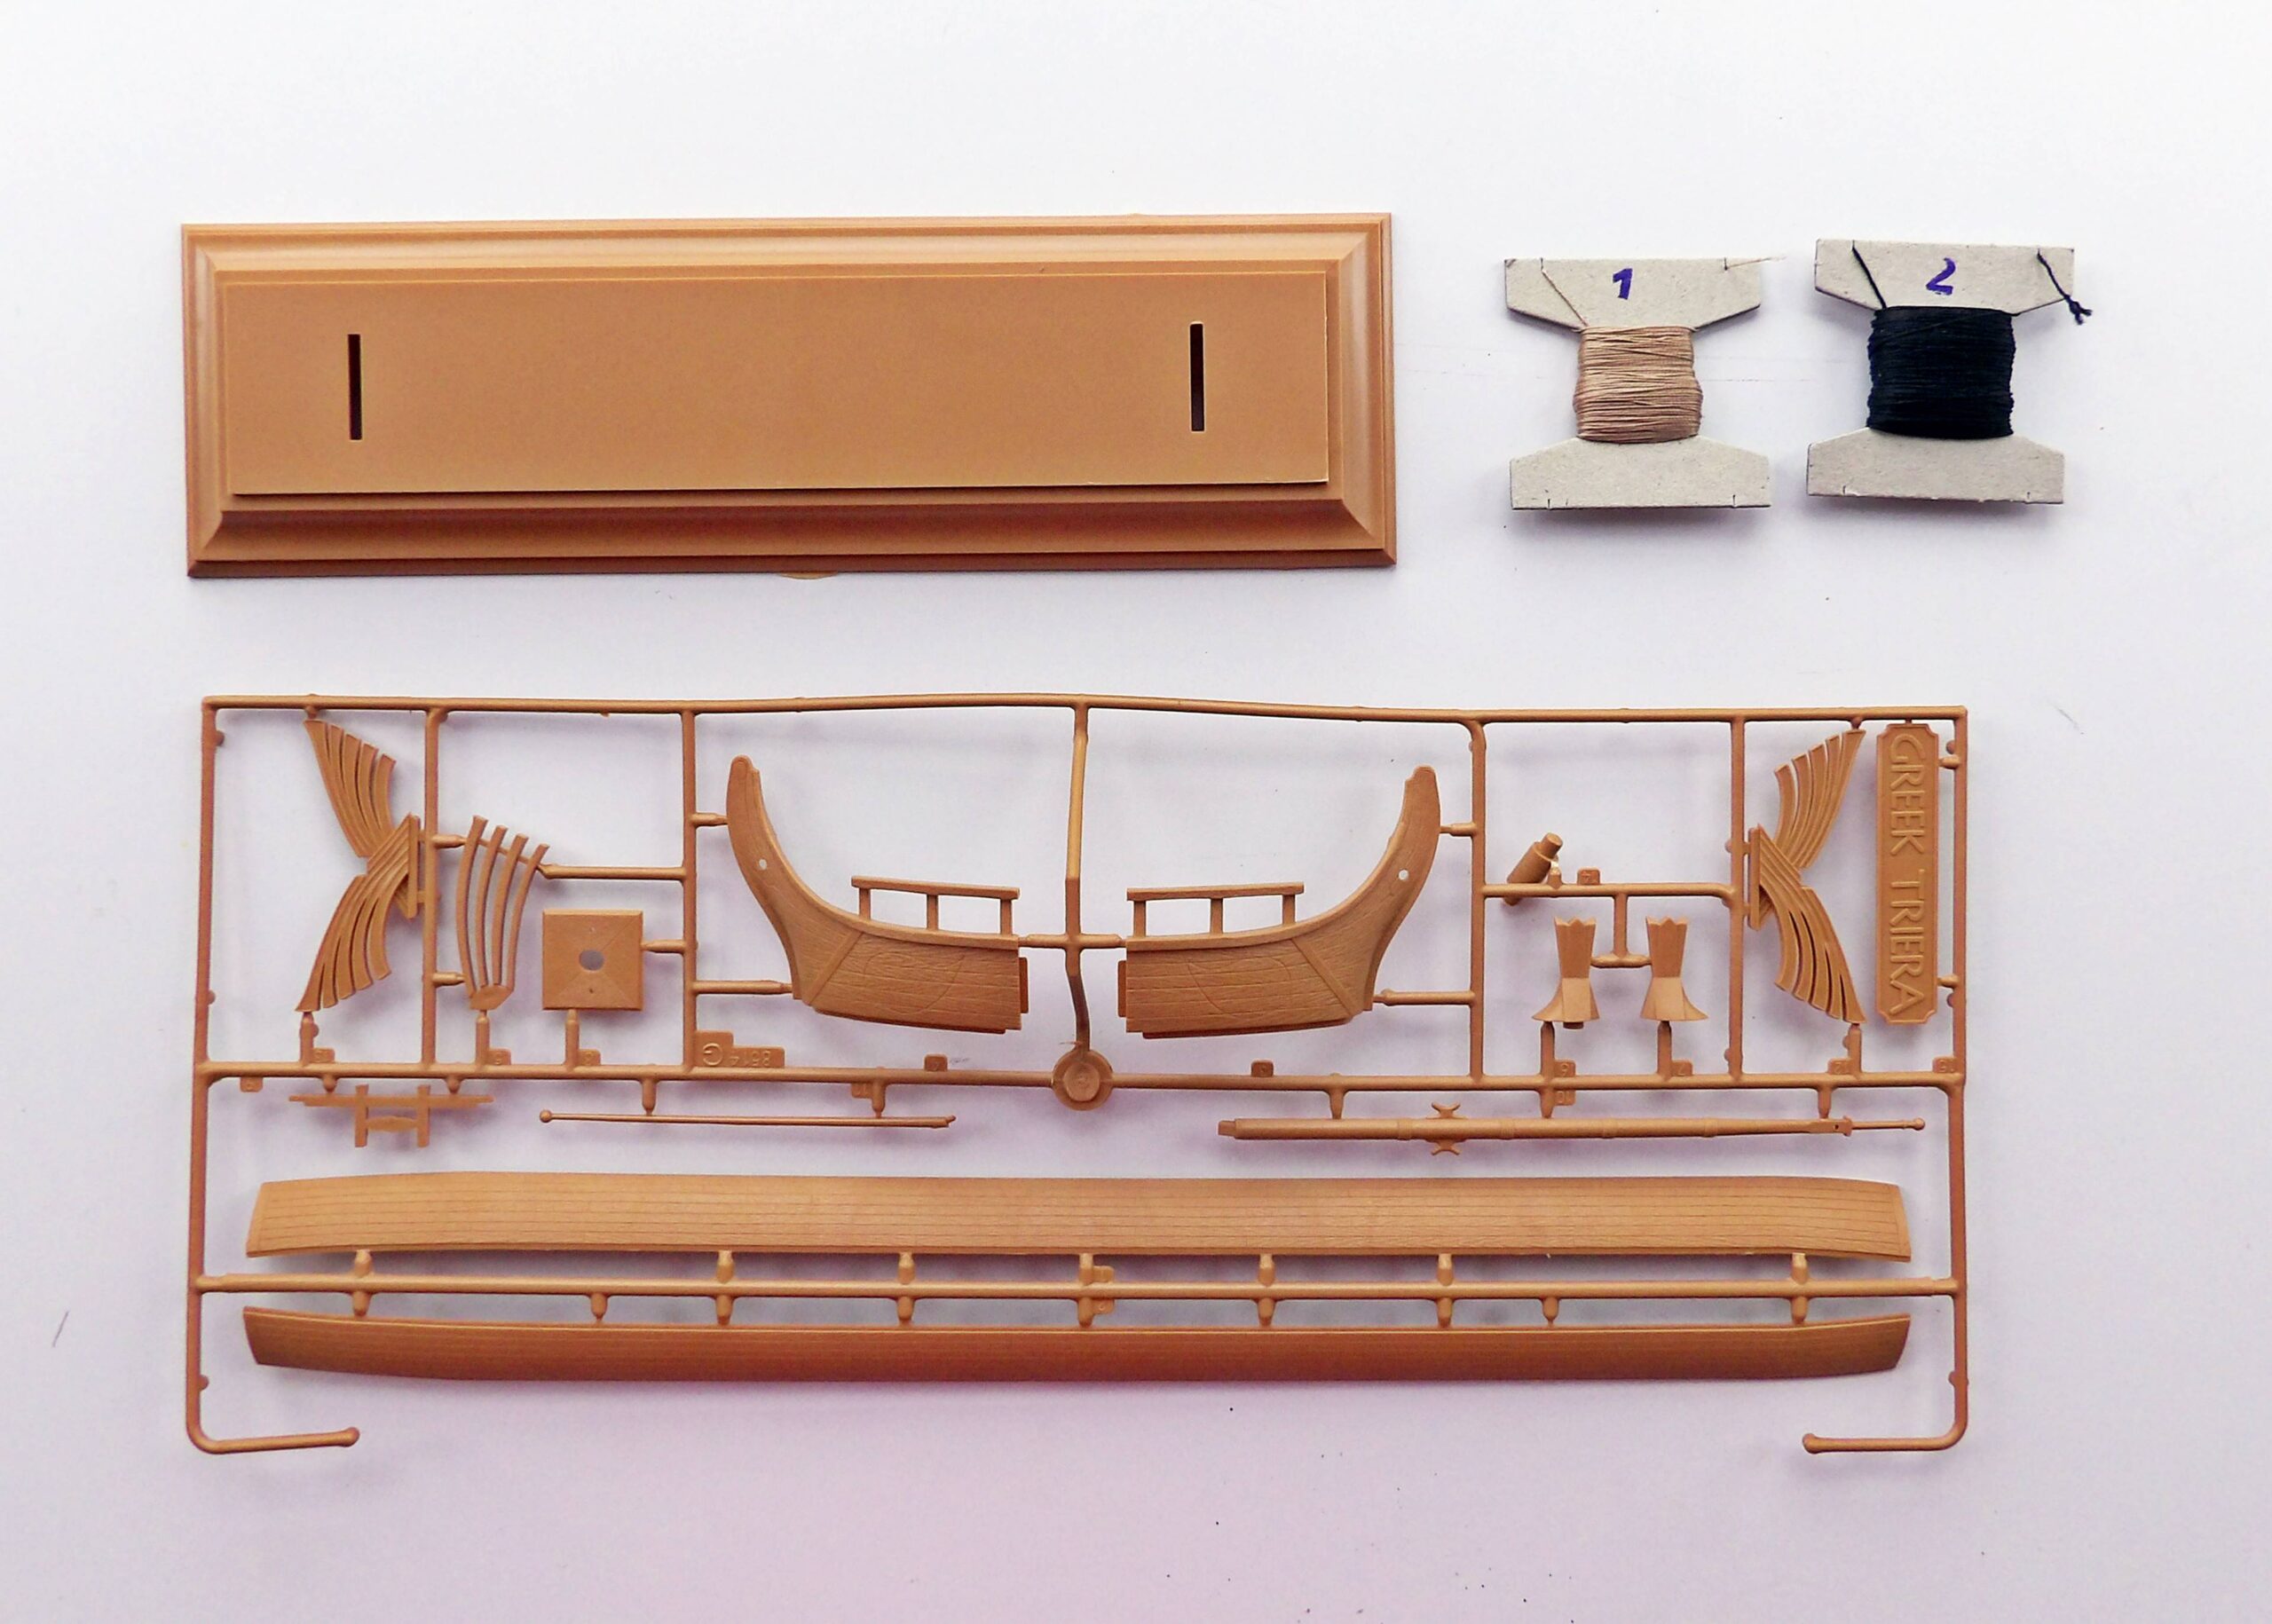
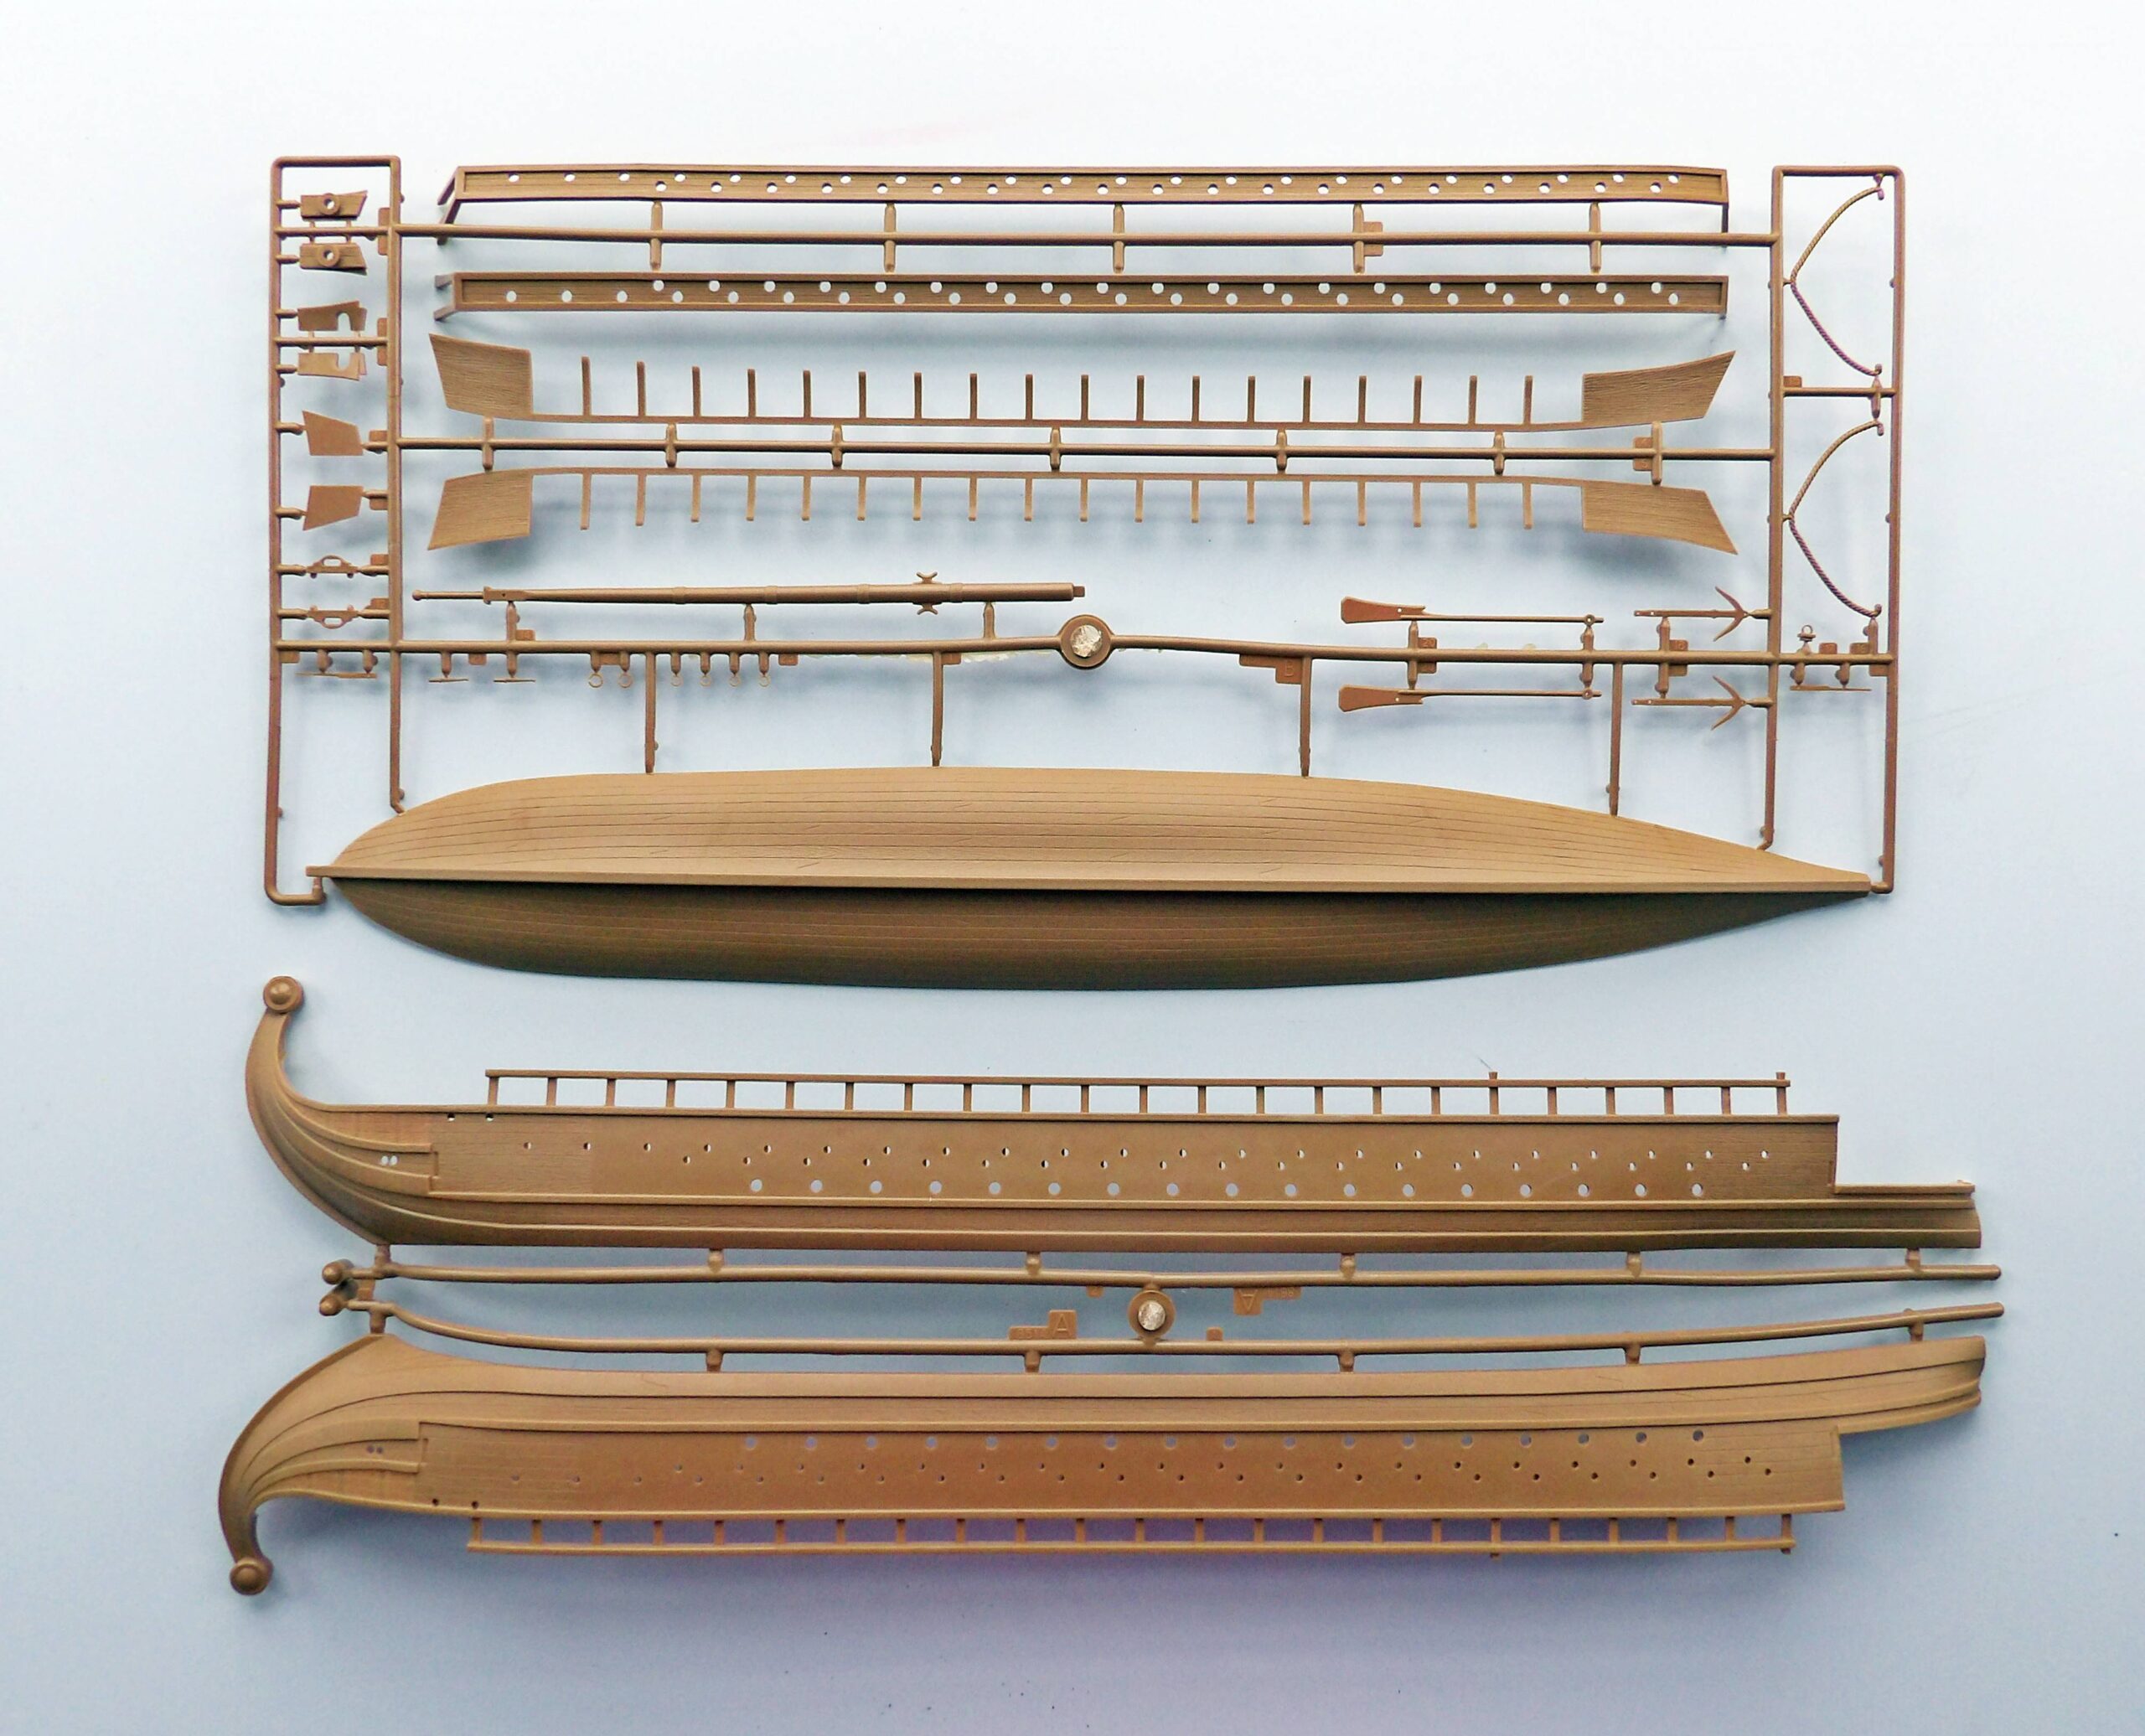
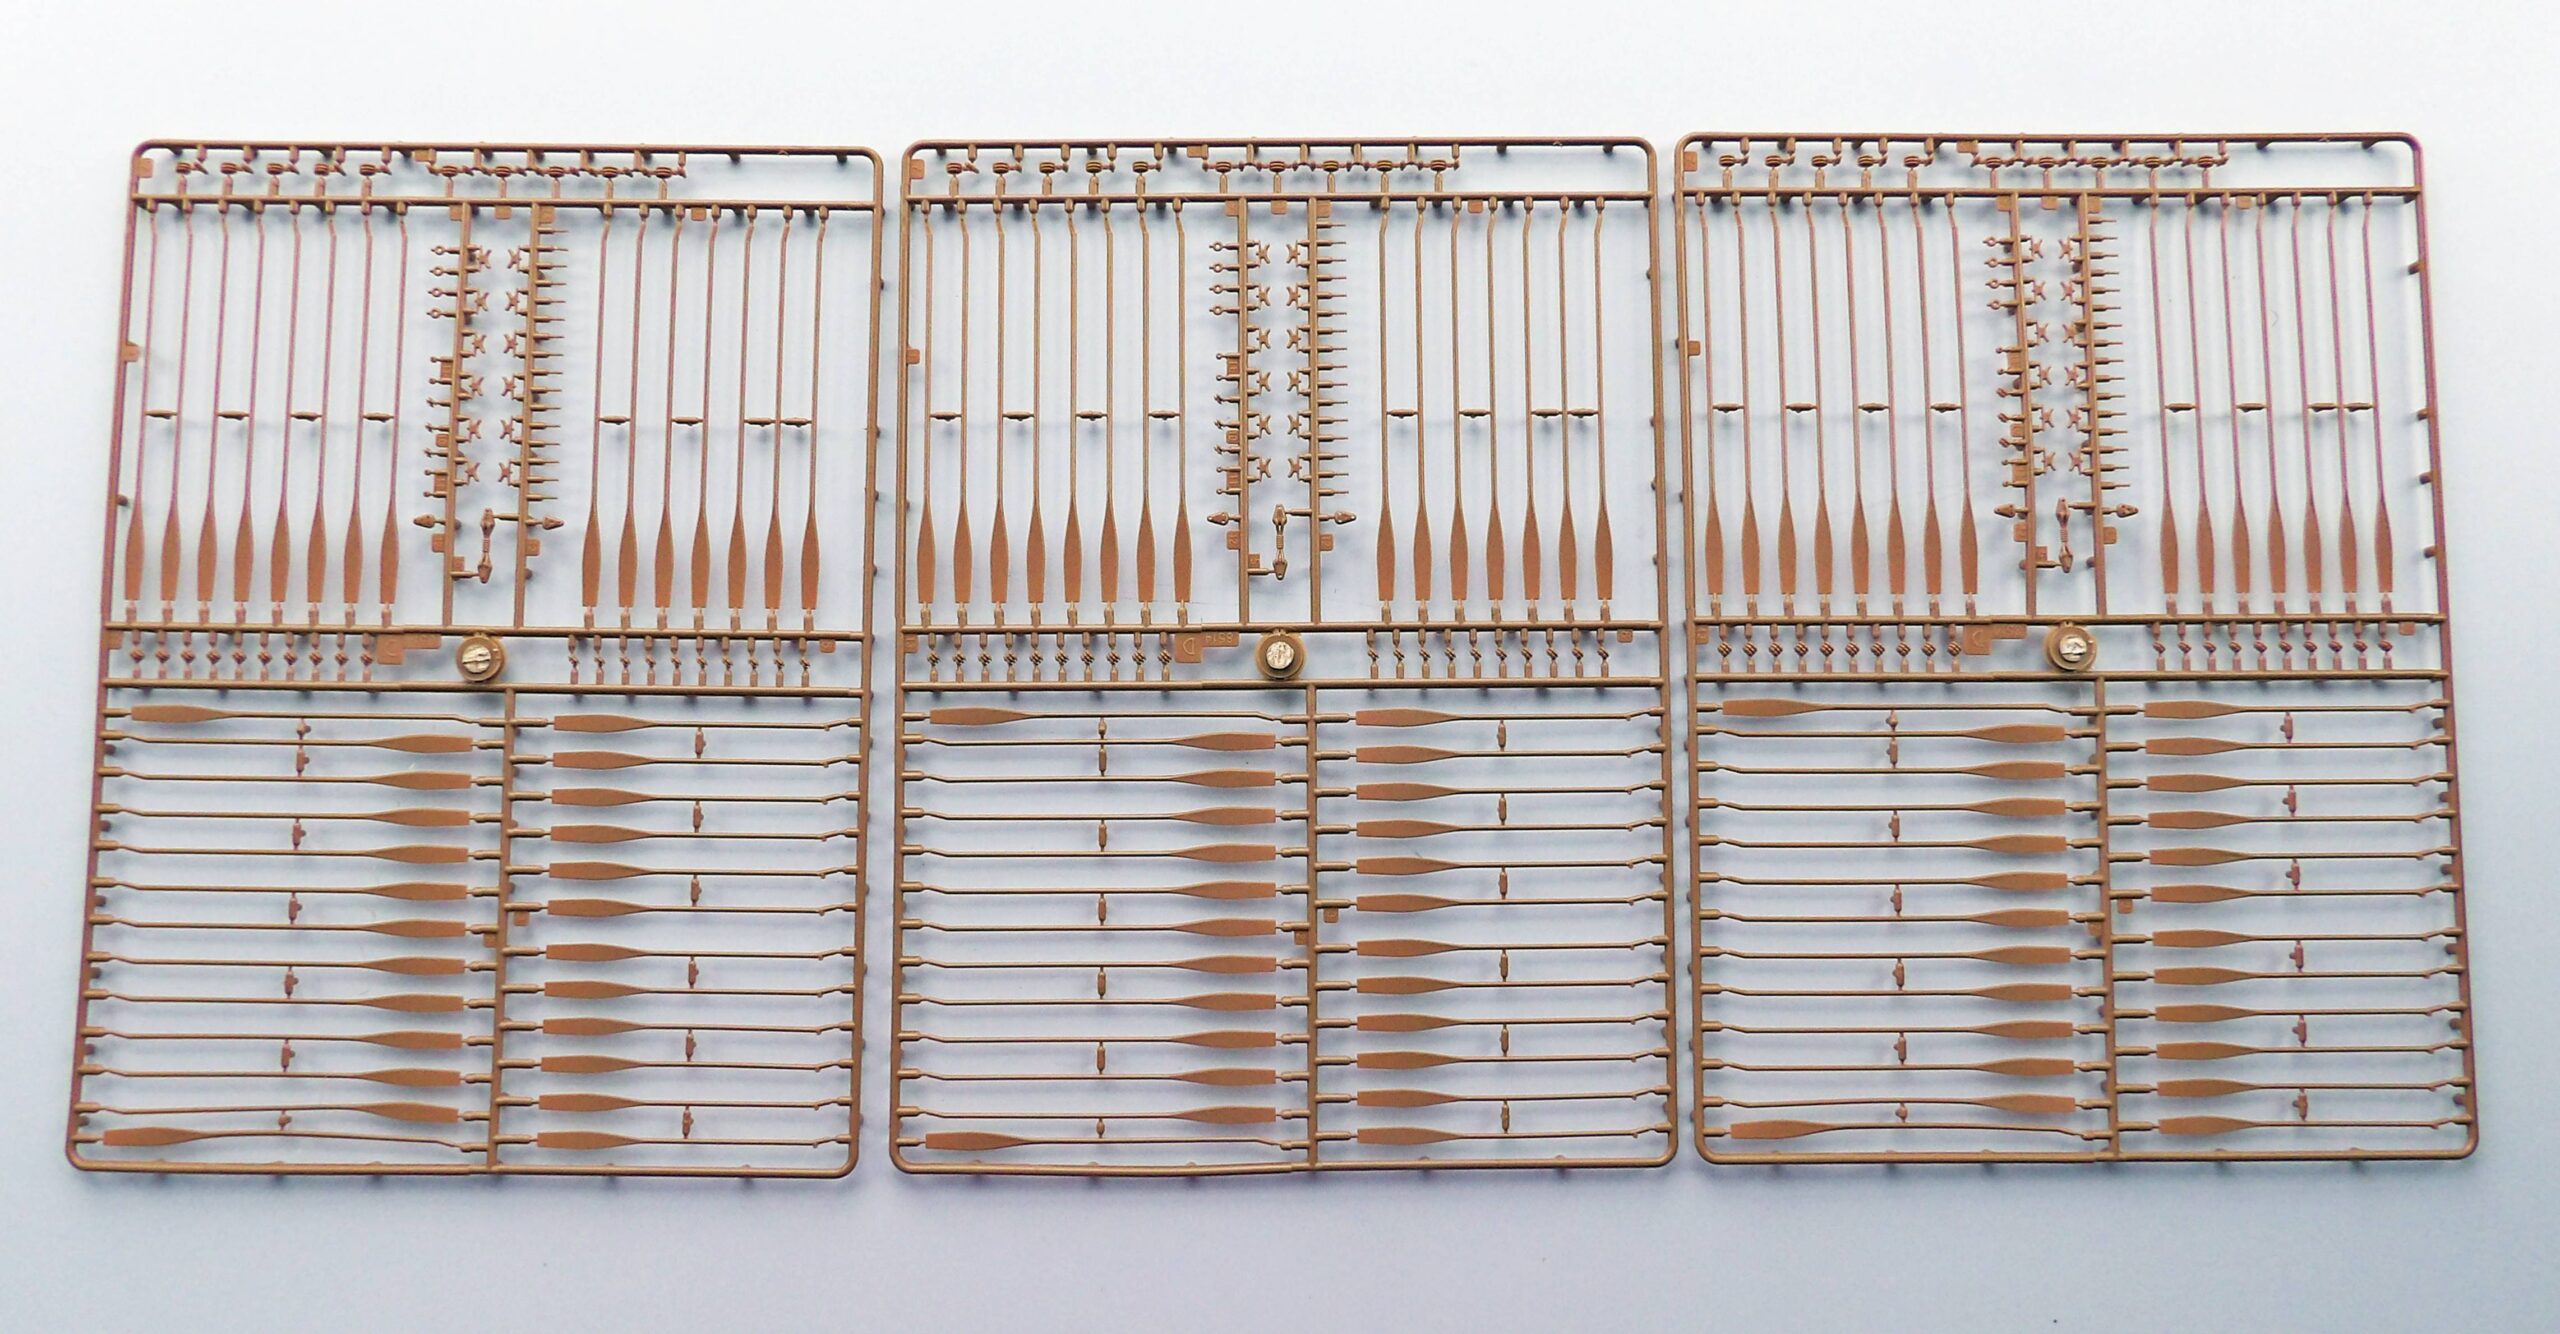
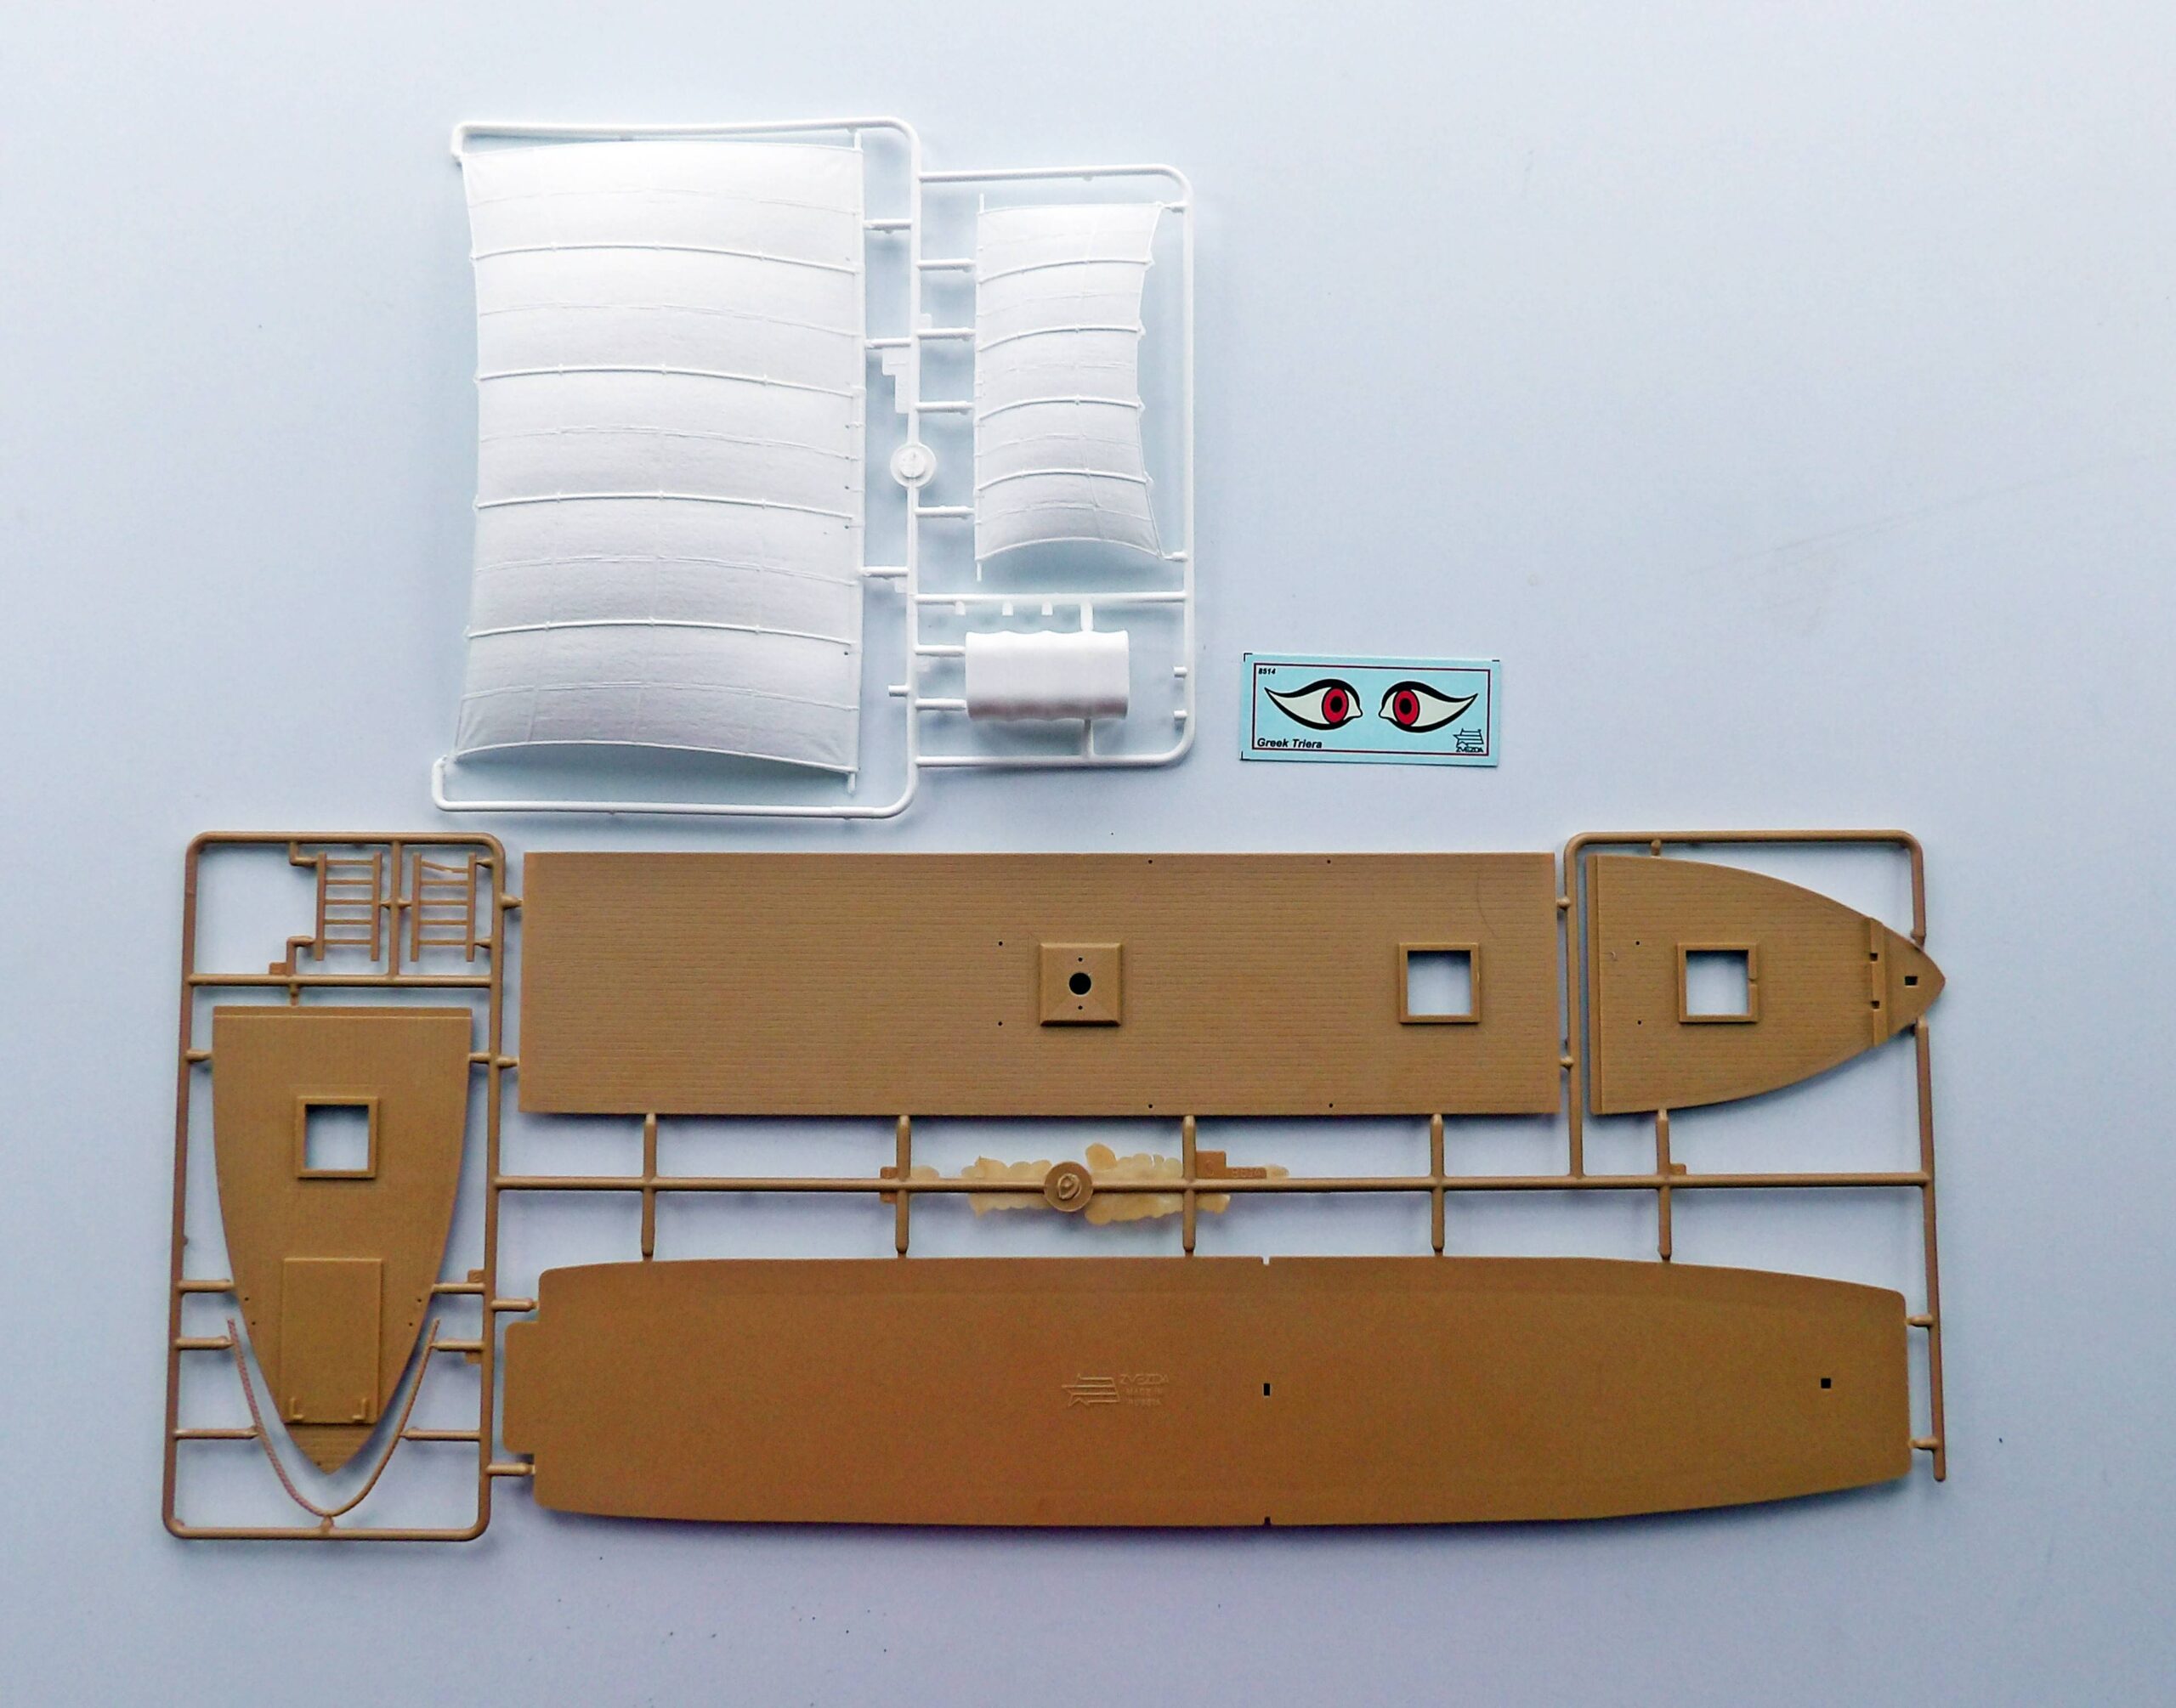
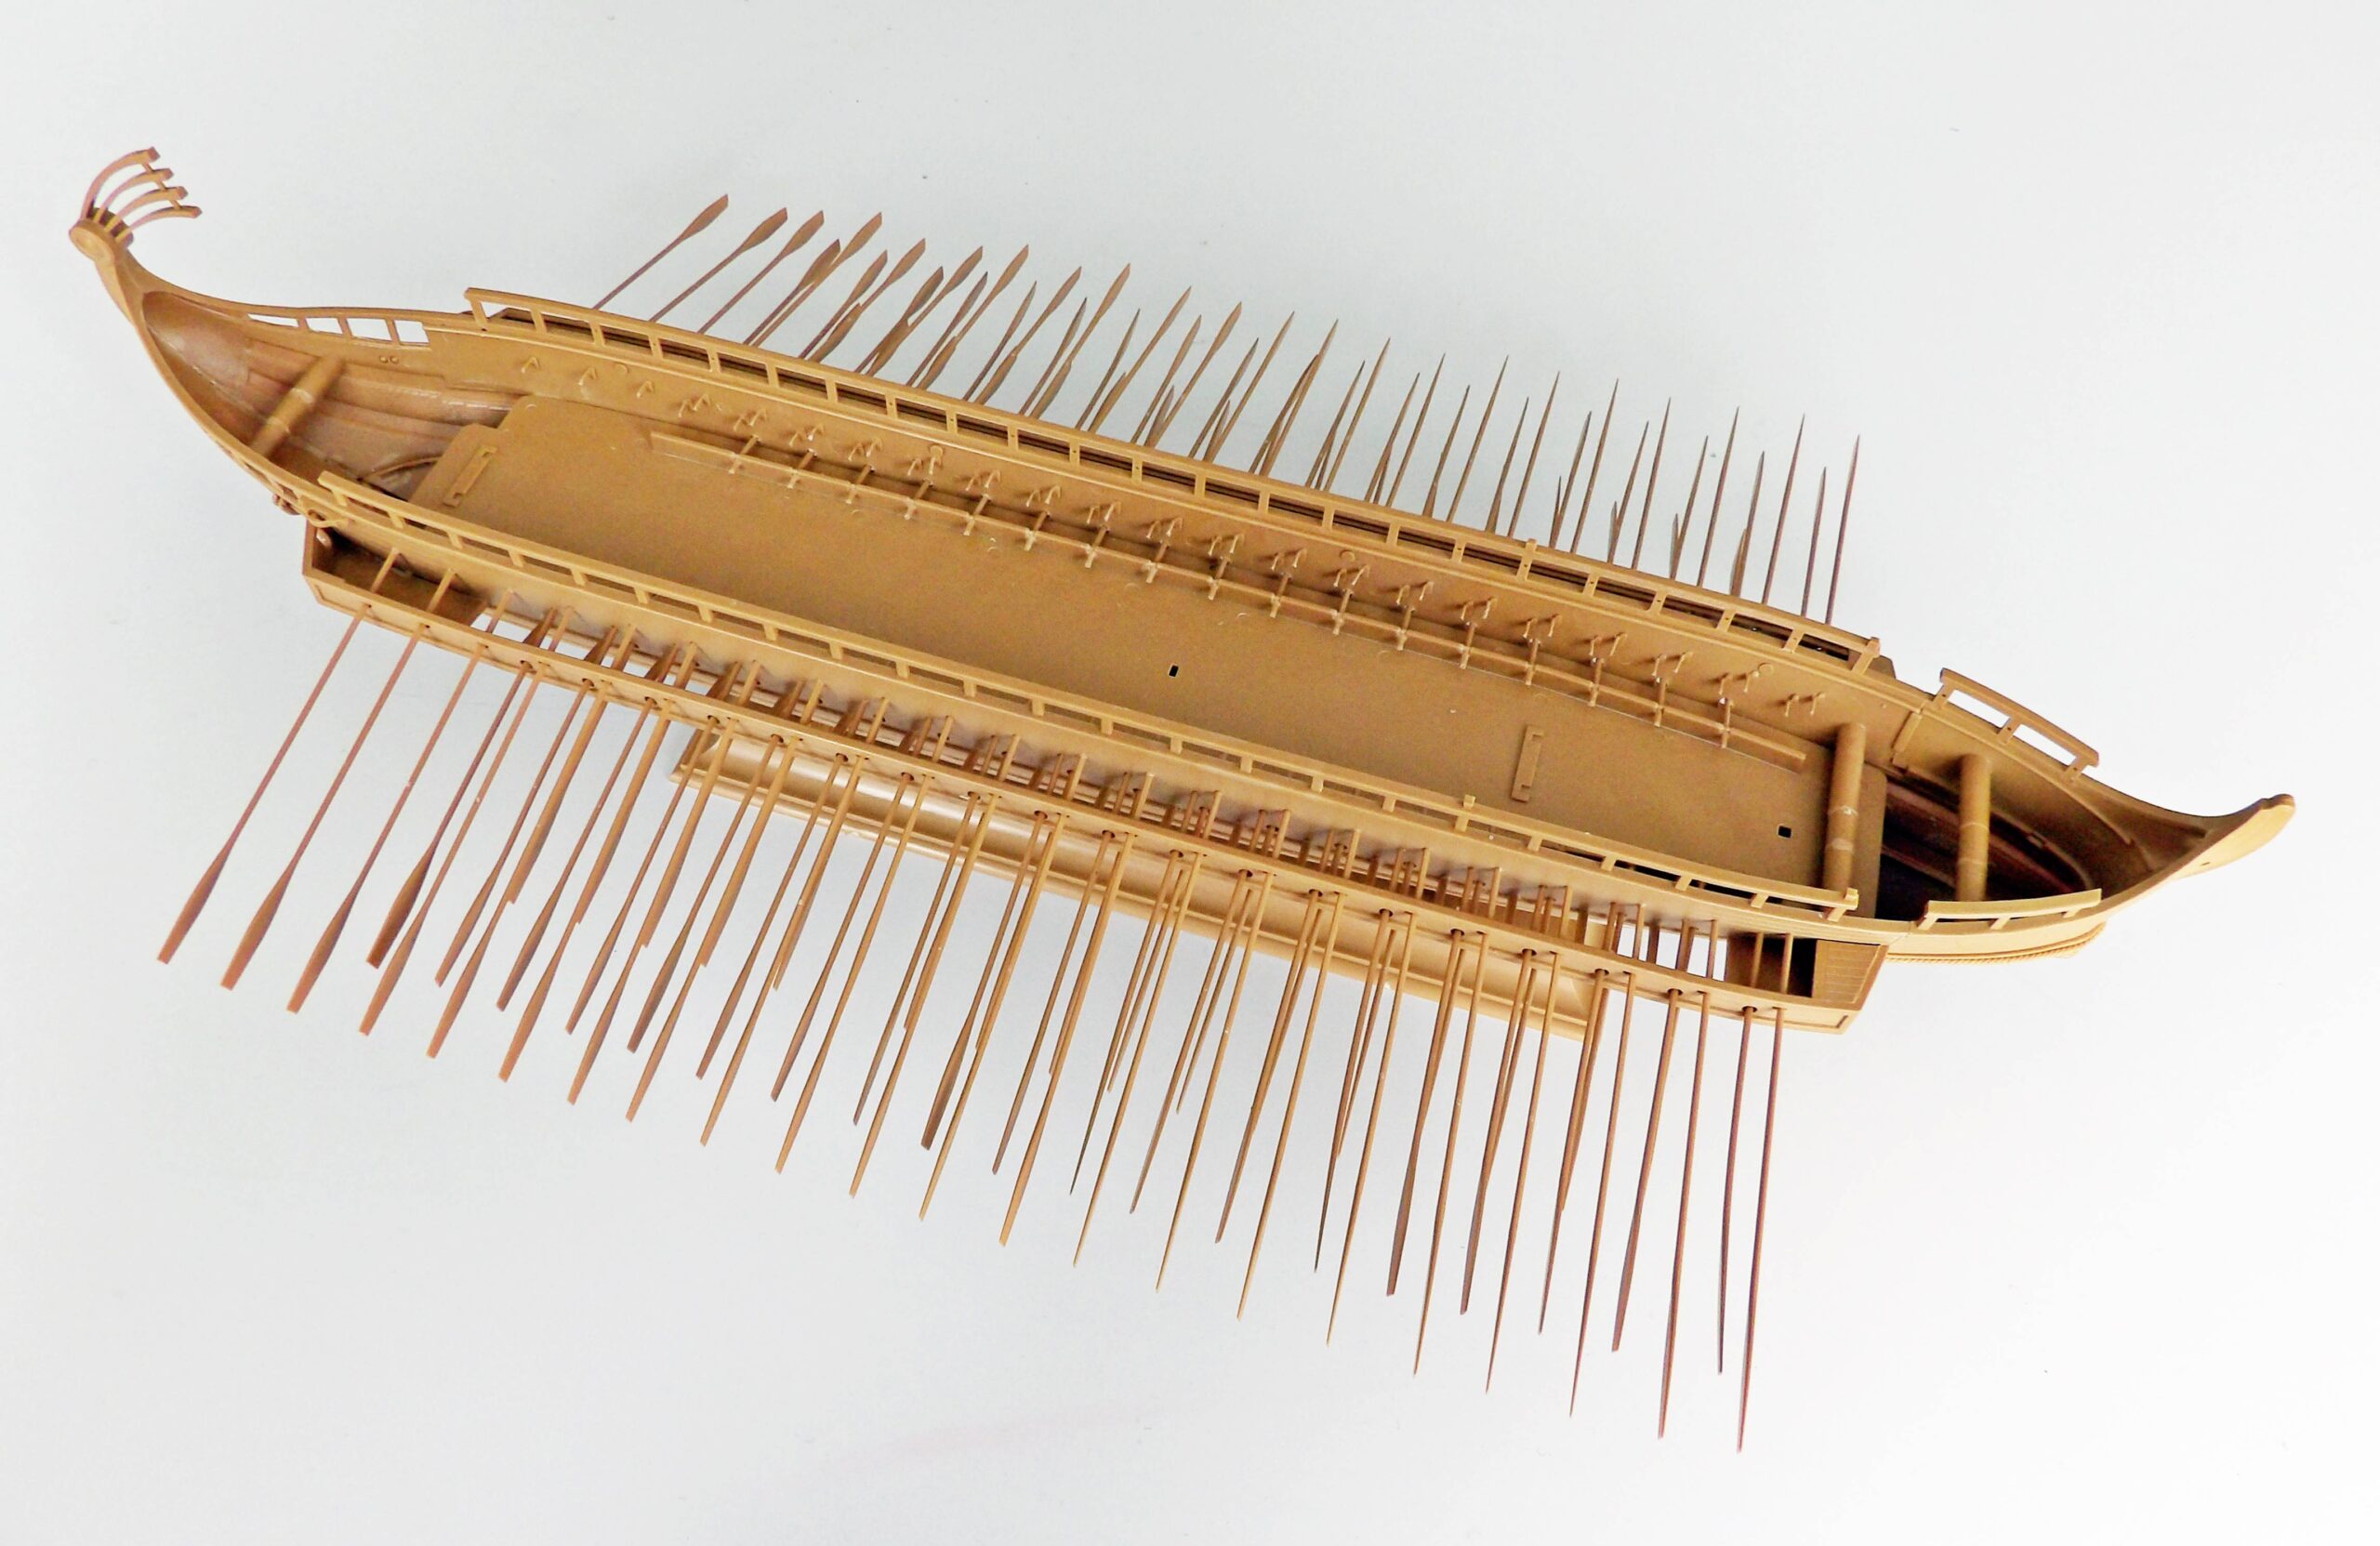
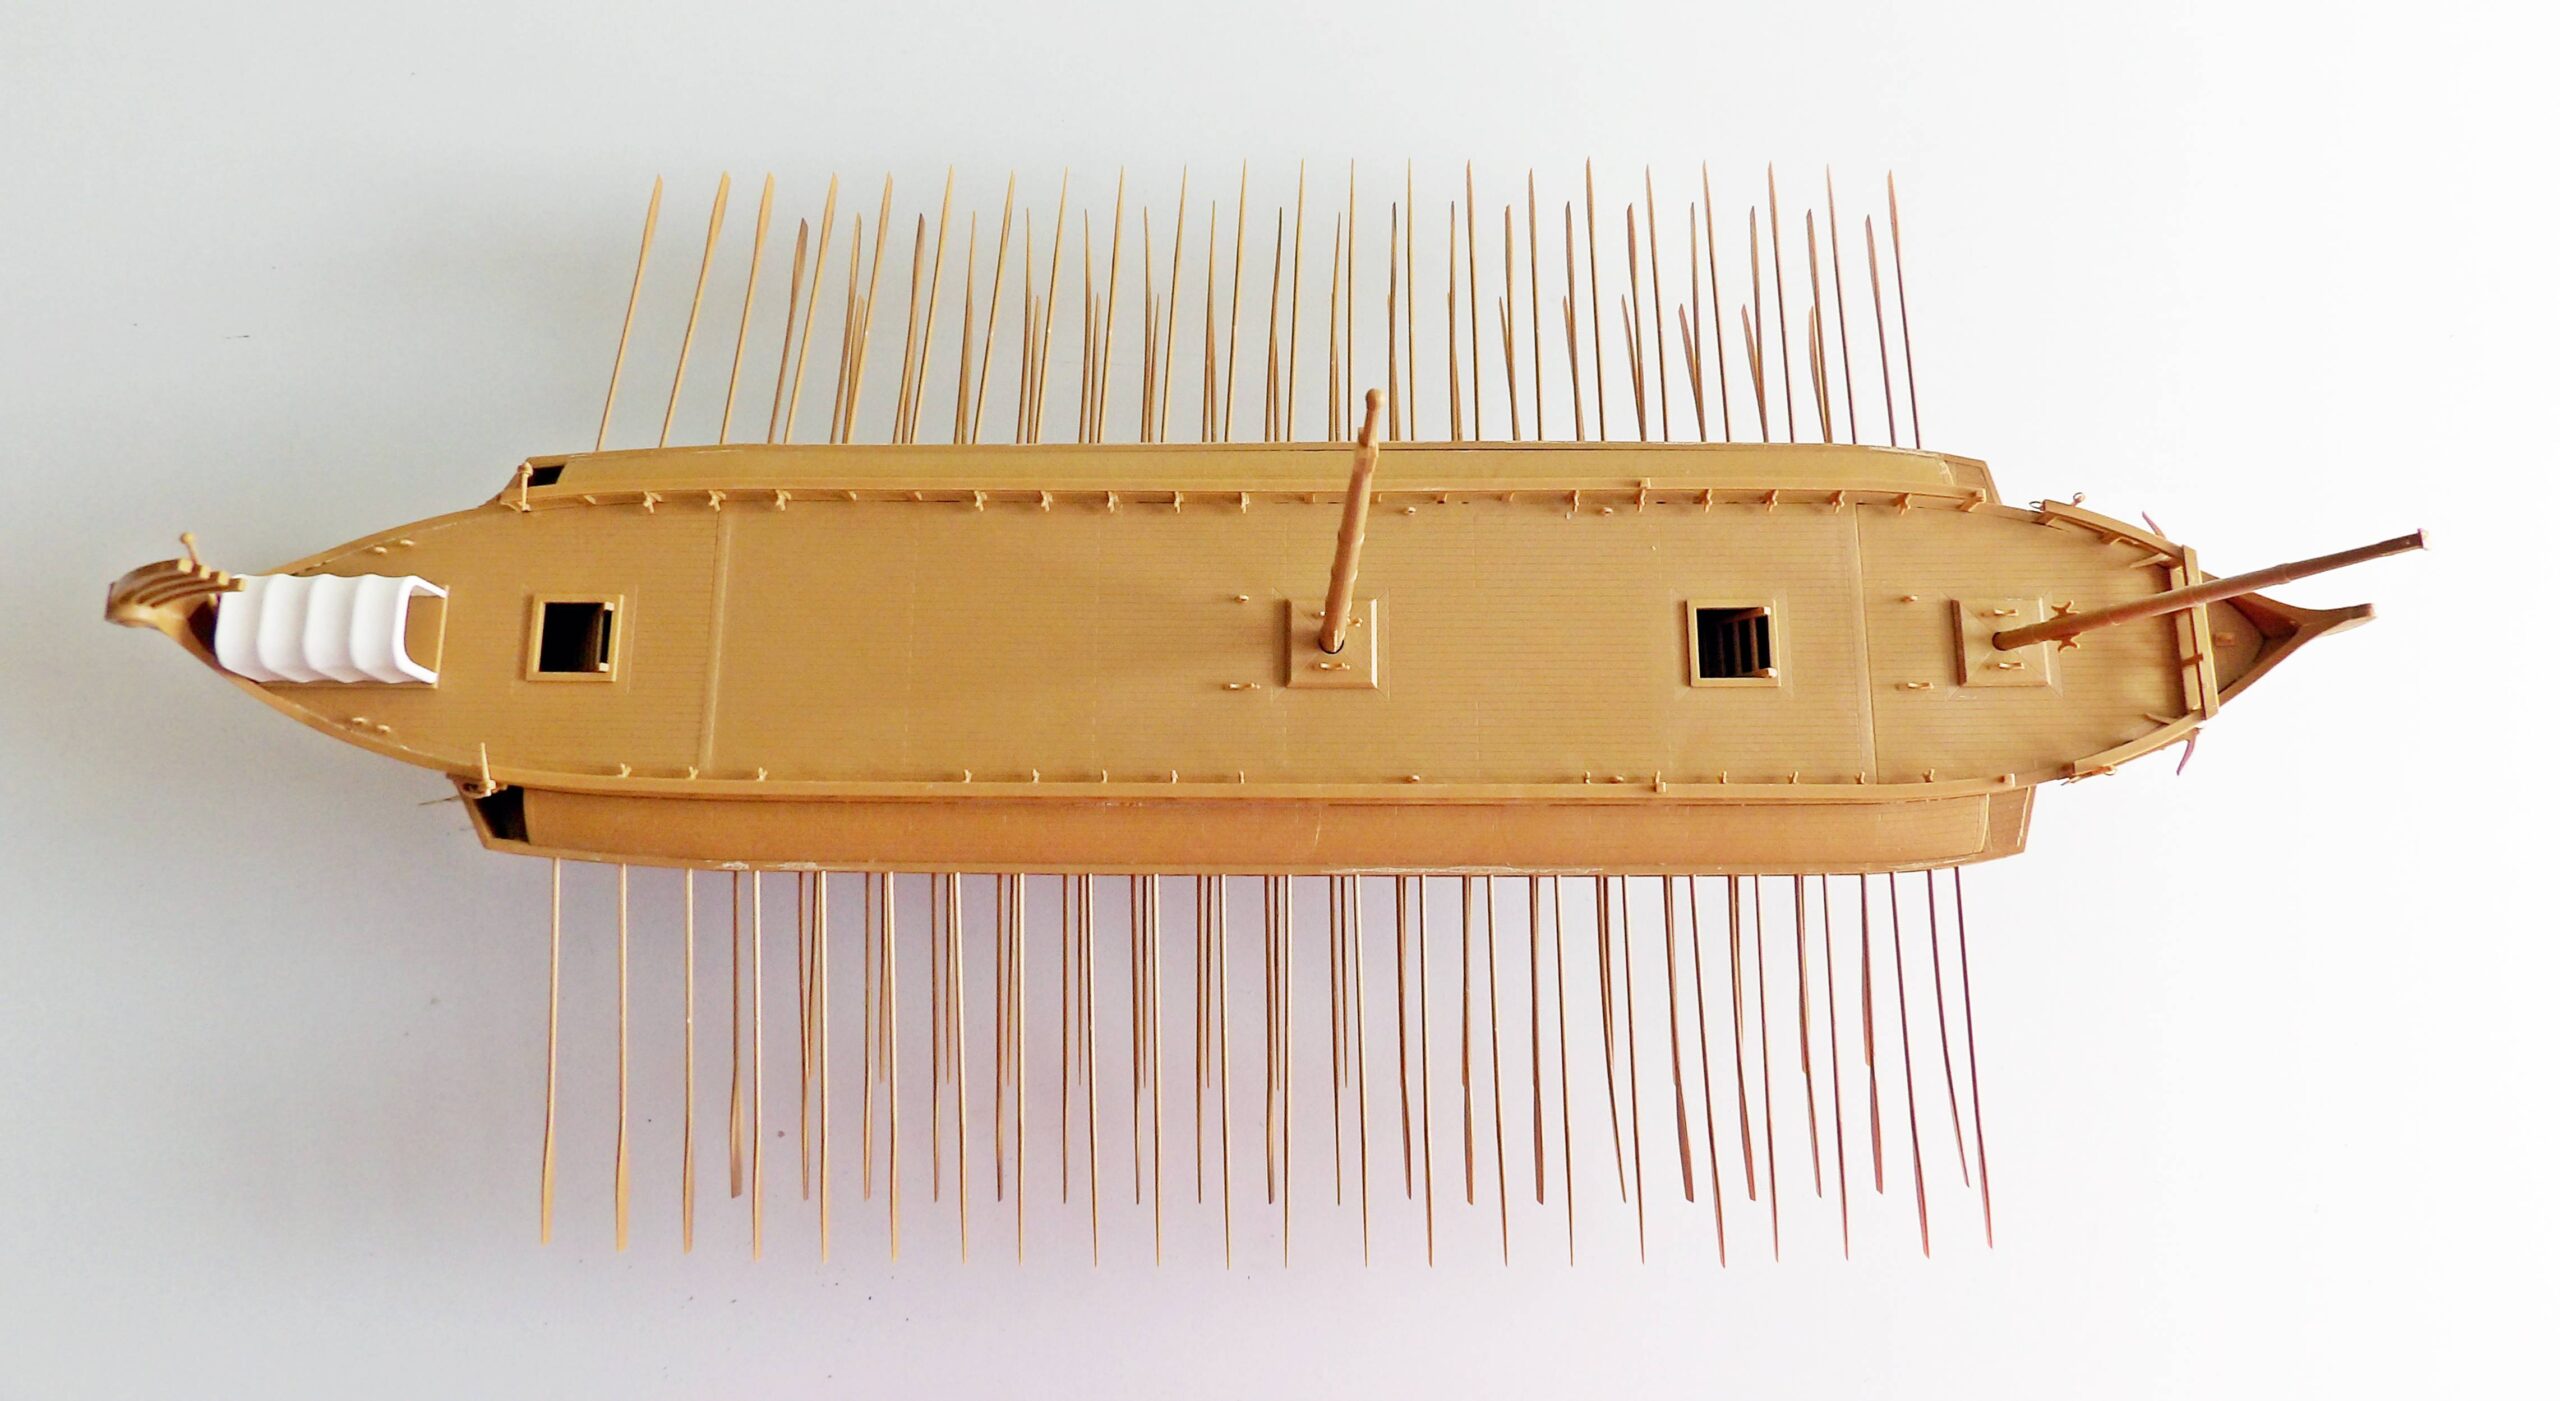
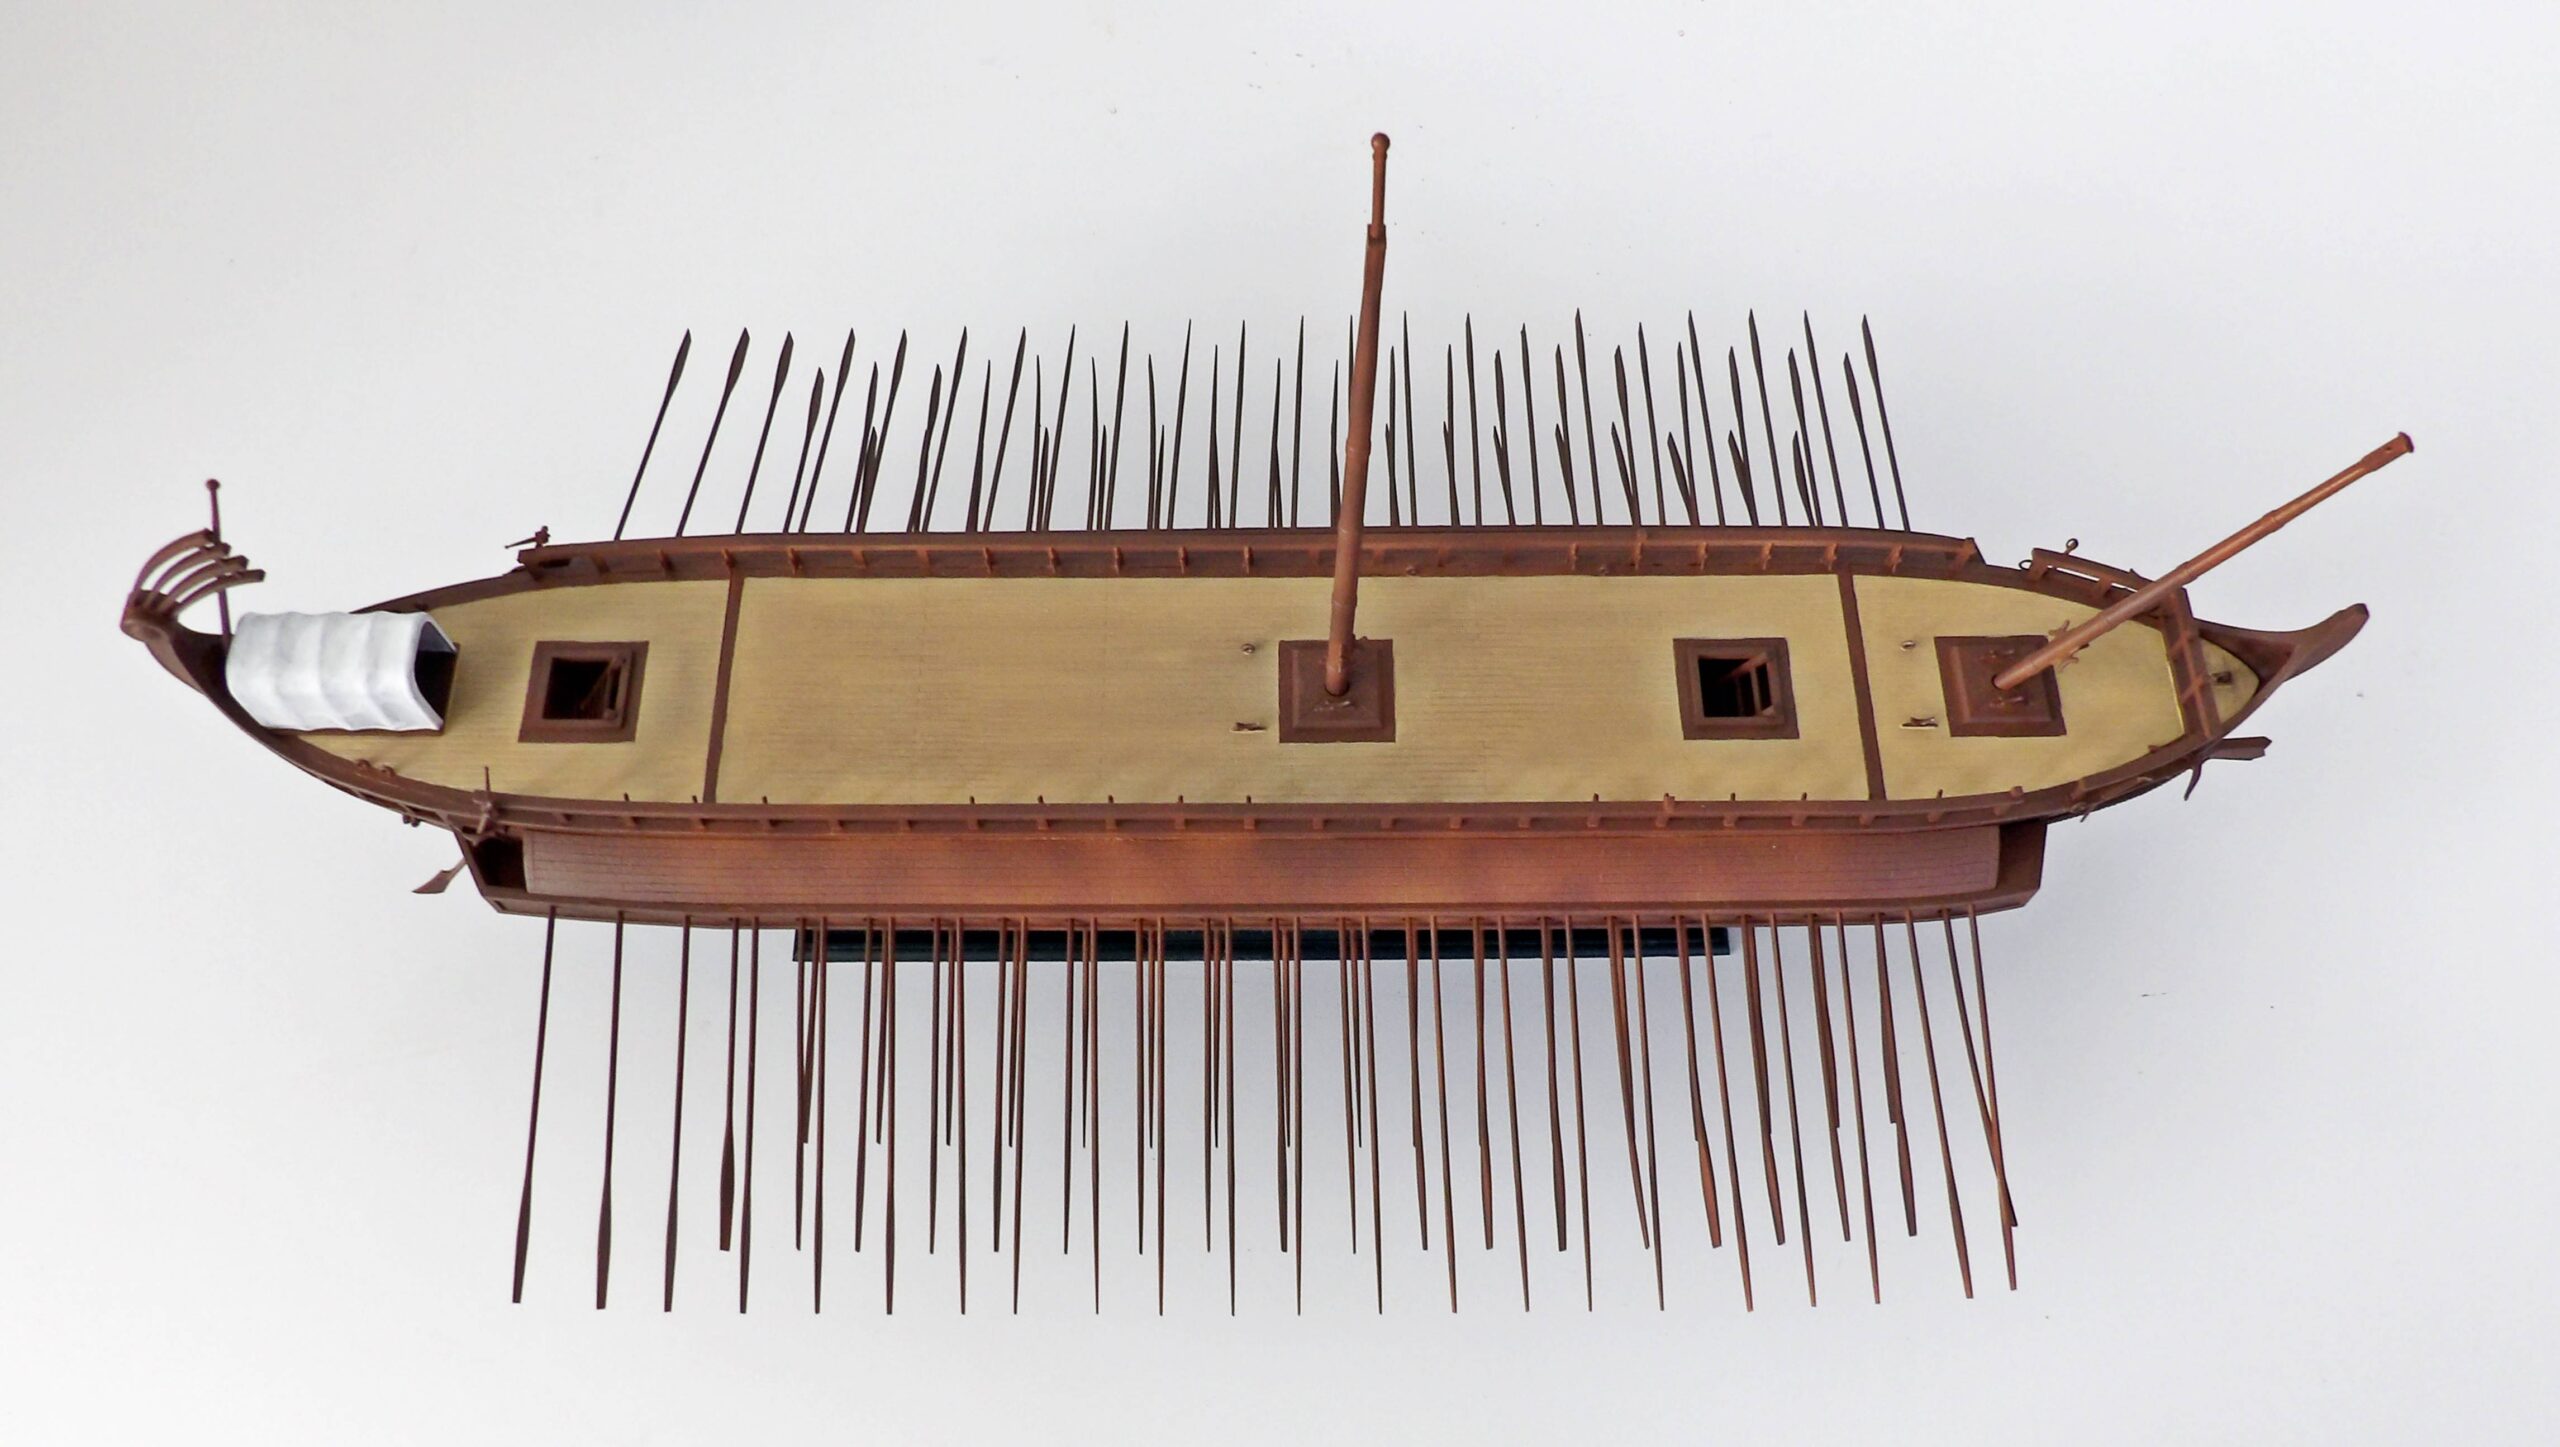
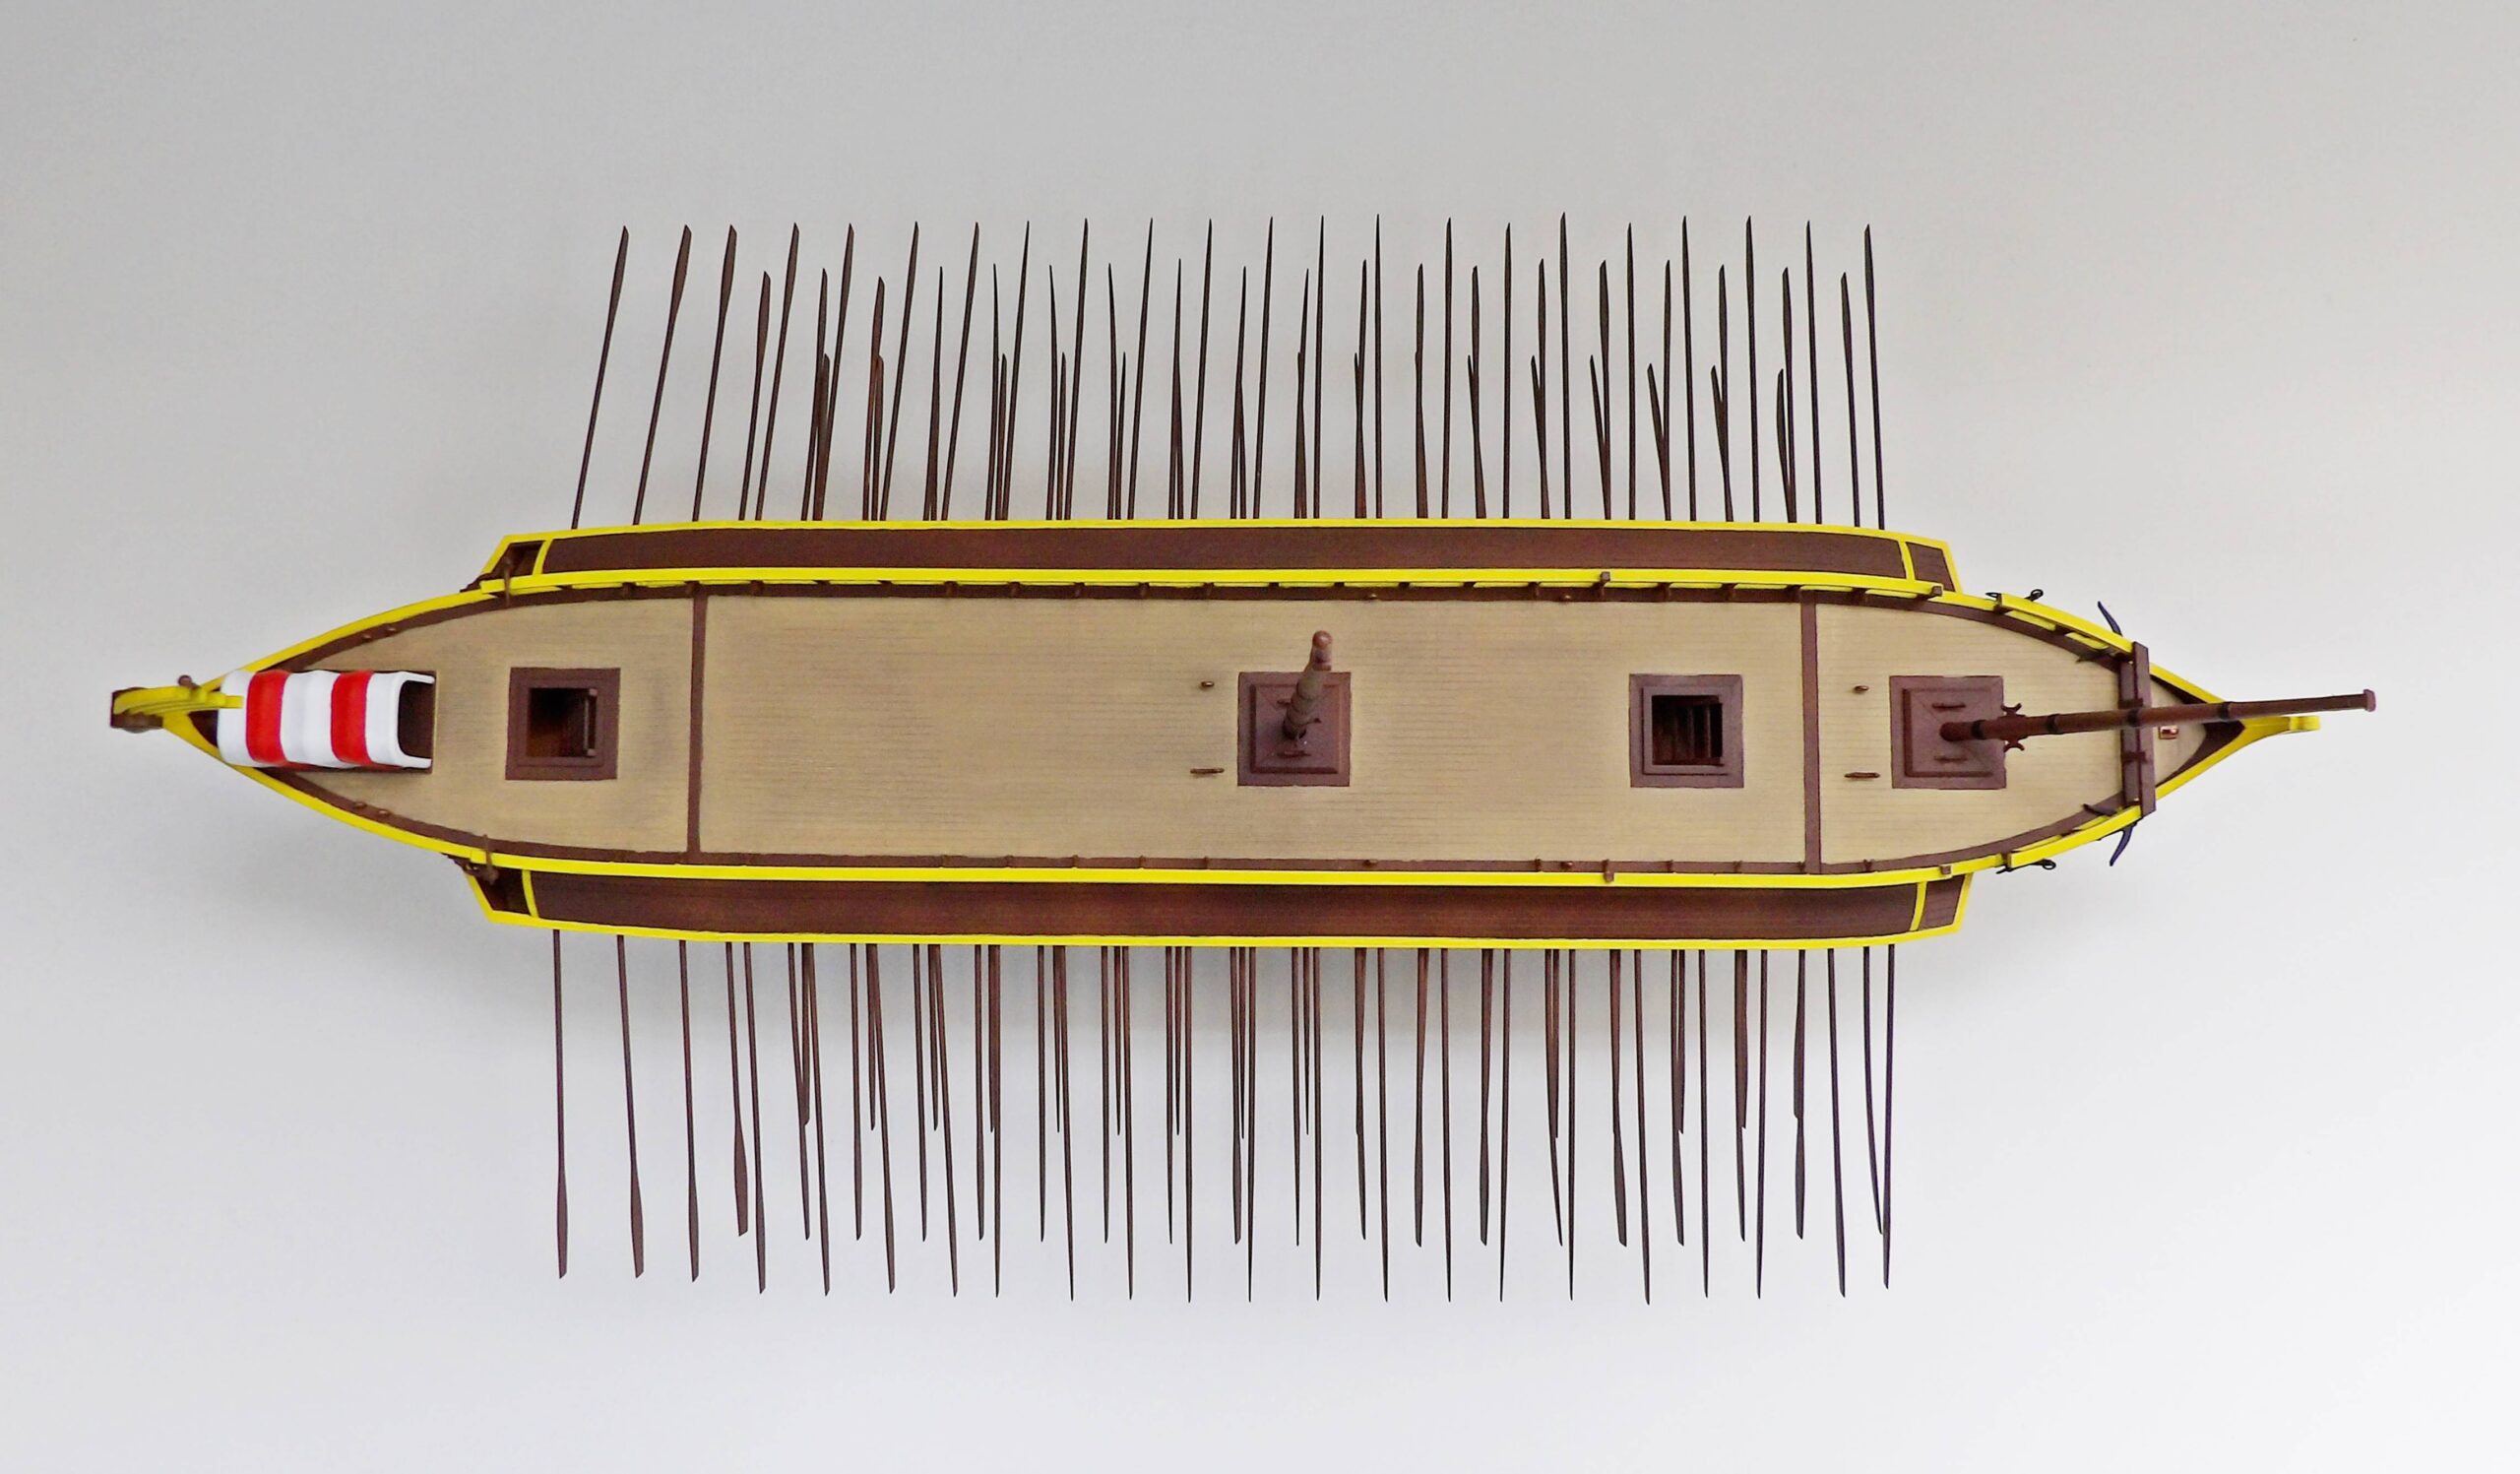
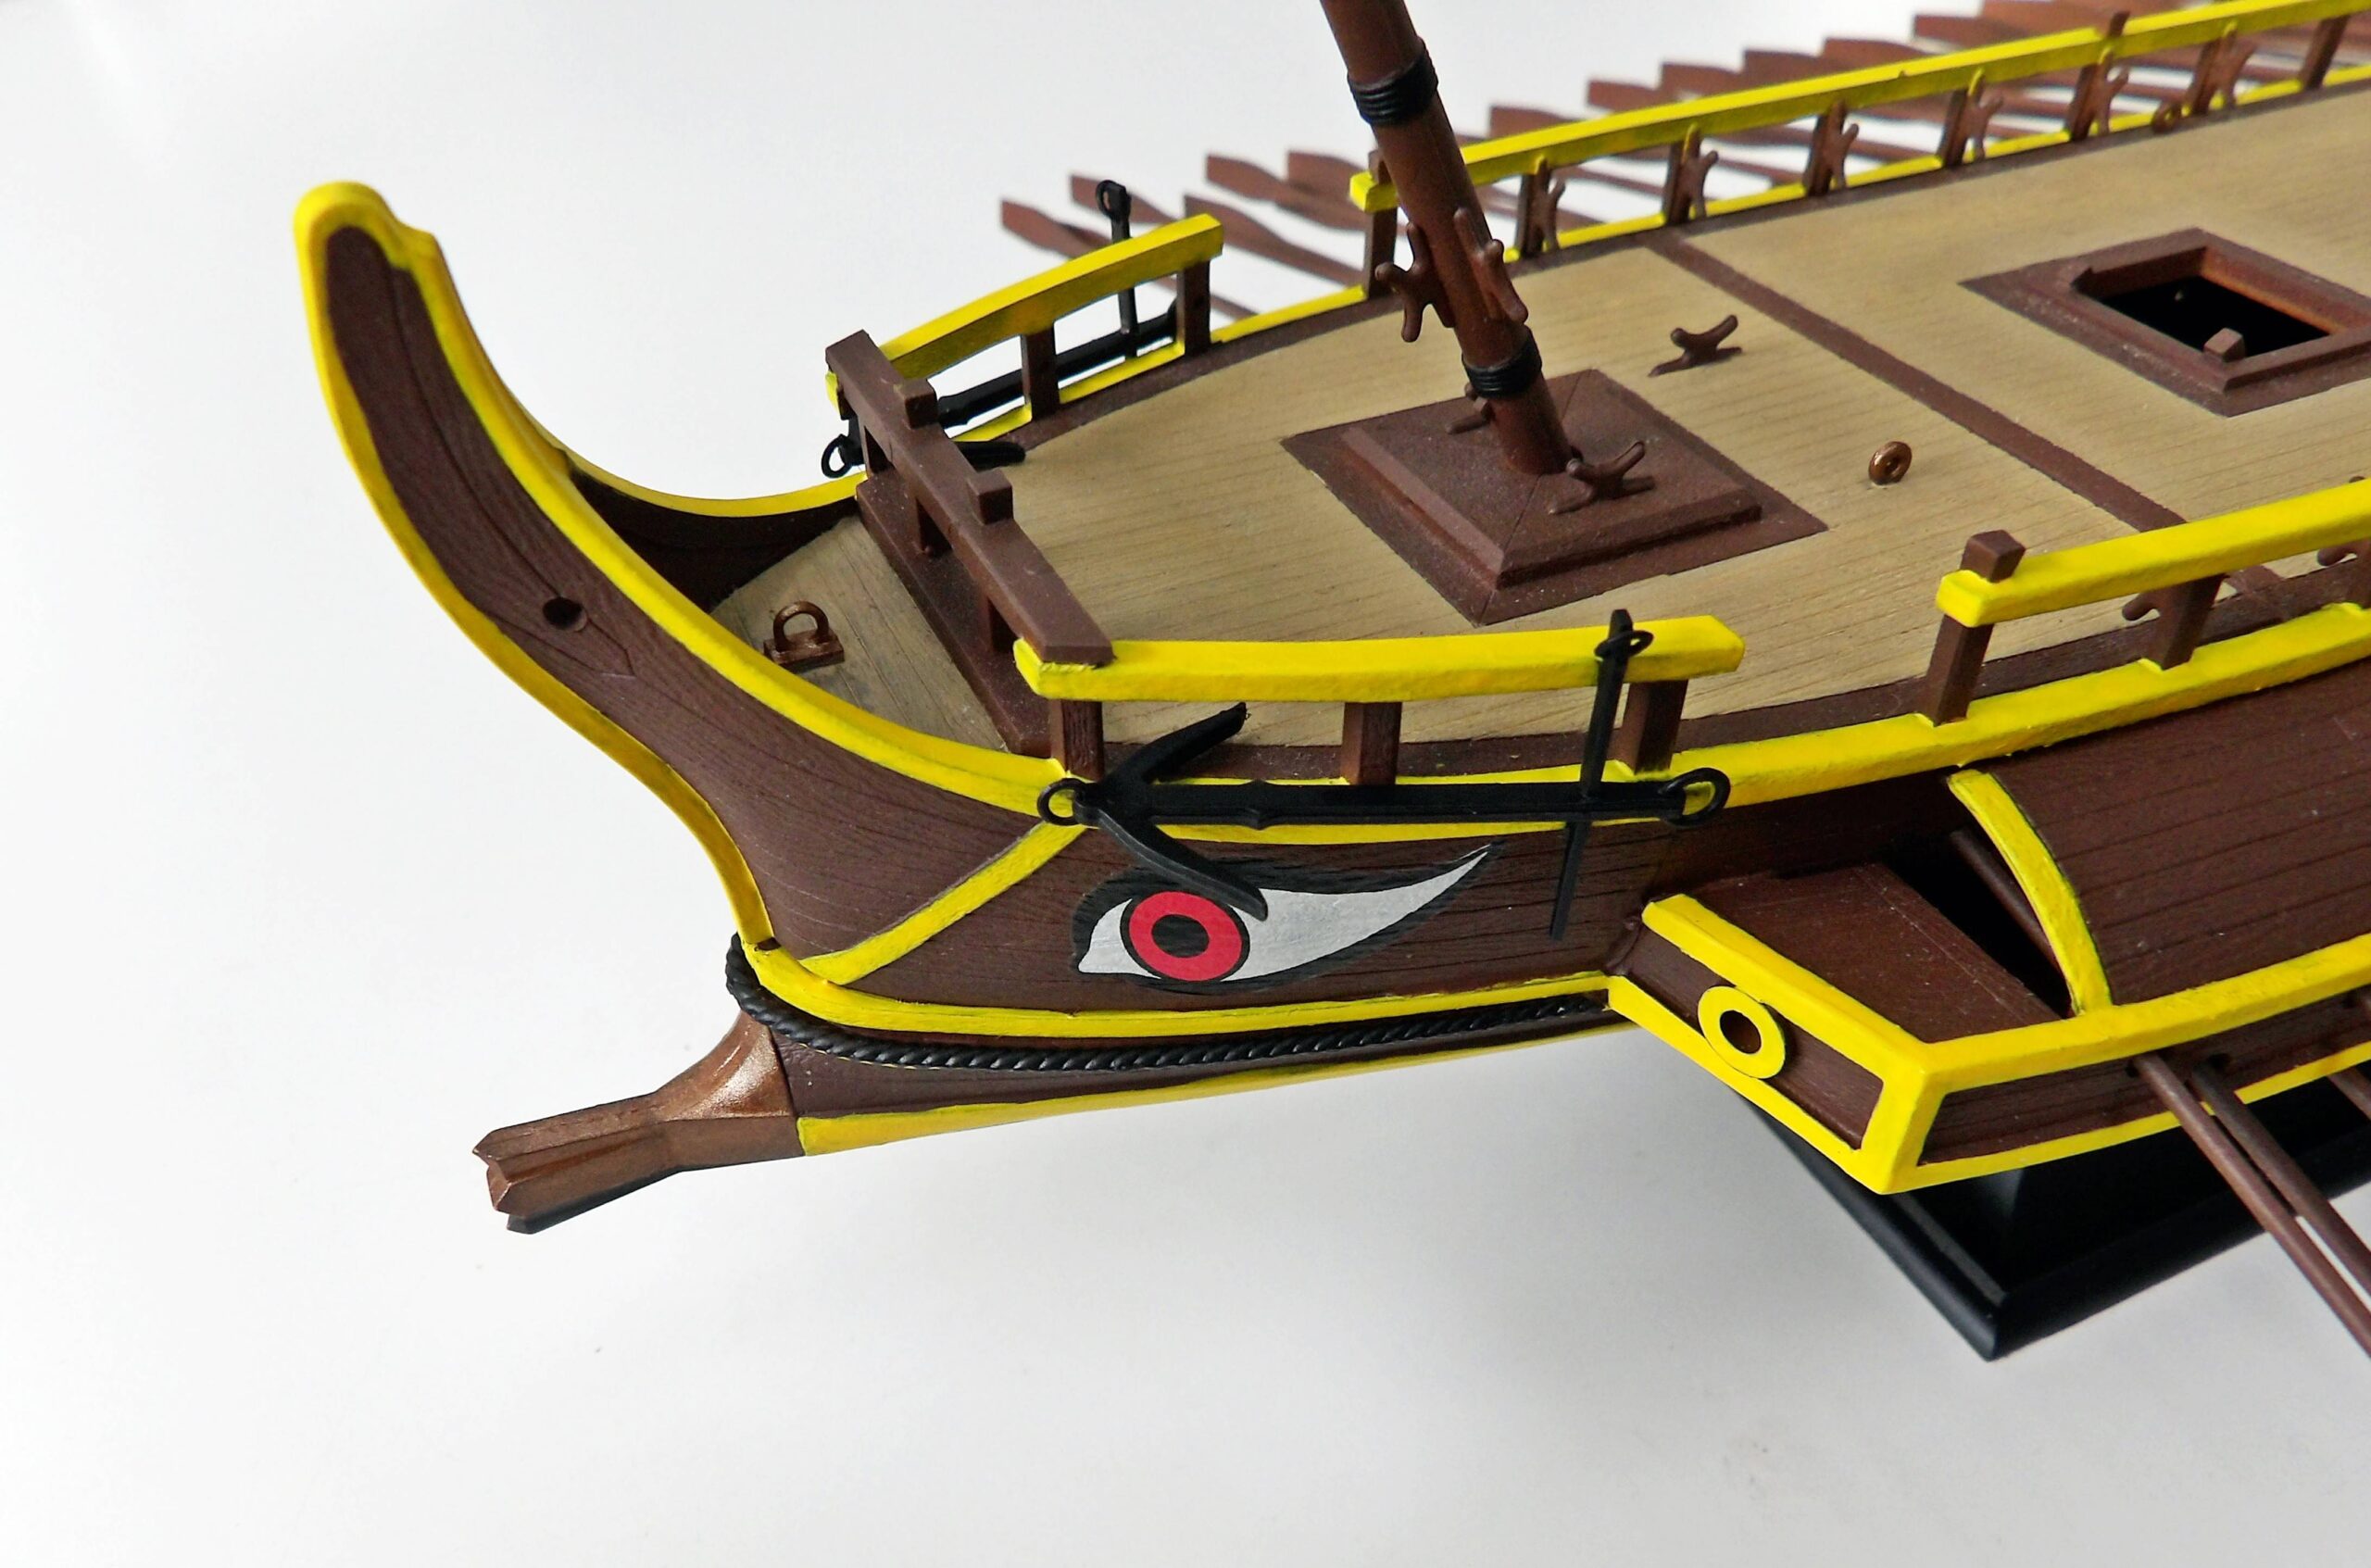
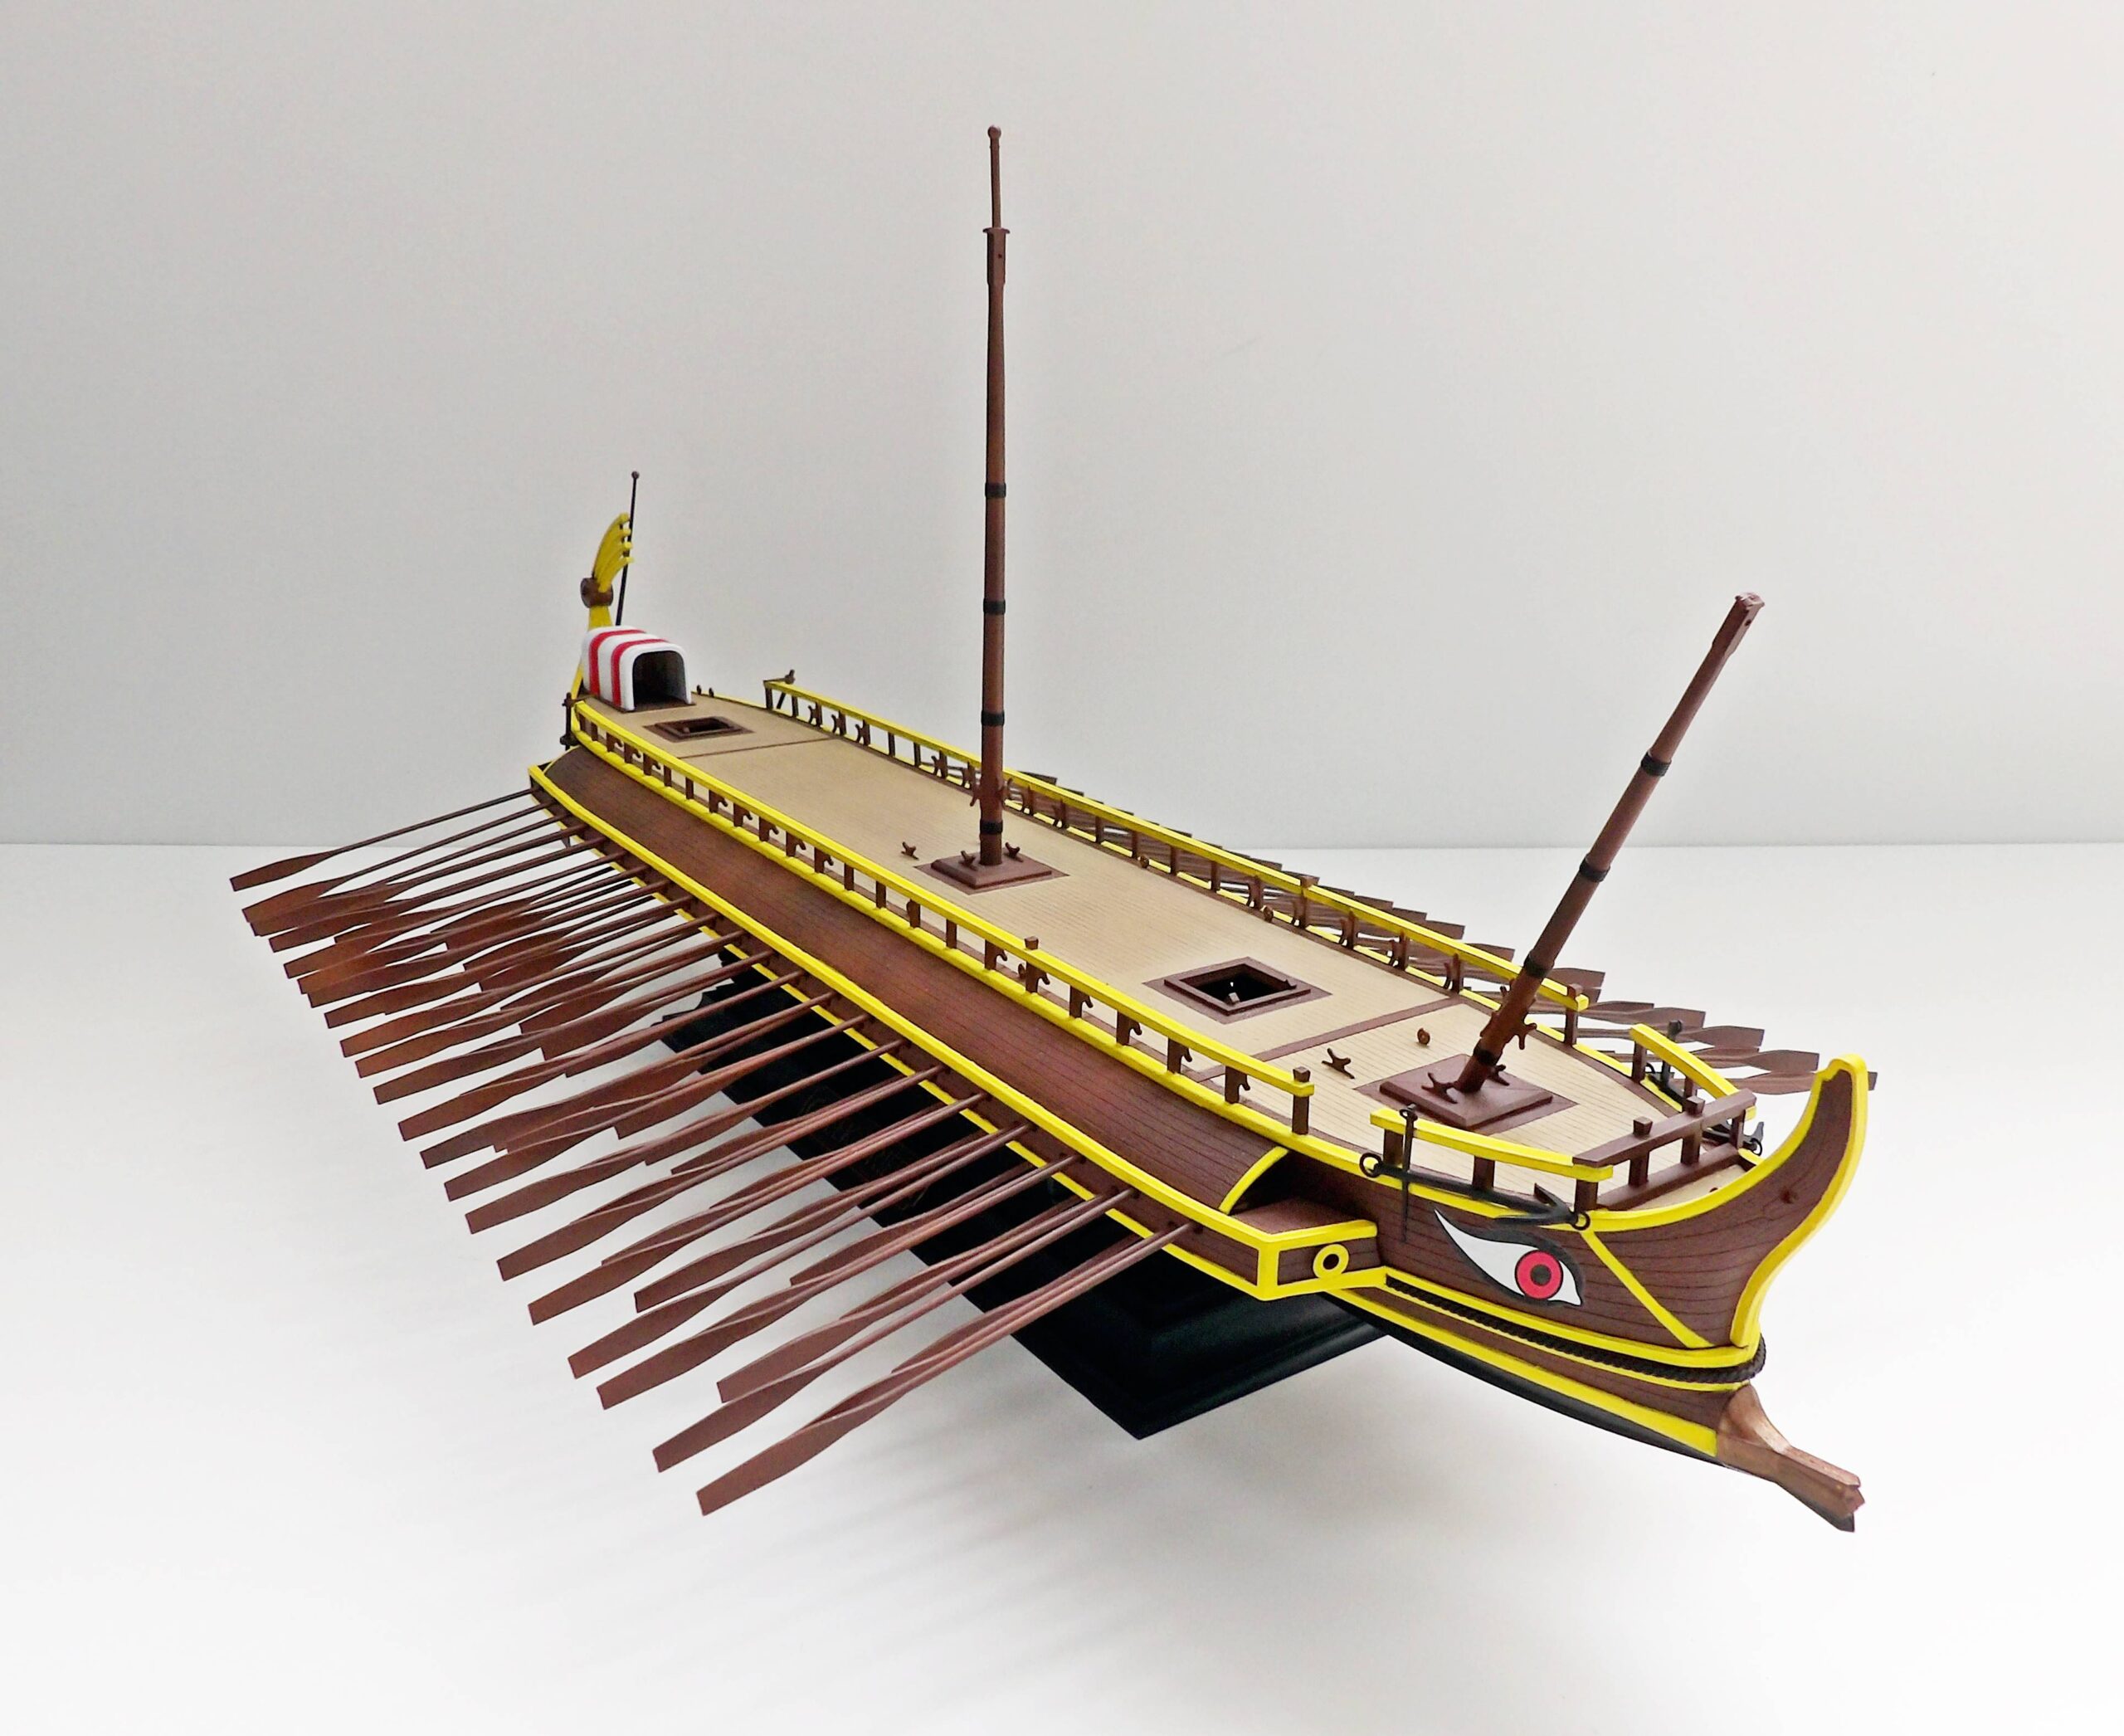
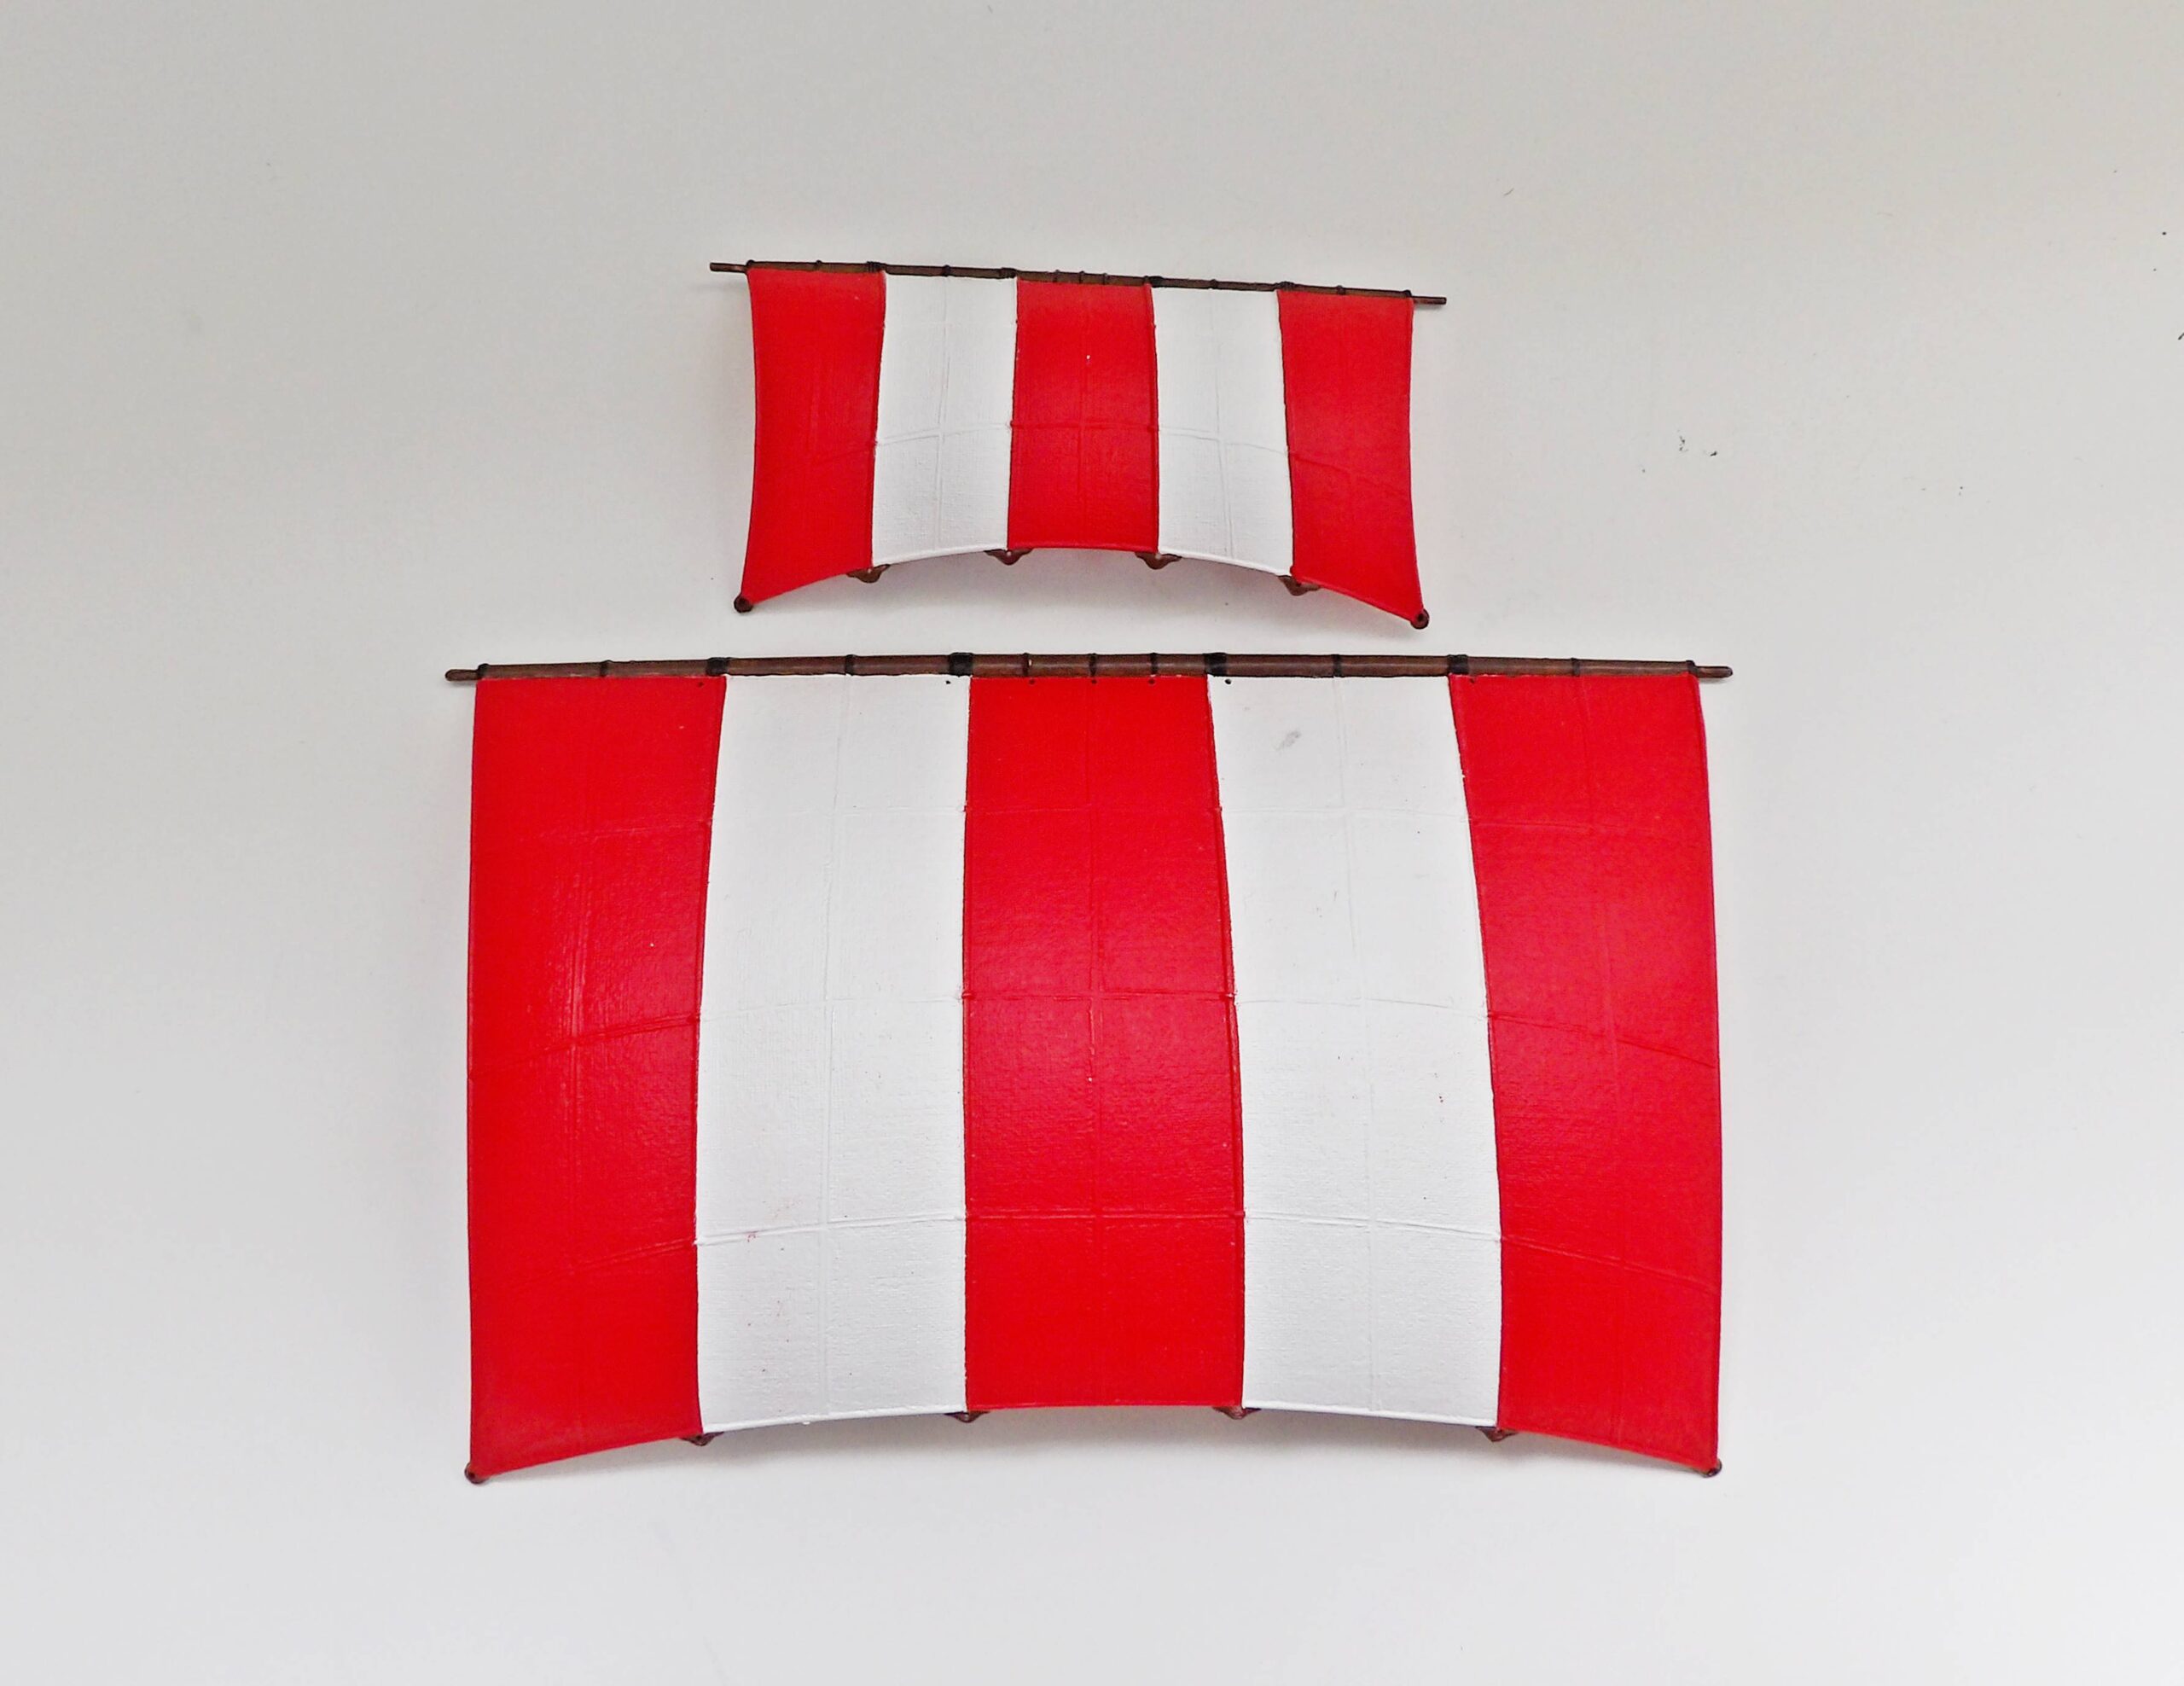
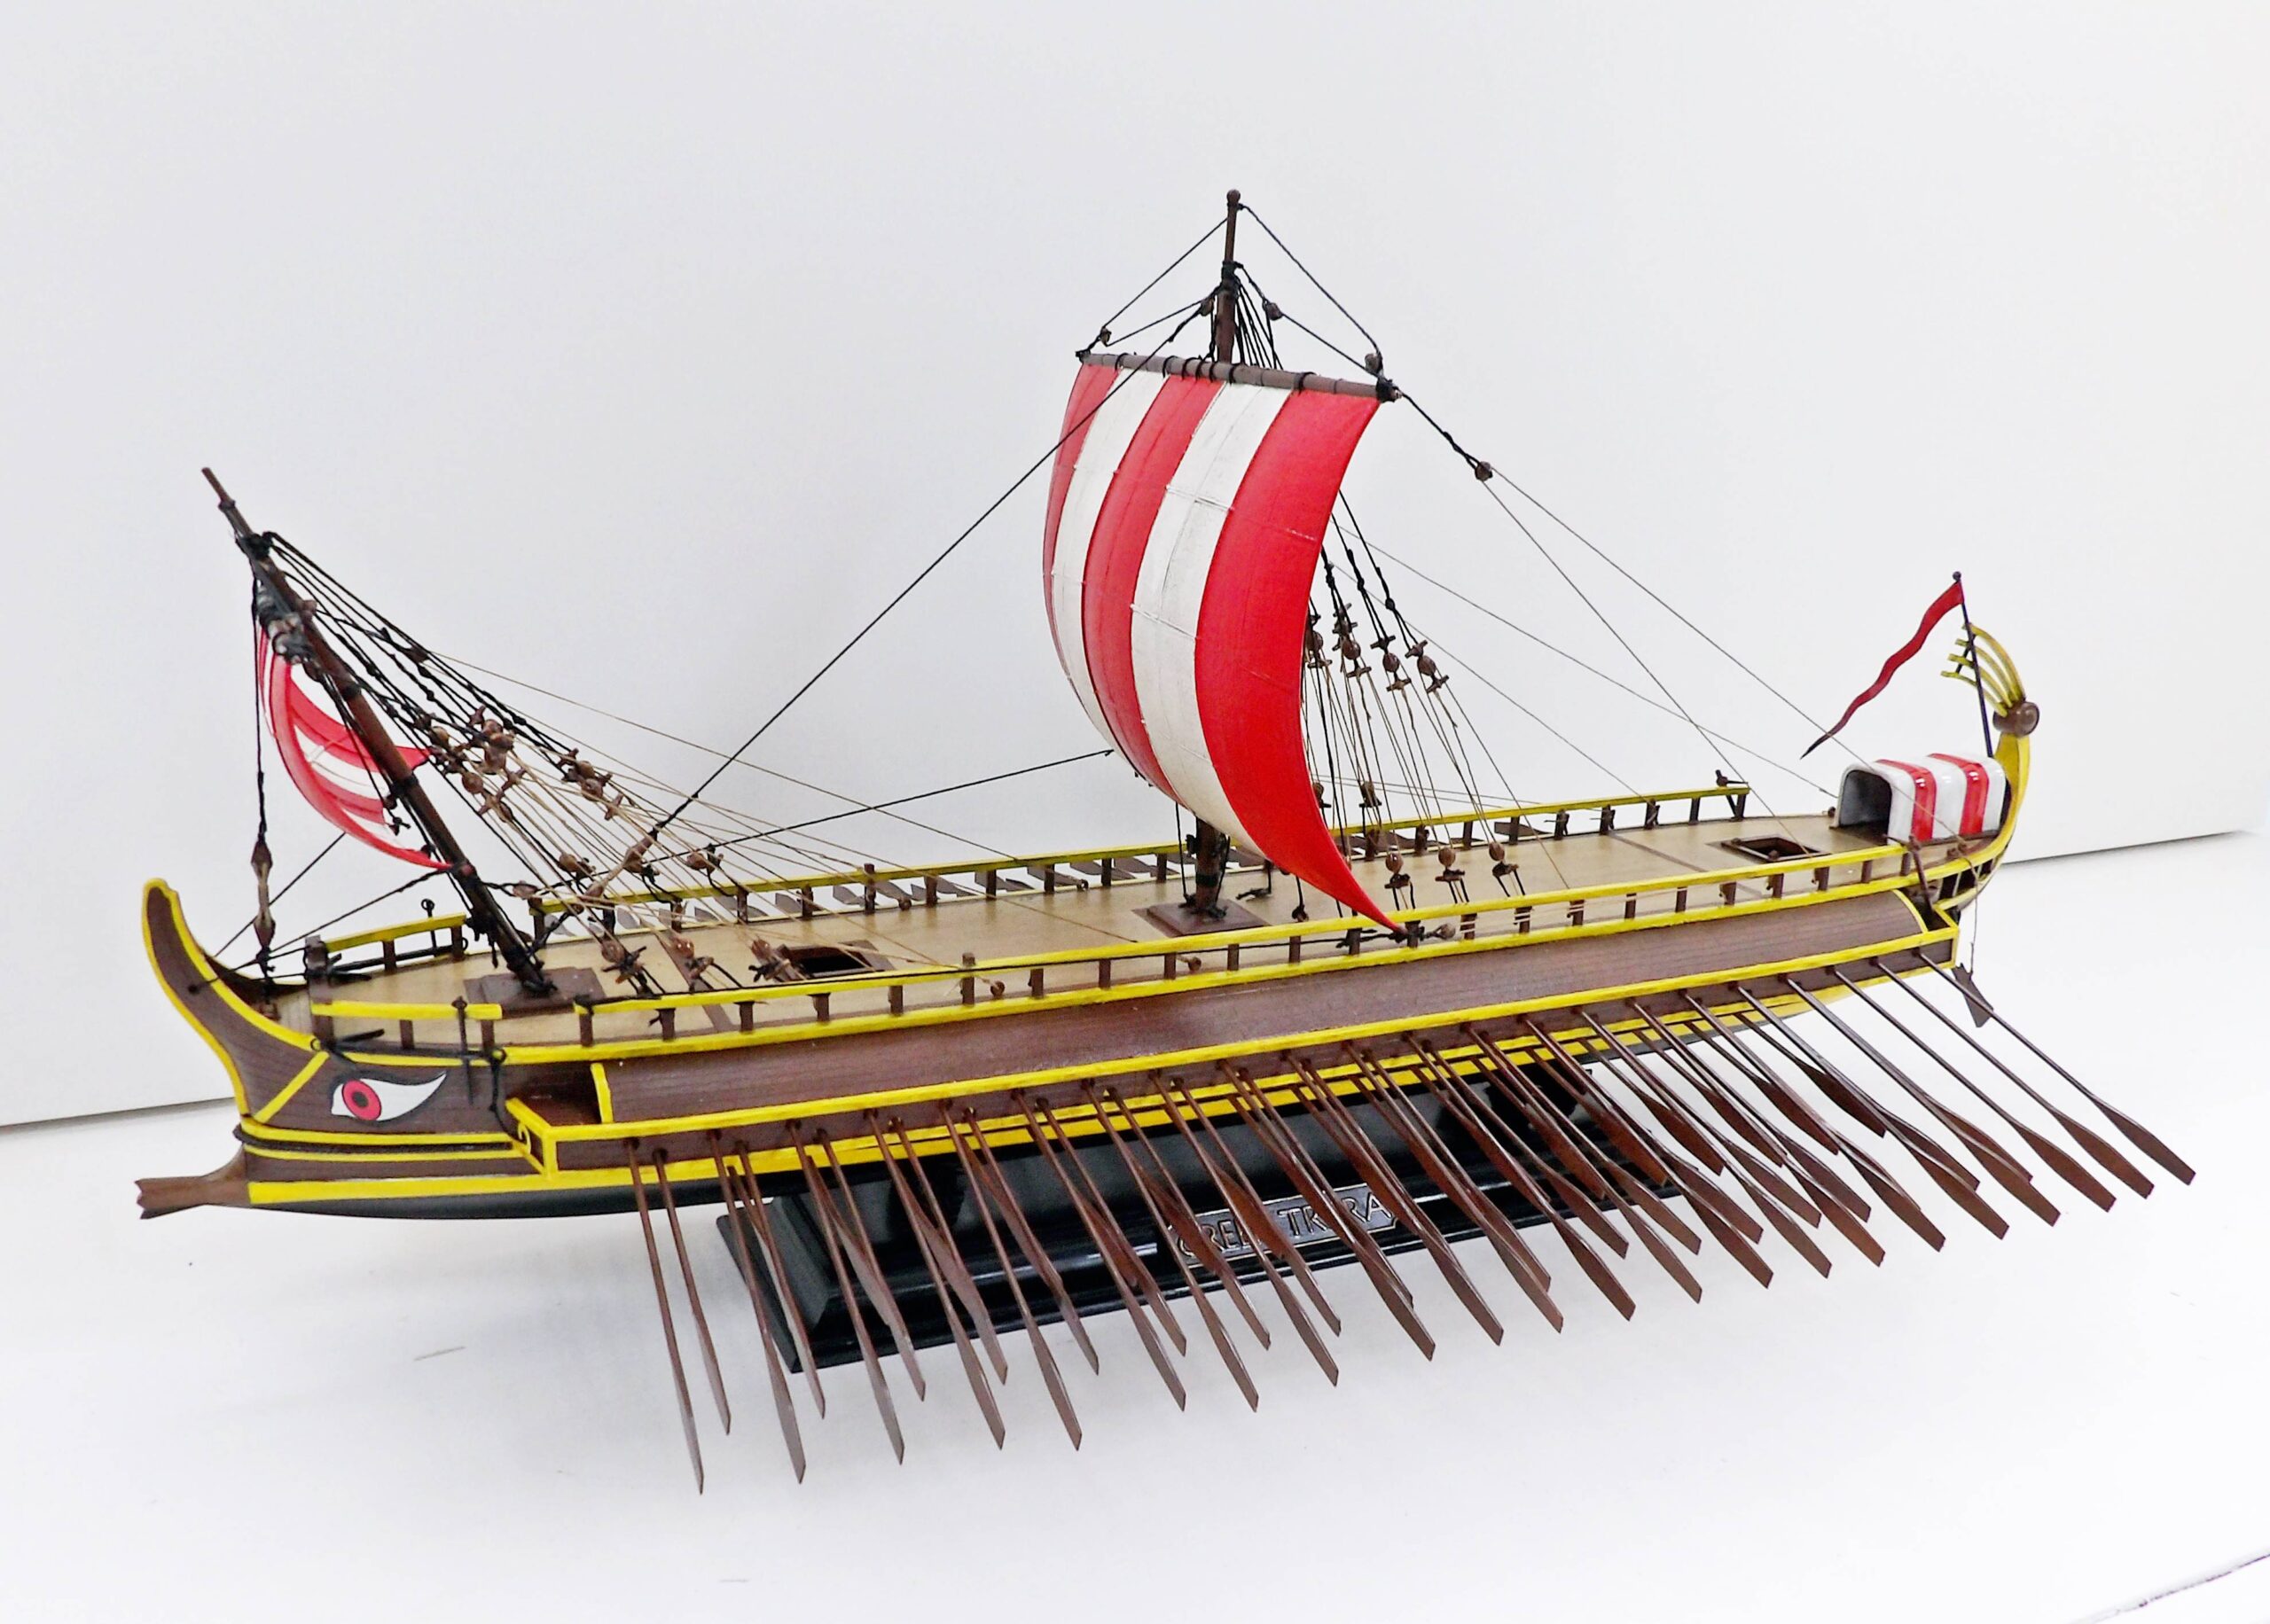
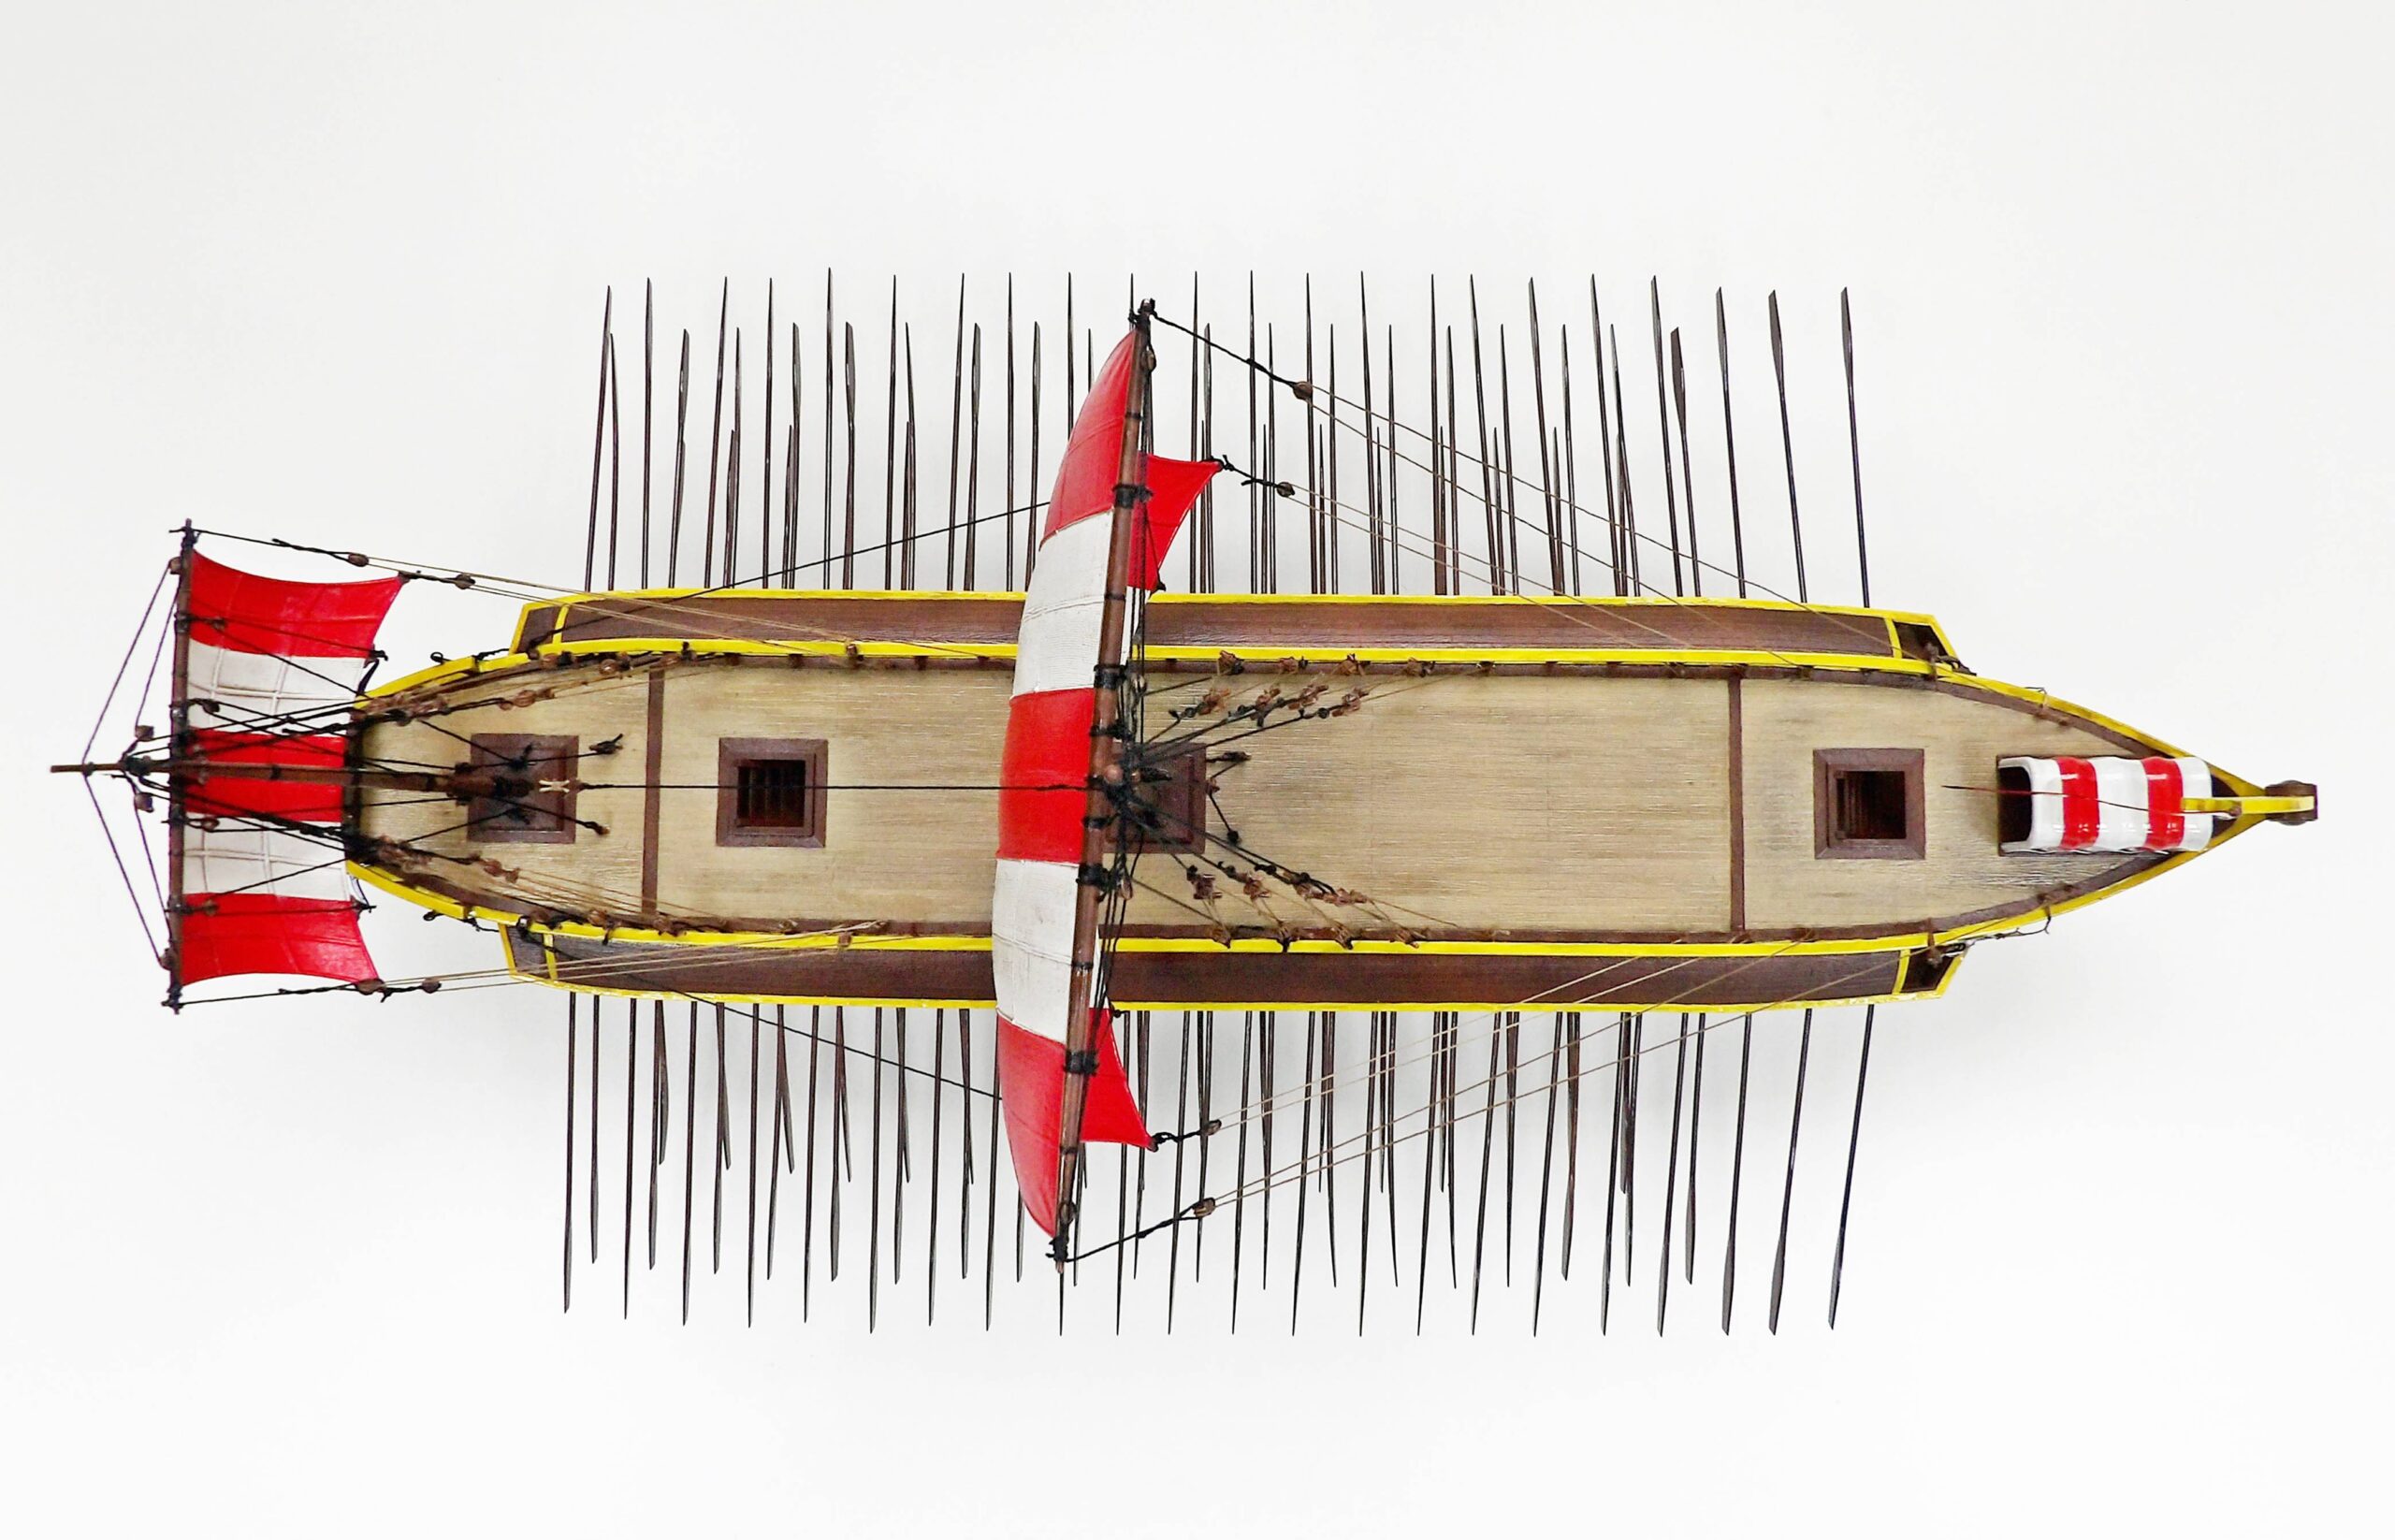
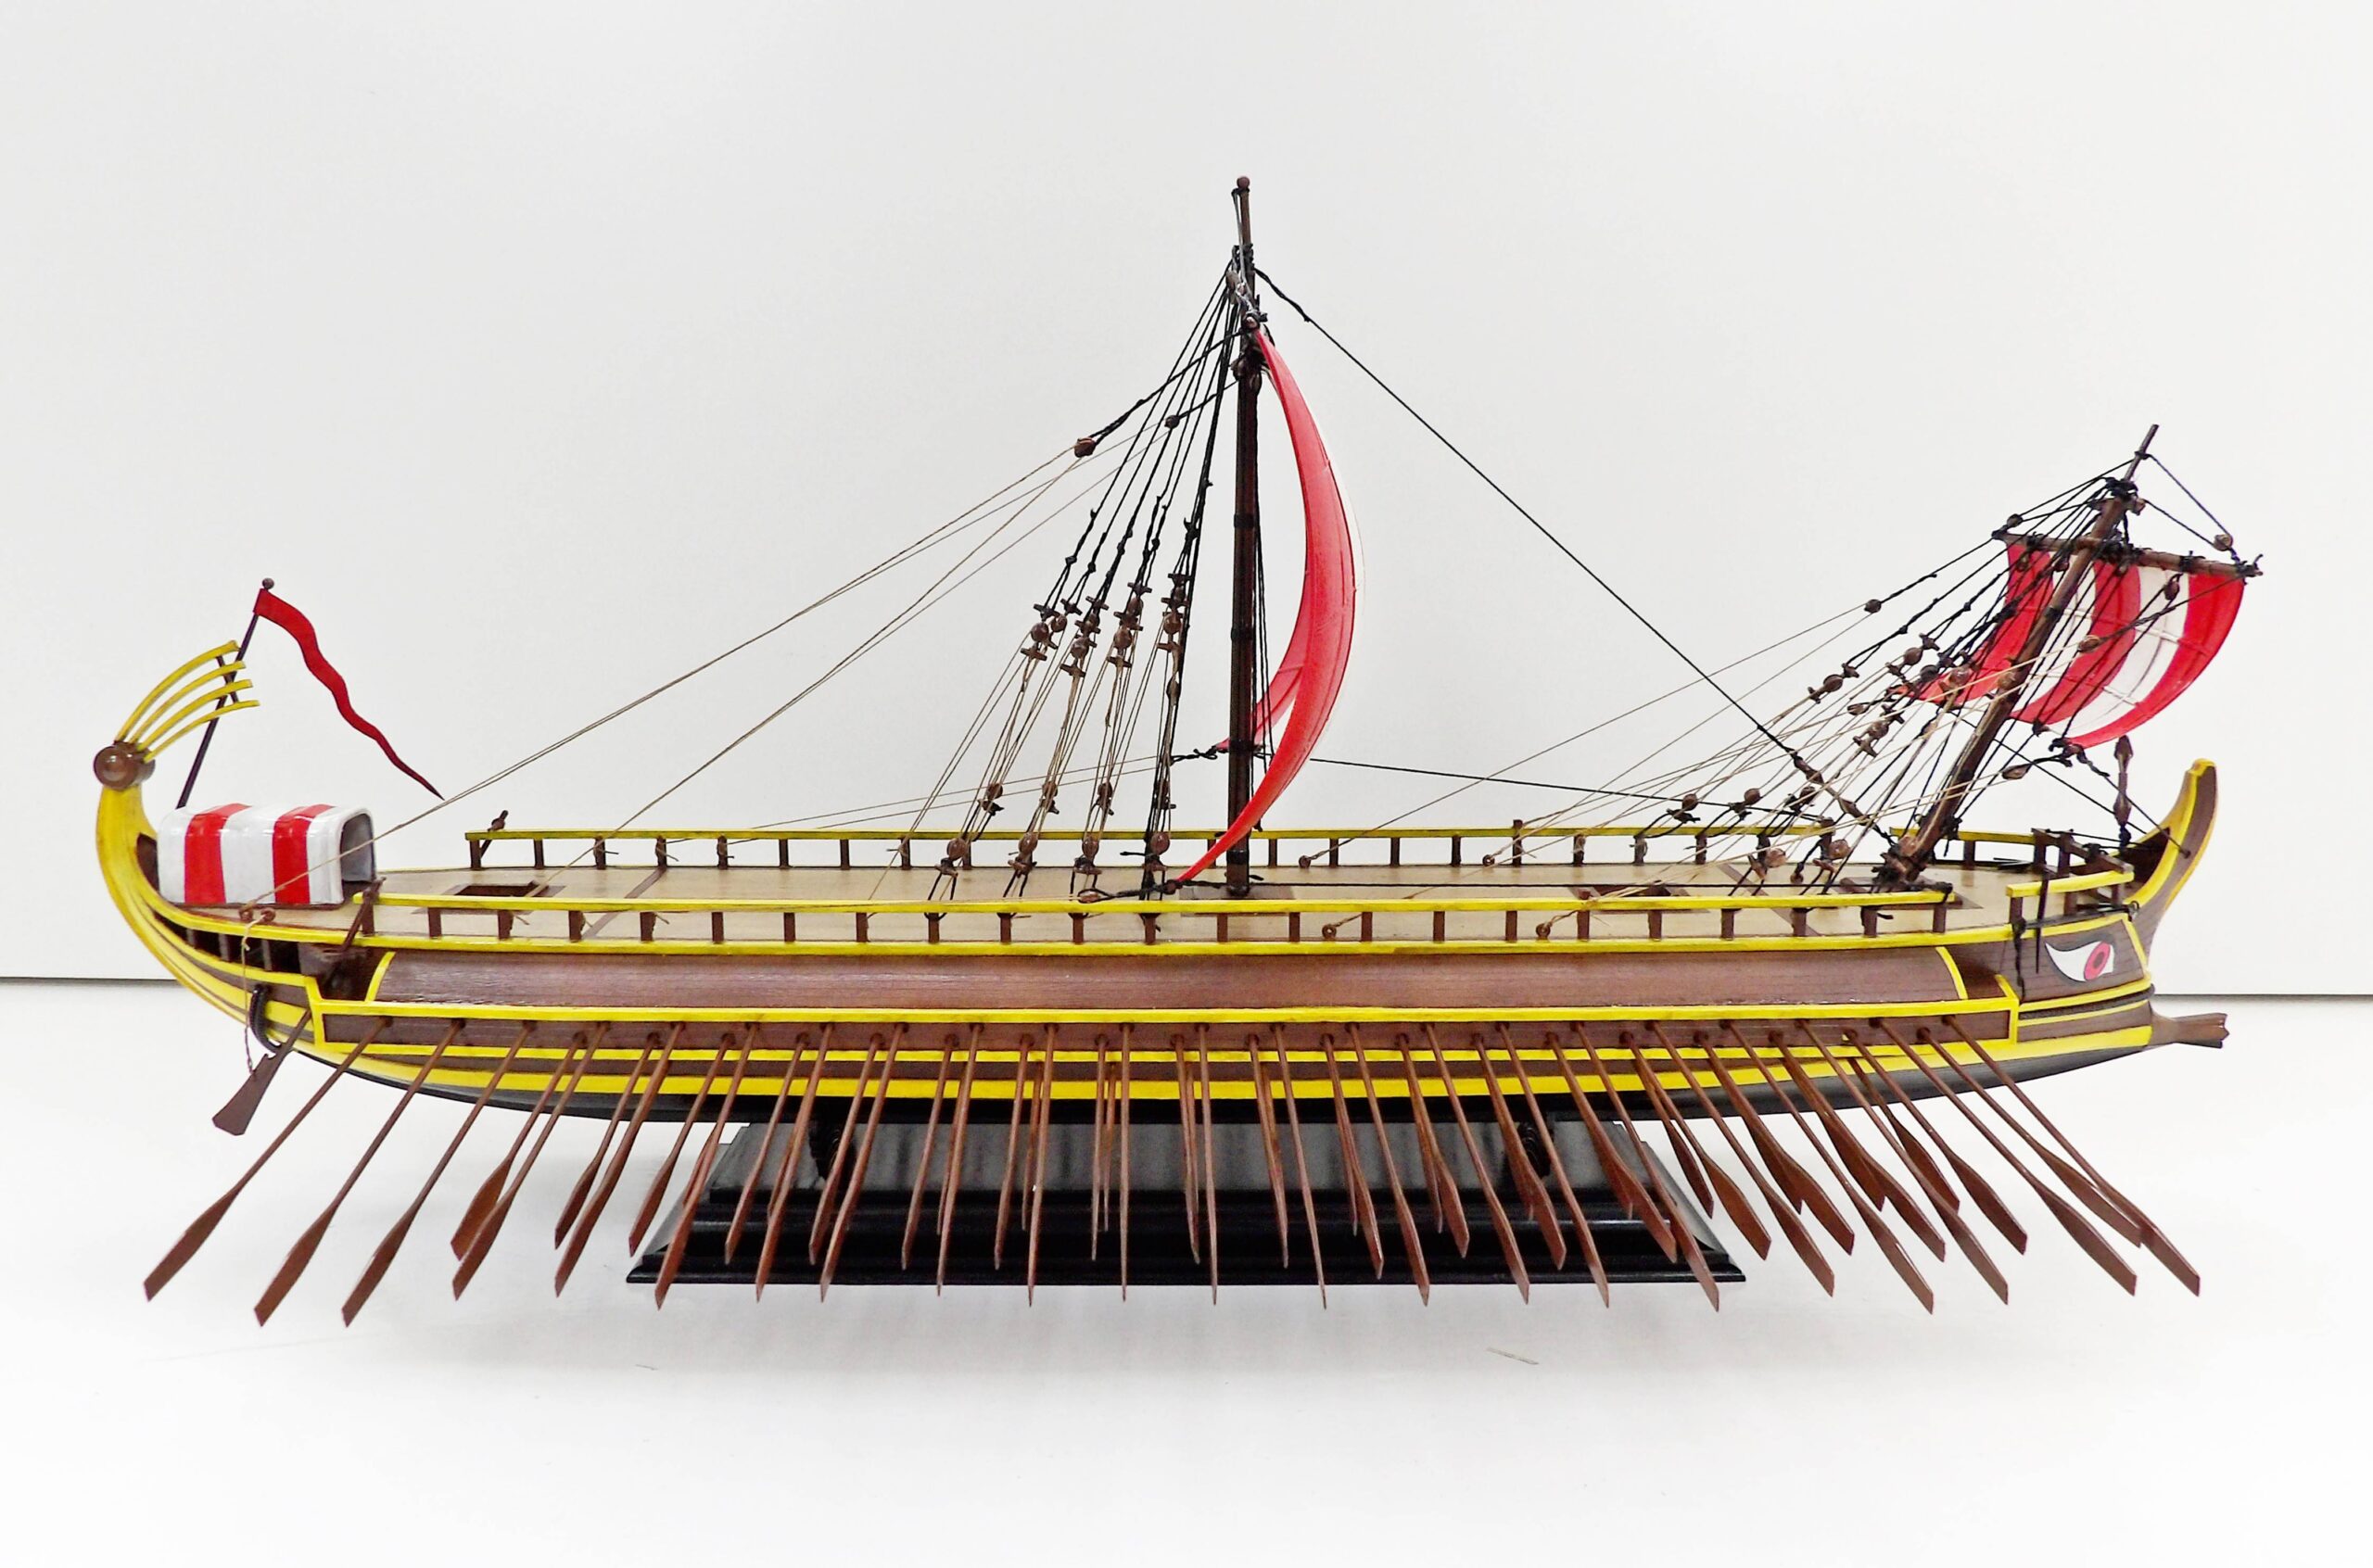
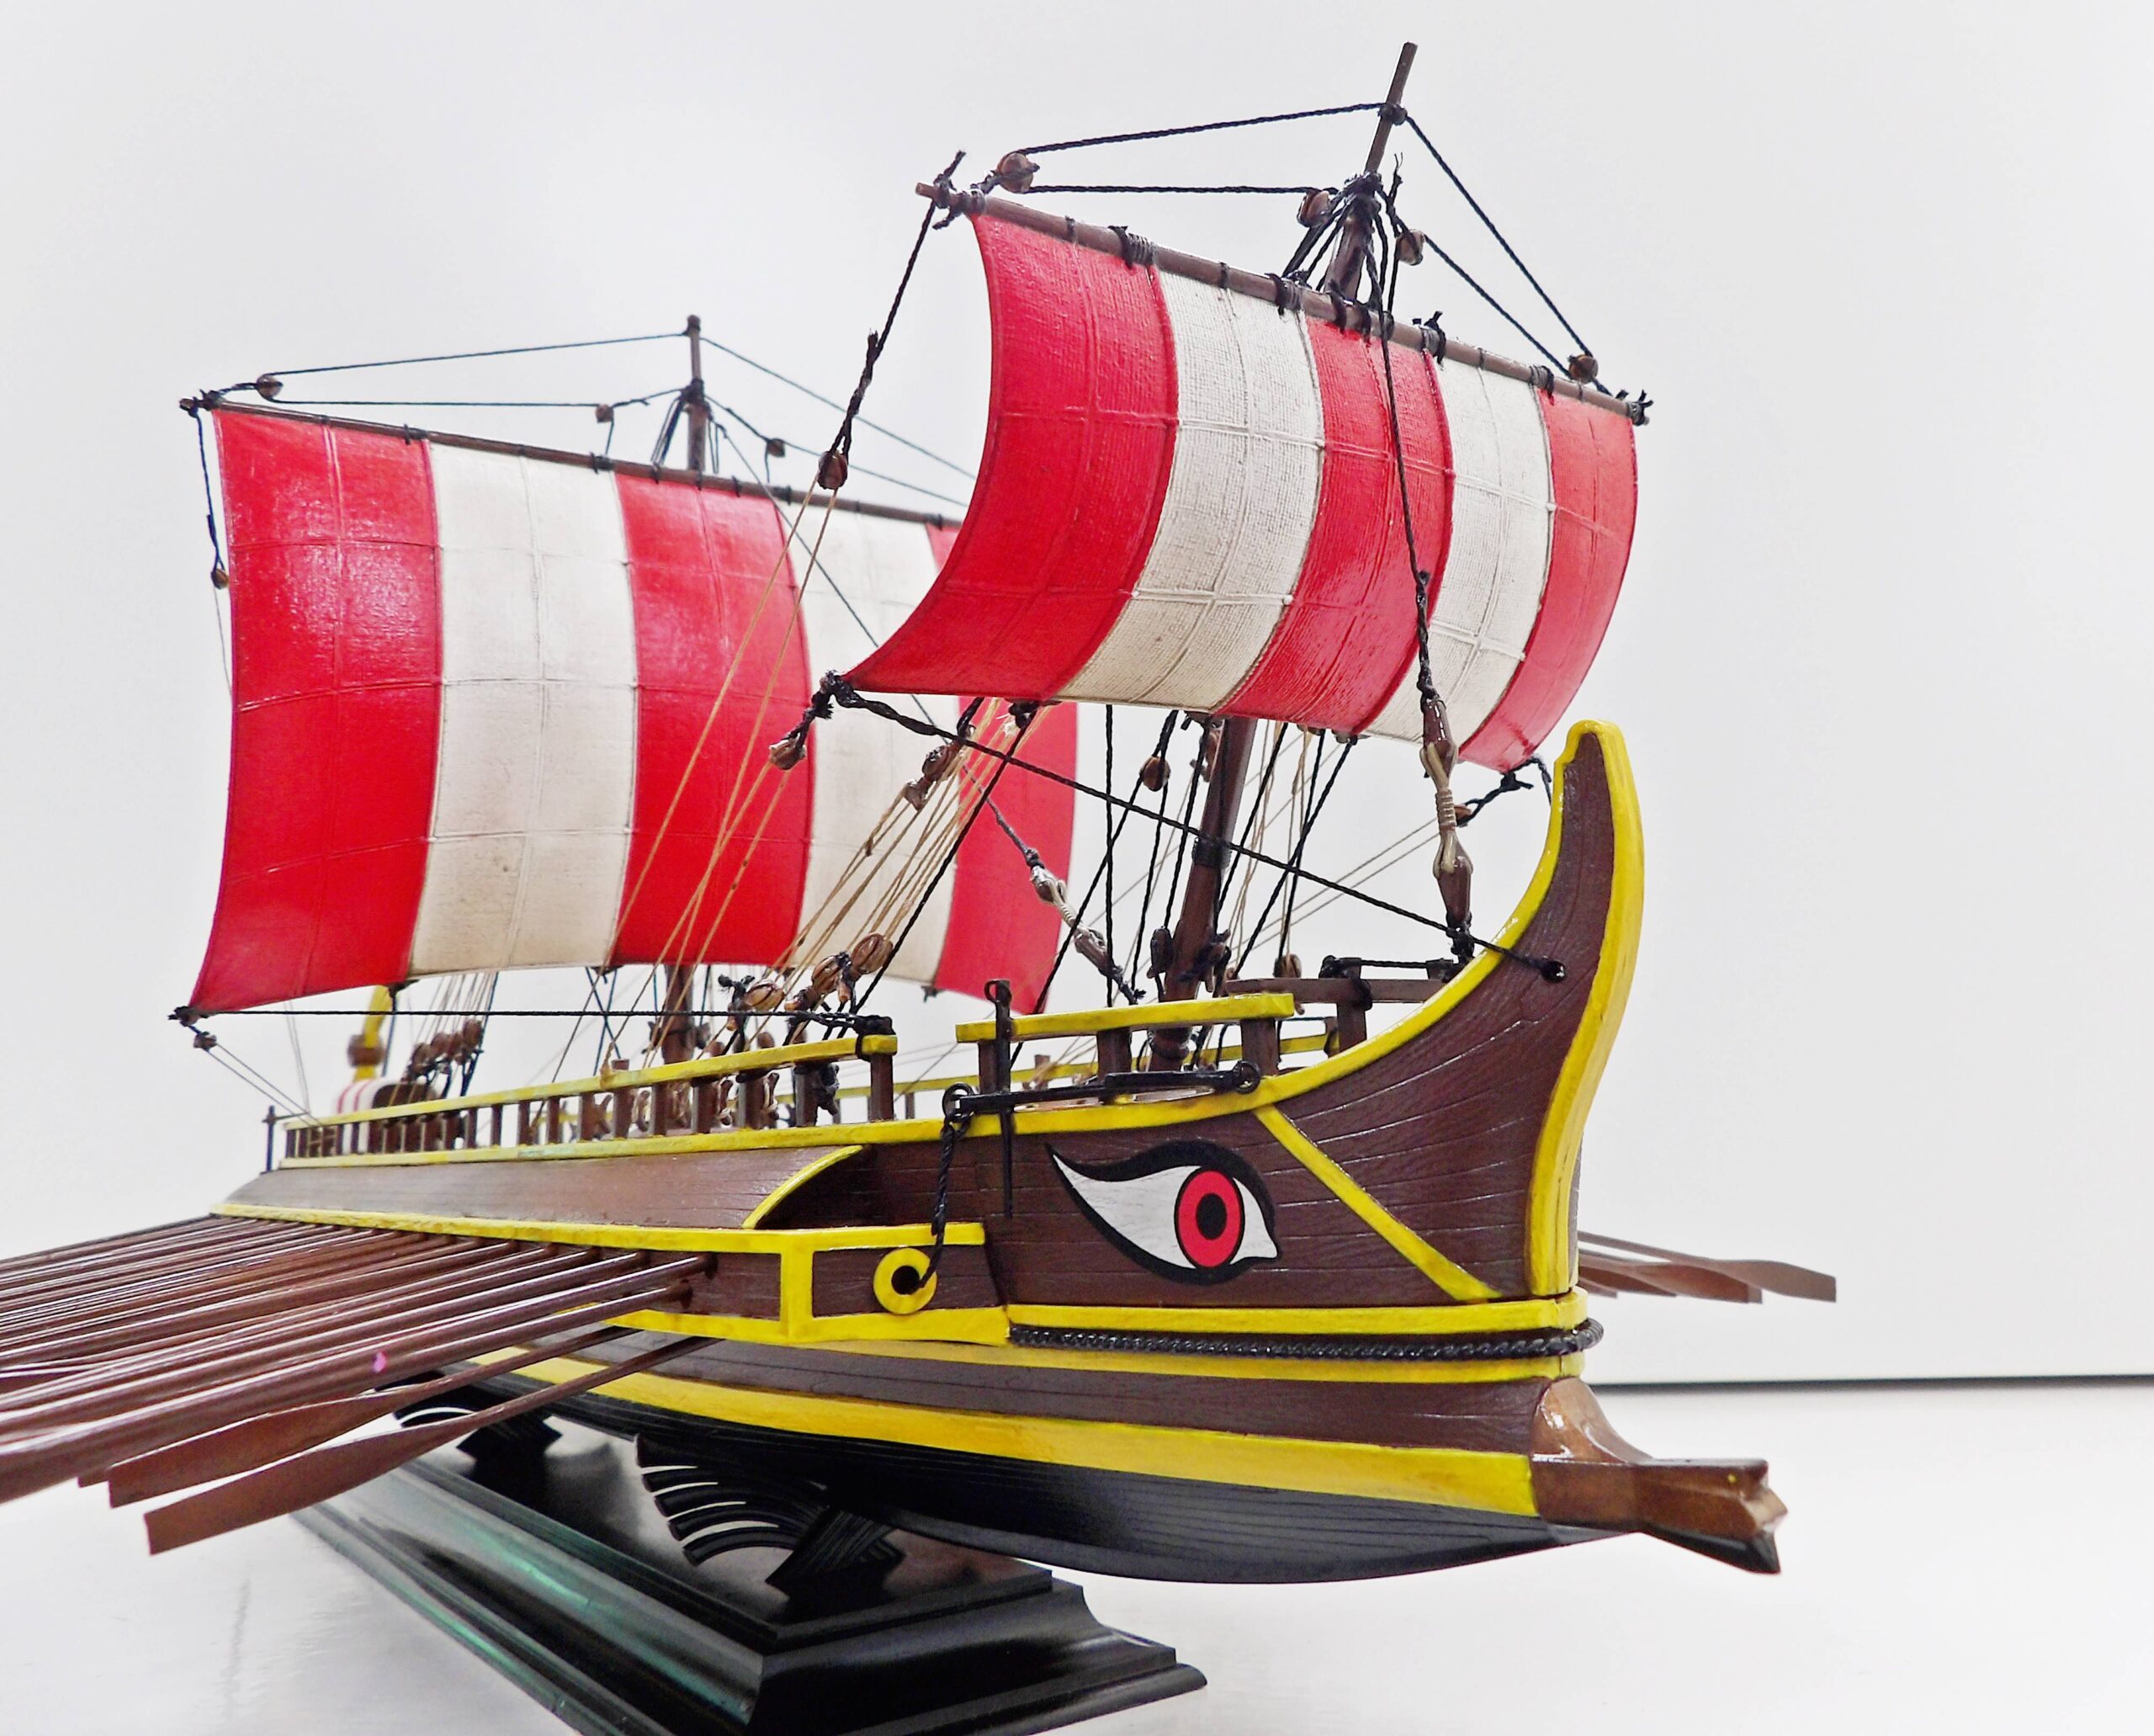
After building this ship, we can safely say that the ancient Greeks would never have employed us. It turns out this project, which we began in May 2021, took two whole years to finish! The part that we thought we would enjoy the most was the rigging. It was quite fun to bein with, until we realised we’ve completely misread the instruction and had to redo it again and again. Nevertheless, we persevered and here is the building process in all its glory.

We felt duped by the box art. The ship looks quite simple, doesn’t it? A dap of paint, then a little rigging here and there and it should be done, right?
Included in the kit were the stand, rigging thread, and the ship.
The bottom of the hull and be left off for a waterline finish.
One hundred and twenty oars were included.
The sails, decks, and the decal of the eyes.
We assembled the main parts of the ship together, taking care the position the oars correctly before the glue dries.
The deck is glued in place, and the masts are added.
The ship is now ready for airbrushing.
We airbrushed the whole ship in dark brown (Ammo Mig Brown Soil) and then hand painted the deck in a lighter colour (Ammo Mig New wood).
The edges are hand painted in bright yellow.
The ram is painted in brass and the eyes are added.
The main ship is finished, now on to the final details!
The fore sail and main sail are painted in red and white stripes.
The name plate and display stand painted.
Finally, the flag is added. The ship is rigged and lightly washed with The Army Painter Soft Tone.

Construction of Hasegawa Zero Fighter (Egg Plane)

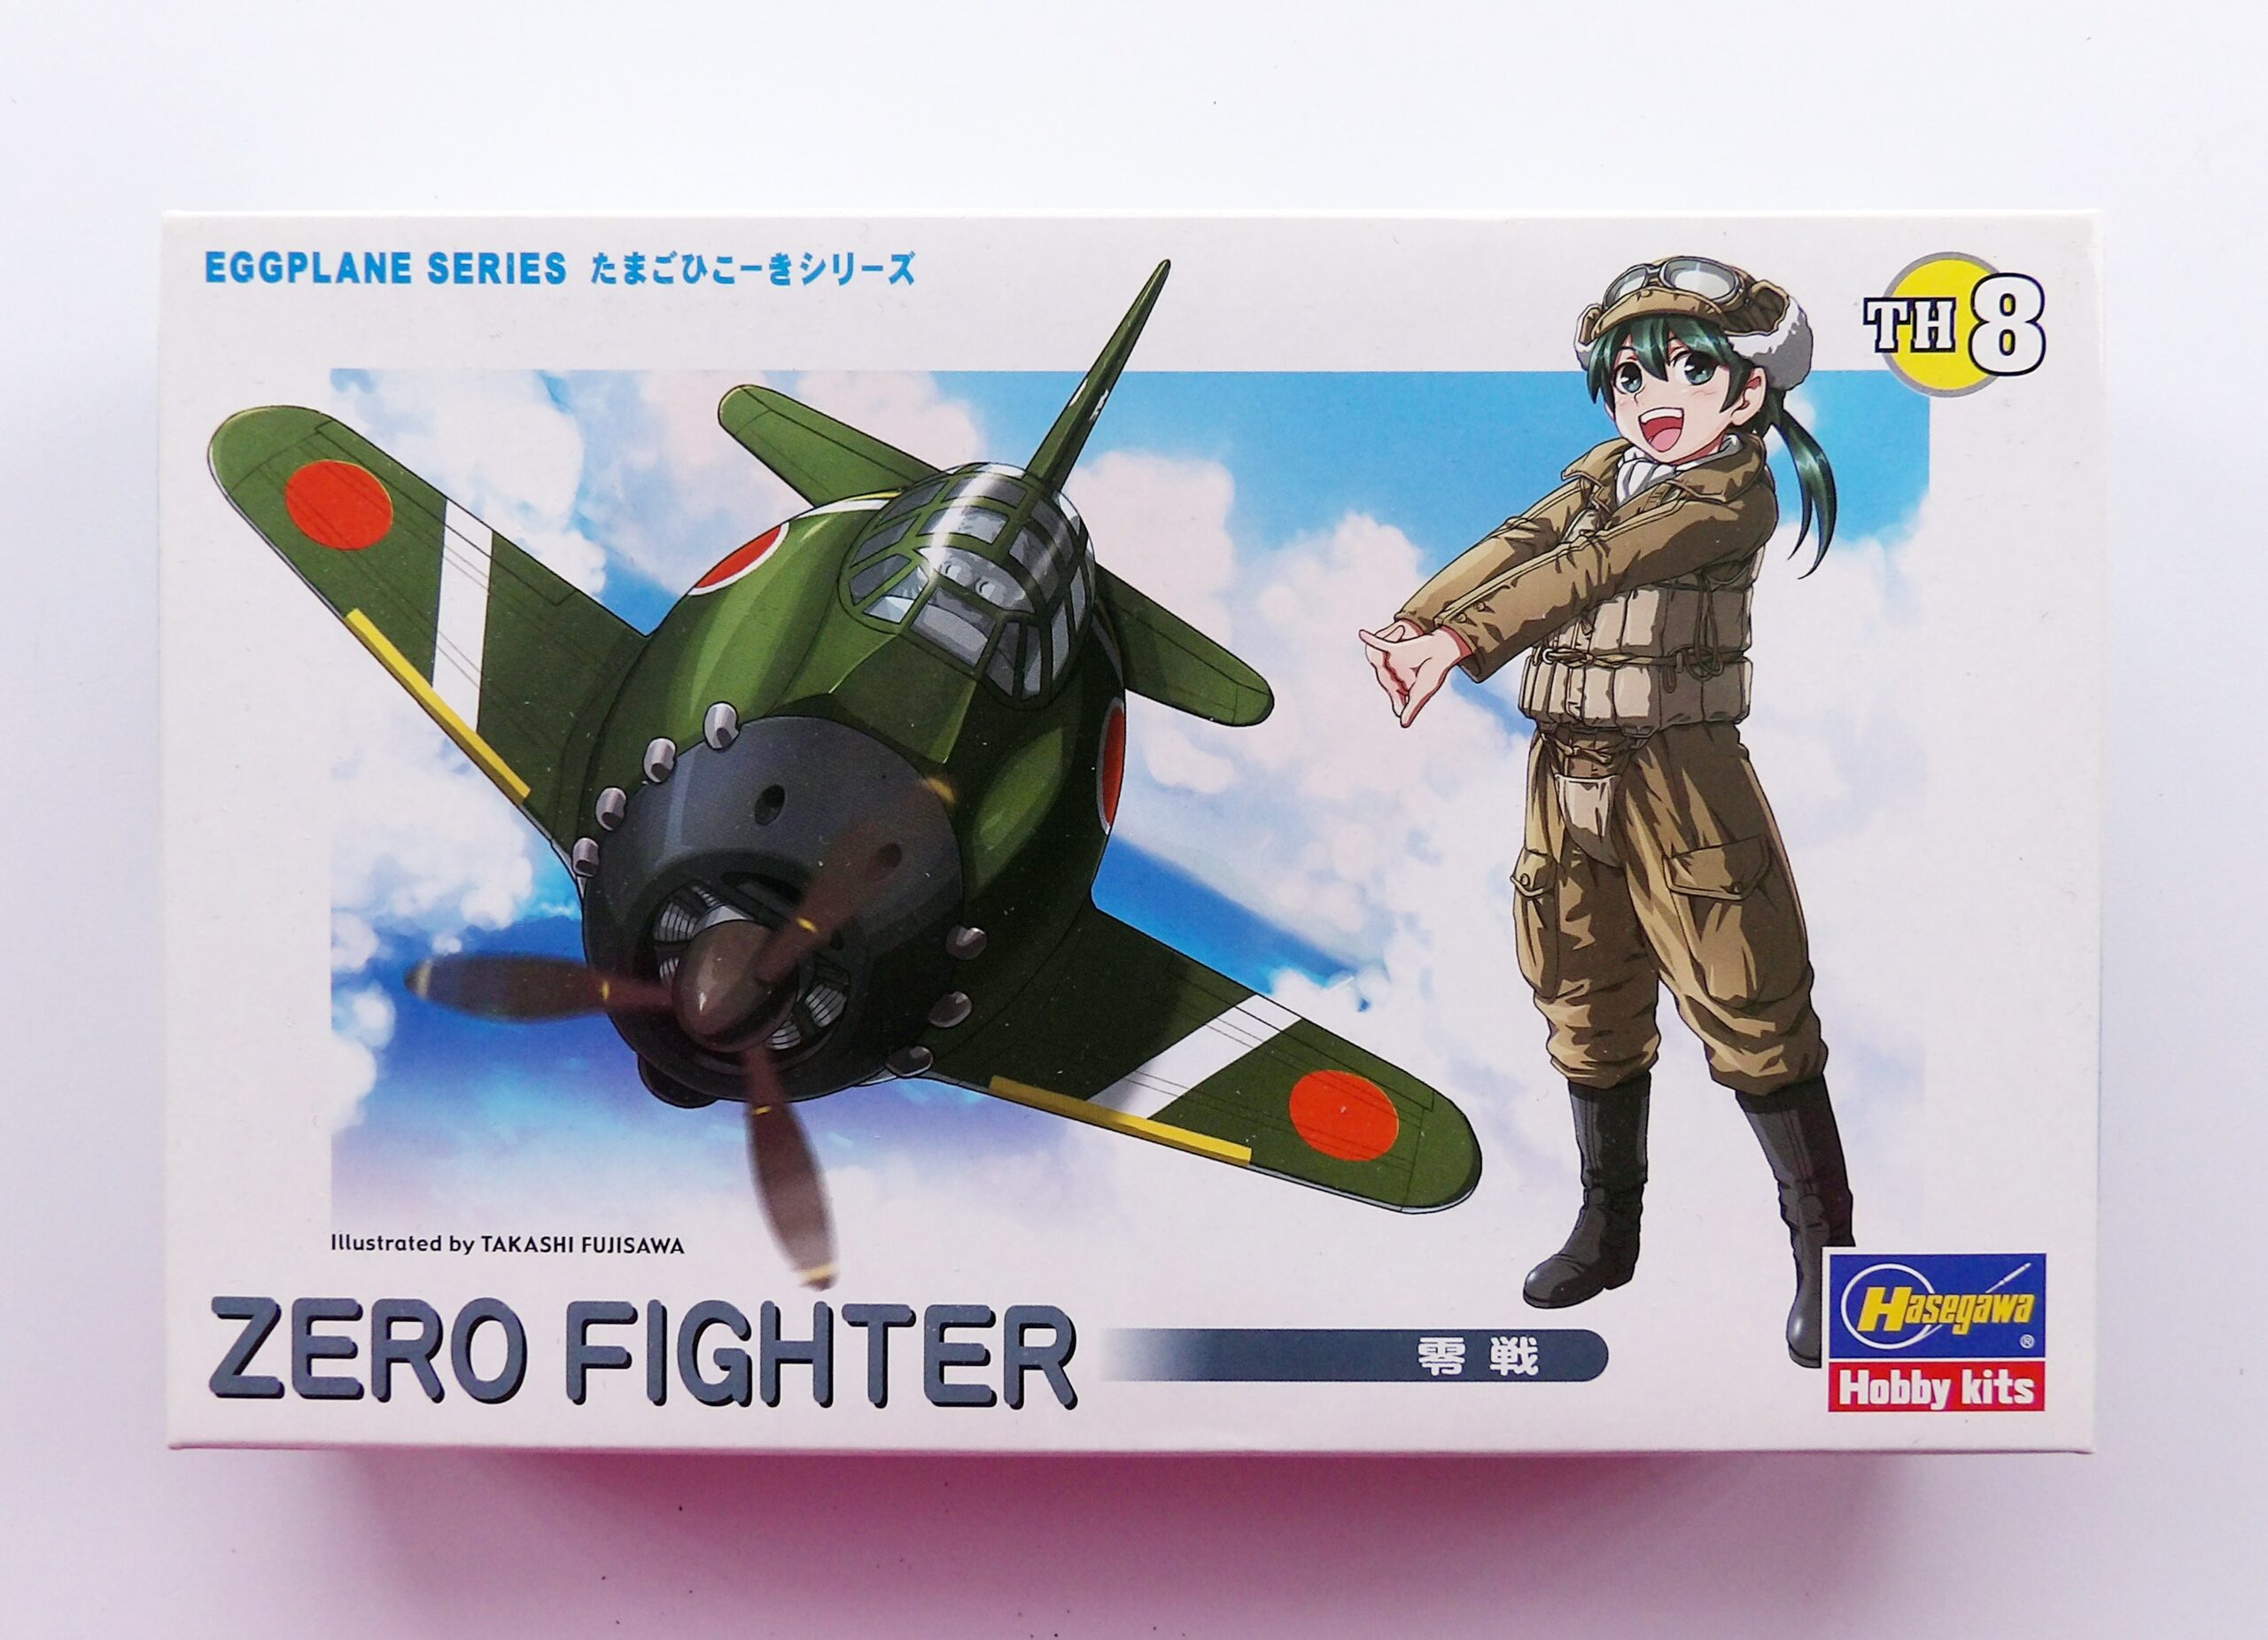
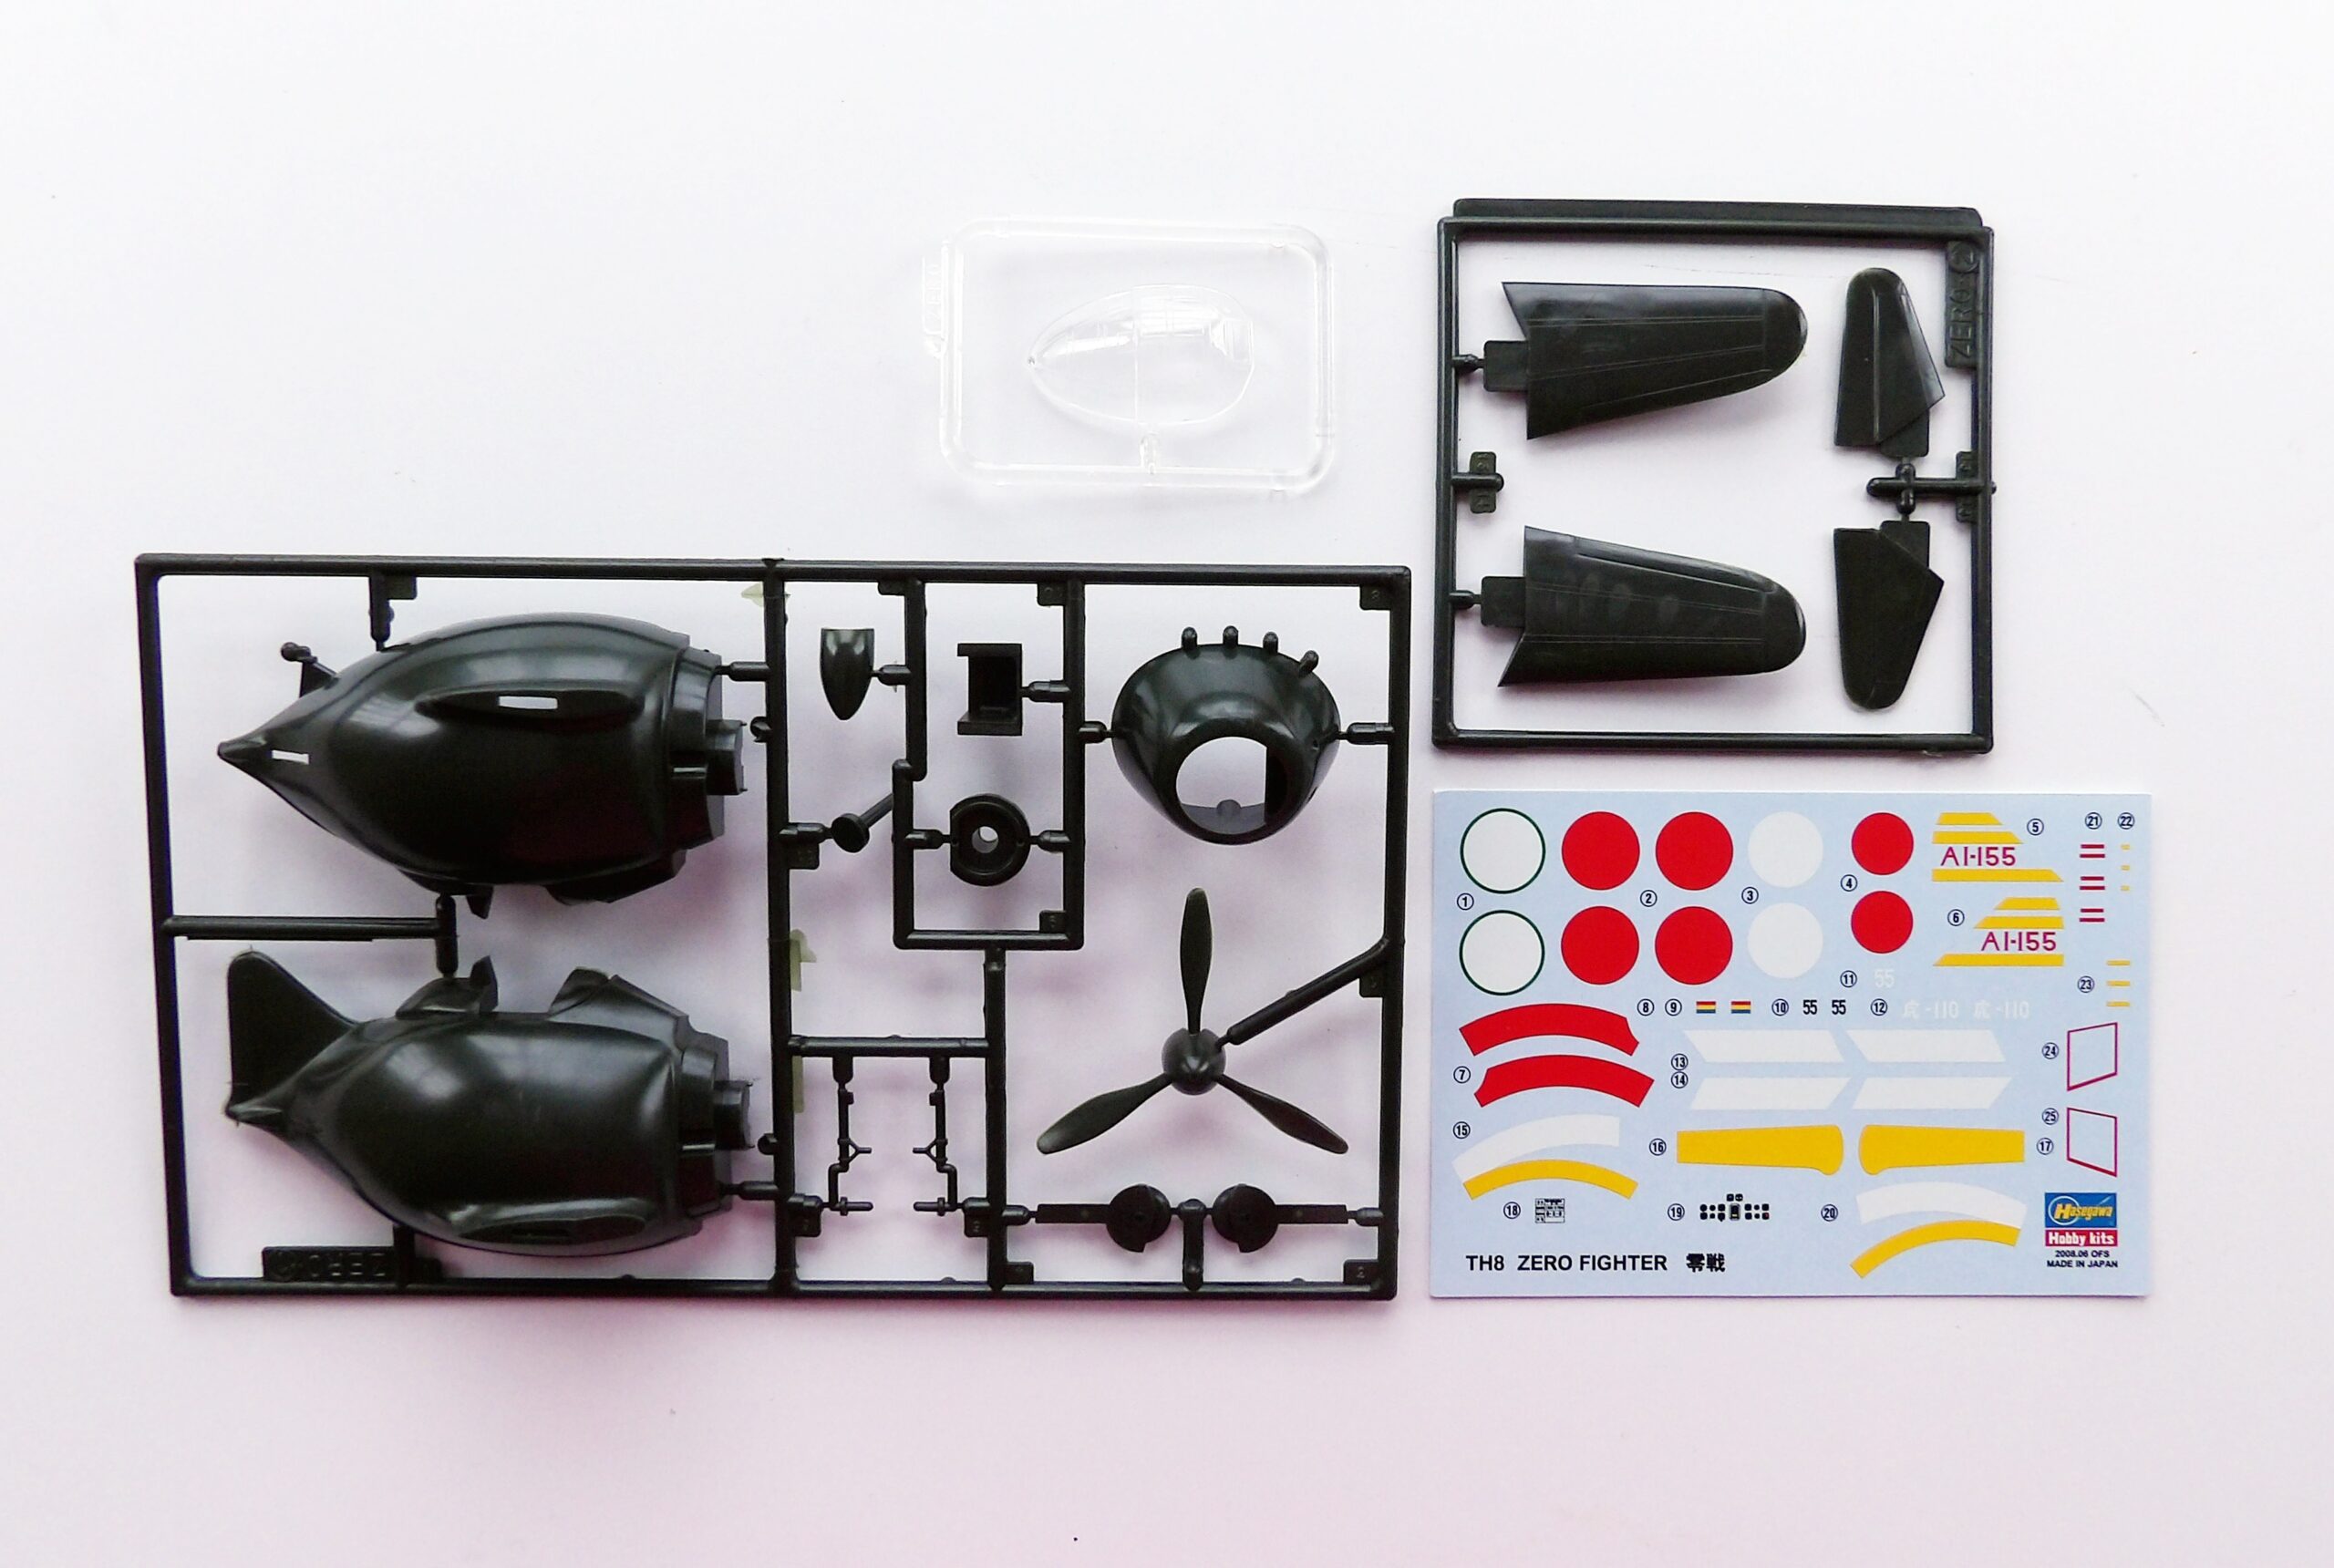
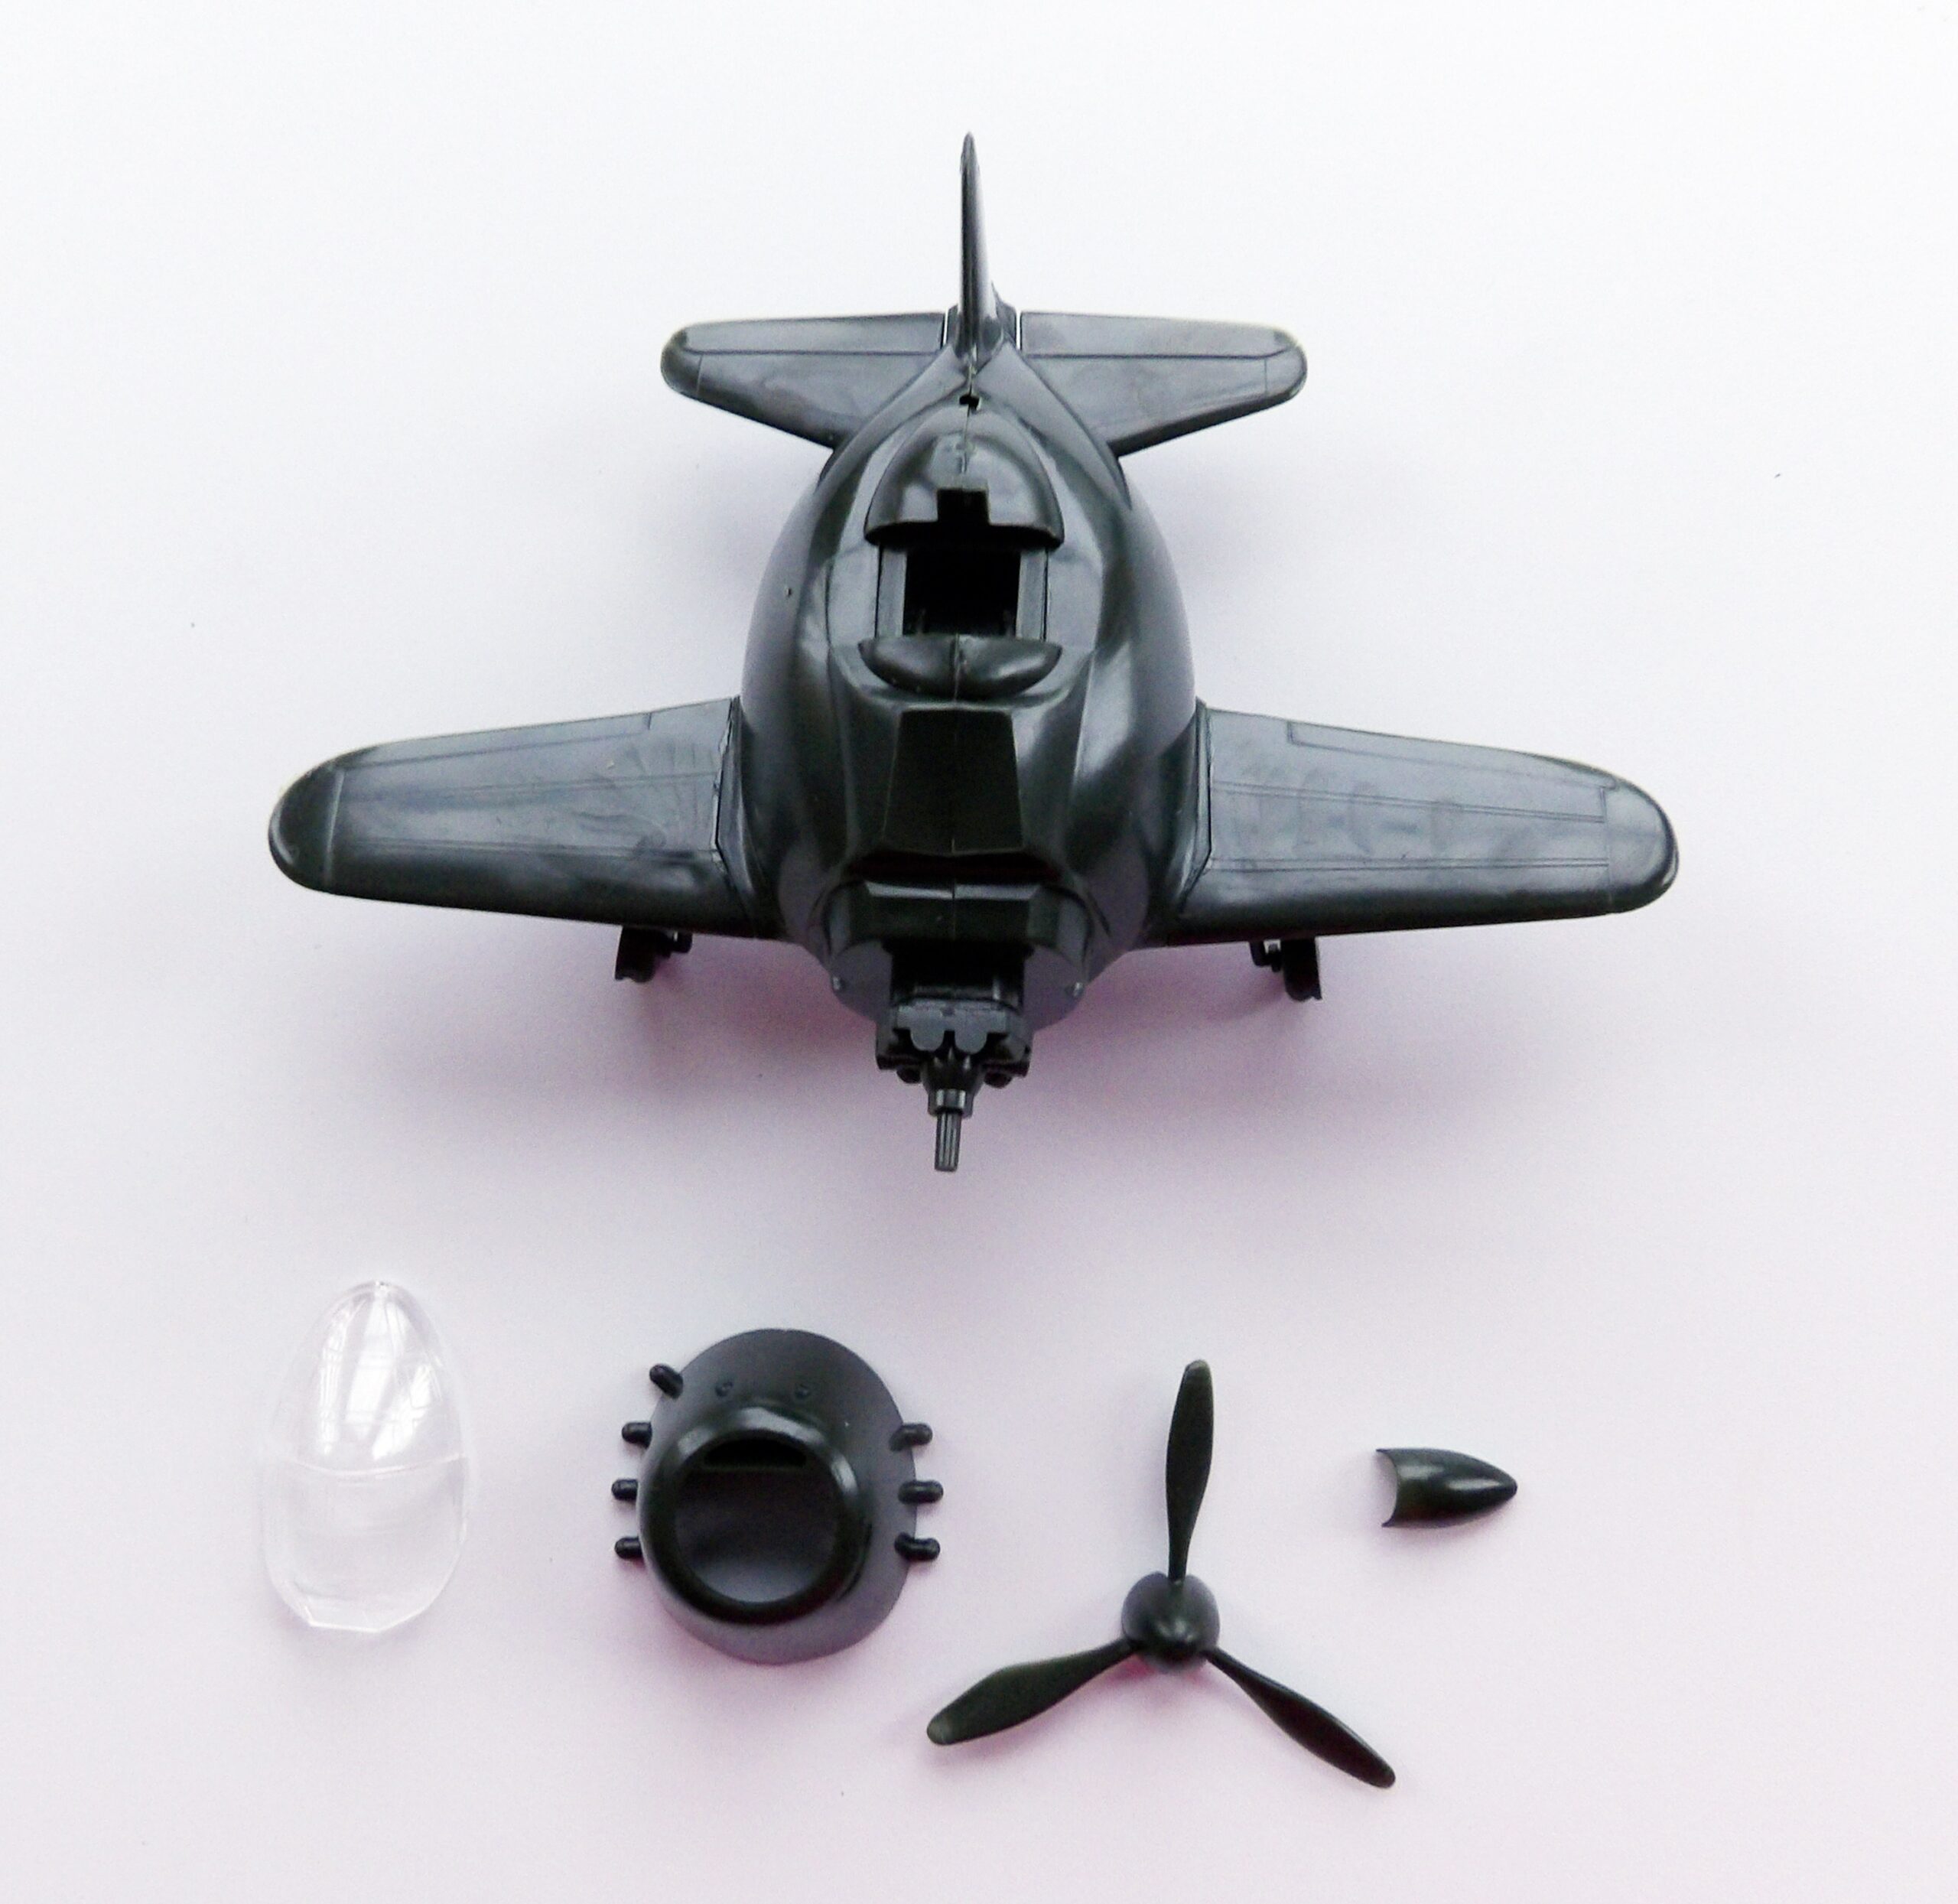
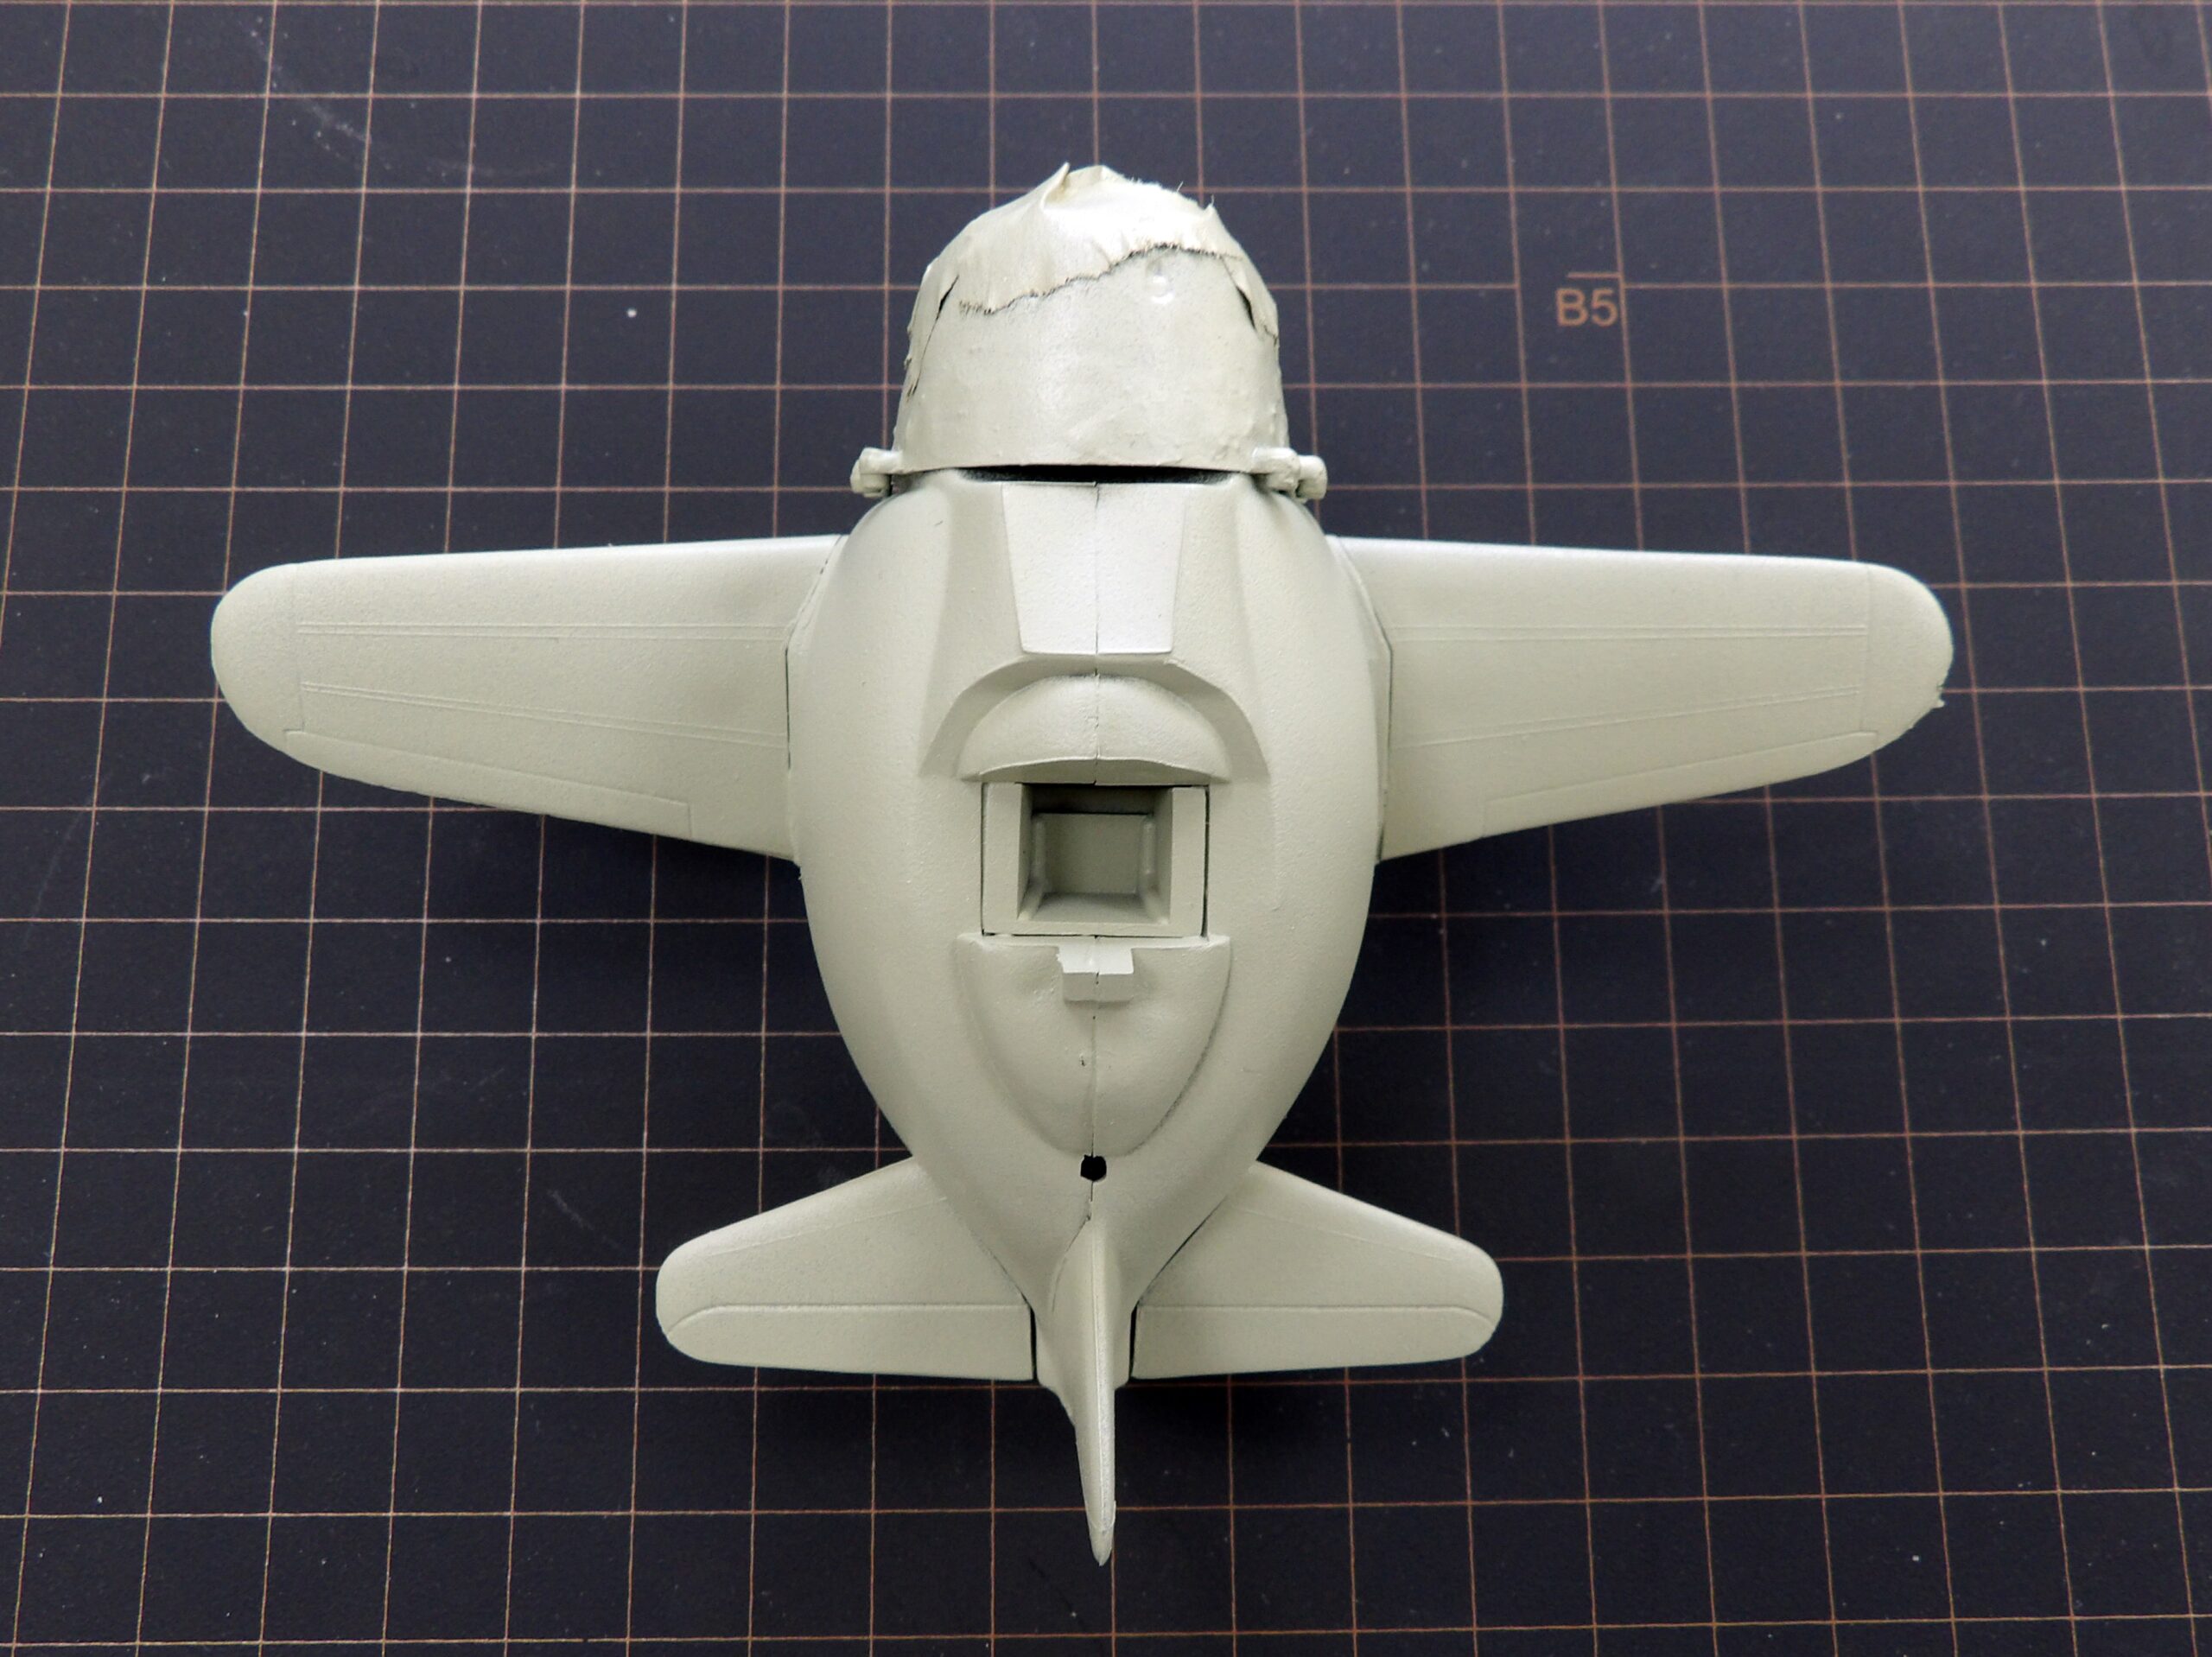
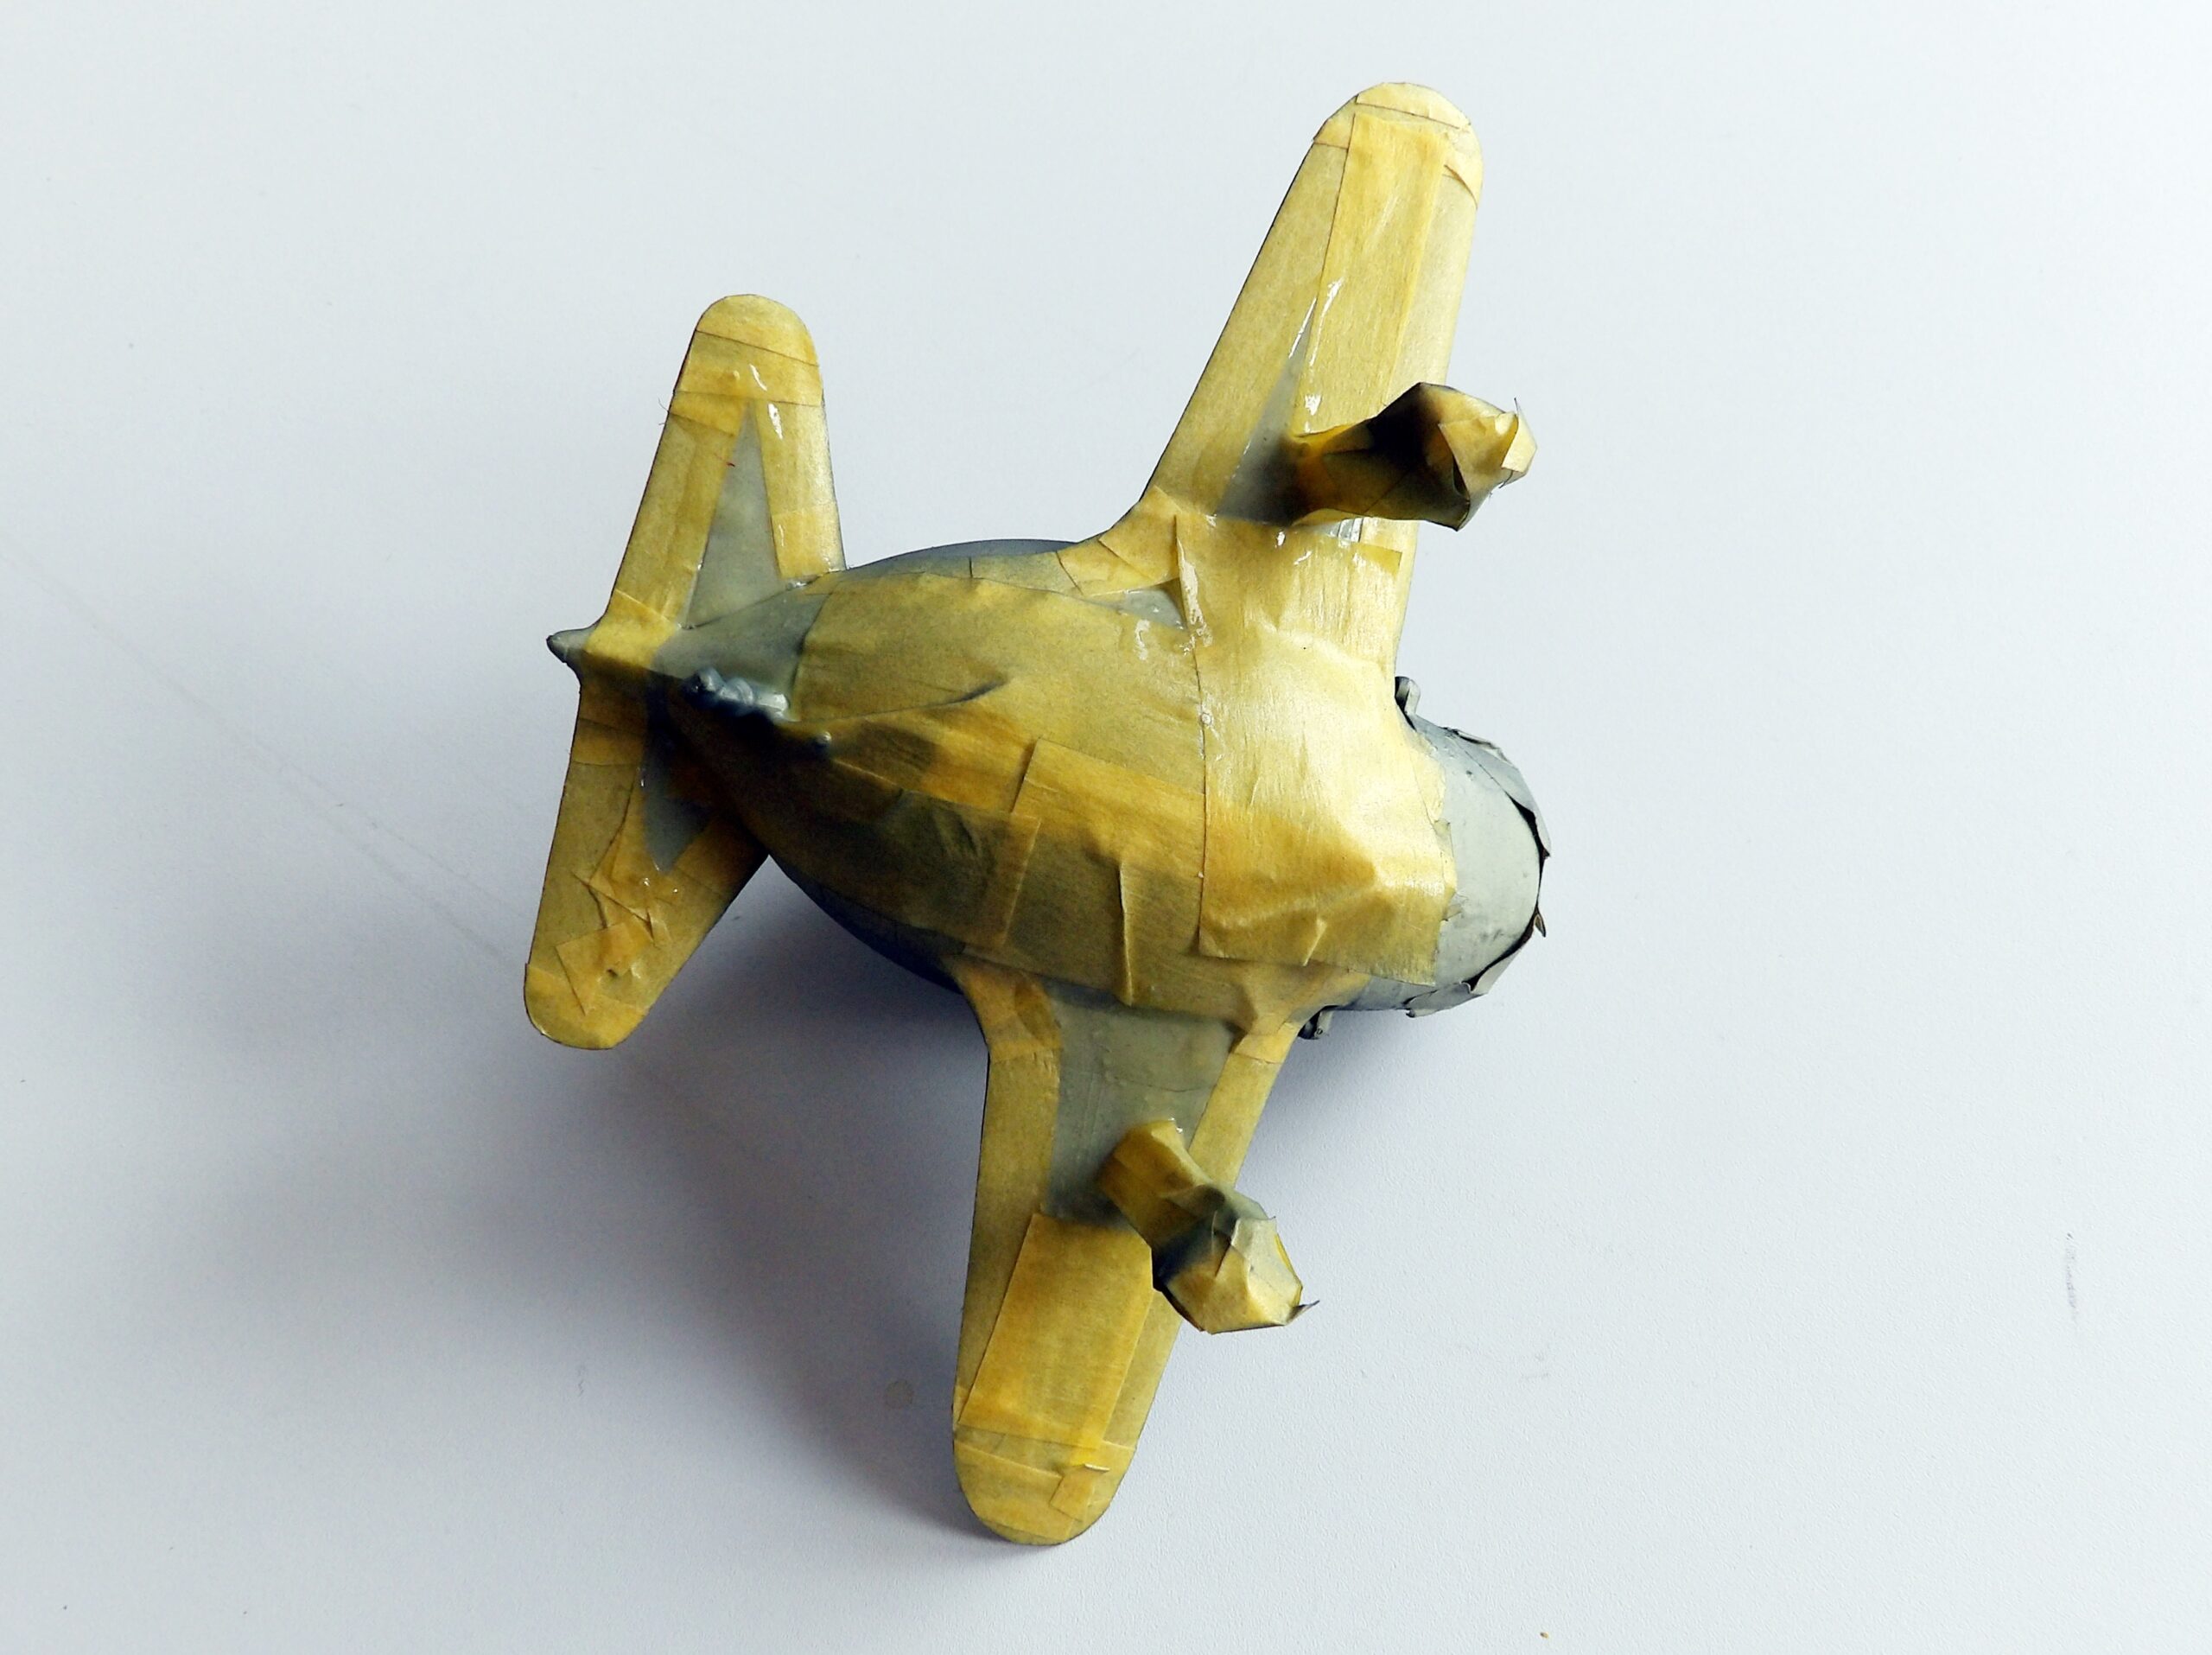
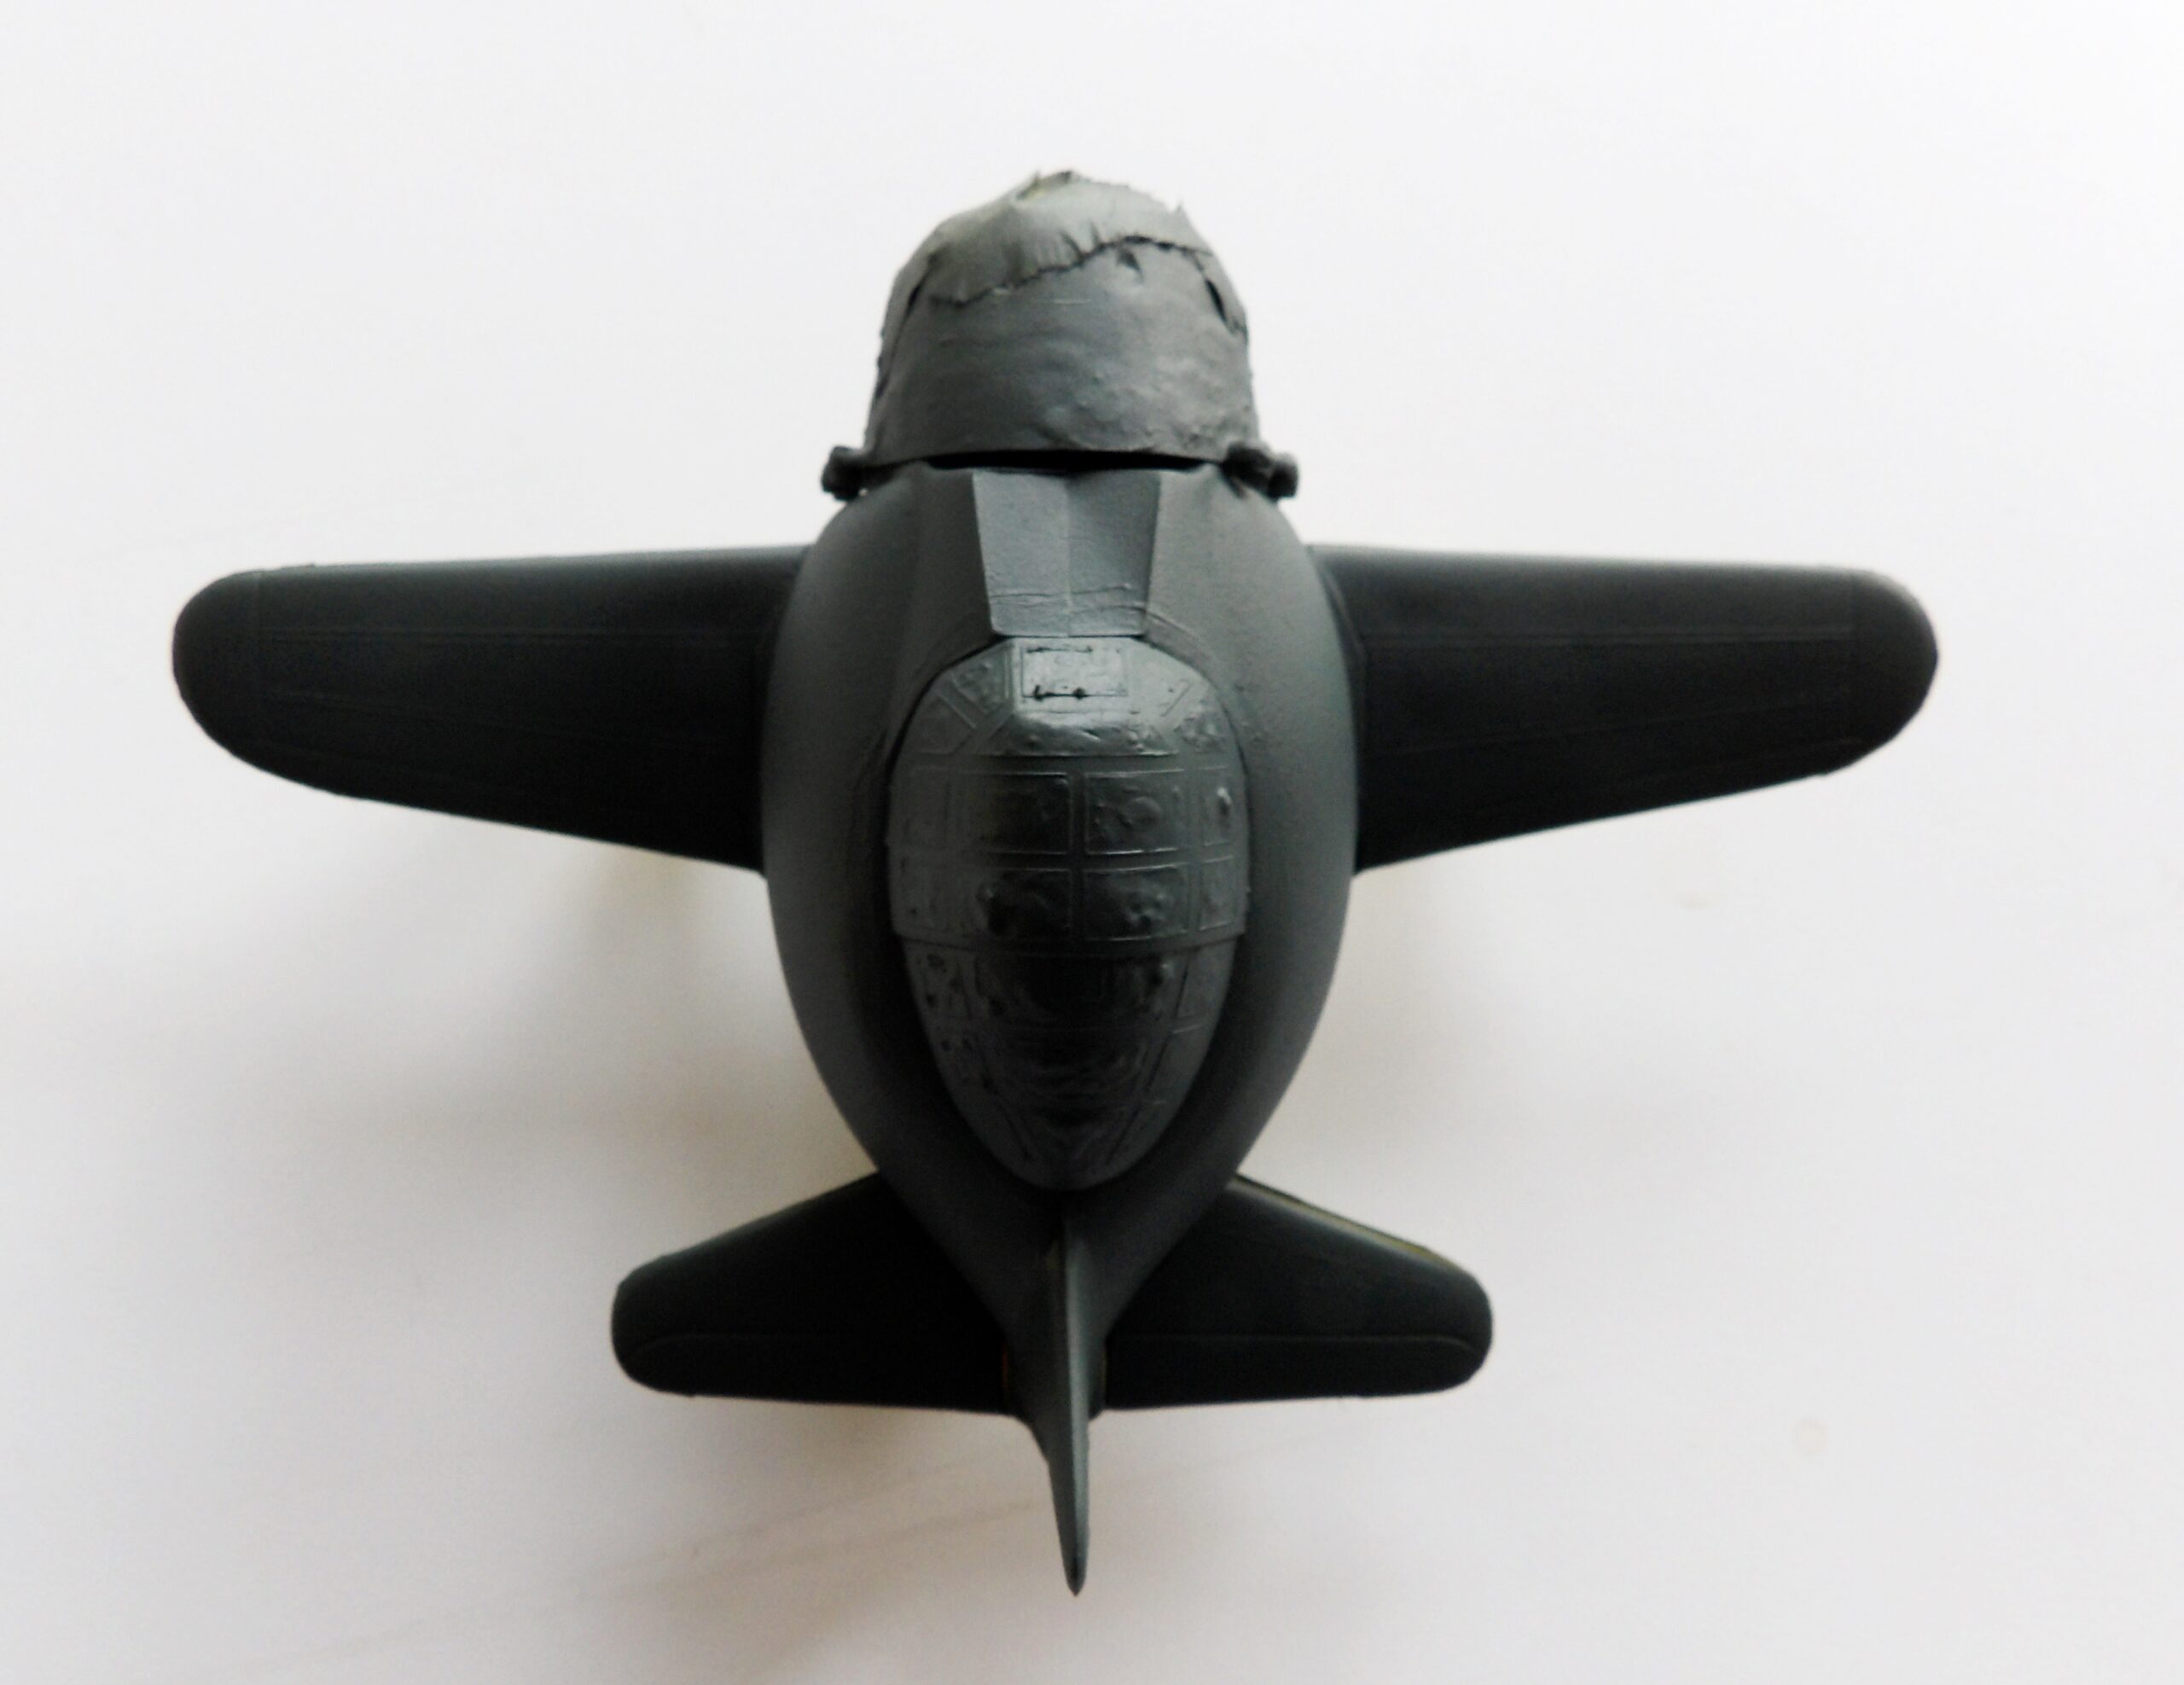
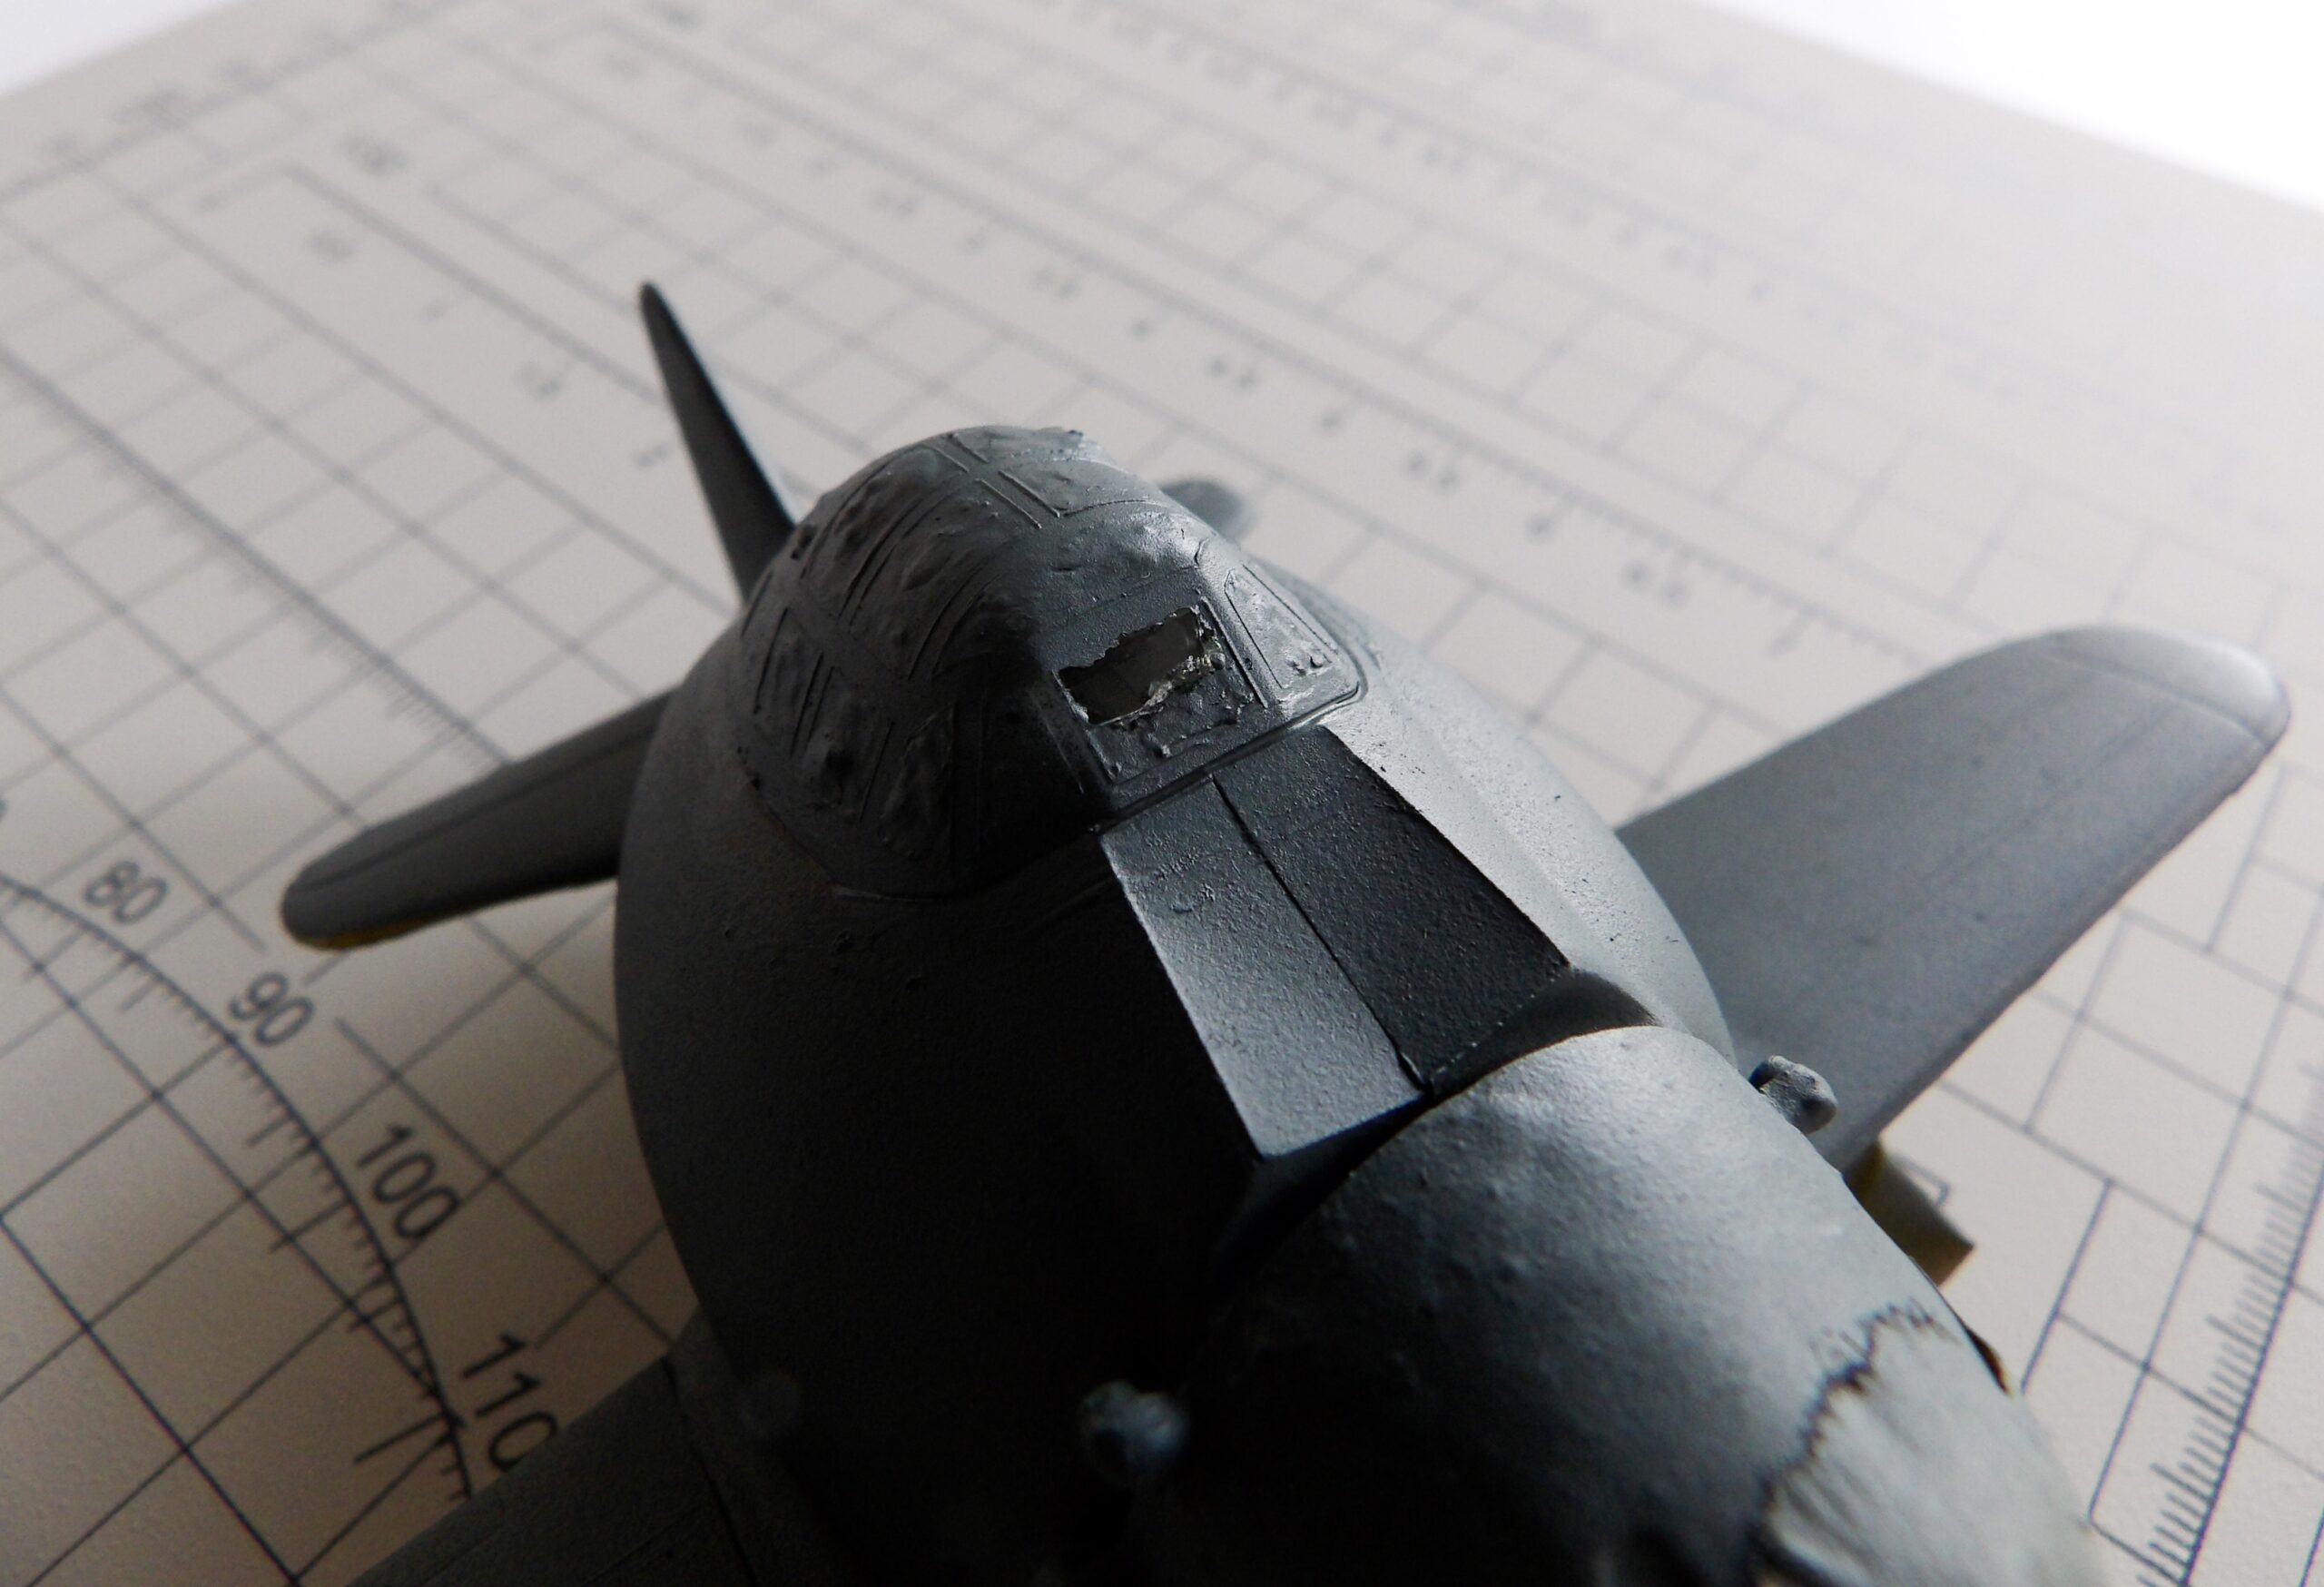
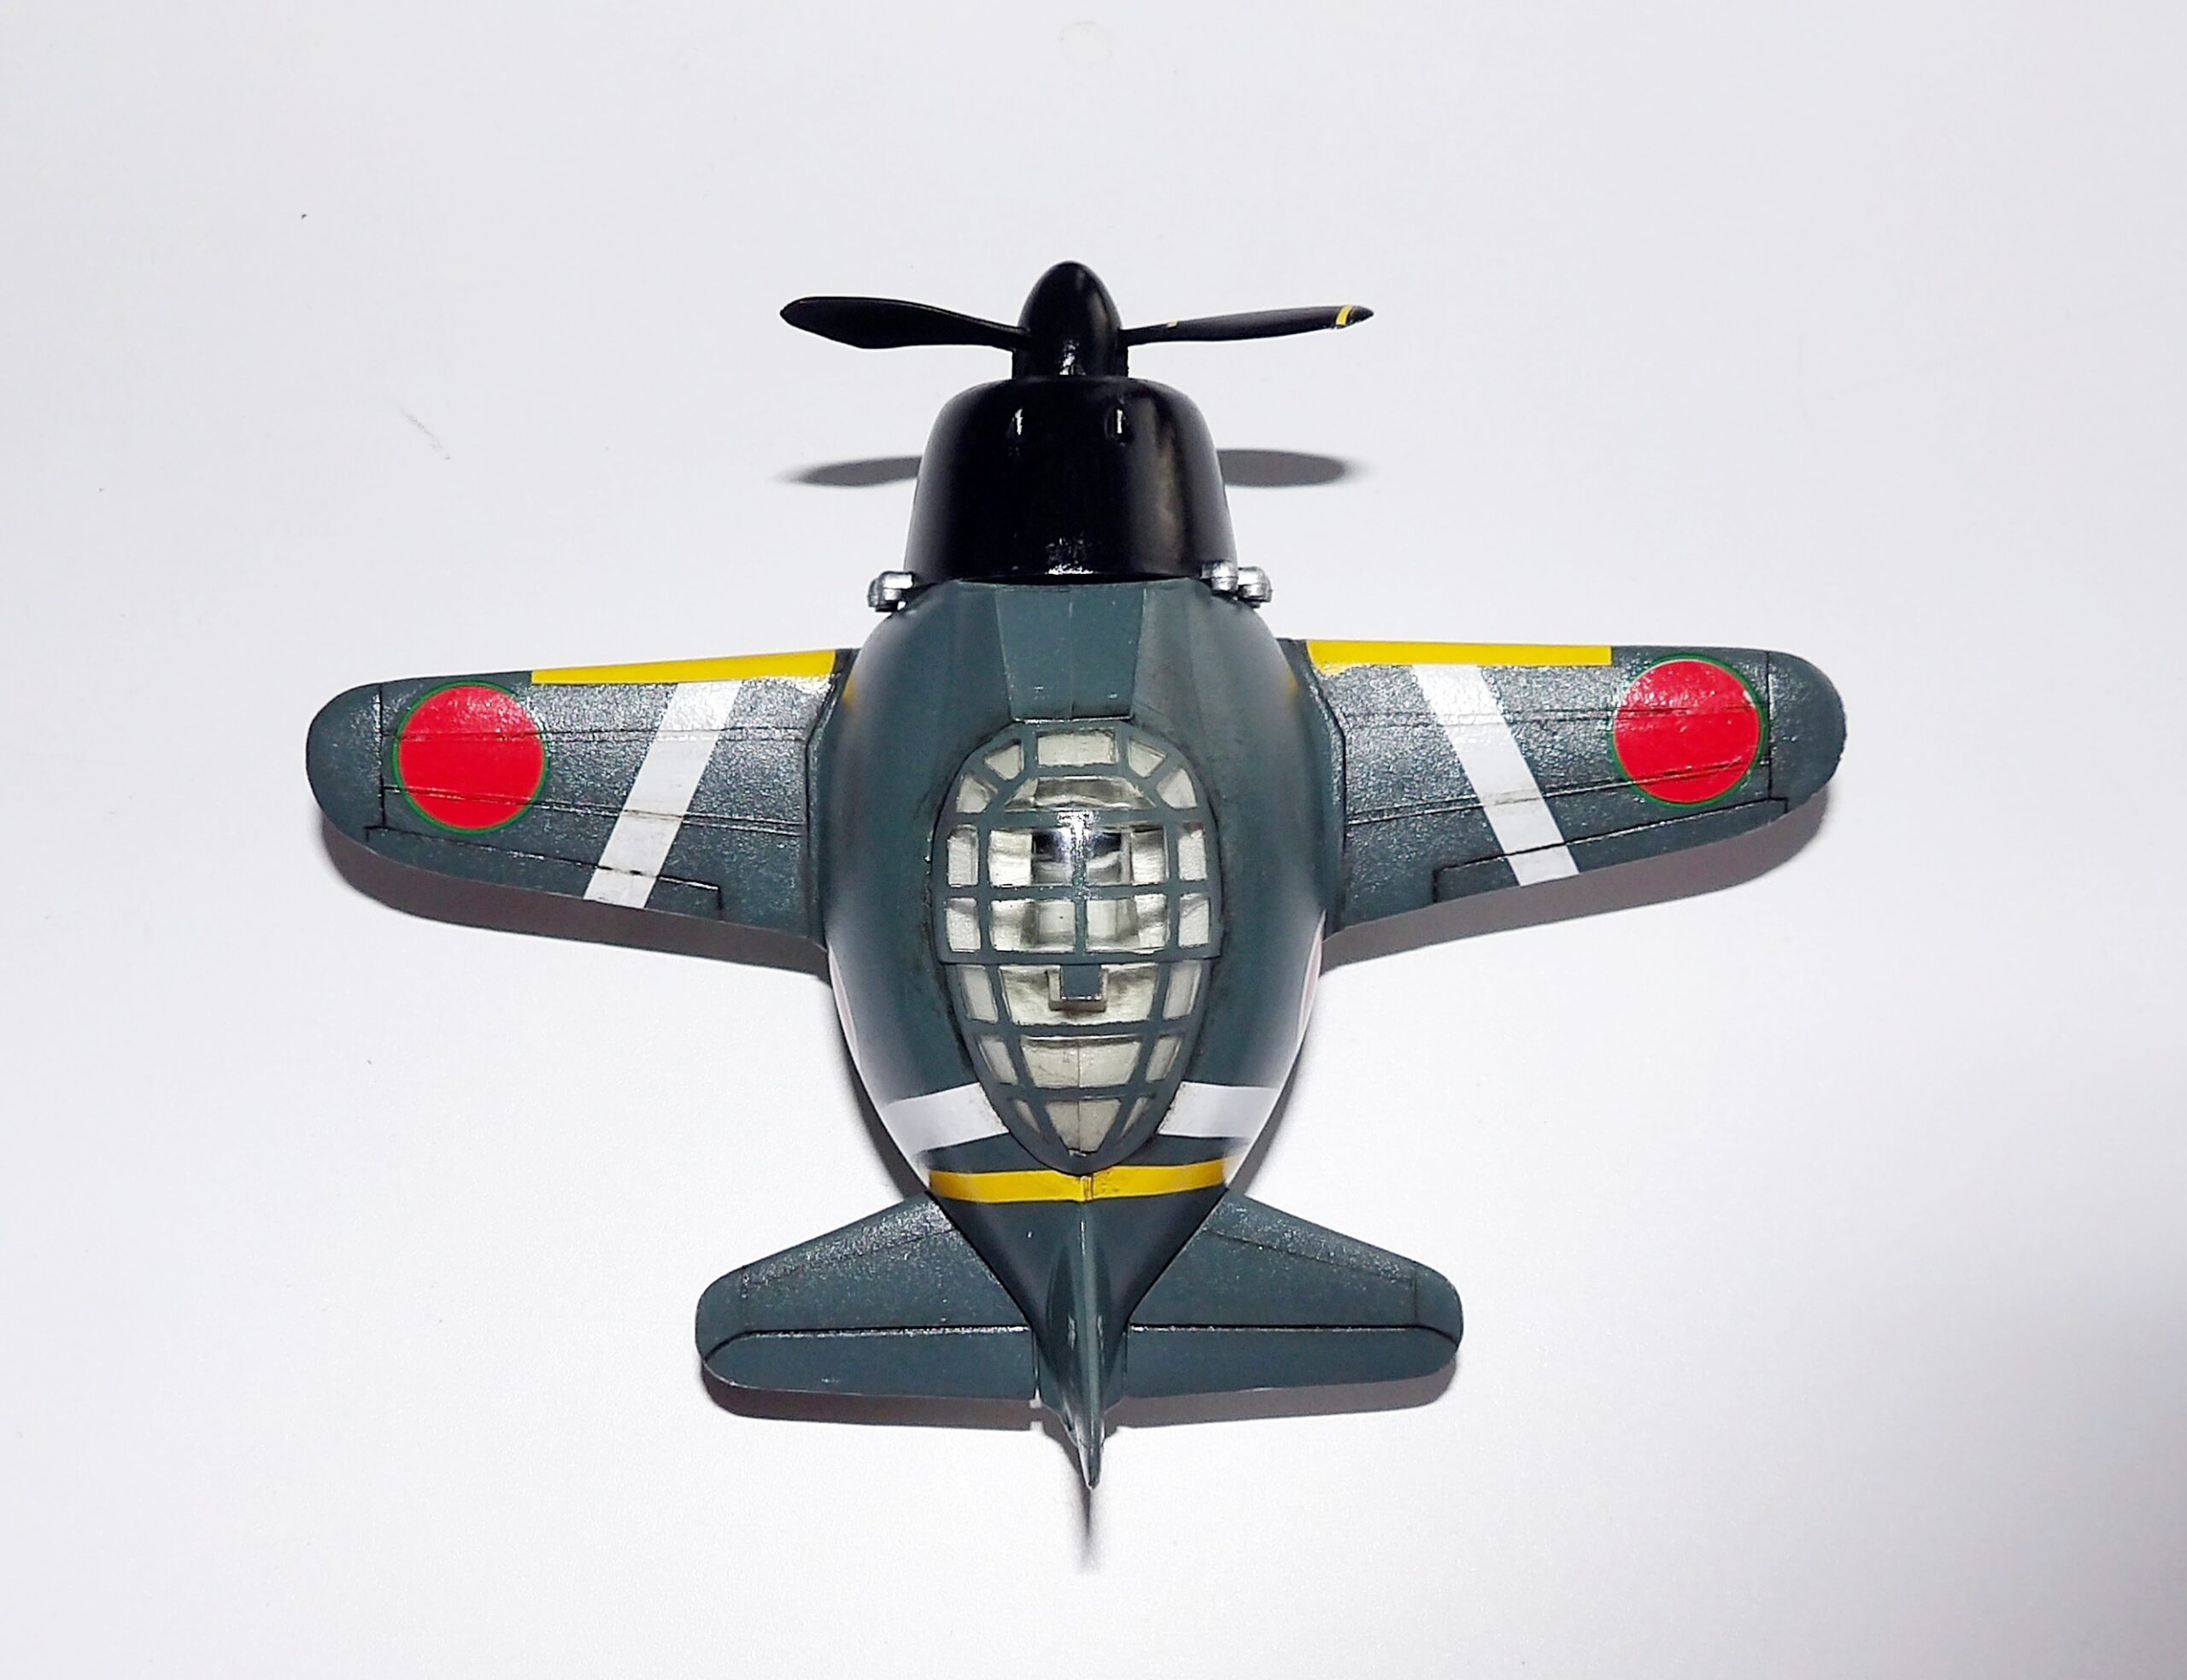
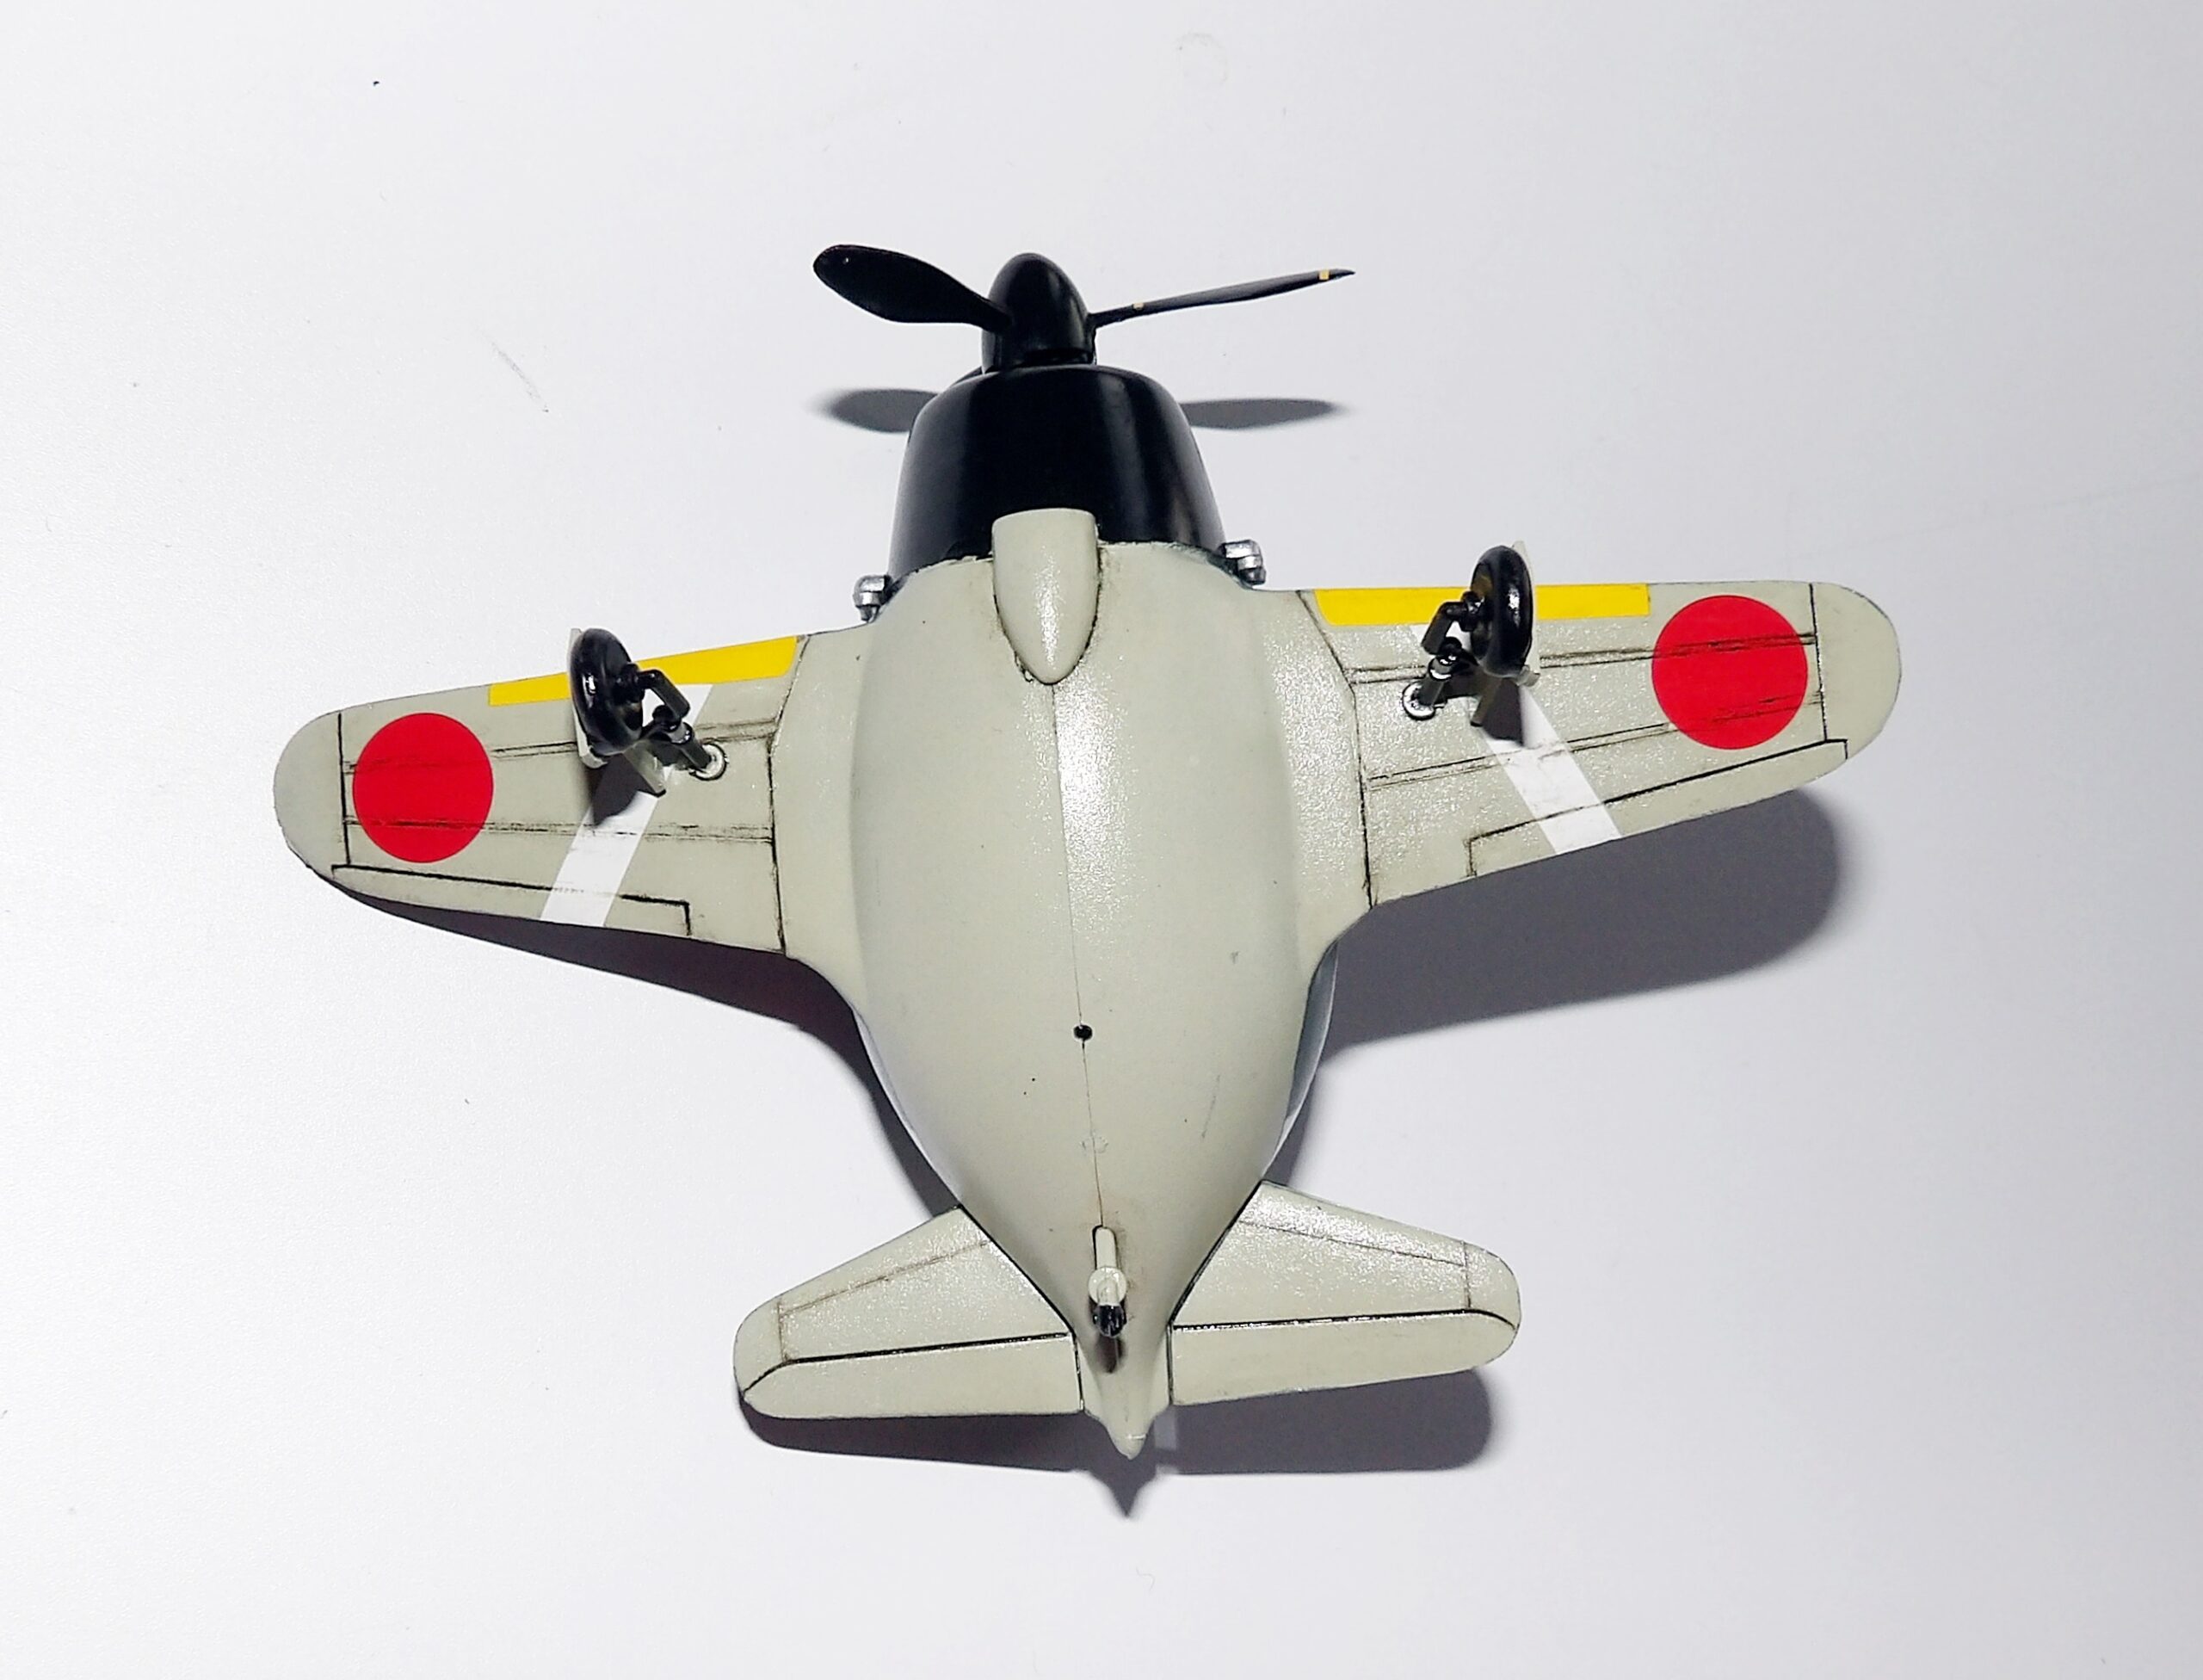
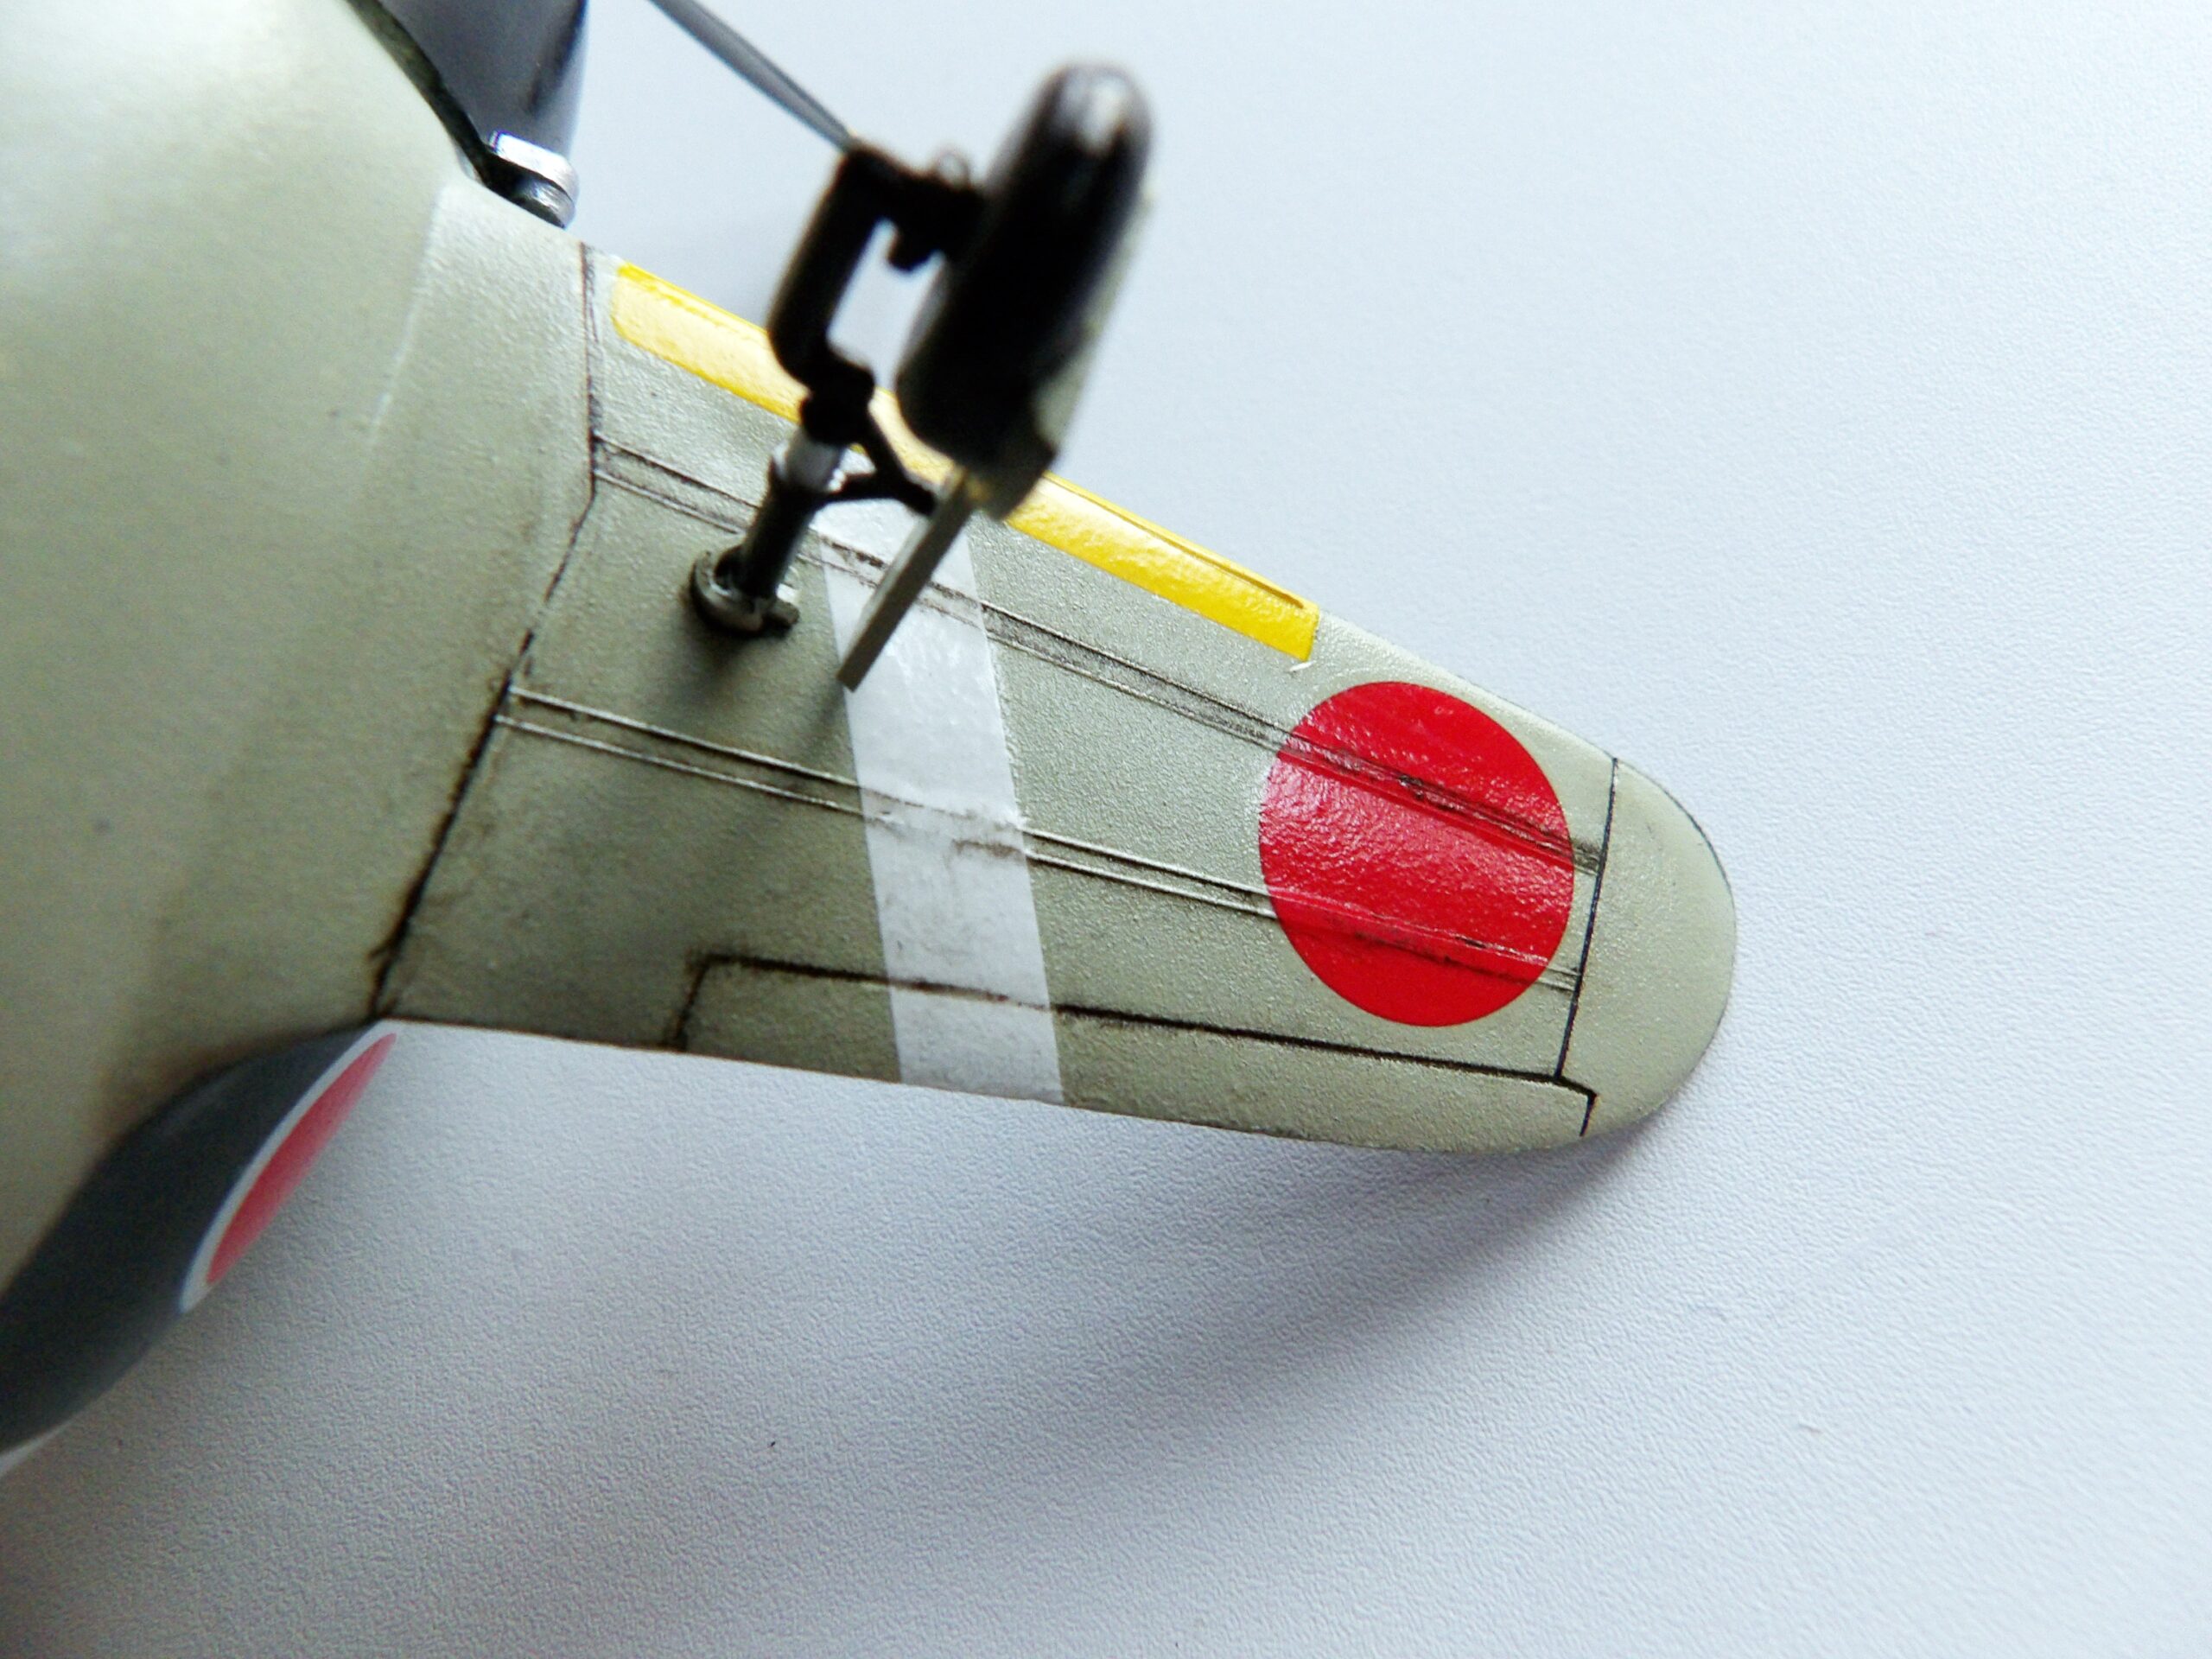
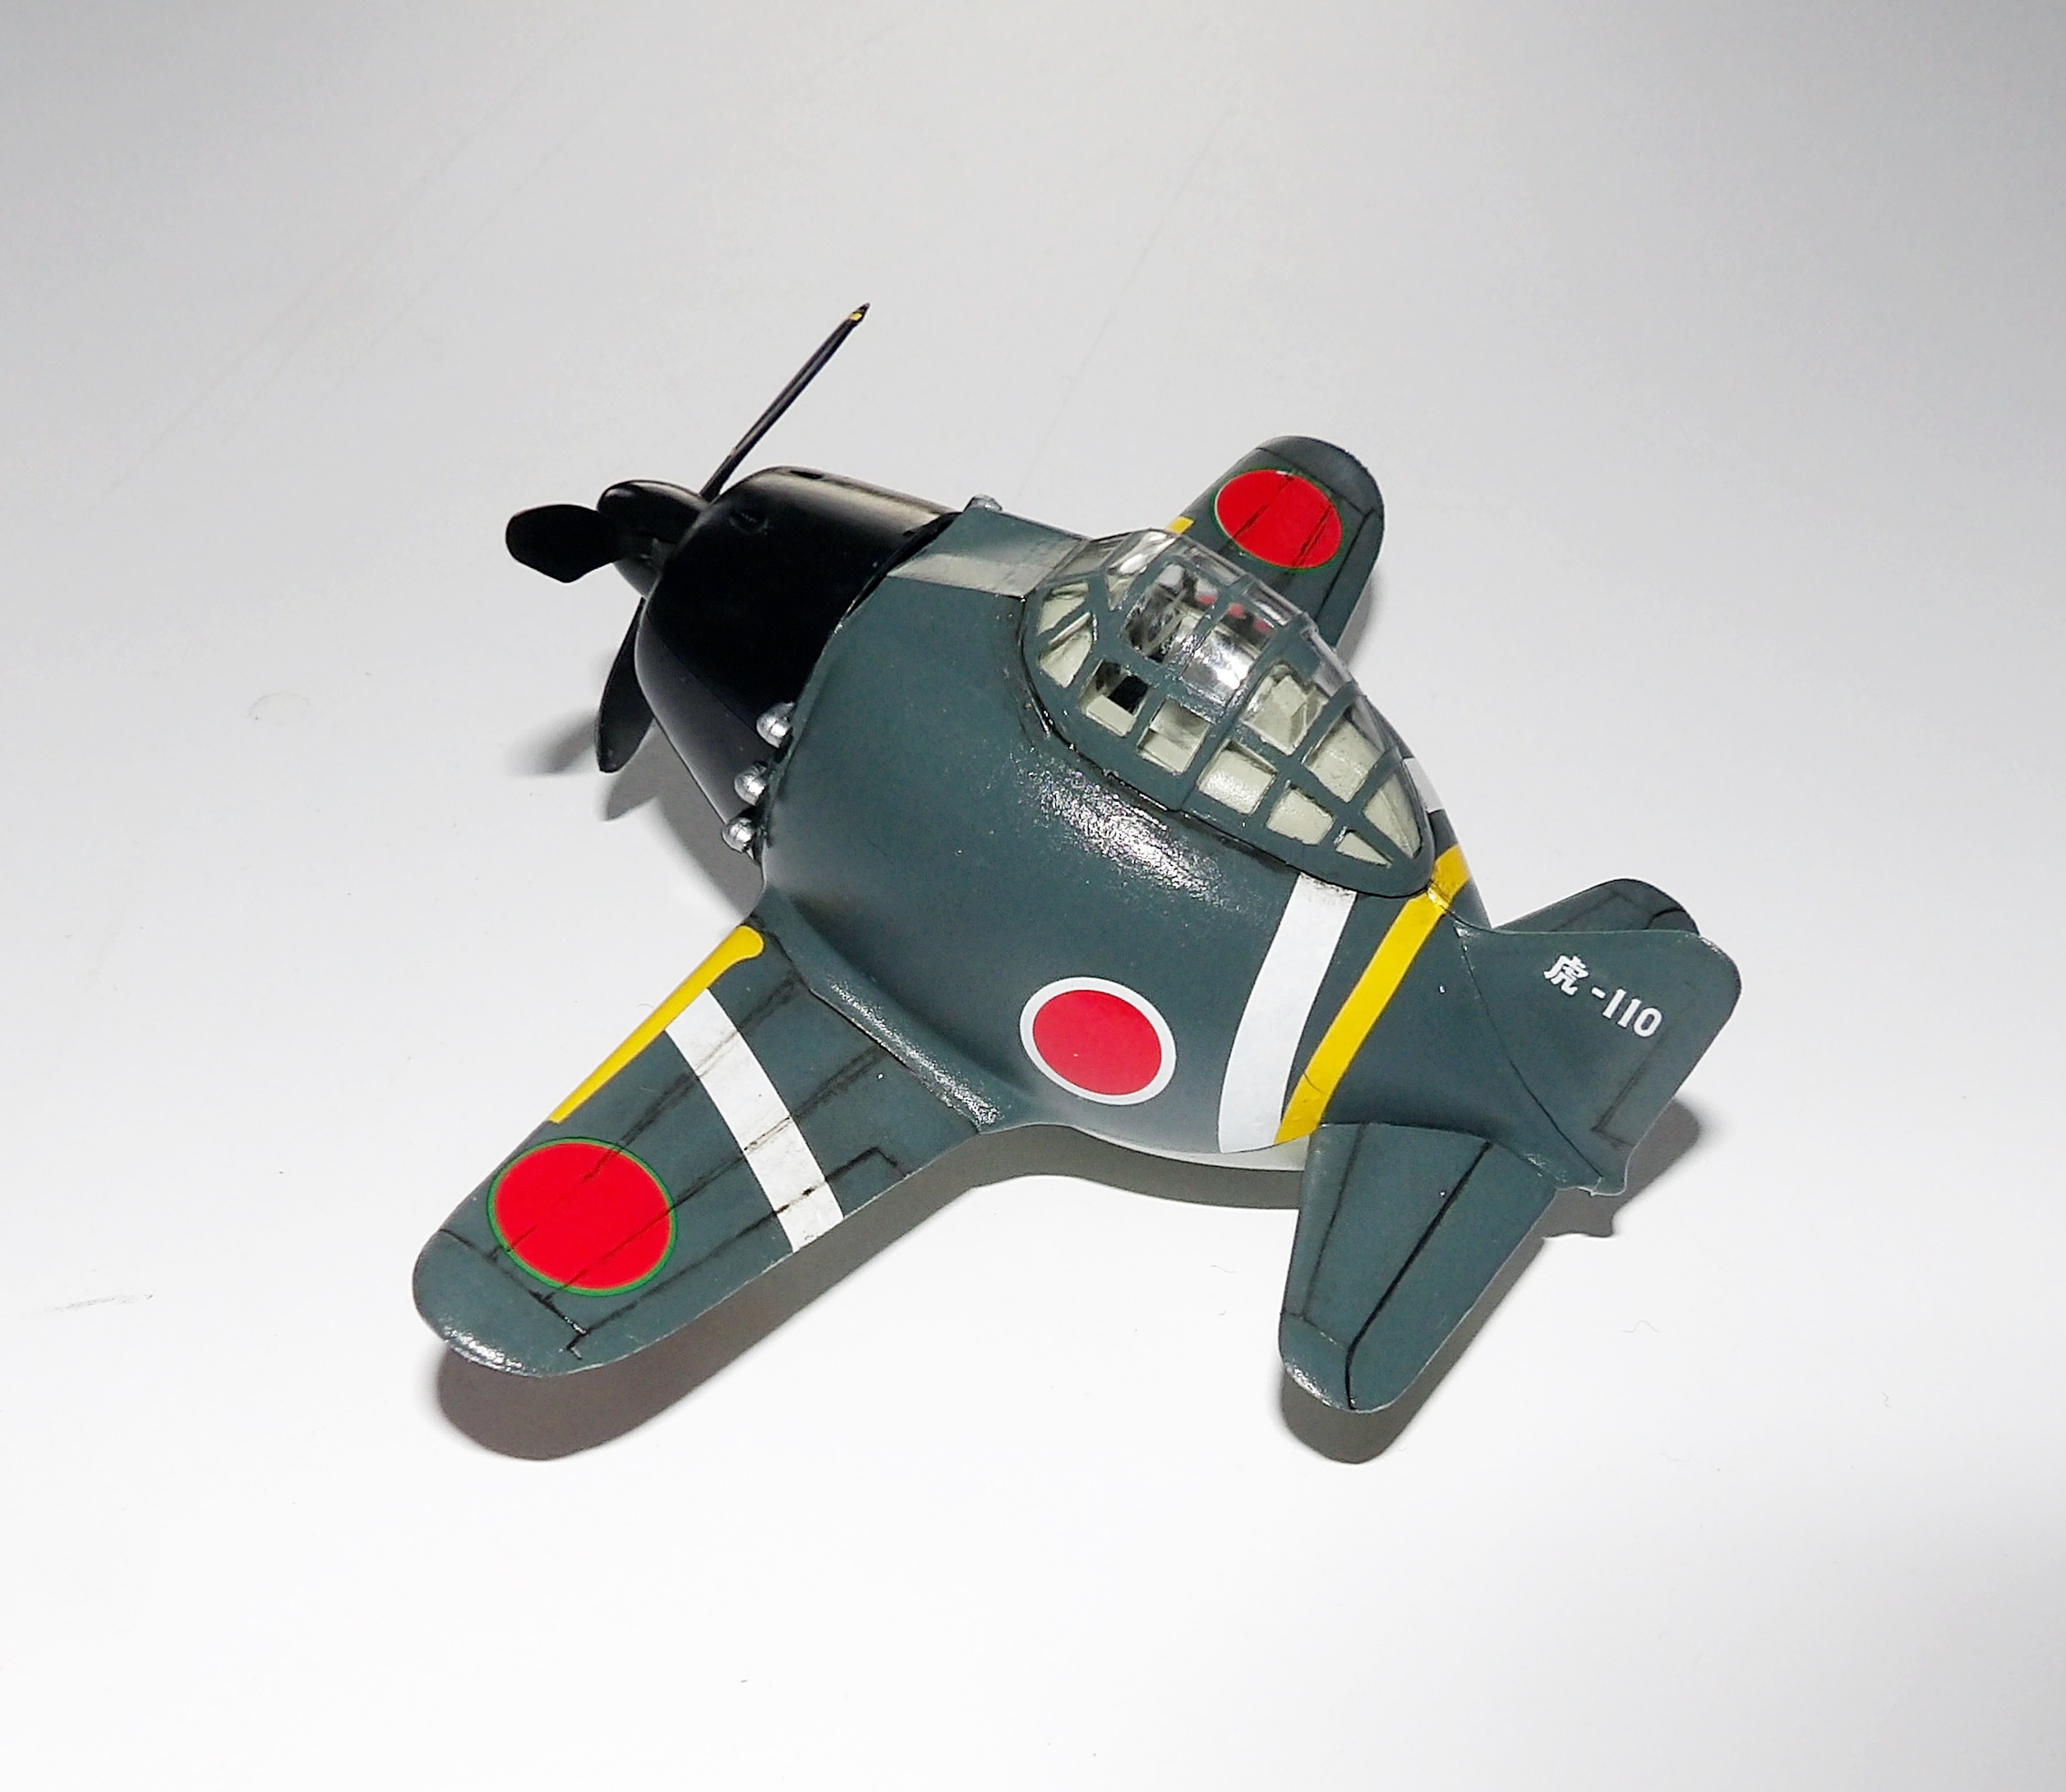
In between two big projects, we have sneaked in this simple model build to save our sanity. Egg planes really are as fun as they look.

Hasegawa zero Space Craft Model Shop Dundee Scotland
Albeit the box art, this is one of those egg planes that does not include a pilot. Boo!
Hasegawa zero Space Craft Model Shop Dundee Scotland
As you can see, this model is very straight forward. The decal sheet covers two options.
Hasegawa zero Space Craft Model Shop Dundee Scotland
We reached this stage within half an hour.
Hasegawa zero Space Craft Model Shop Dundee Scotland
After priming the model in matt black, the nose and wheels are masked off and the model is airbrushed Gray Green.
Hasegawa zero Space Craft Model Shop Dundee Scotland
We masked off the underside using a combination of masking tape and masking fluid. Straight lines are masked with masking tape. Large and hard to reach areas are covered with masking fluid.
Hasegawa zero Space Craft Model Shop Dundee Scotland
The canopy is also masked with masking fluid. The model is airbrushed IJN Green.
Hasegawa zero Space Craft Model Shop Dundee Scotland
Once the paint has dried, we began to peel off the masking fluid.
Hasegawa zero Space Craft Model Shop Dundee Scotland
All the masking products are removed.
Hasegawa zero Space Craft Model Shop Dundee Scotland
Decals are added to the model.
Hasegawa zero Space Craft Model Shop Dundee Scotland
The model is varnish. The panel lines are picked out using green/brown paneliner and the model is sealed again with varnish.
Hasegawa zero Space Craft Model Shop Dundee Scotland
This is what the underside looks like.
Hasegawa zero Space Craft Model Shop Dundee Scotland
The panel lines are more prominent on this side.
Hasegawa zero Space Craft Model Shop Dundee Scotland
Done!

Model Build – Miniart 1:35 British Lorry 3t

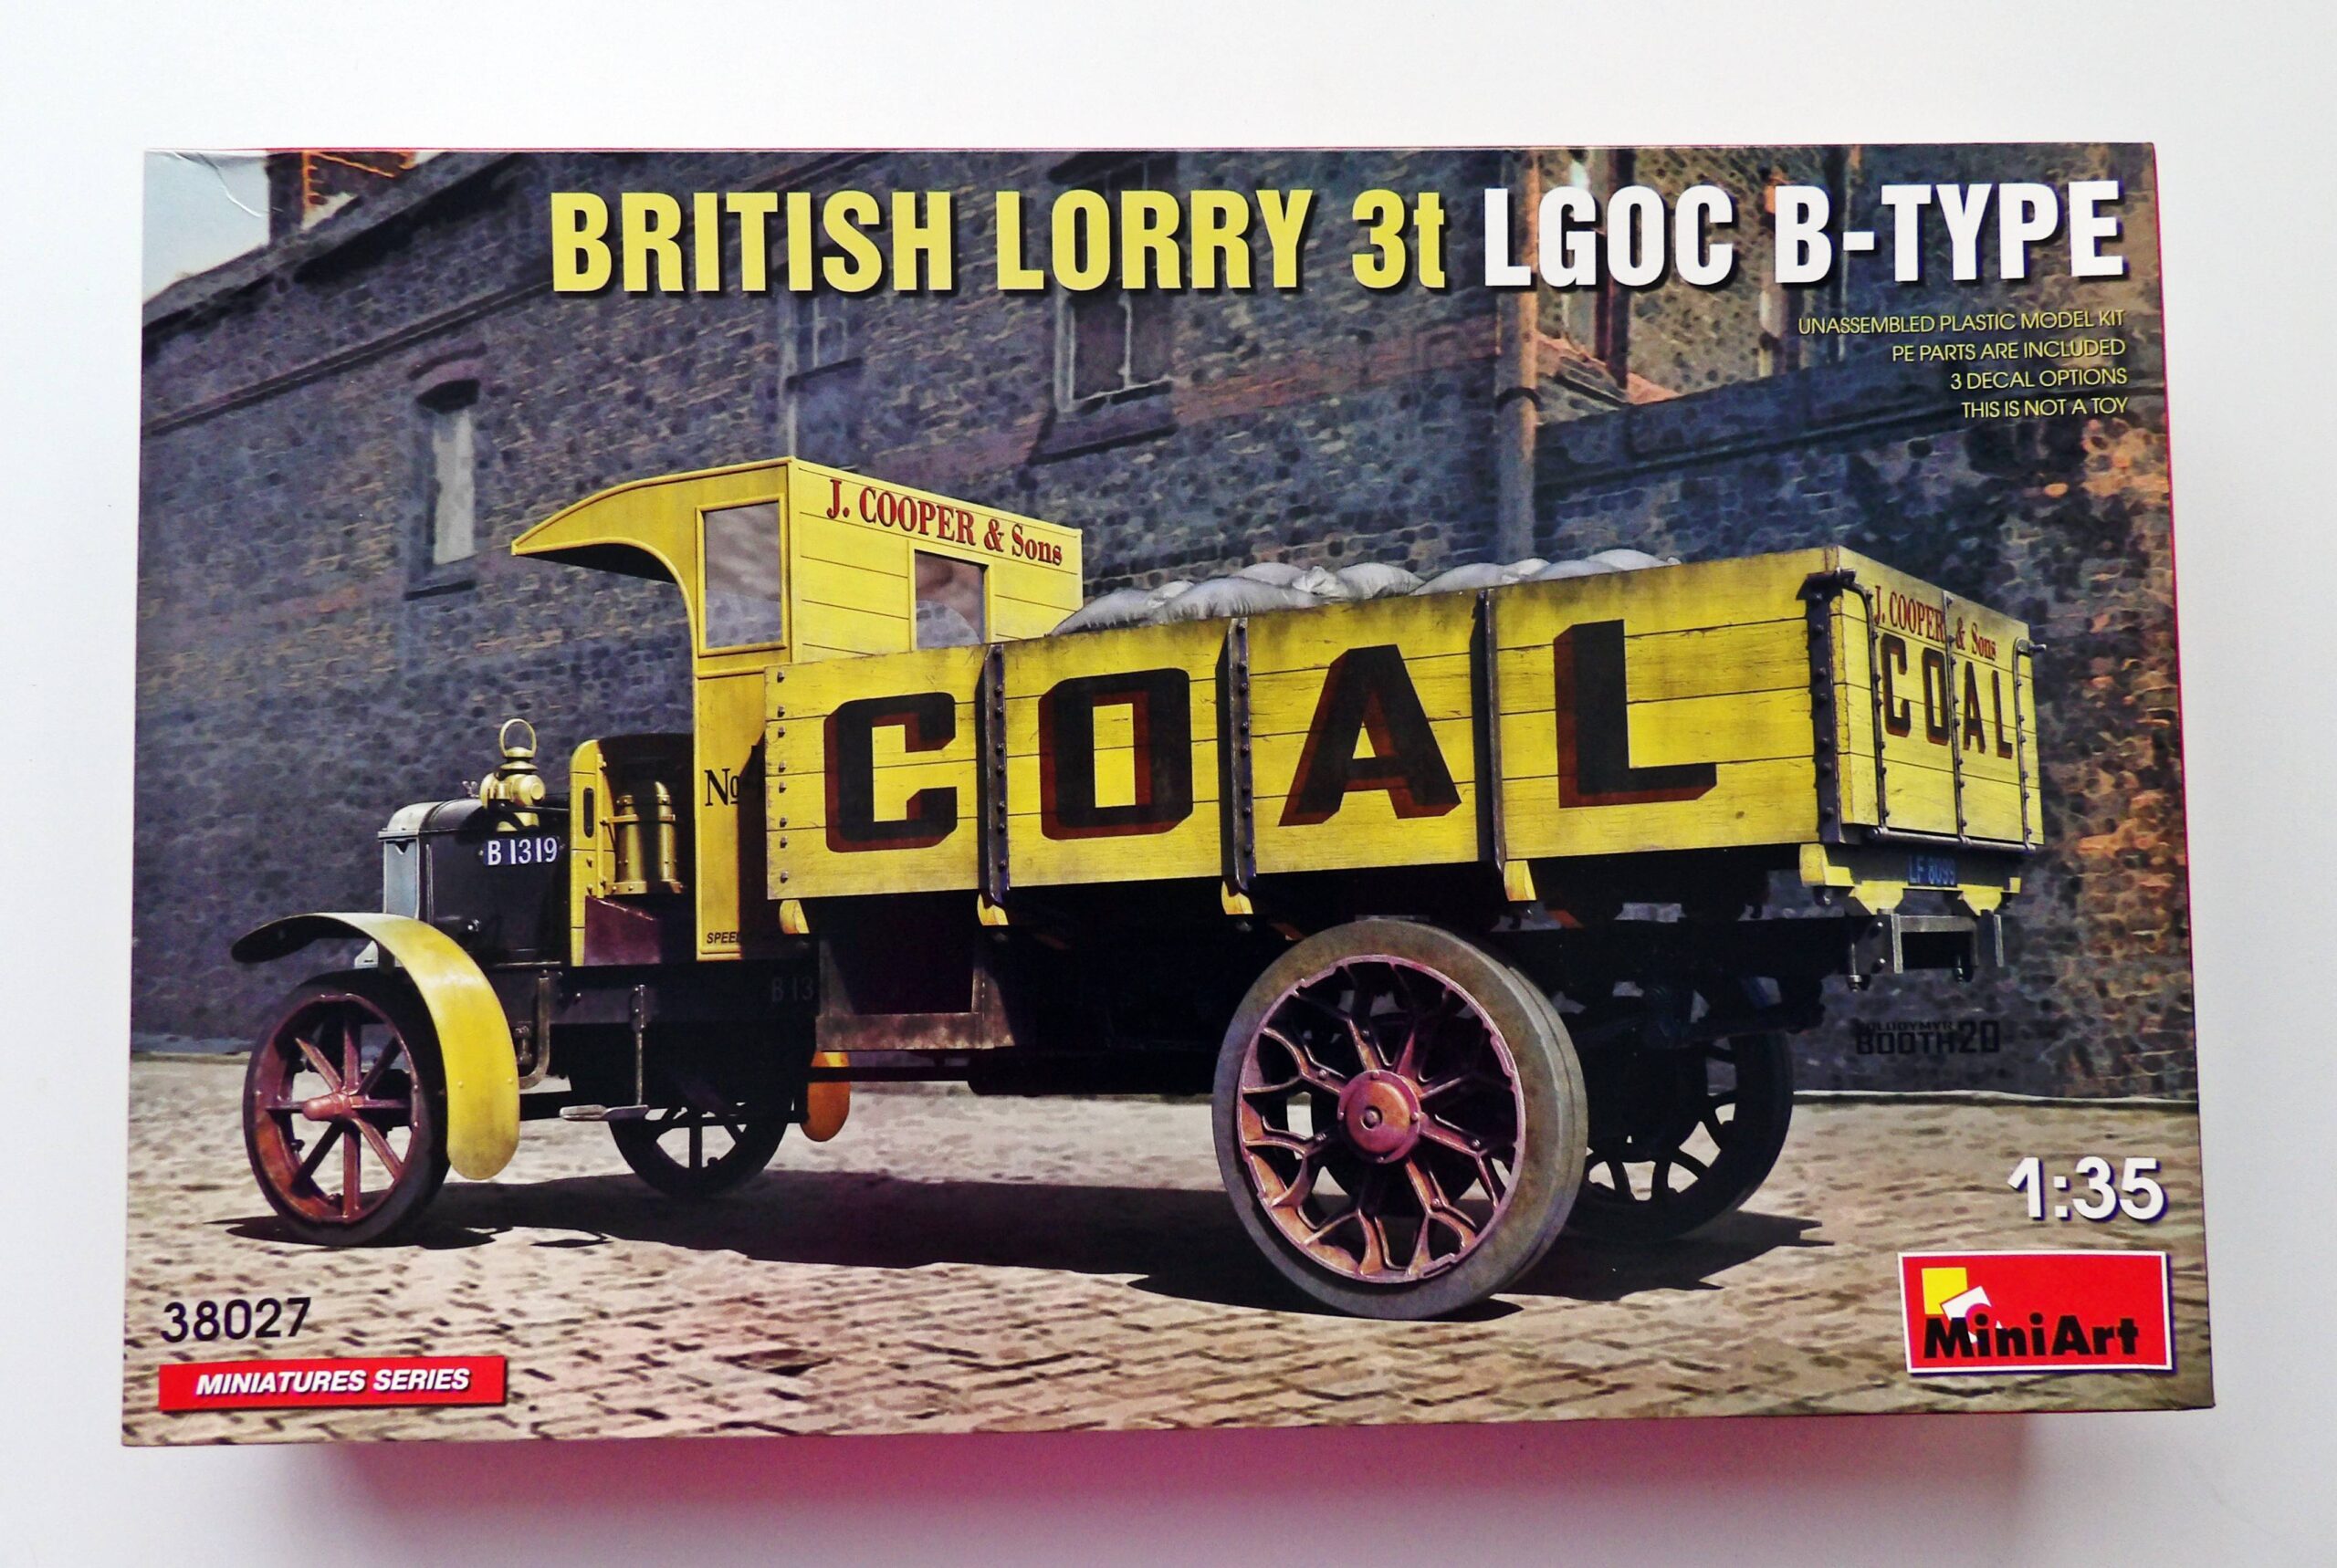
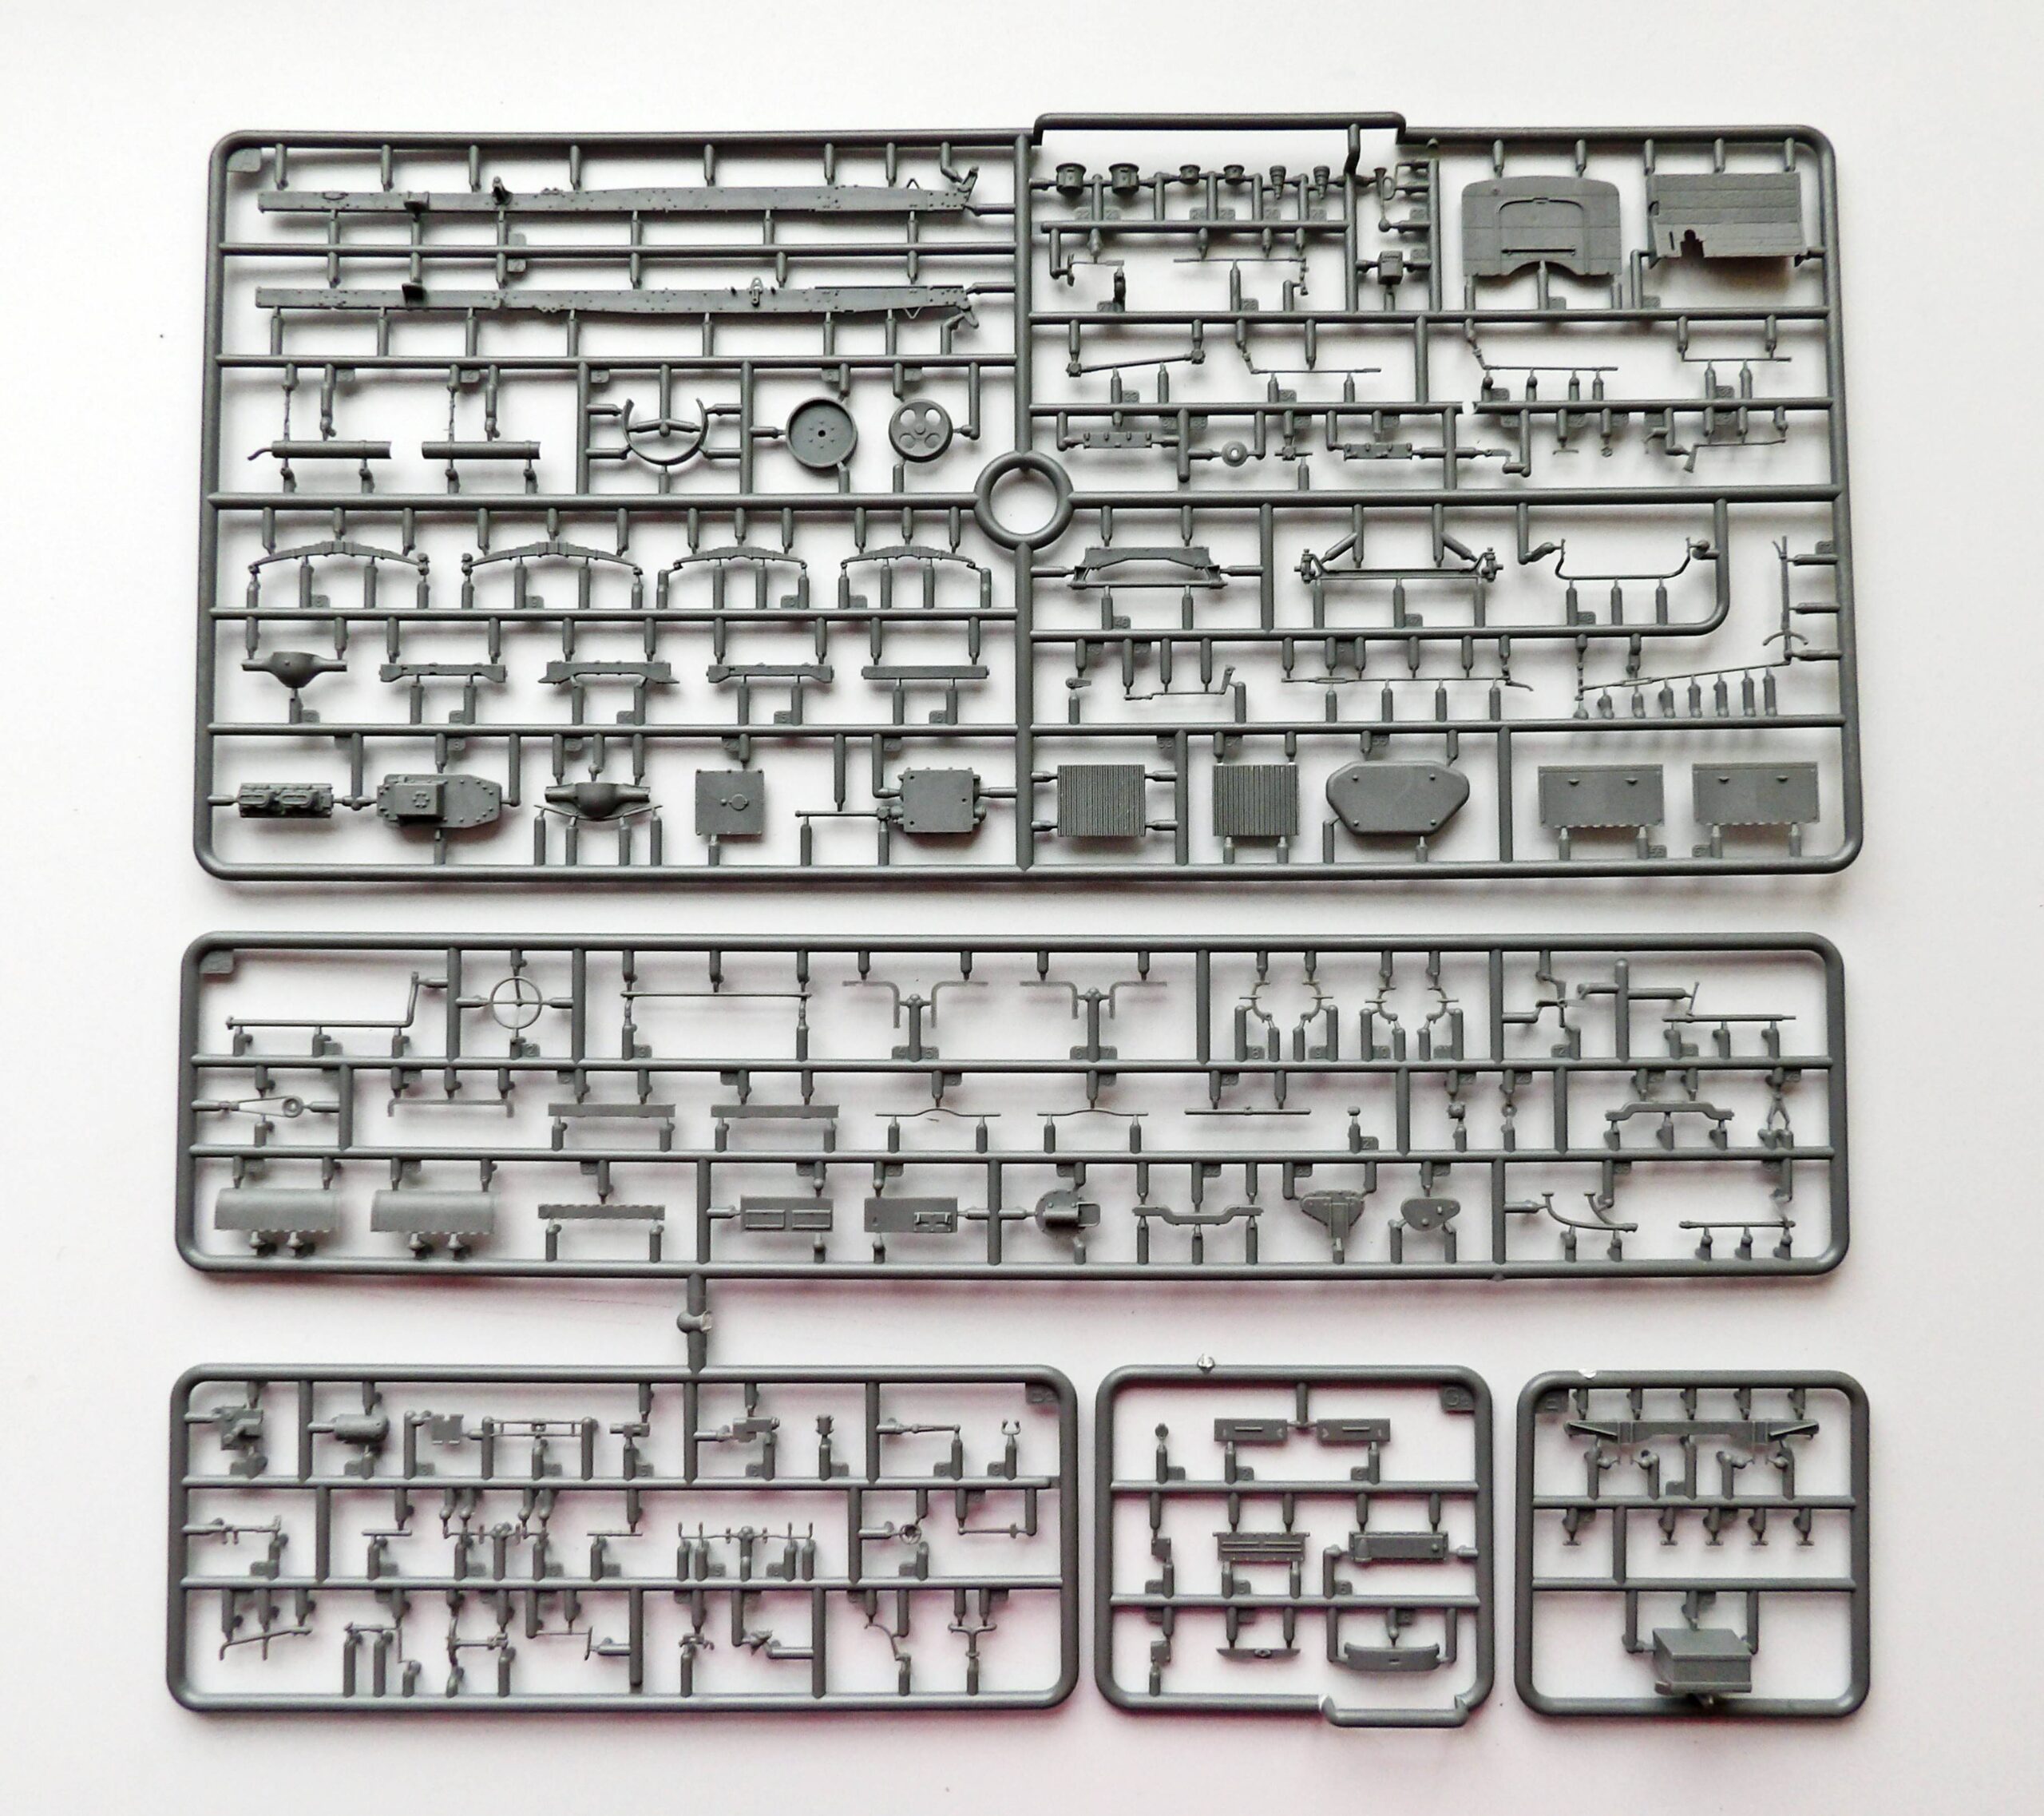
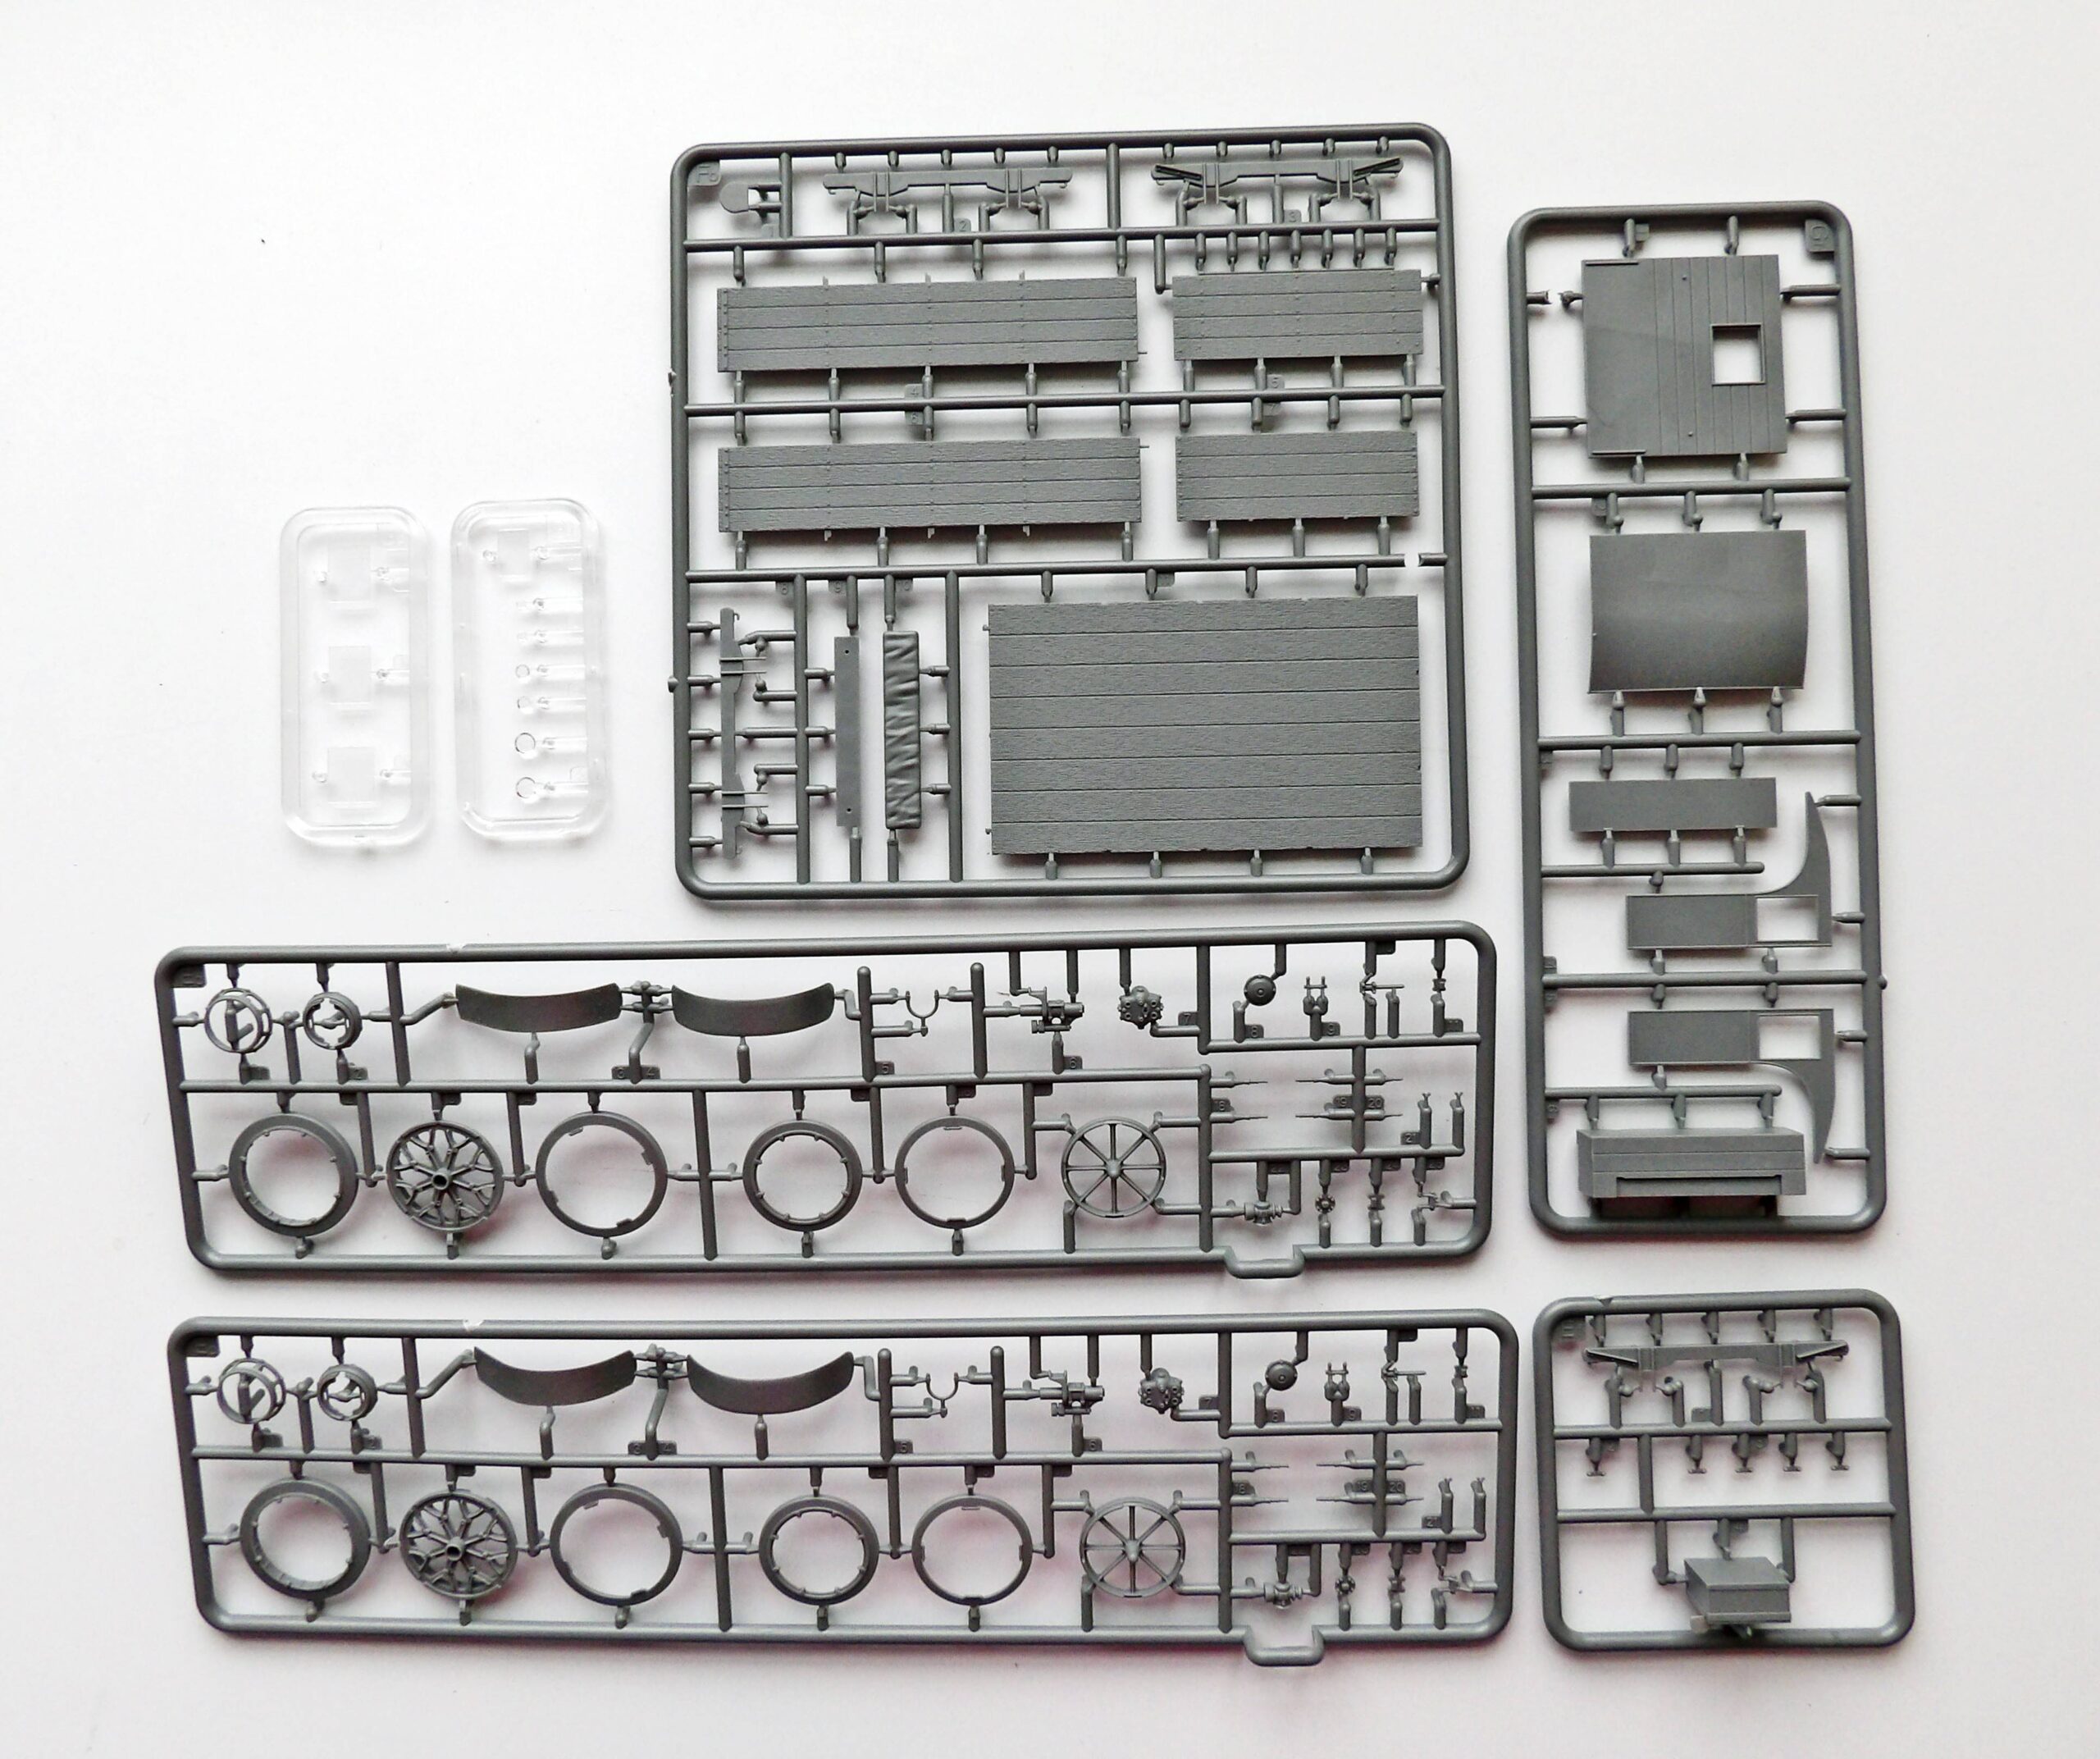
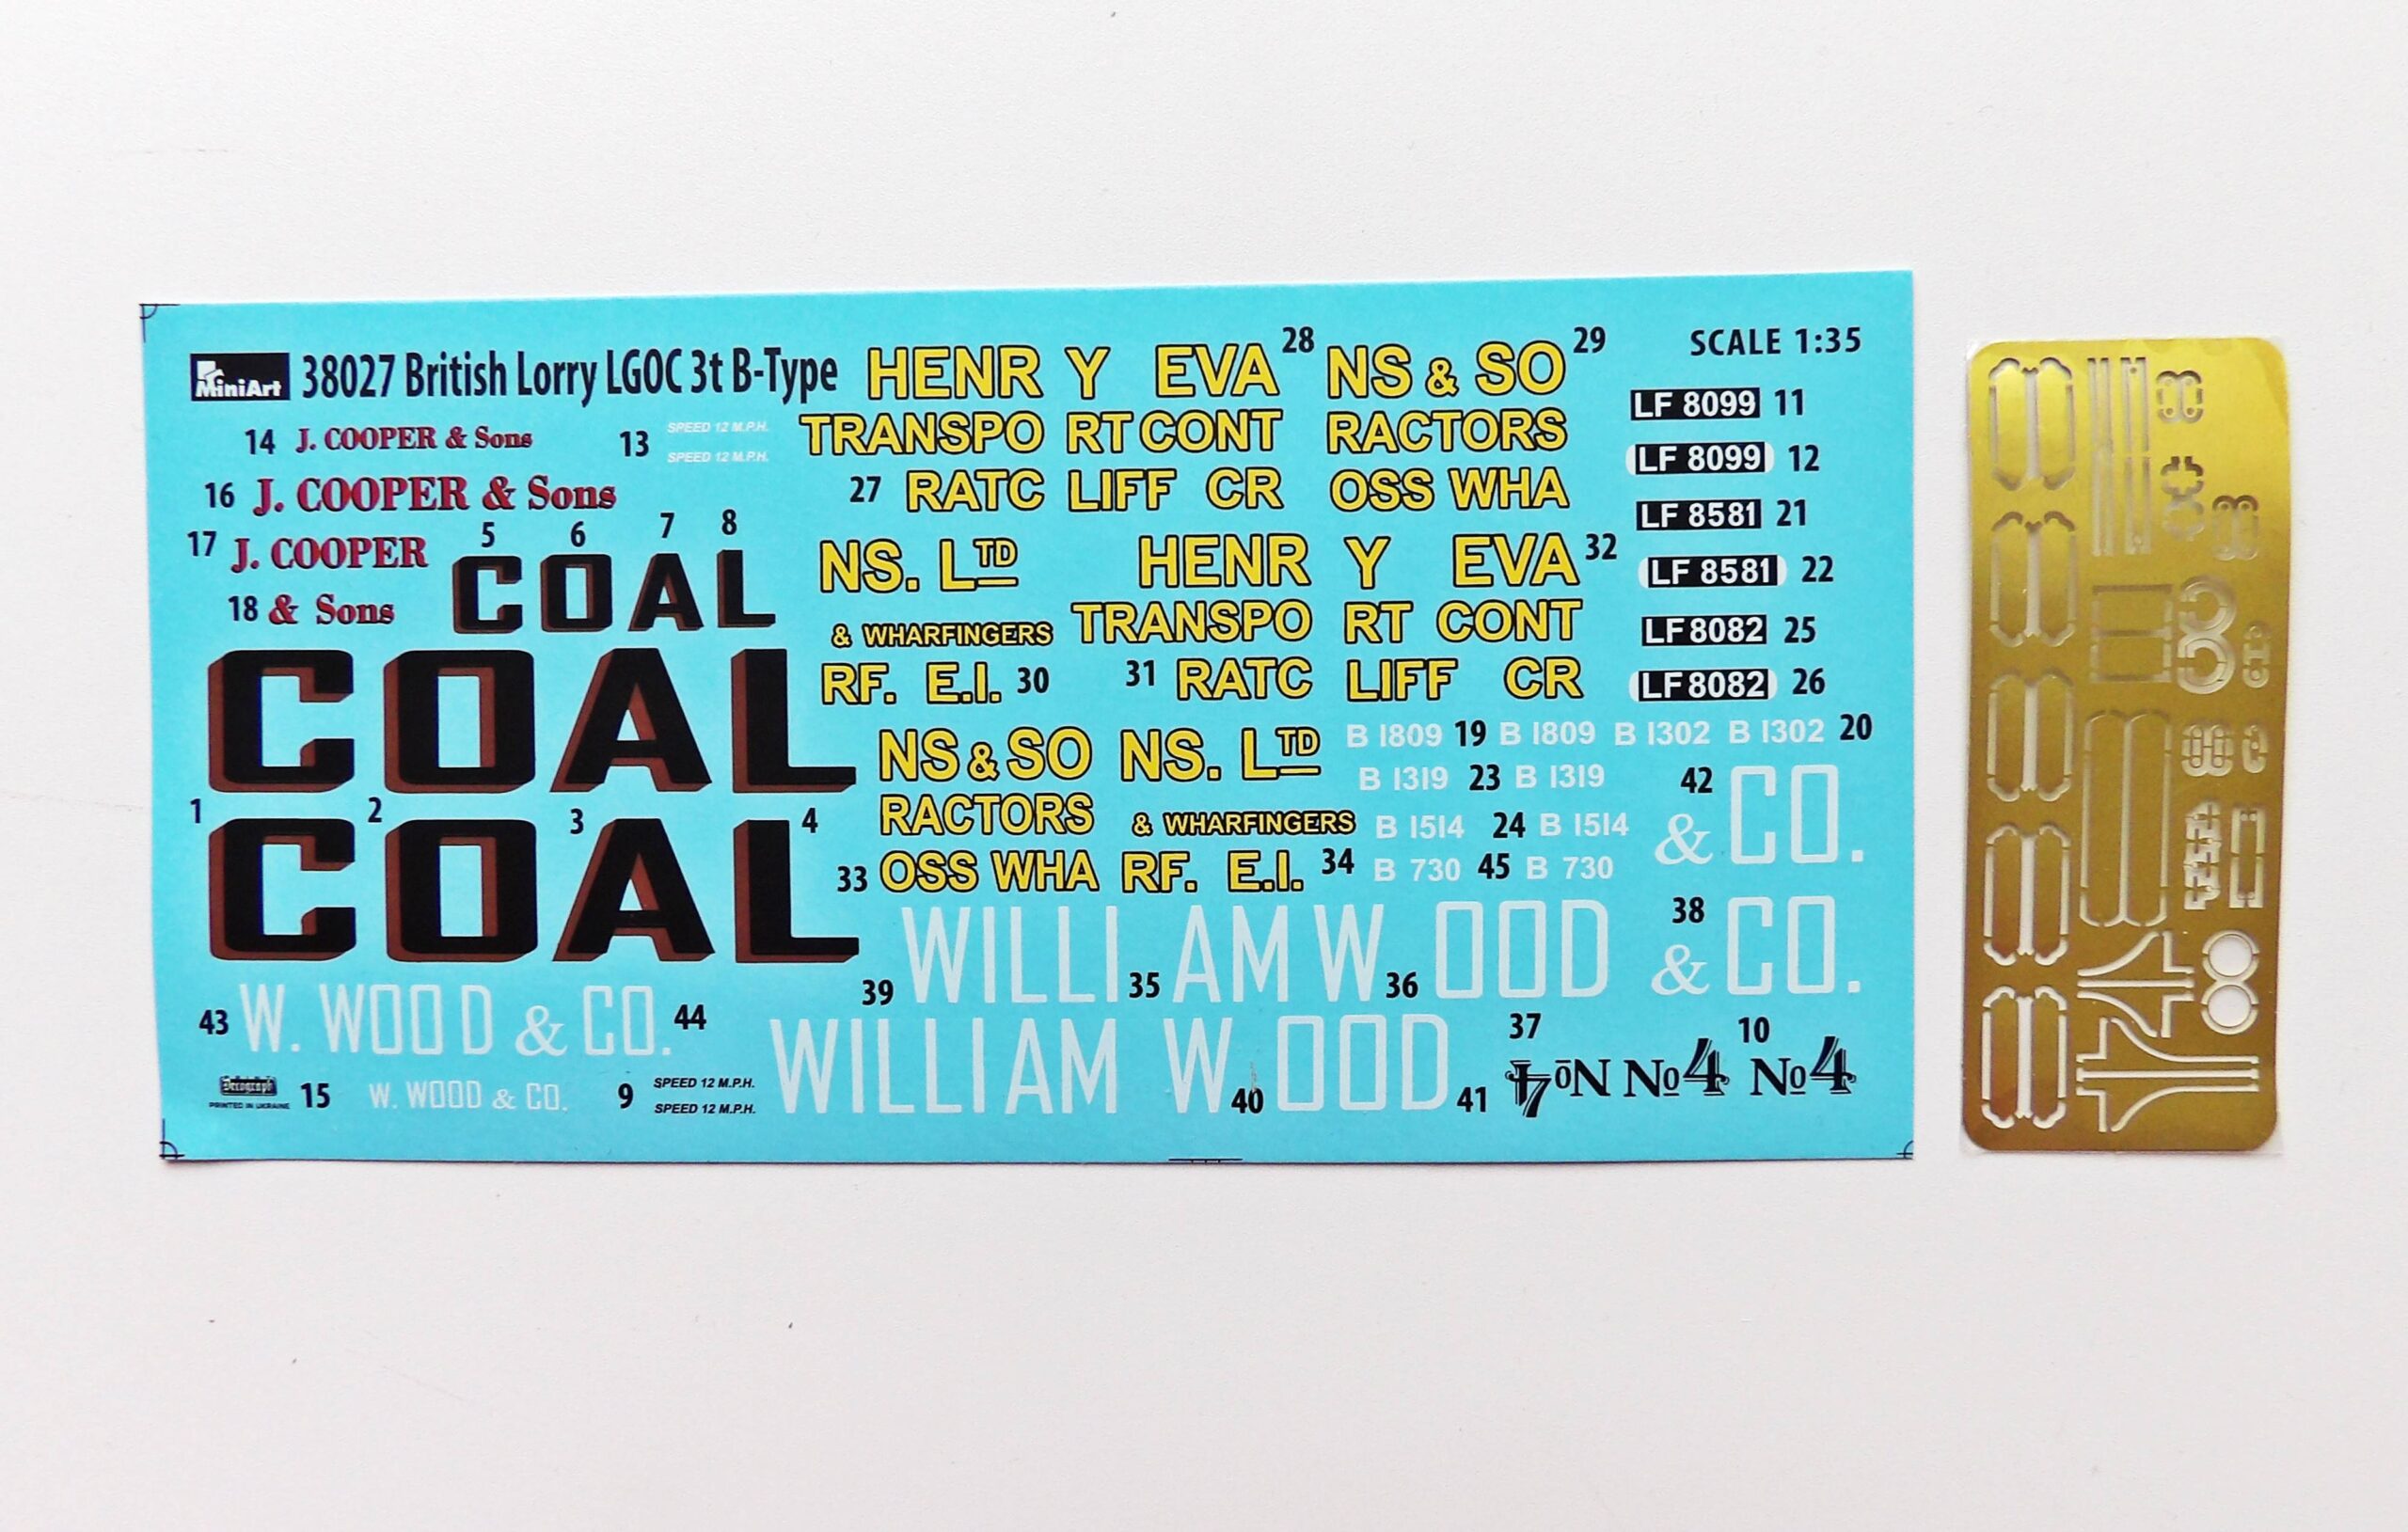
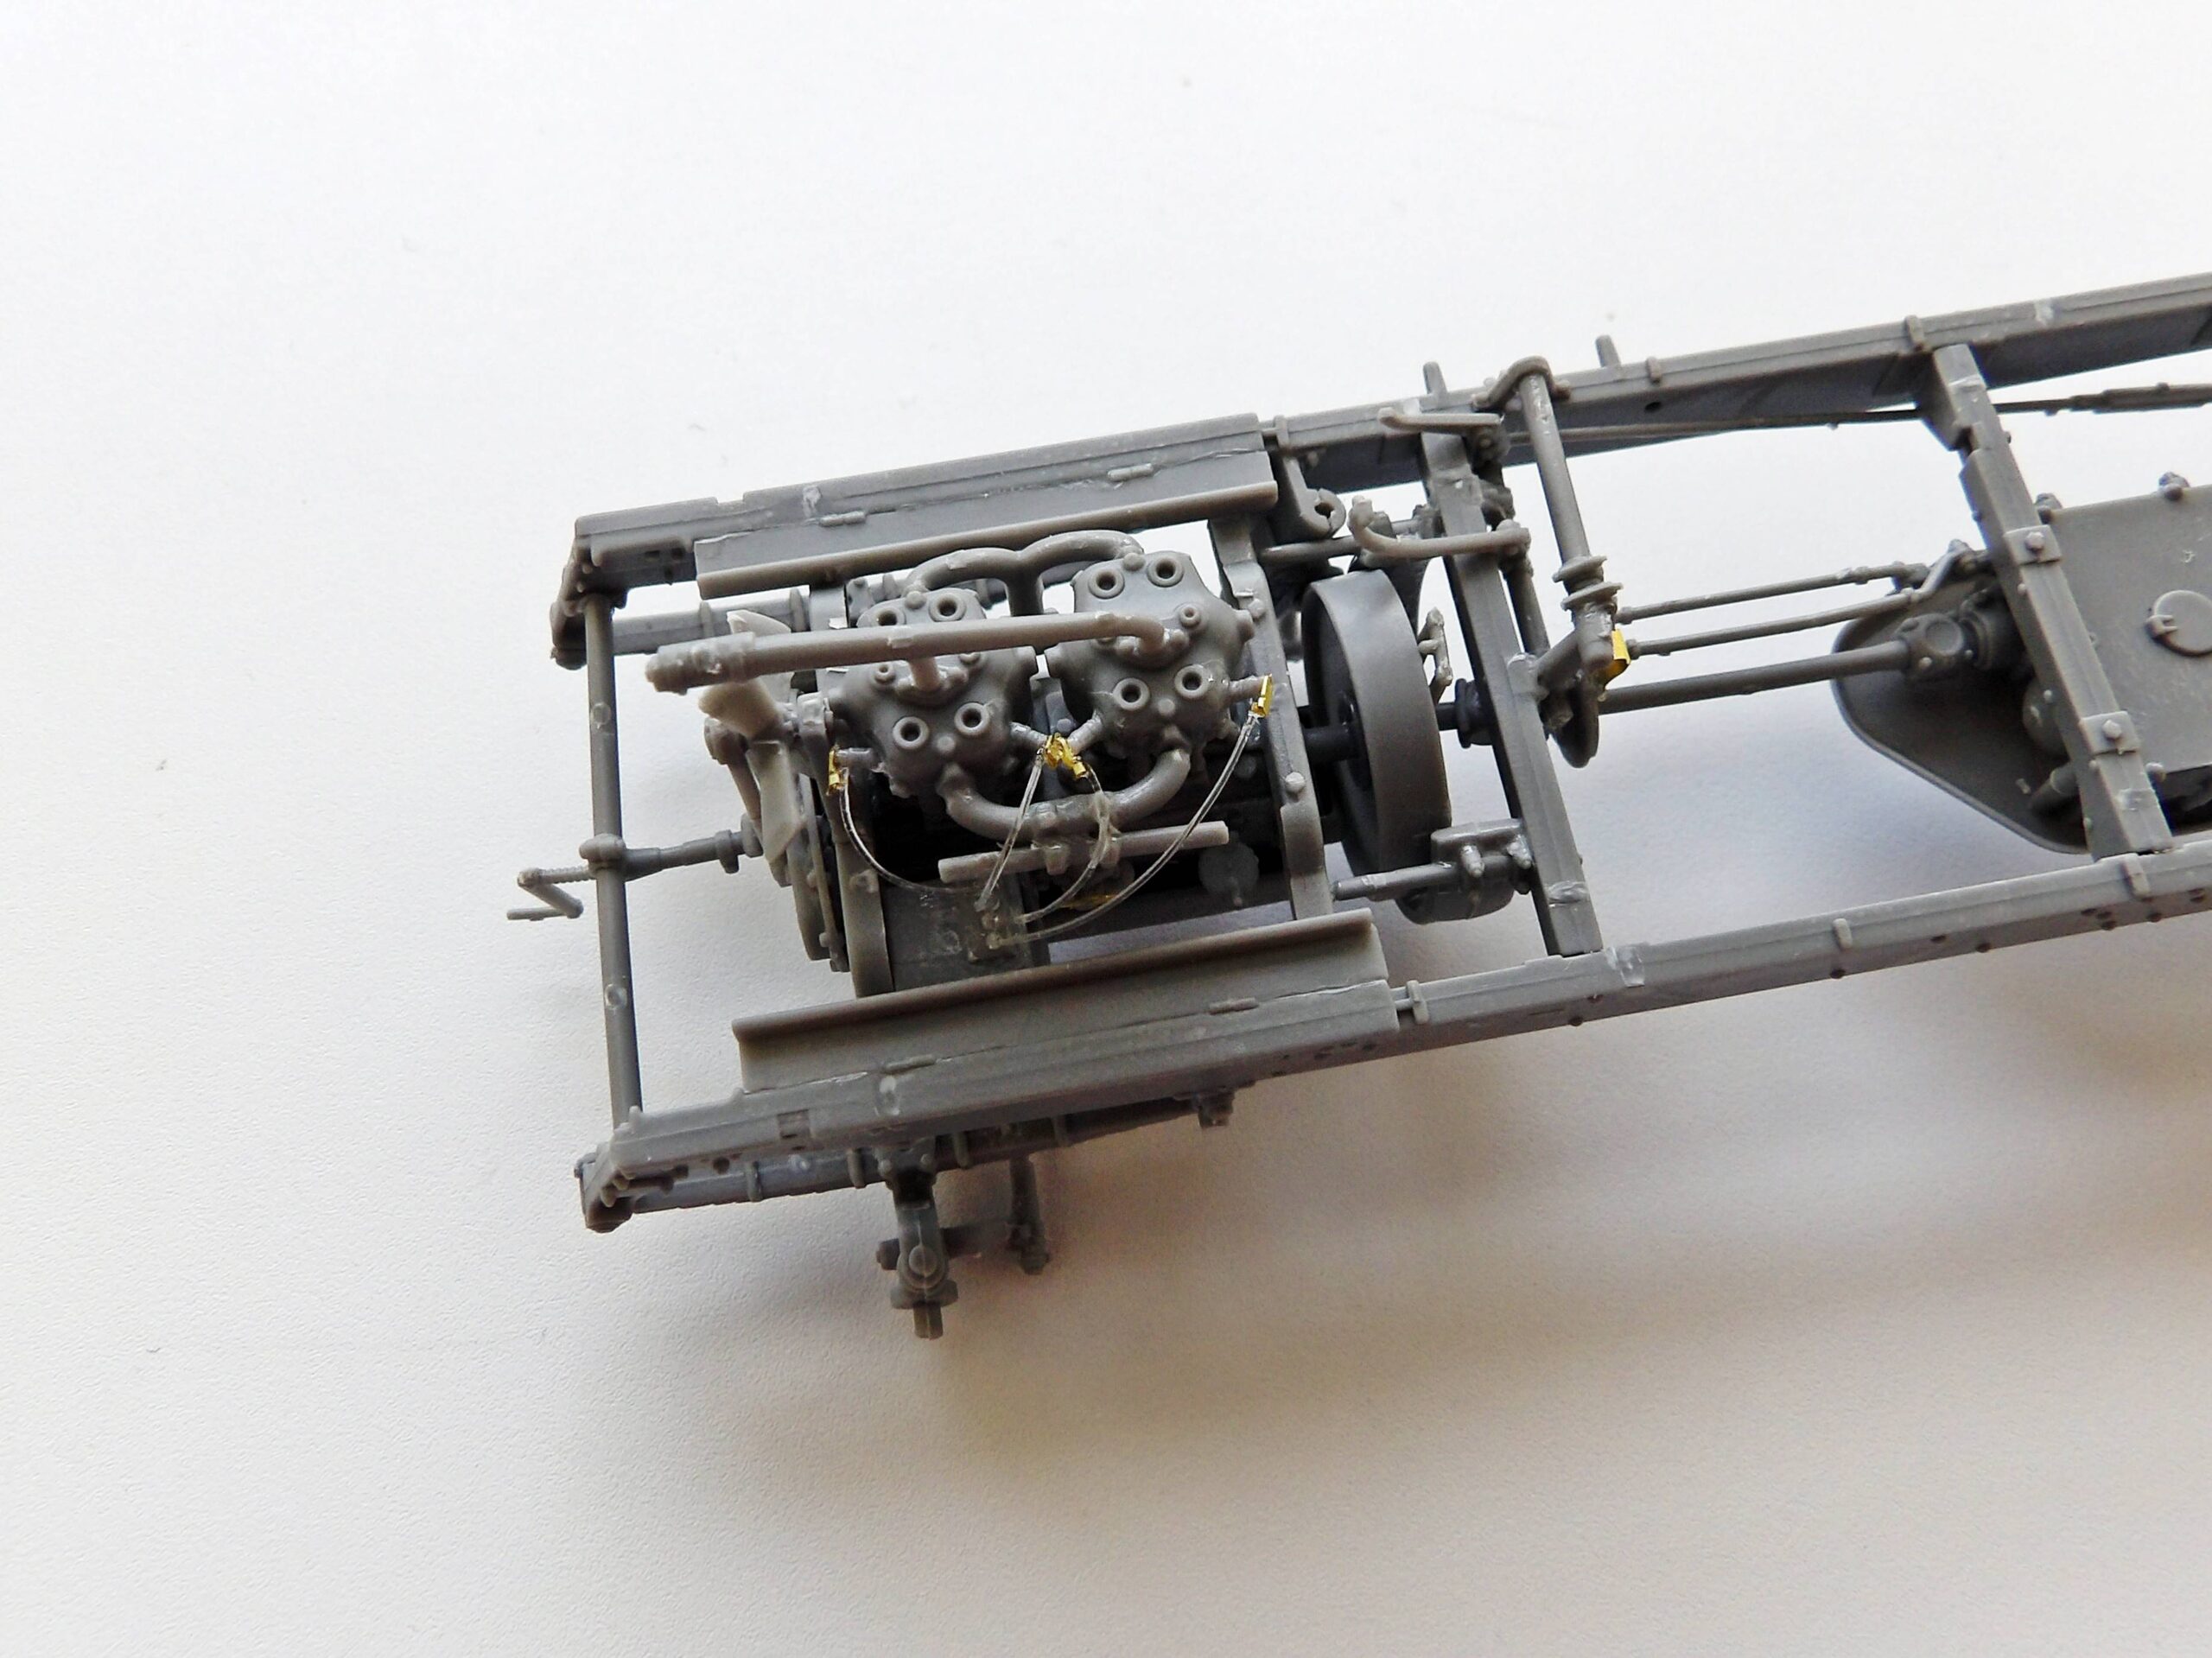
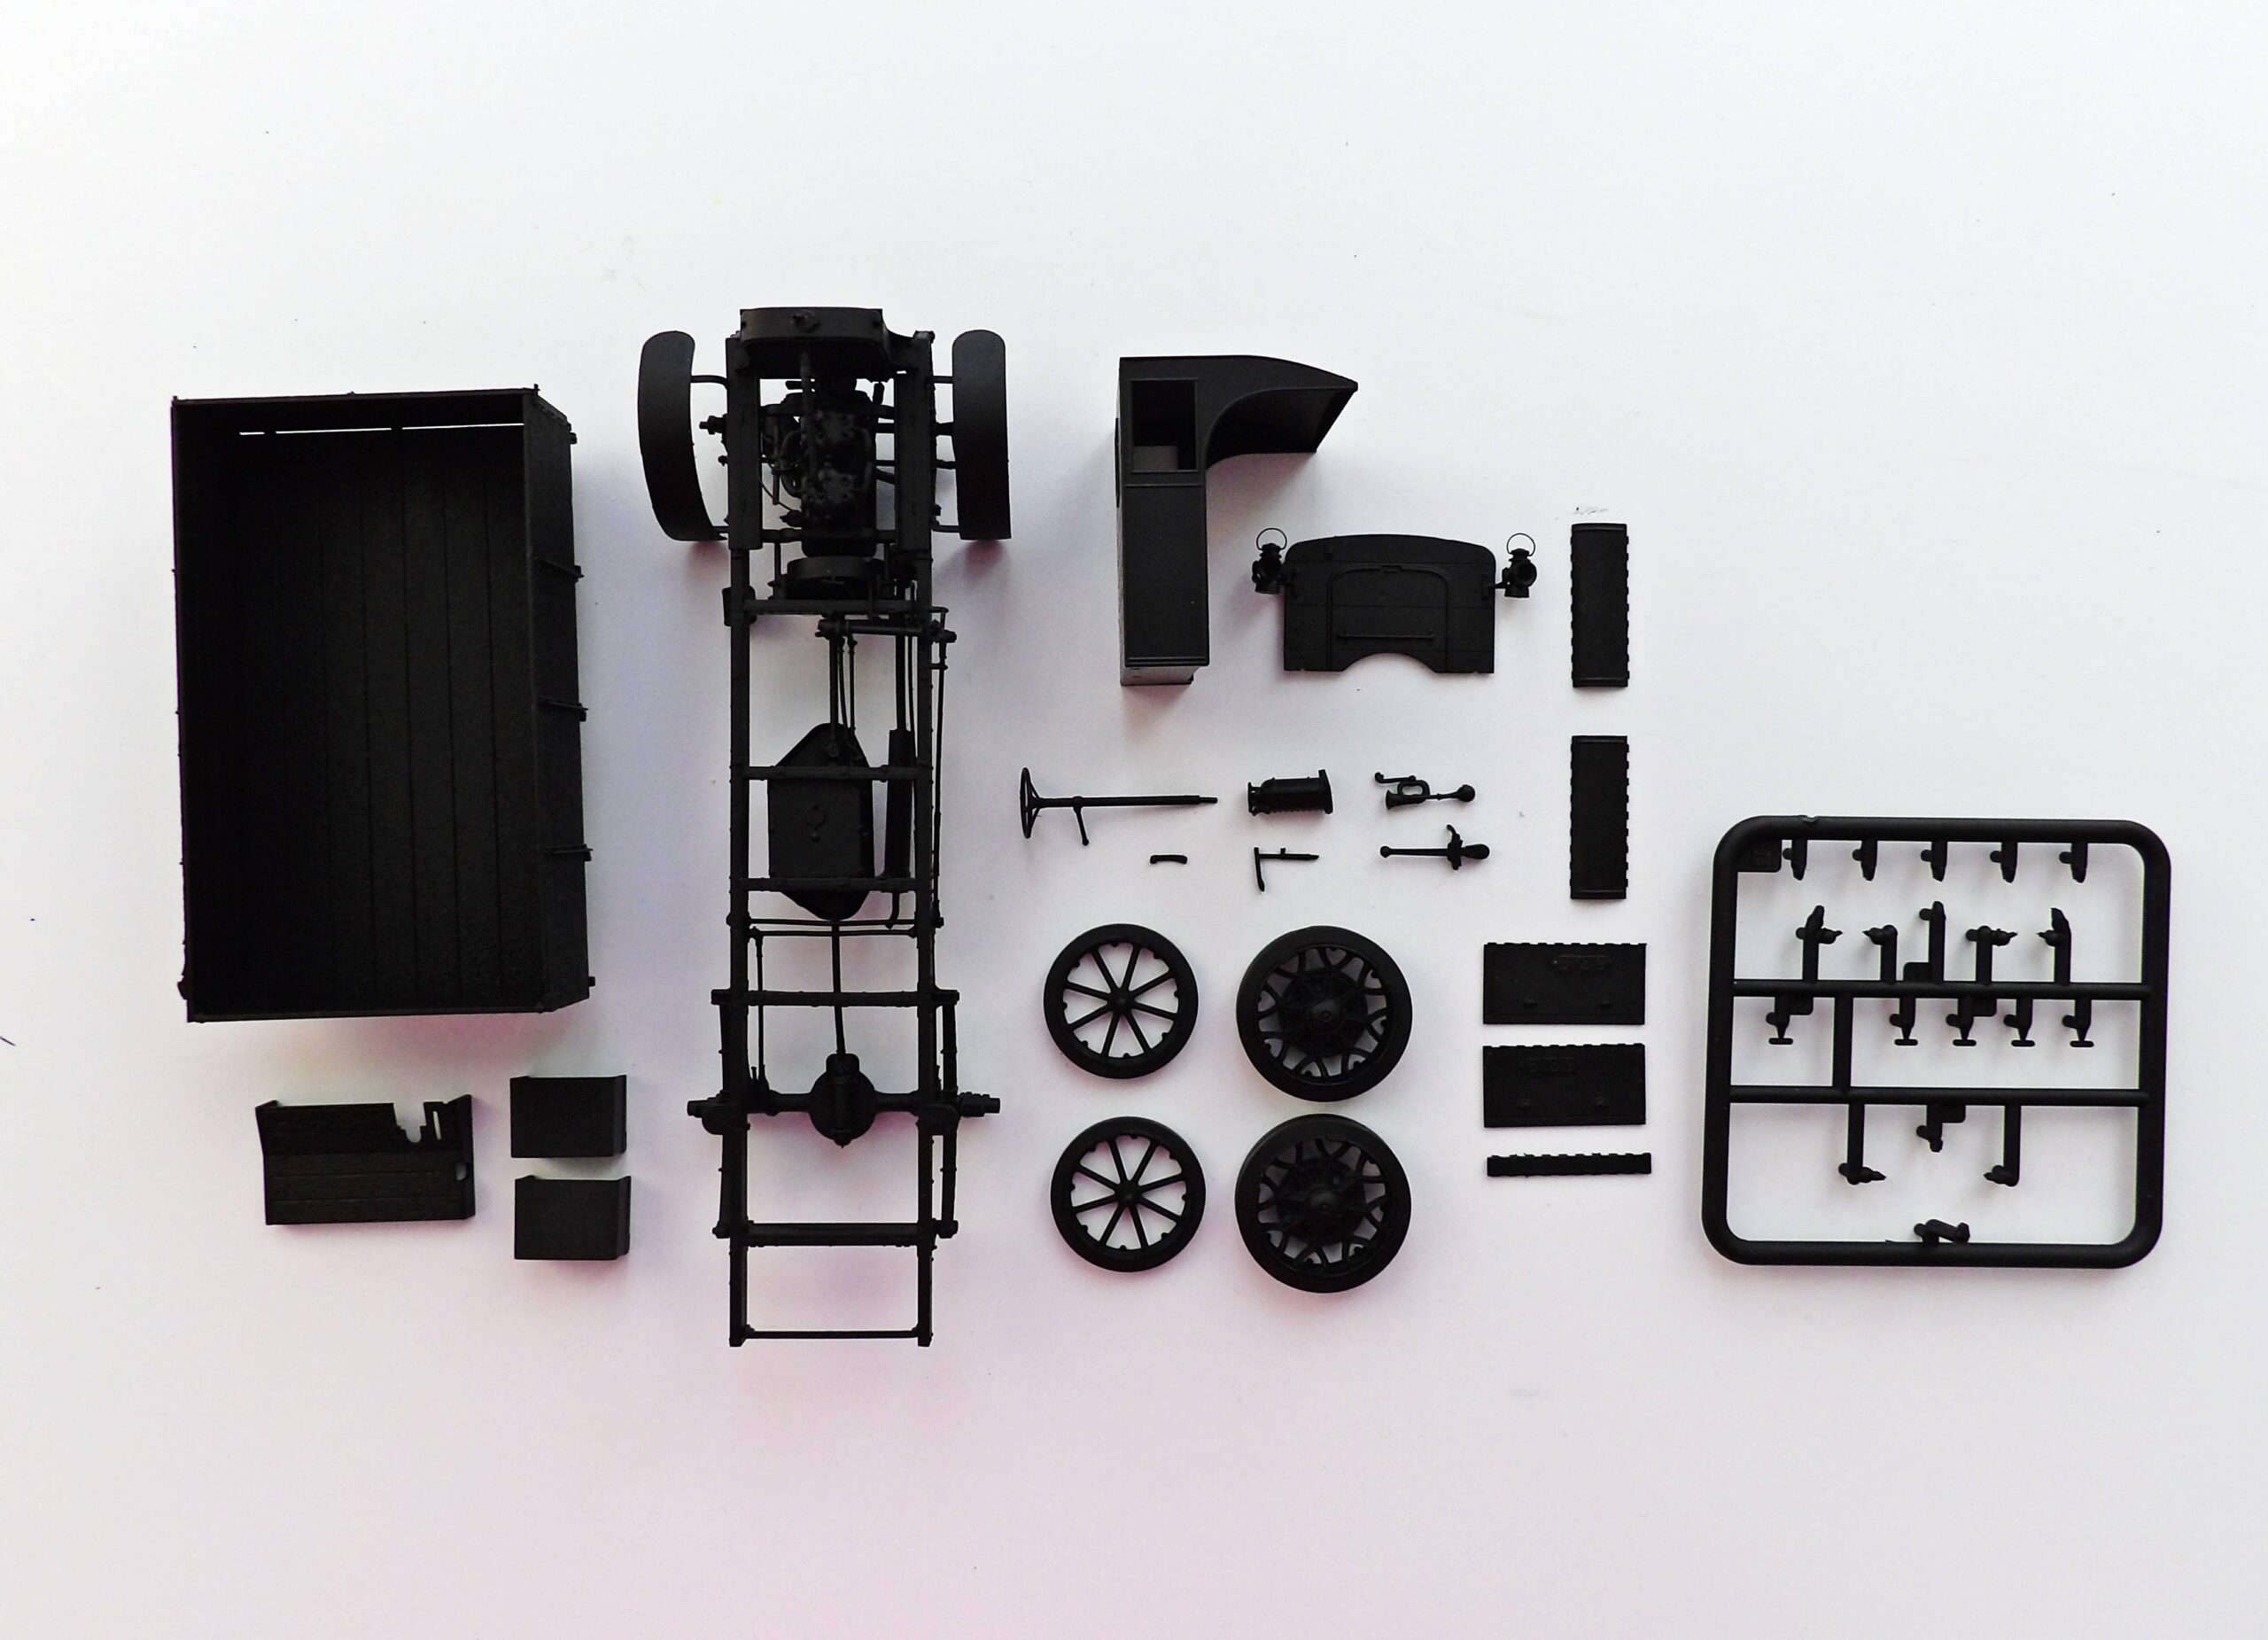
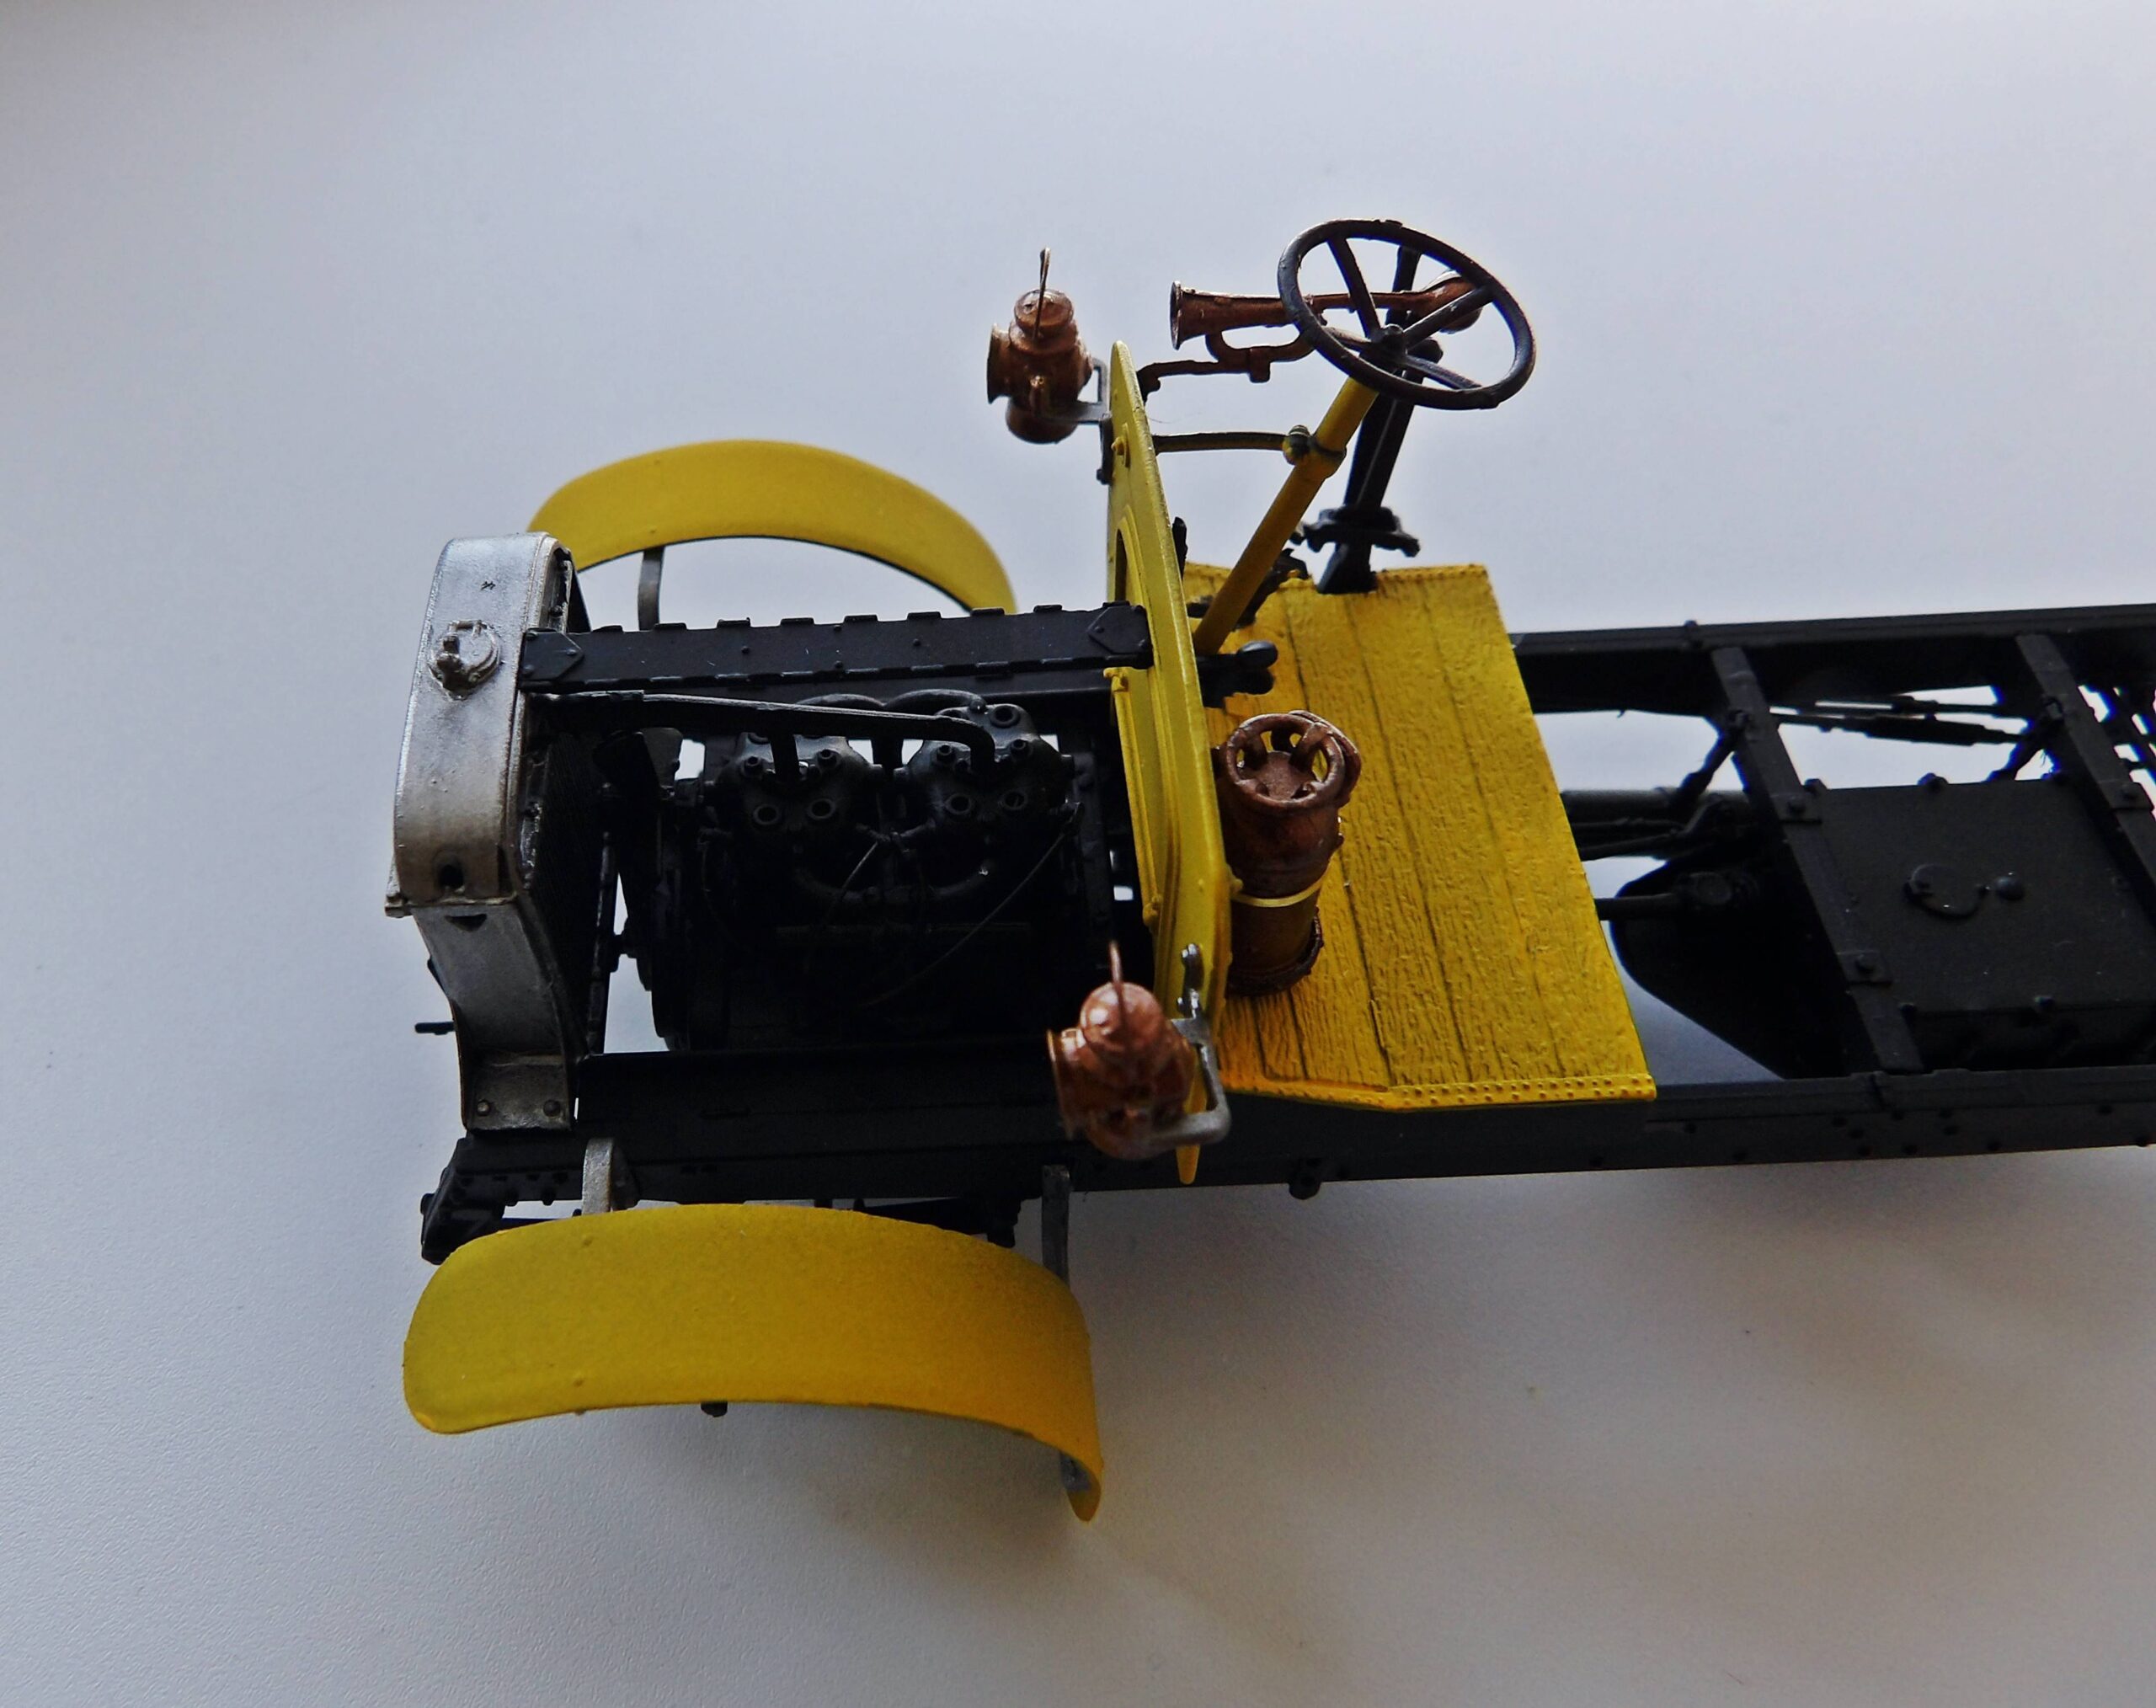
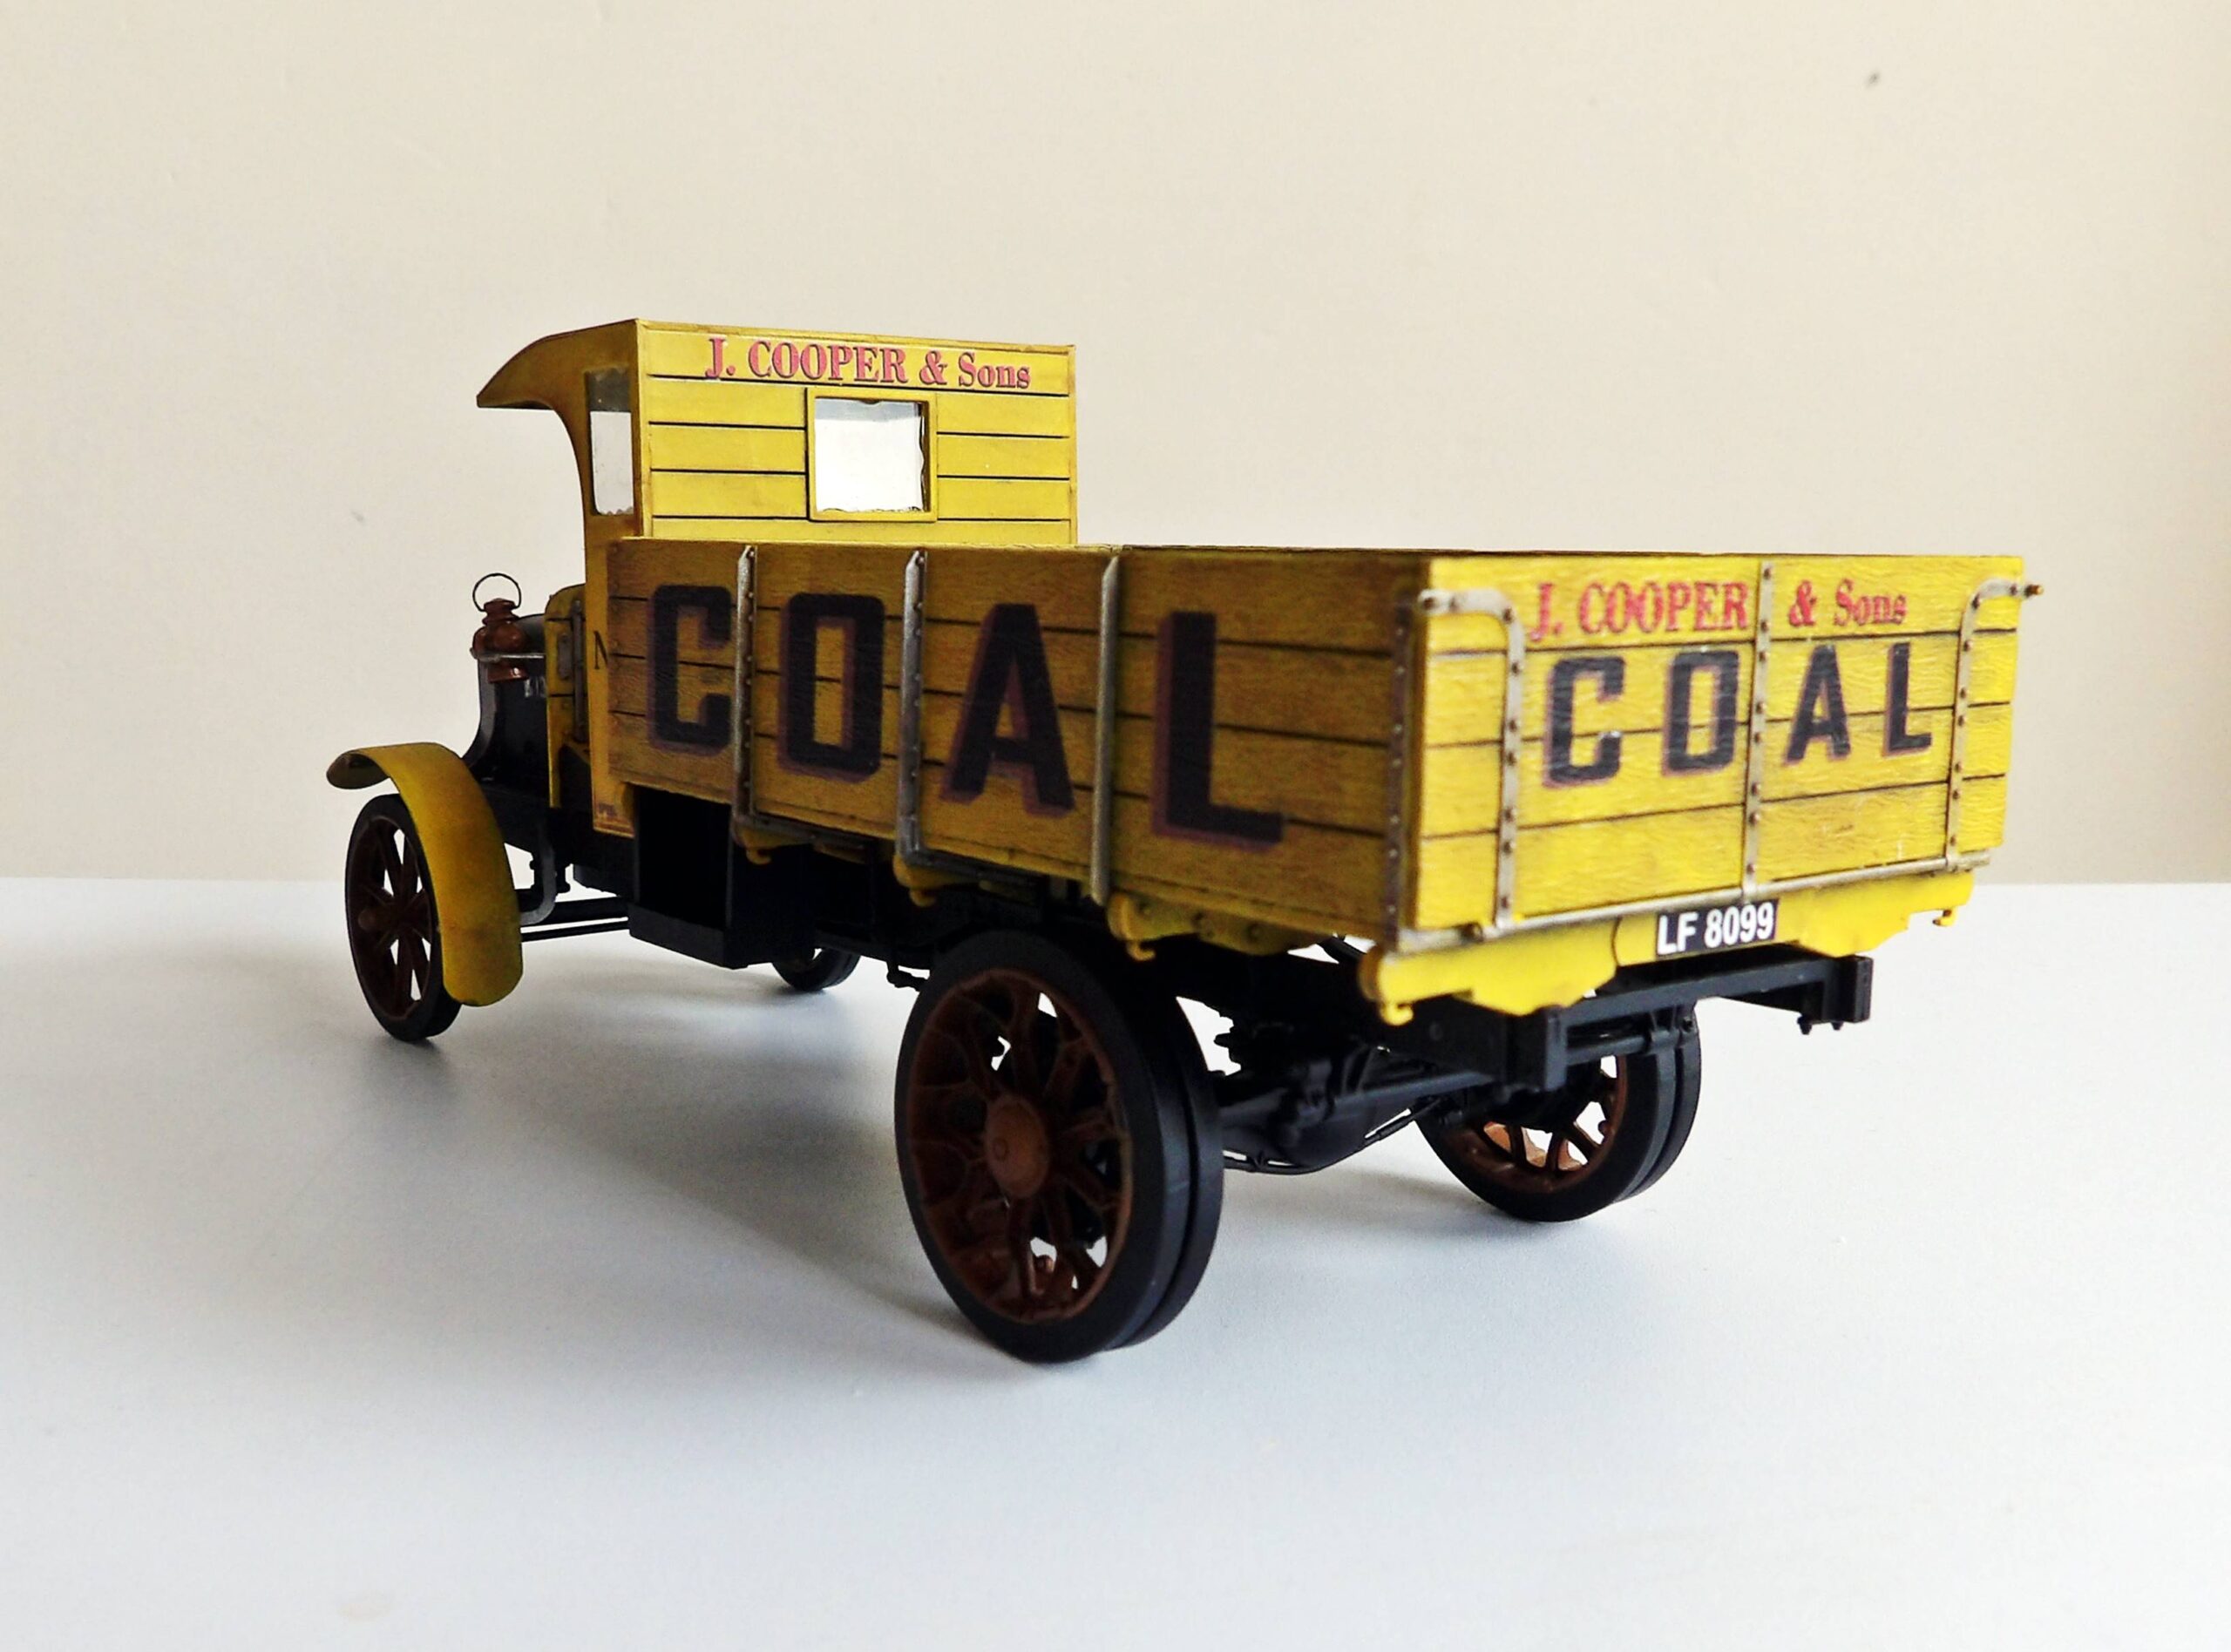
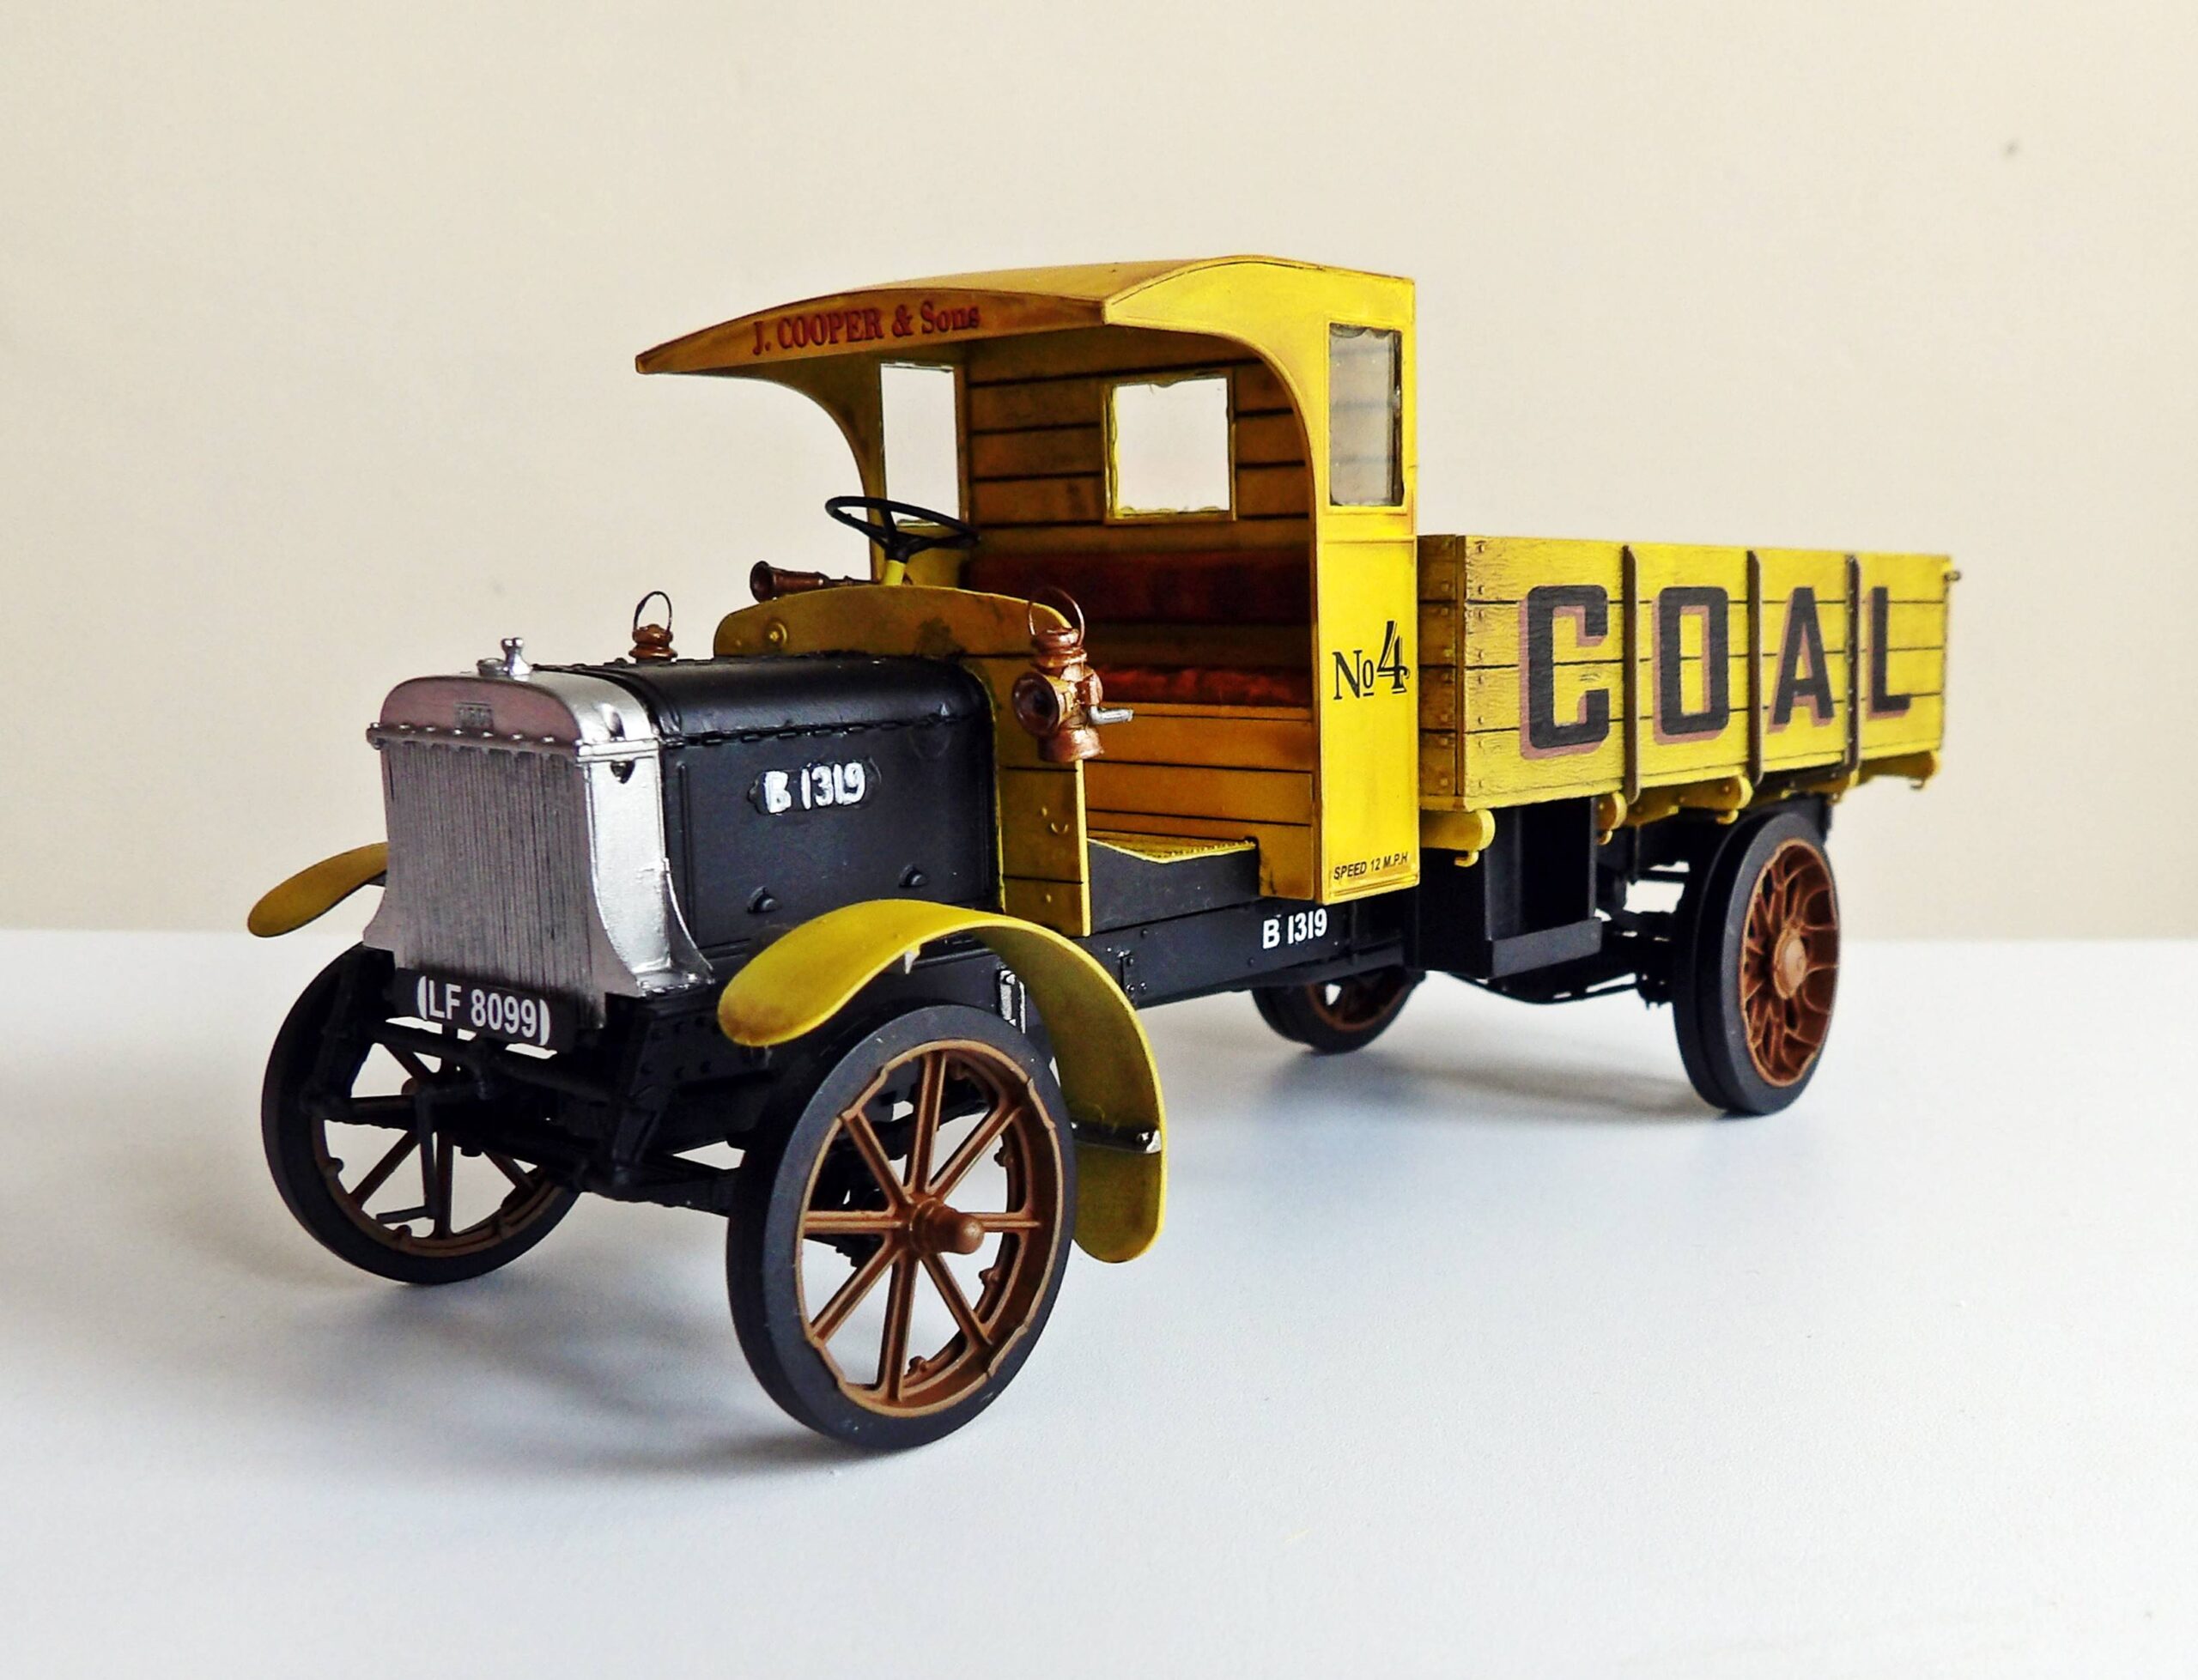
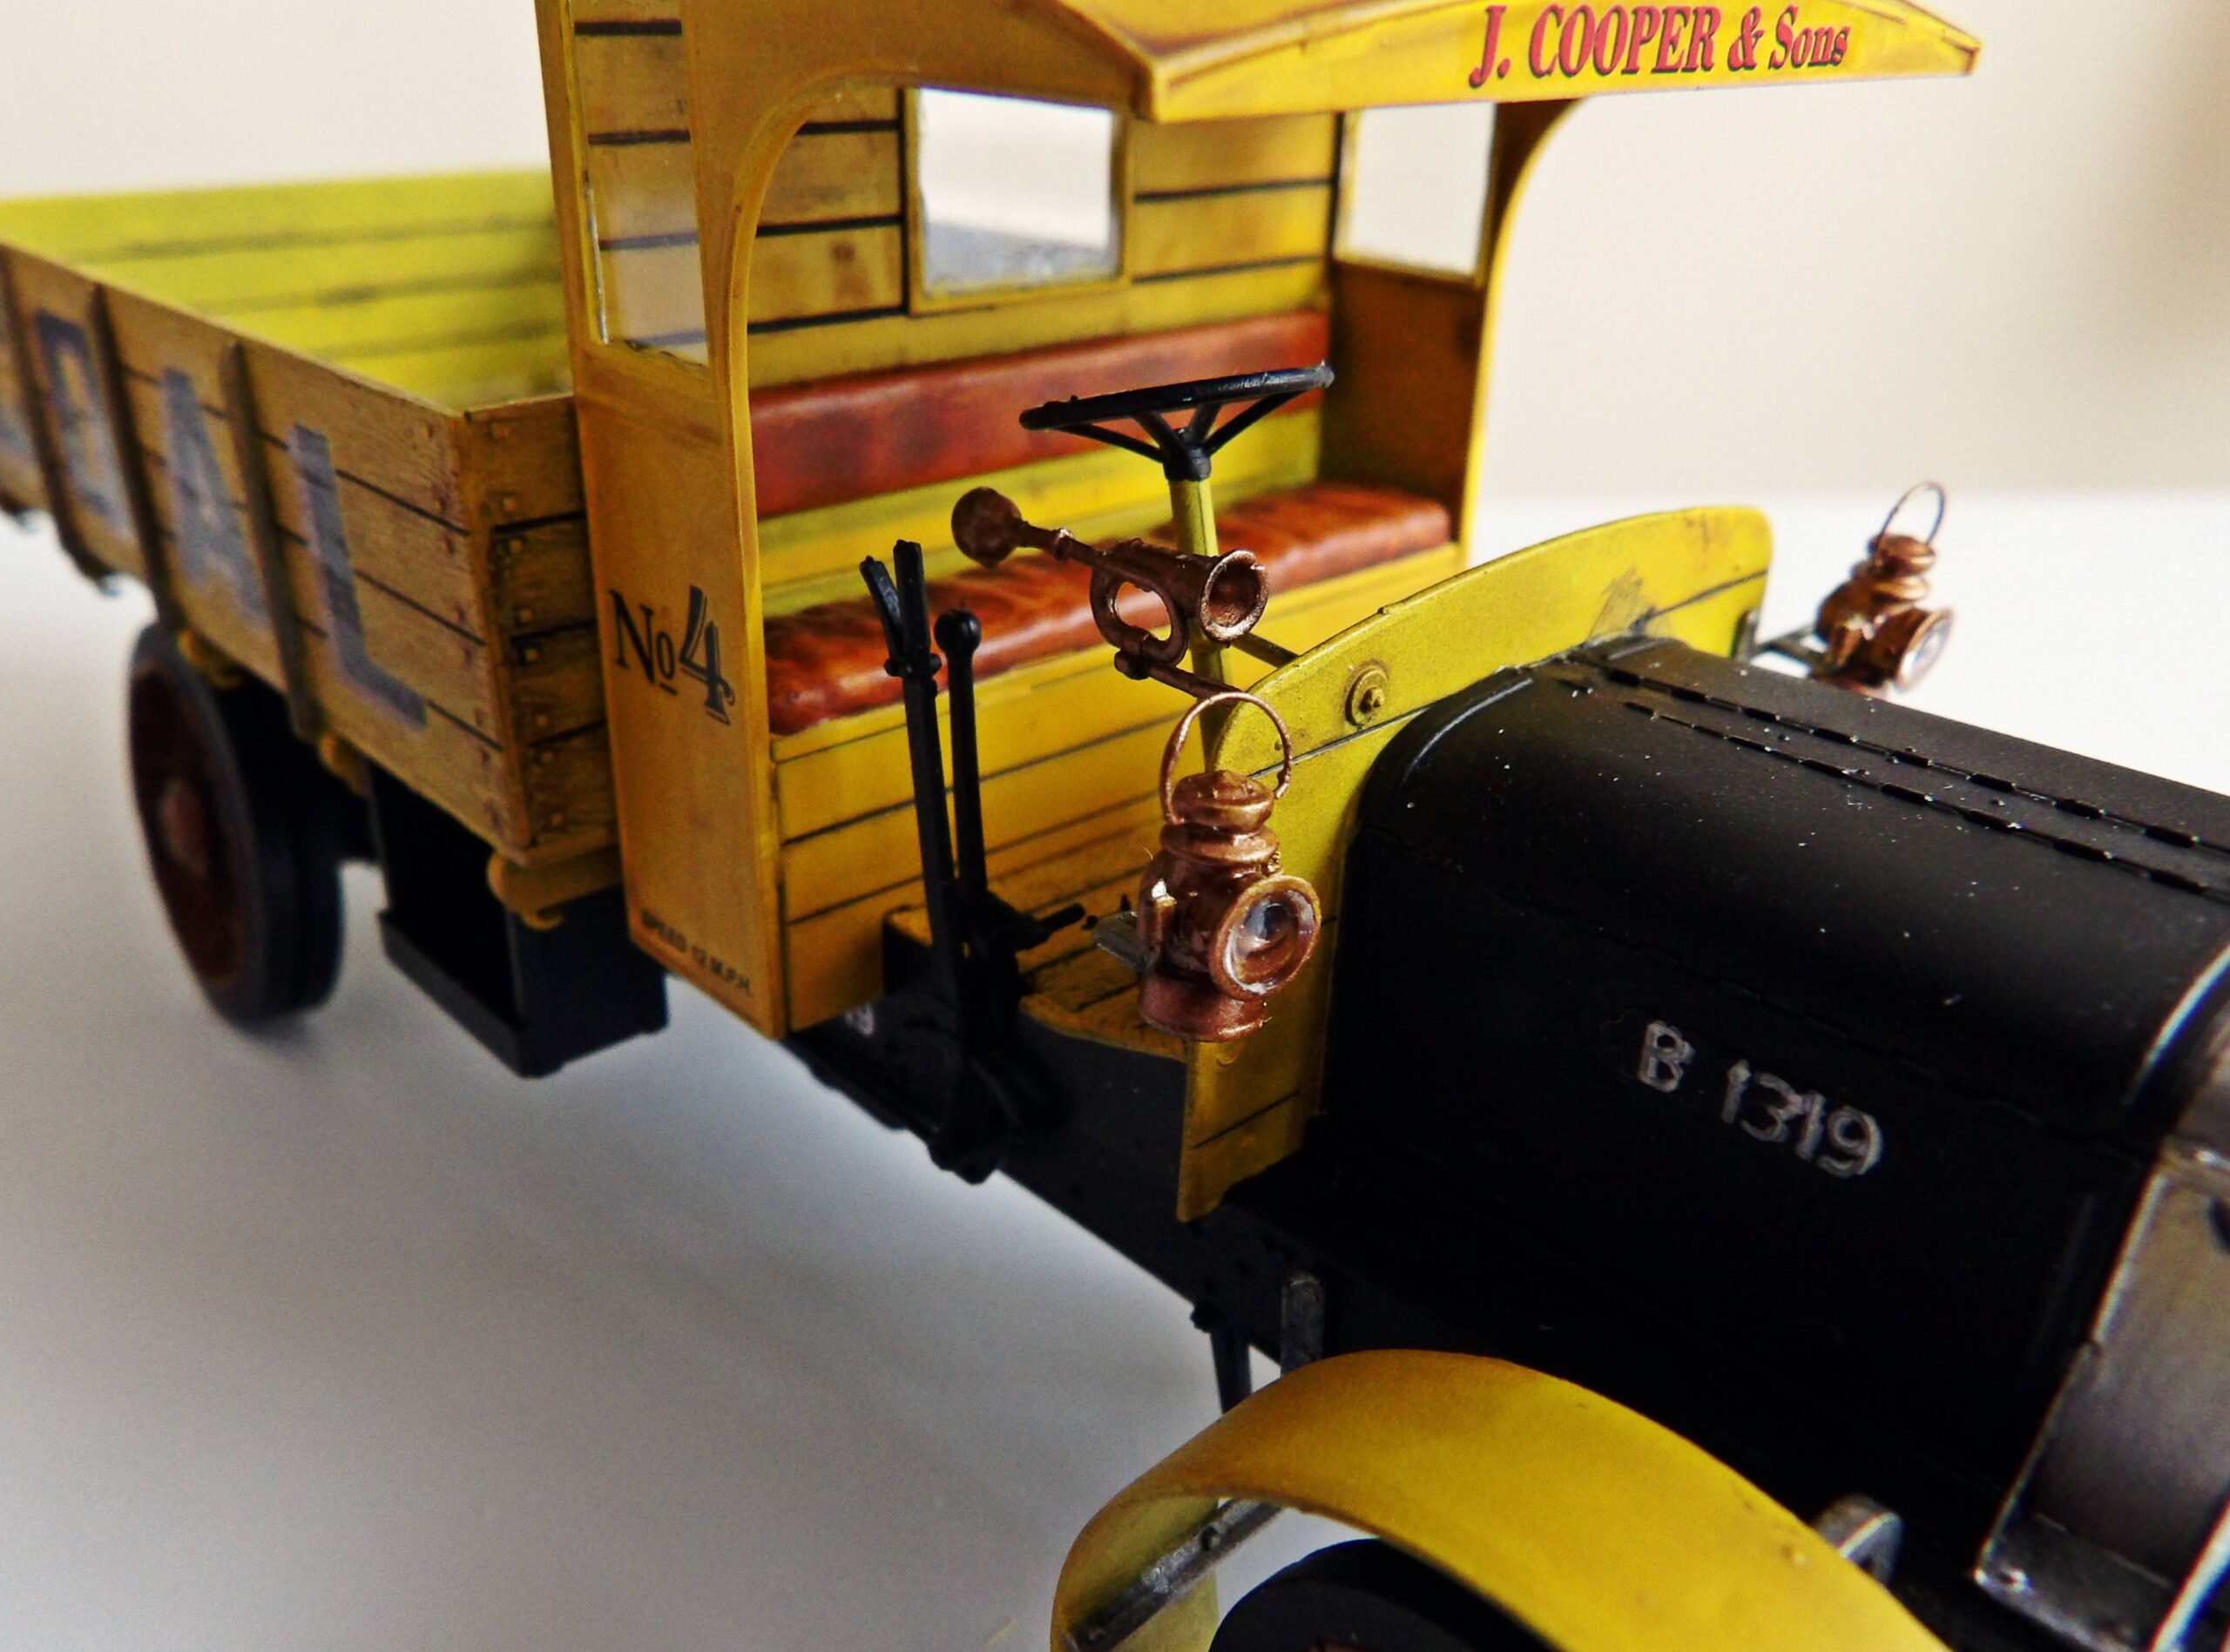
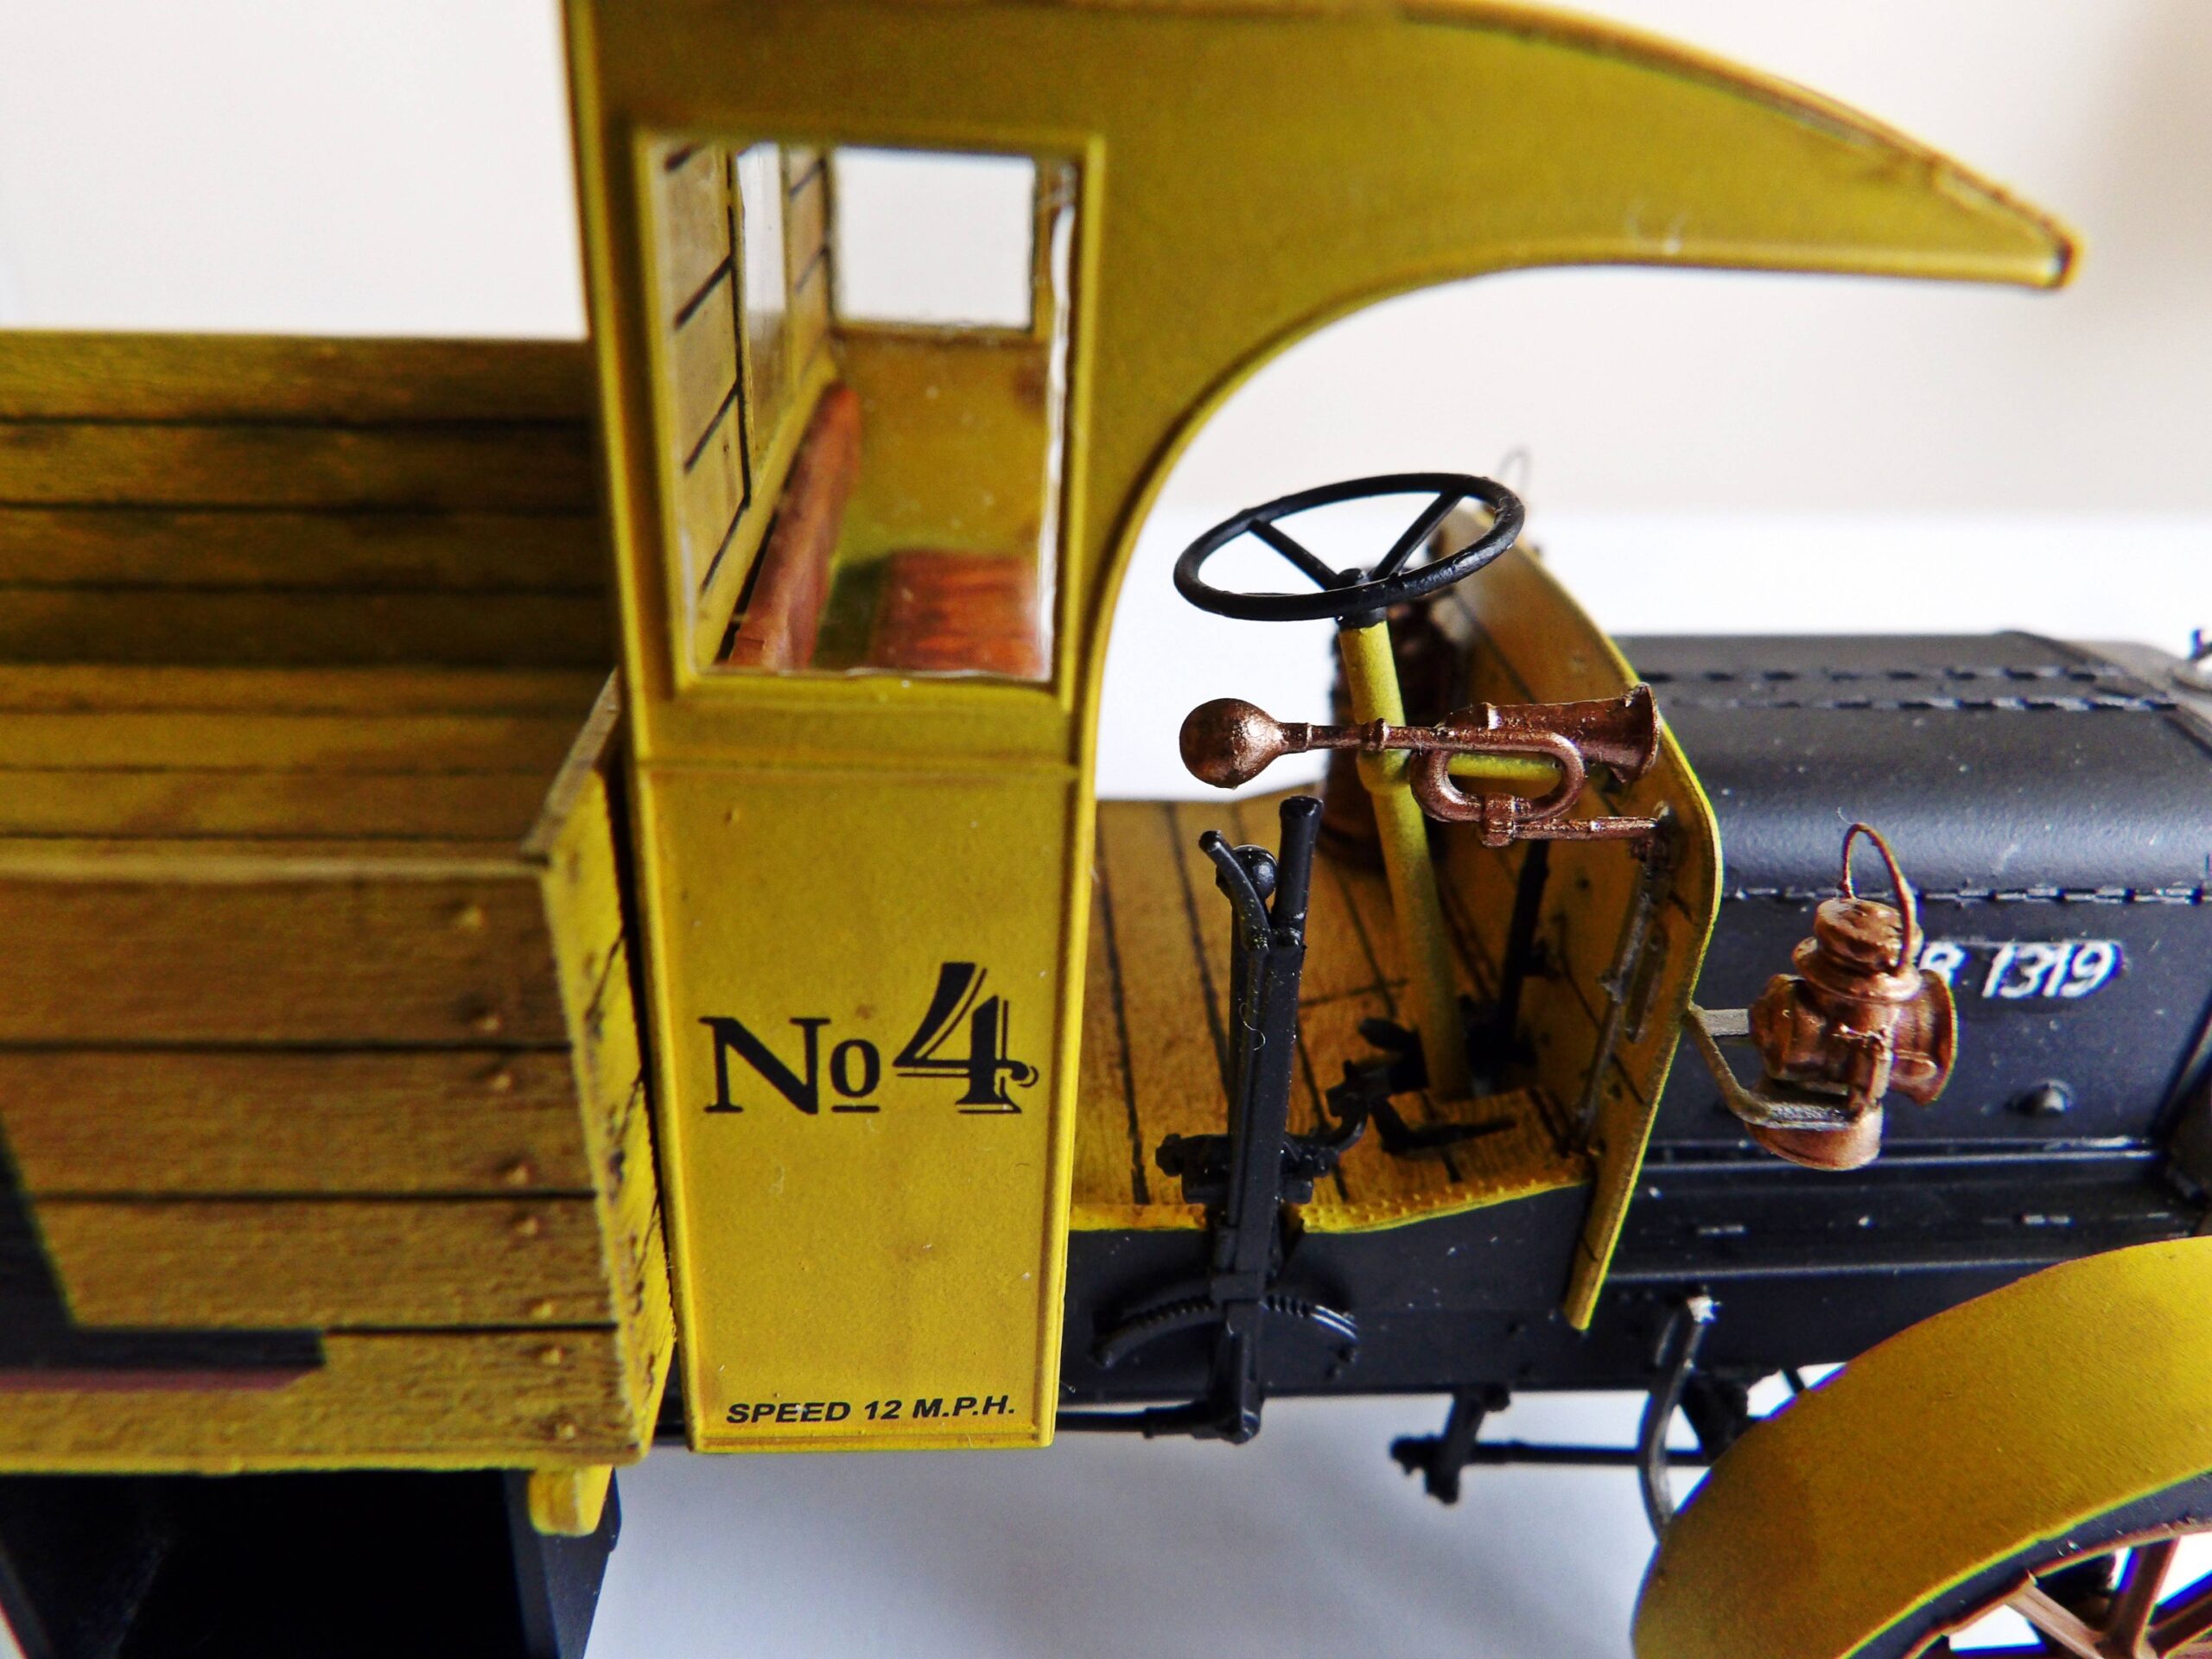
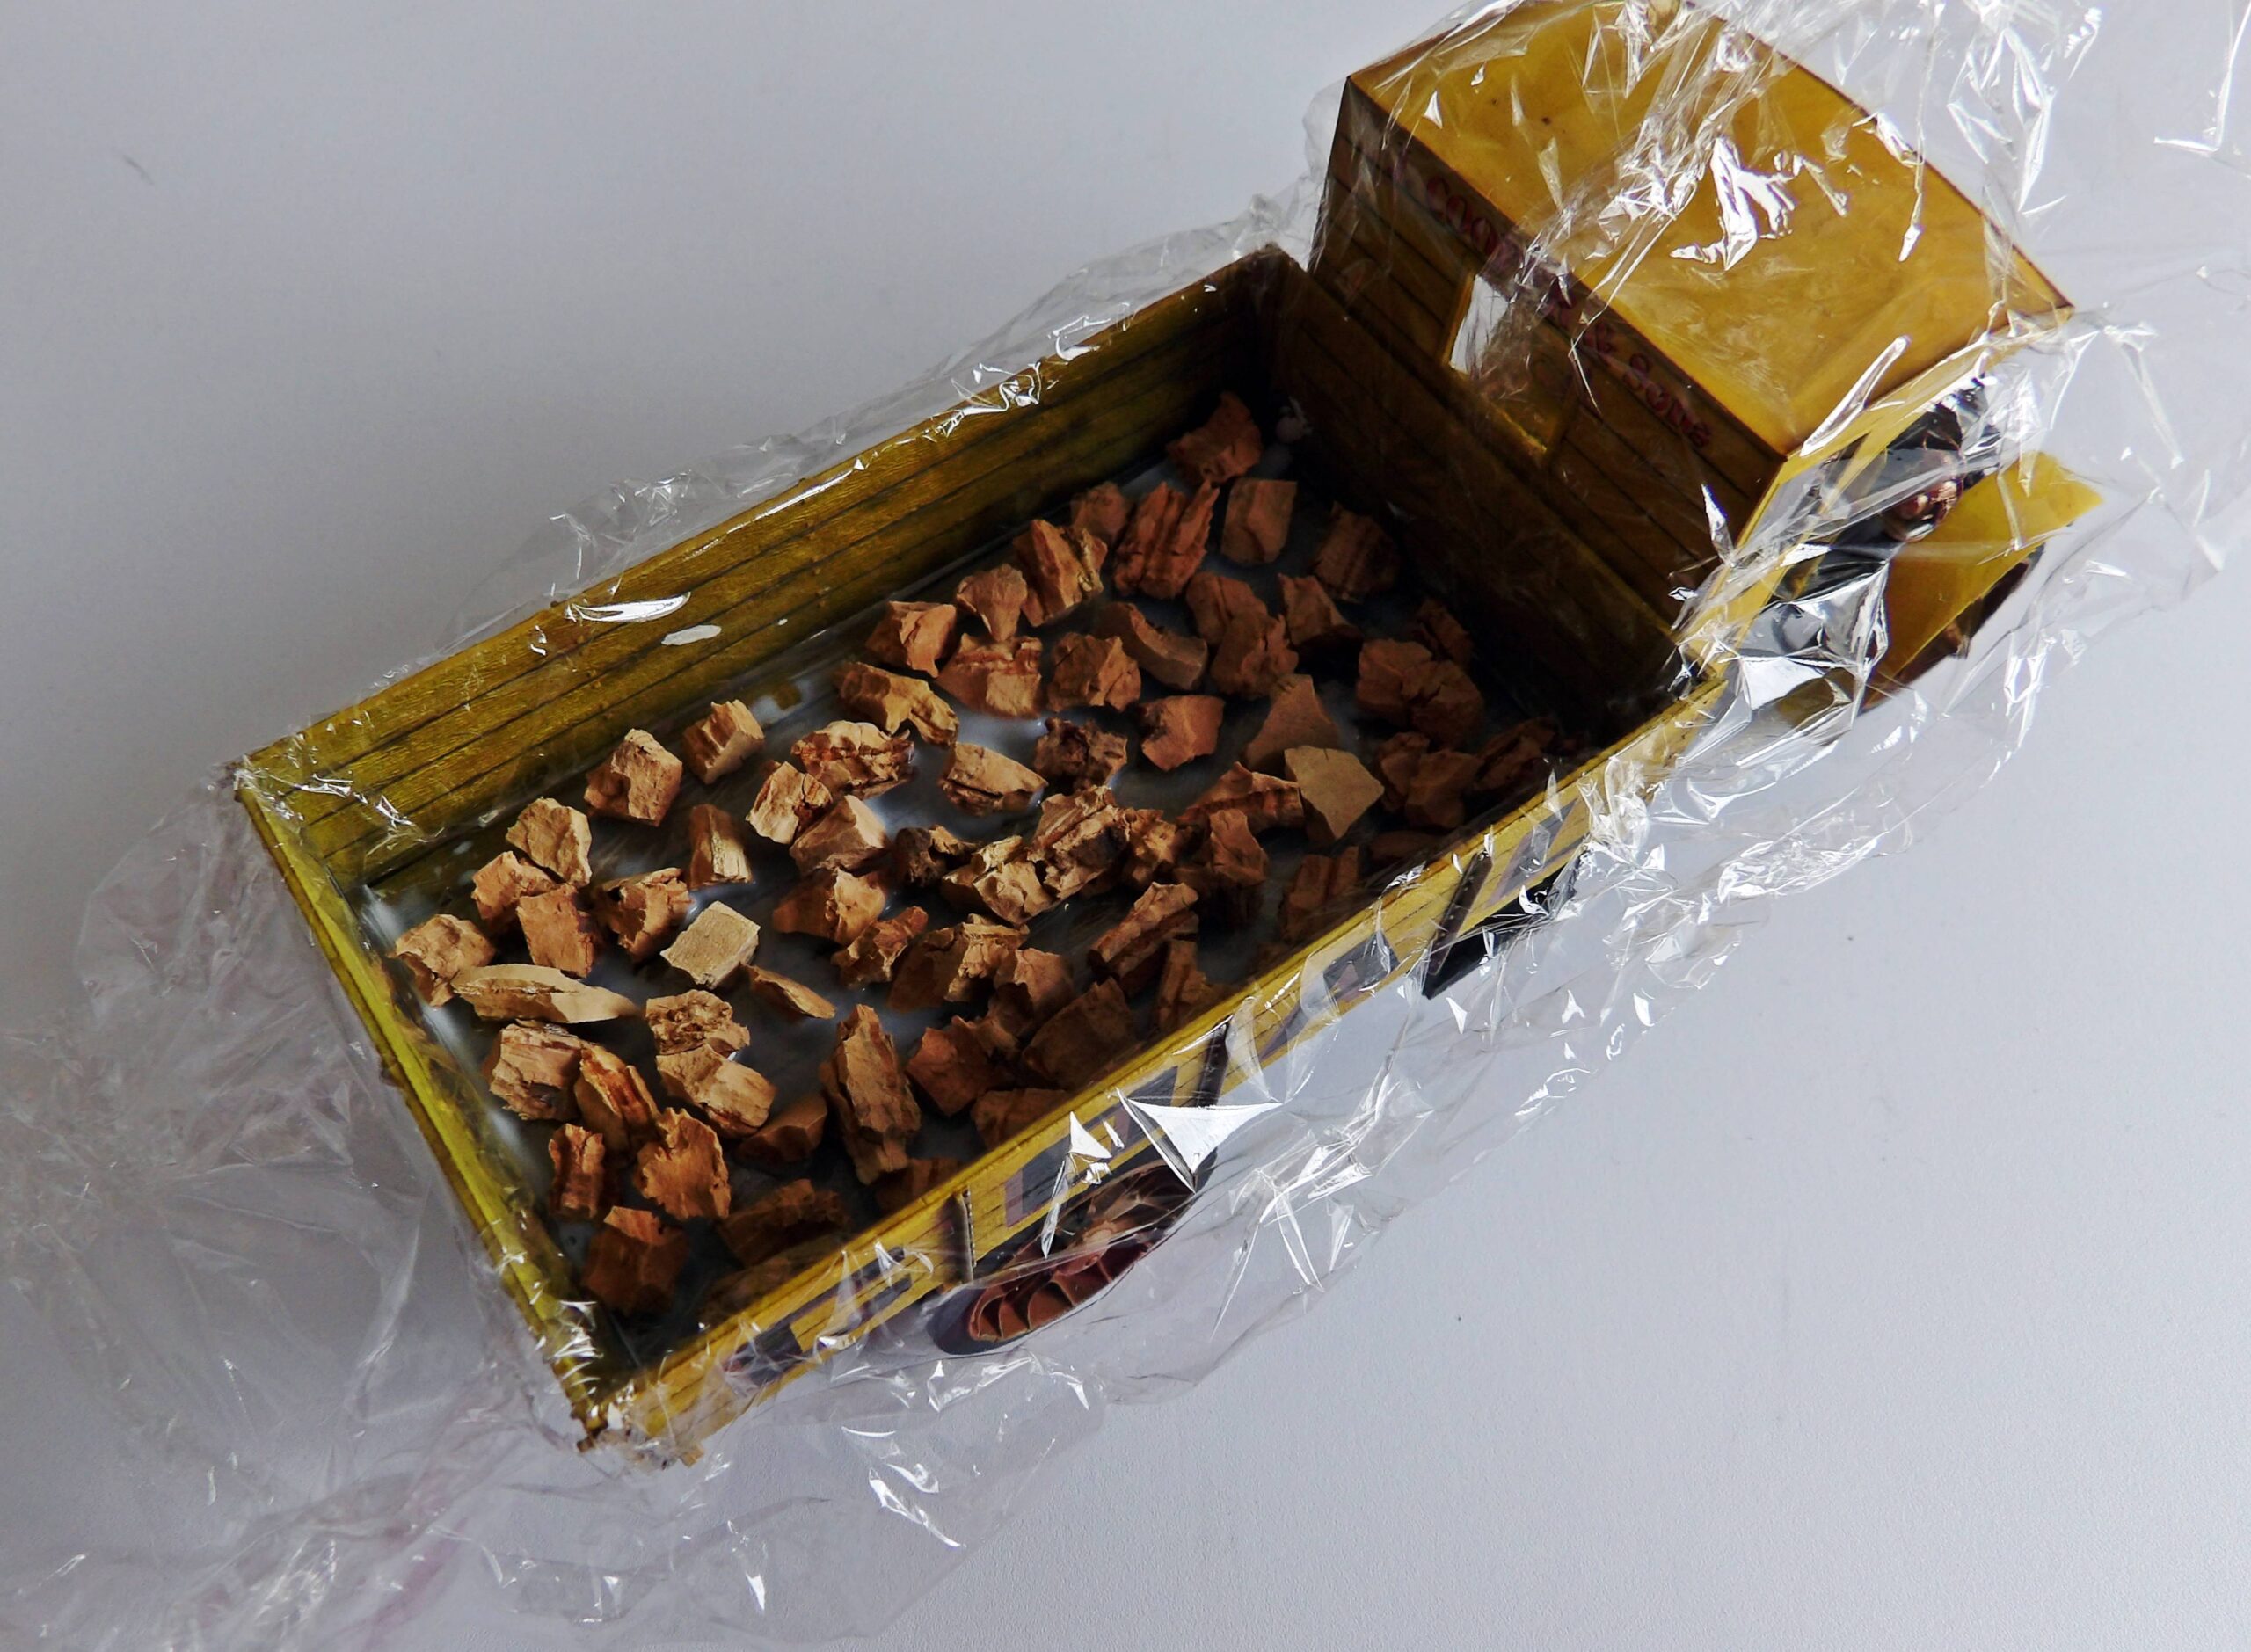
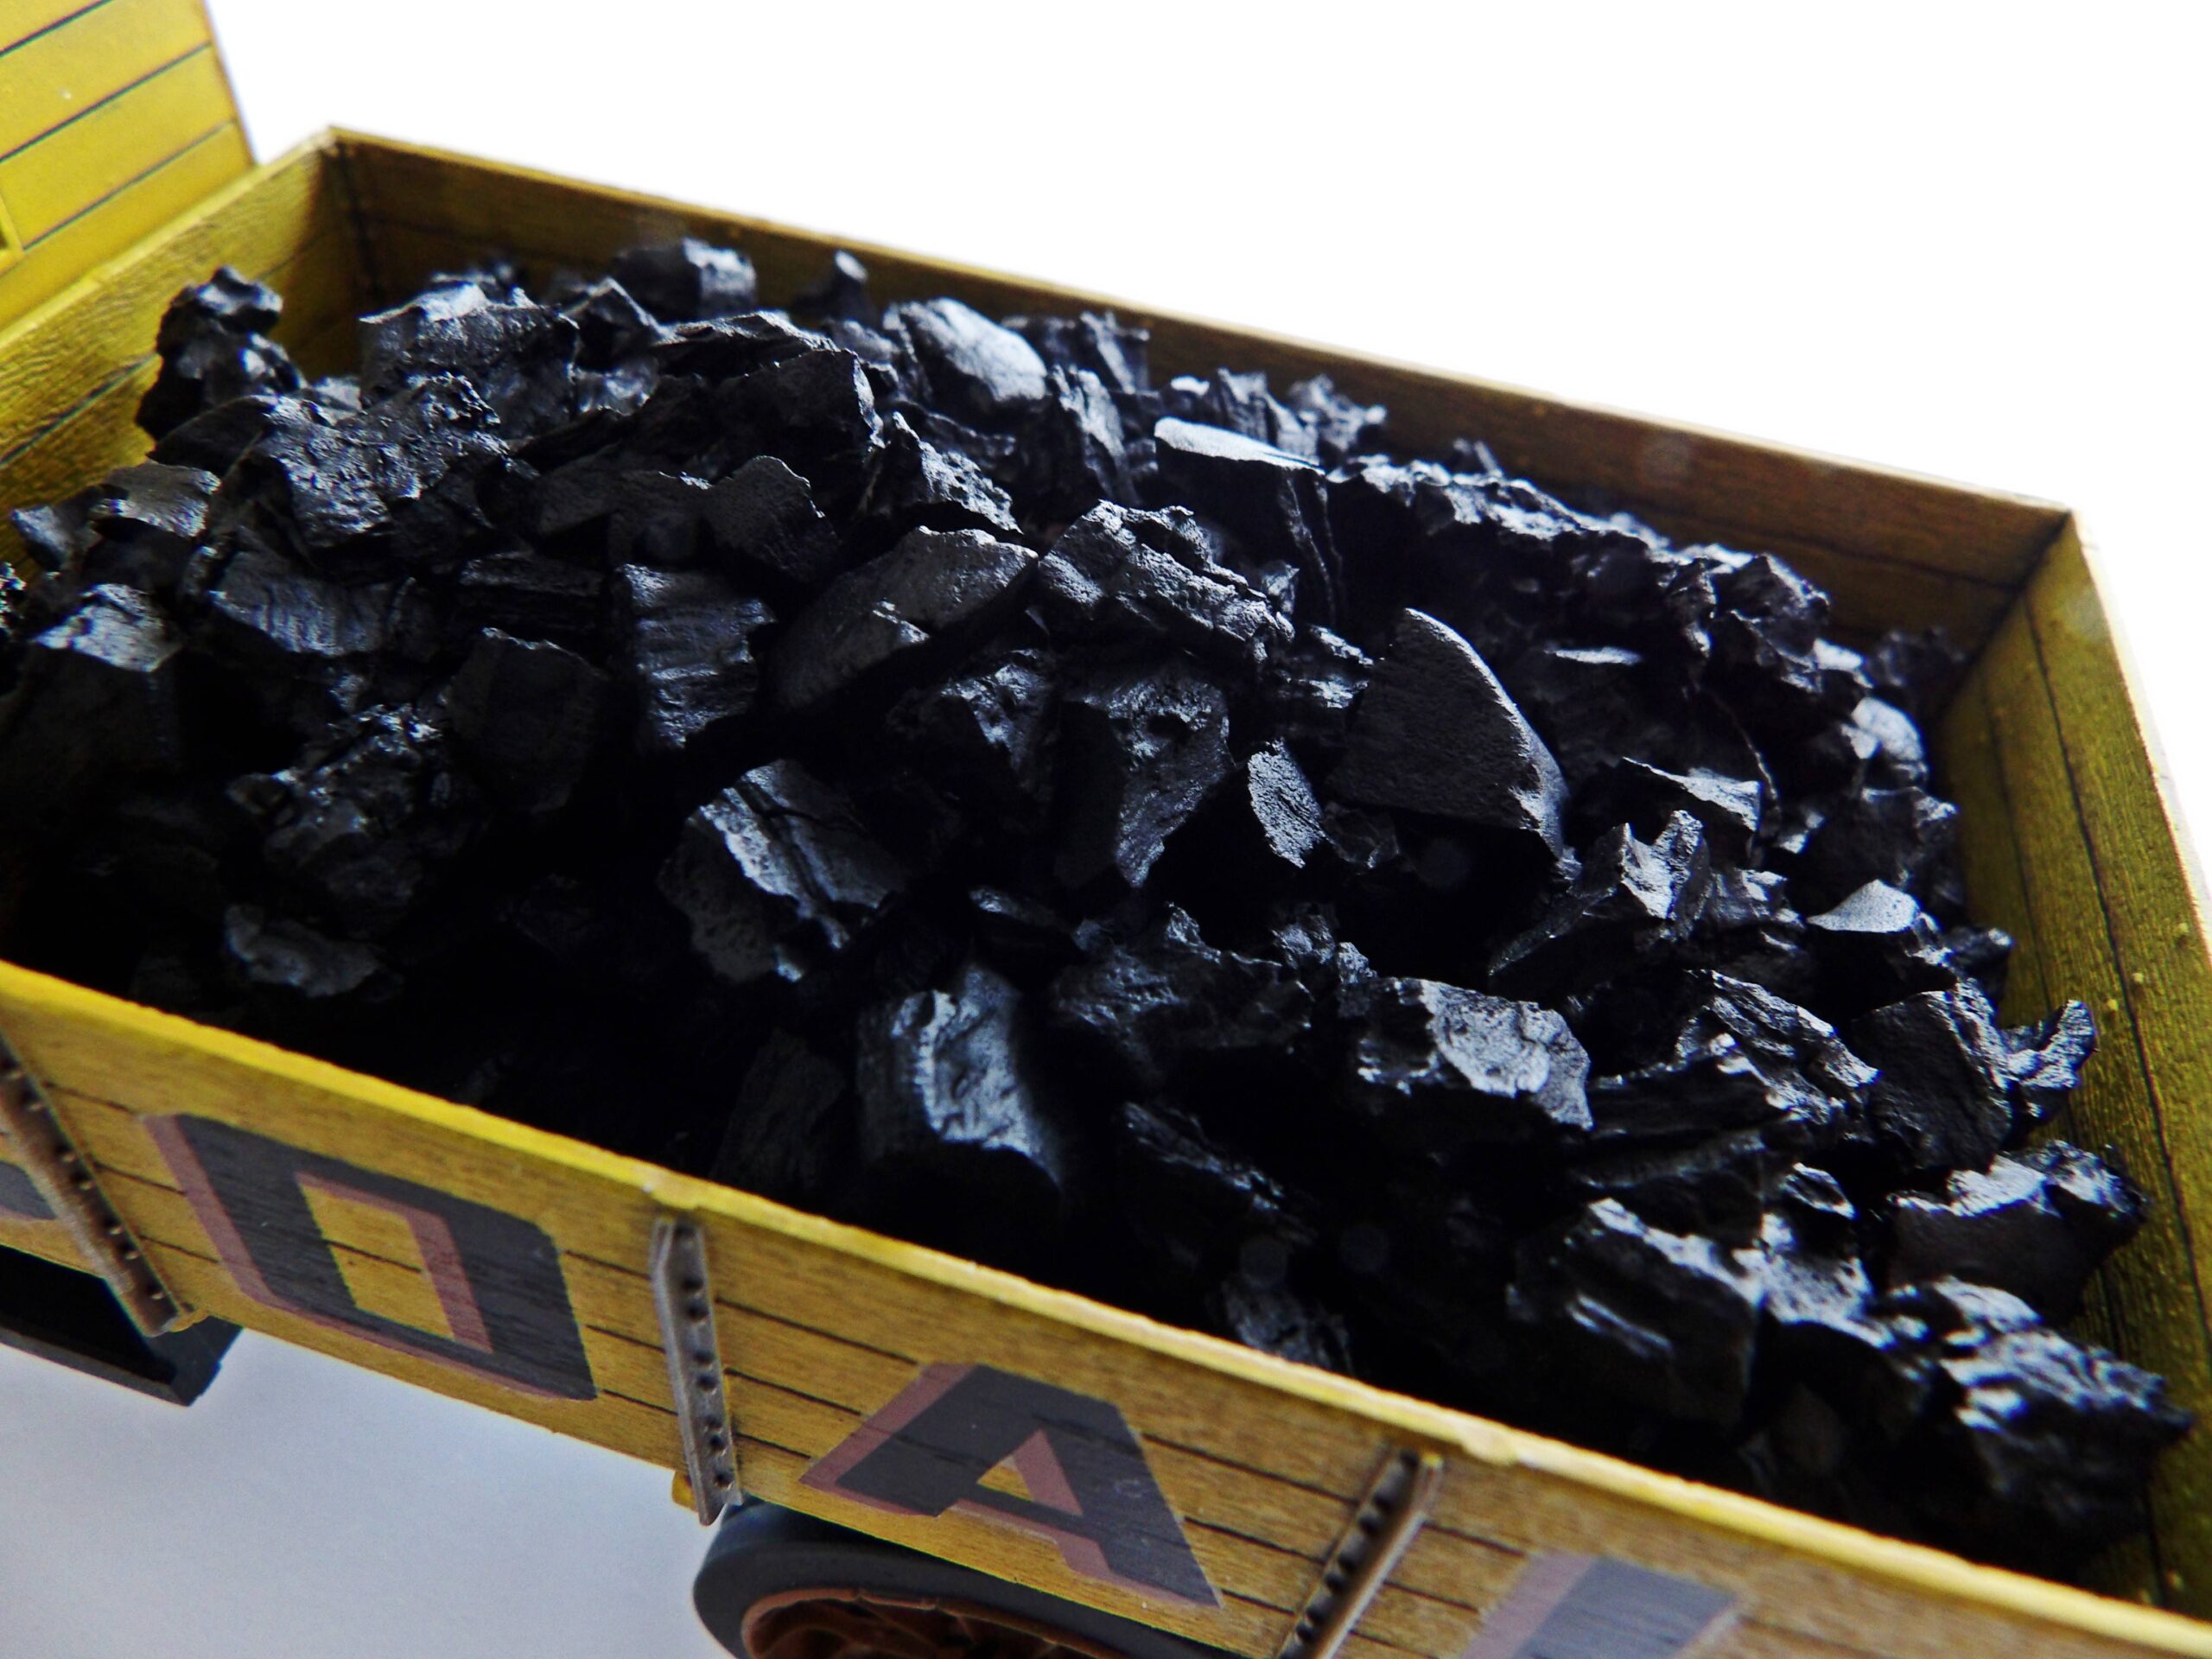
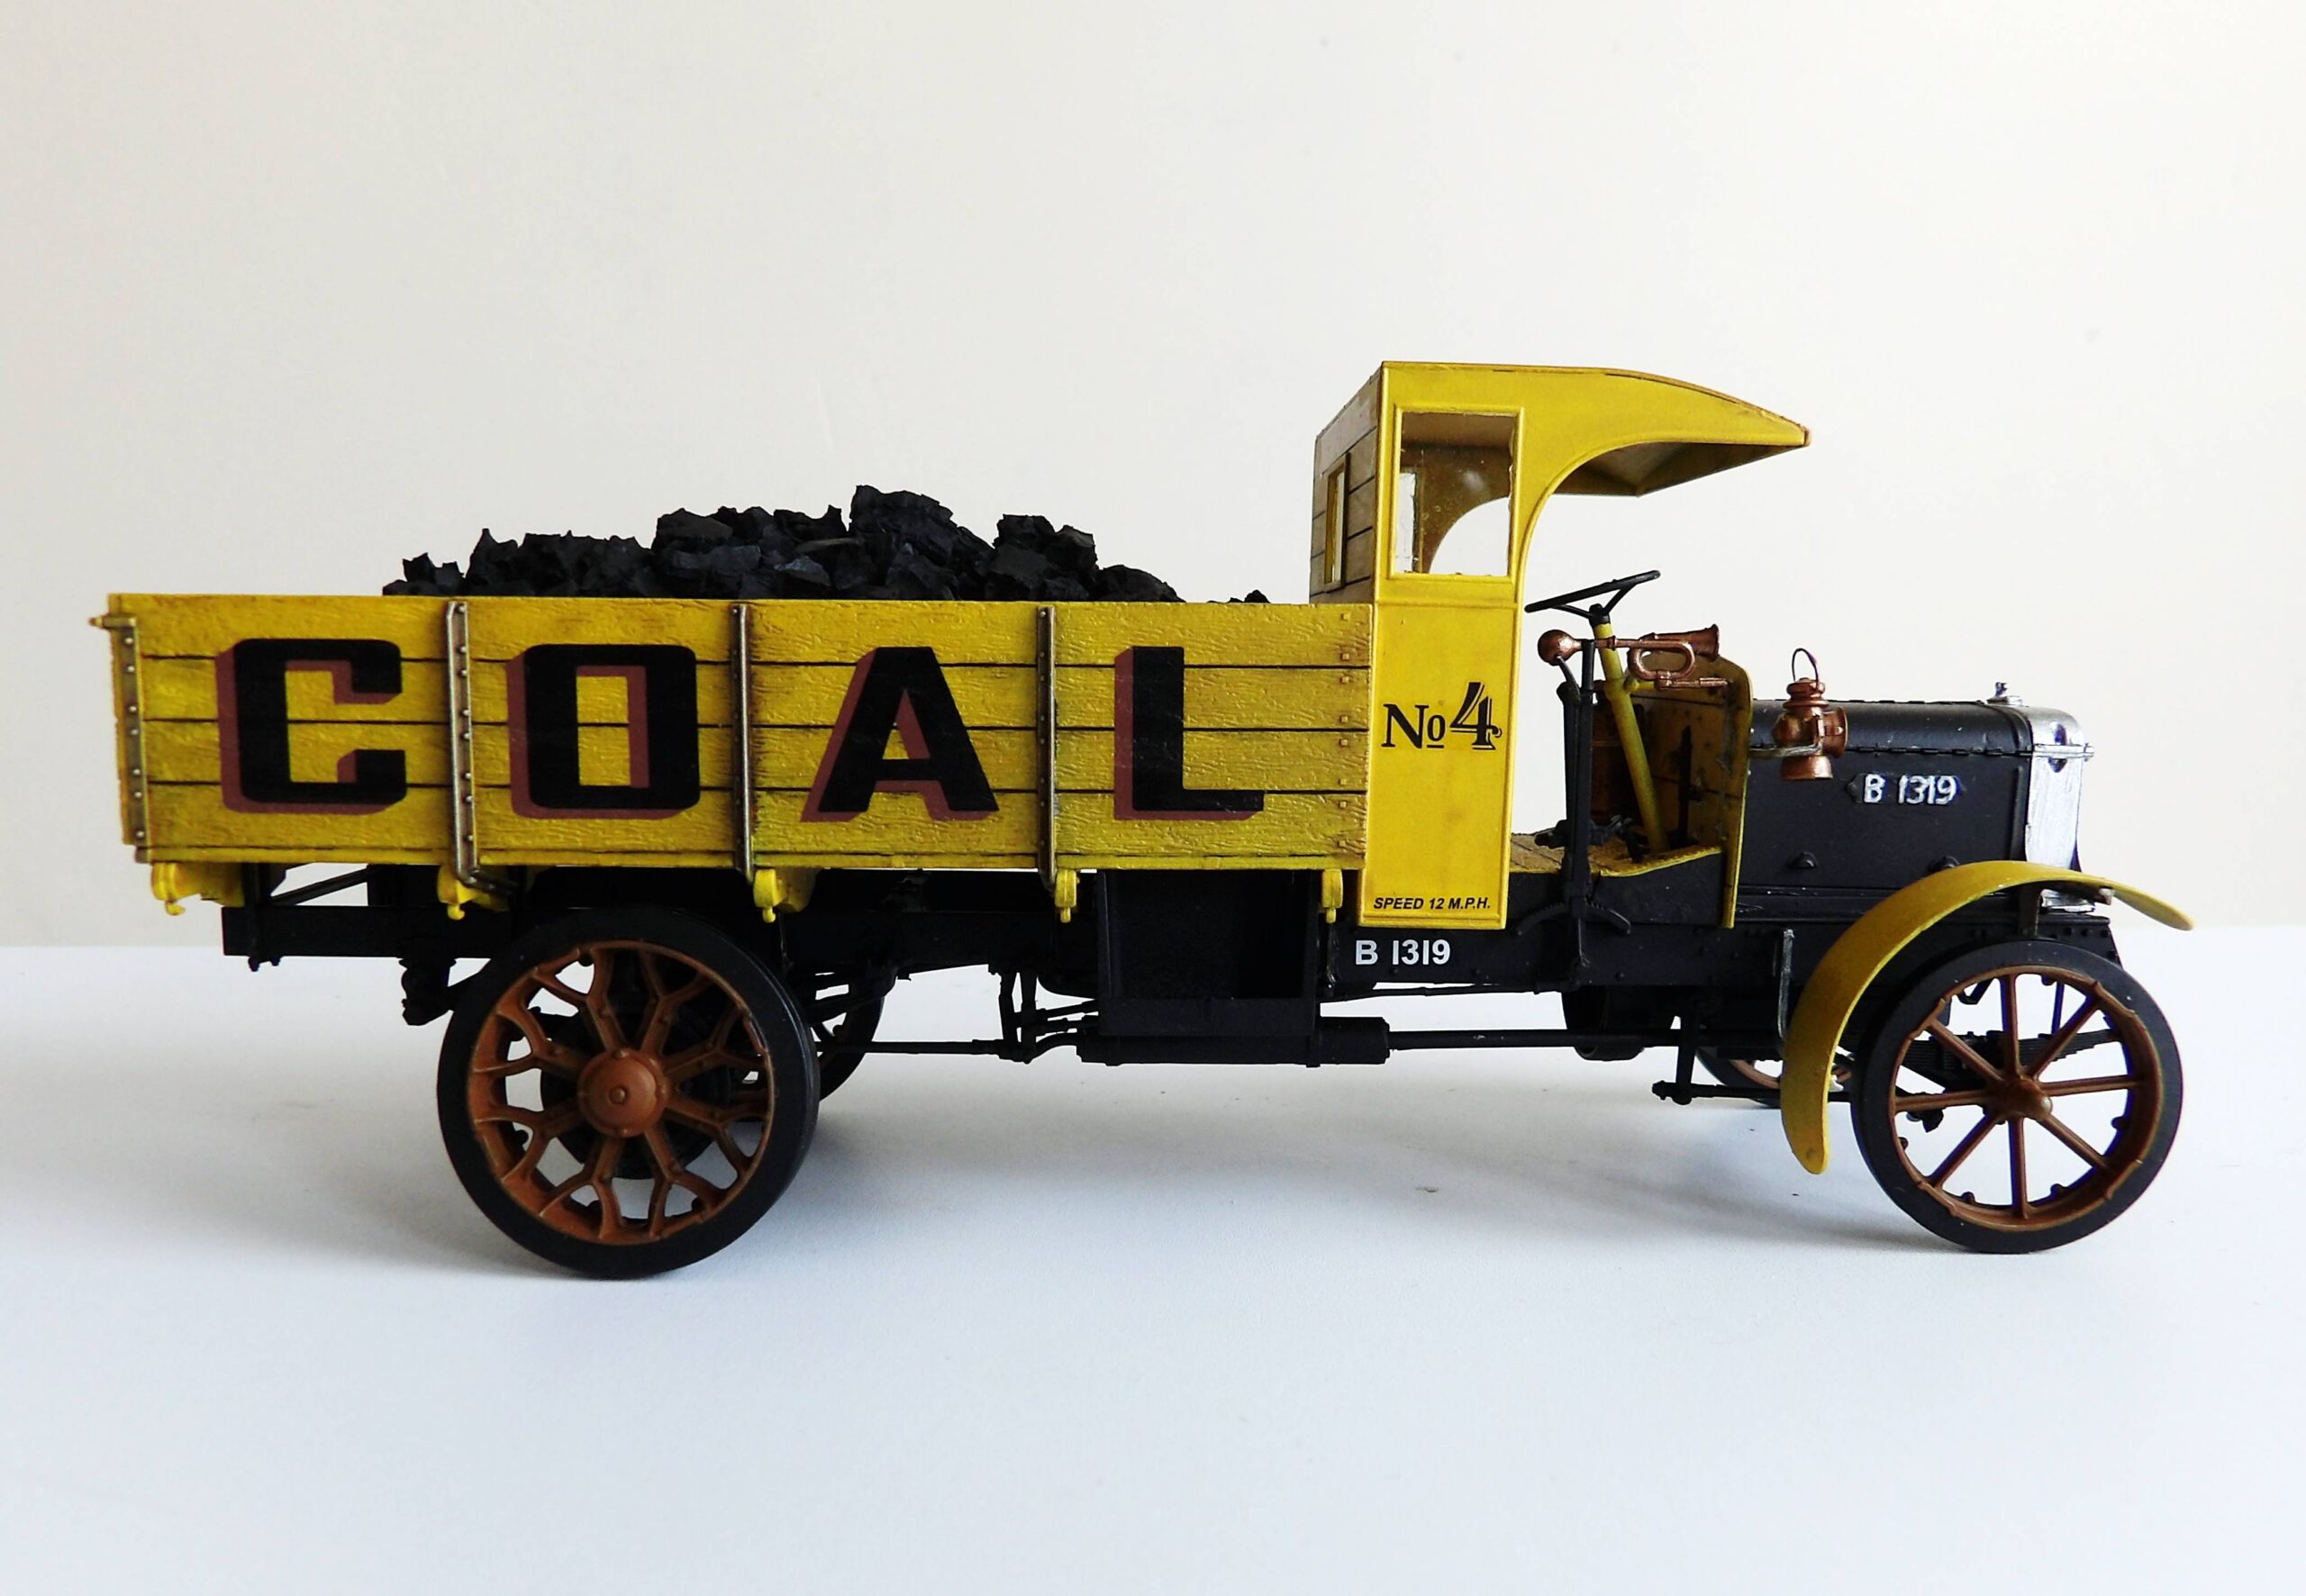
Following our successful car build back at Christmas, we decided to make another vehicle. We chose this WWI era British lorry by Miniart thinking it would be a walk in the park. How hard could it be? It’s just a wooden box on four wheels, no? No!

Miniart British Lorry Coal Space Craft Model Shop Dundee Scotland
This interesting box art is what tempted us to build this model. There are types of lorry you can make: a coal lorry, a generic transport lorry, or wood carrier.
Miniart British Lorry Coal Space Craft Model Shop Dundee Scotland
As always, it was only after we opened the box that we realised what we are in for. Hands down, this is the most detailed model we have built to date.
Miniart British Lorry Coal Space Craft Model Shop Dundee Scotland
Look, here are the parts for the wooden box! At least that bit would be easy…hopefully!
Miniart British Lorry Coal Space Craft Model Shop Dundee Scotland
Here is the decal sheet and some very delicate photo-etched parts.
Miniart British Lorry Coal Space Craft Model Shop Dundee Scotland
A big chunk of the entire model build was spent on this engine, which is mostly covered up in the end!
Miniart British Lorry Coal Space Craft Model Shop Dundee Scotland
Here is the completed chassis.
Miniart British Lorry Coal Space Craft Model Shop Dundee Scotland
Large sections of the model is made up and primed in matt black.
Miniart British Lorry Coal Space Craft Model Shop Dundee Scotland
We airbrushed the main body in matt yellow and hand painted the smaller details (such as the stirring wheel and lights).
Miniart British Lorry Coal Space Craft Model Shop Dundee Scotland
Here is the airbrushed wooden box. Next, we will be bringing out some of those nice grain details with paneliners and a layer of wash.
Miniart British Lorry Coal Space Craft Model Shop Dundee Scotland
The decals are applied and the model is vanished with a layer of dark wash.
Miniart British Lorry Coal Space Craft Model Shop Dundee Scotland
We used a dark brown paneliner to bring out the gaps between the wooden planks.
Miniart British Lorry Coal Space Craft Model Shop Dundee Scotland
To glue on the clear window without clouding the plastic, we used UV glue. It’s a little fiddly to use, but it is much stronger than your normal clear plastic glue.
Miniart British Lorry Coal Space Craft Model Shop Dundee Scotland
To finish off, we made the ‘coal’. We used cork boulders, which were the right shape and didn’t add too much weight to the overall model. We covered the lorry with cling film, so the ‘coal’ can be pulled out and sprayed black once the glue has dried.
Miniart British Lorry Coal Space Craft Model Shop Dundee Scotland